Table of Contents >> Show >> Hide
- Why Start Vegetable Seeds Indoors?
- Step 1: Choose the Right Crops and Start at the Right Time
- Step 2: Gather Supplies That Help Instead of Just Looking Official
- Step 3: Prep Your Containers and Moisten the Mix
- Step 4: Sow Seeds at the Proper Depth
- Step 5: Give Seeds Warmth to Germinate and Light to Grow
- Step 6: Water Carefully and Prevent Common Problems
- Step 7: Thin, Feed, and Pot Up Seedlings as Needed
- Step 8: Harden Off Before Transplanting Outdoors
- Quick Troubleshooting for Indoor Seed Starting
- Common Vegetables to Start Indoors vs. Direct Sow
- The Real-Life Experience of Starting Vegetable Seeds Indoors
- Conclusion
Starting vegetable seeds indoors is a little like running a tiny springtime nursery on your kitchen table, basement shelf, or spare room corner. It is part science, part optimism, and part “why do I suddenly own three spray bottles and a heat mat?” But when you do it right, indoor seed starting gives you stronger transplants, more variety, and a head start on the growing season. It can also save money compared with buying a cart full of nursery starts that somehow costs about the same as a small appliance.
If you have ever watched a tomato seed wake up, shrug off the soil, and reach for the light like it has somewhere important to be, you already know the magic. The trick is giving seedlings what they actually need, not what we assume they need. More water is not always better. A sunny window is not always enough. And starting everything indoors is not a badge of honor; some vegetables would rather skip the indoor spa treatment and go straight to the garden.
Below, you will learn how to start vegetable seeds indoors in eight practical steps, with tips for choosing the right crops, setting up your supplies, preventing common mistakes, and raising sturdy seedlings that are ready for life outside.
Why Start Vegetable Seeds Indoors?
Indoor seed starting is most useful for vegetables that need a longer growing season or benefit from a jump on spring. Think tomatoes, peppers, eggplant, broccoli, cabbage, cauliflower, onions, and many herbs. These crops often perform better when they get a protected indoor start before moving outside.
That said, not every seed wants the indoor treatment. Root crops like carrots and beets usually prefer direct sowing because transplanting can disturb their roots. Beans, peas, corn, and radishes also tend to do just fine when planted directly in the garden. In other words, the goal is not to start all vegetable seeds indoors. The goal is to start the right ones indoors.
Step 1: Choose the Right Crops and Start at the Right Time
The first step in learning how to start vegetable seeds indoors is timing. Start too late, and your plants miss the advantage. Start too early, and you end up with lanky, overgrown seedlings that look like they are paying rent under the grow light.
Use your last spring frost date as your anchor
Most seed packets tell you how many weeks before your average last frost date to sow indoors. That countdown matters. As a general guide:
- Tomatoes: about 6 to 8 weeks before transplanting outdoors
- Peppers and eggplant: about 8 to 10 weeks before transplanting
- Broccoli, cabbage, and cauliflower: about 4 to 6 weeks before transplanting
- Cucumbers, squash, and melons: only 2 to 4 weeks before transplanting, if you start them indoors at all
Seed packets are your best crop-specific roadmap, so read them like they contain the answer key. Because they do.
Pick beginner-friendly vegetables
If you are new to indoor seed starting, begin with a few easy, rewarding crops. Tomatoes, peppers, lettuce, basil, broccoli, and cabbage are solid starter choices. They germinate fairly reliably, transplant well, and make you feel like a competent garden wizard.
Step 2: Gather Supplies That Help Instead of Just Looking Official
You do not need a commercial greenhouse setup to start vegetable seeds indoors, but you do need a few basics that actually work.
What you need
- Seeds
- Clean containers with drainage holes
- A sterile or soilless seed-starting mix
- Plant labels
- A tray to catch water
- A clear humidity dome or plastic cover for germination
- Grow lights or a very bright setup
- An optional heat mat for warm-season crops
- A small fan for airflow, if possible
Old yogurt cups, cell trays, and recycled nursery pots can work, but cleanliness matters. Wash reused containers well before planting. Seedlings are tiny, tender, and not emotionally prepared for dirty pots full of disease spores.
The growing medium matters too. Use a seed-starting mix, not heavy garden soil dug from outside. Seed-starting mixes are lighter, better drained, and less likely to bring in pathogens that cause damping-off, the dreaded seedling collapse that can wipe out a tray overnight.
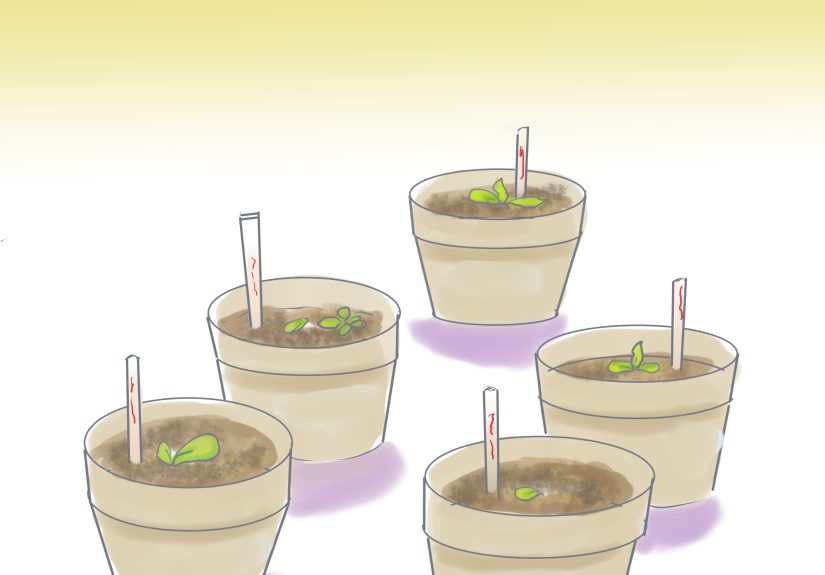
Step 3: Prep Your Containers and Moisten the Mix
Before sowing, fill your containers with pre-moistened seed-starting mix. You want it evenly damp, like a wrung-out sponge, not dripping wet. If the mix is too dry, it can repel water at first. If it is too wet, your seeds may end up sitting in a swamp. Very few vegetable seedlings dream of a swamp vacation.
Press the mix gently into the containers so there are no major air pockets, but do not compact it into brick form. Seeds need good contact with the mix, plus enough oxygen for germination.
Label everything before or right after planting. Do not trust your memory. Every gardener believes they will remember which tray is tomato and which tray is pepper. Every gardener is overly optimistic.
Step 4: Sow Seeds at the Proper Depth
One of the most important indoor seed-starting steps is planting seeds at the correct depth. A simple rule of thumb is to plant seeds about two to three times as deep as they are wide. Tiny seeds need only a light covering, while larger seeds go a bit deeper.
Spacing matters too
If you are sowing into cell packs, place one or two seeds per cell. If you are sowing in a flat, give seeds enough room so seedlings do not immediately crowd each other. Overcrowded seedlings compete for light and airflow, and that is how you end up with a tray of skinny drama queens.
After sowing, lightly cover the seed, gently water or mist if needed, and place a clear cover over the tray to hold in moisture during germination.
Step 5: Give Seeds Warmth to Germinate and Light to Grow
Seeds and seedlings need two different environments. This is where many gardeners get tripped up.
For germination: prioritize warmth
Most vegetable seeds germinate best when the growing medium stays warm, often in the range of about 65 to 75 degrees Fahrenheit. Warm-season crops like tomatoes and peppers especially appreciate steady warmth. A heat mat can help, particularly in cool rooms.
After sprouting: prioritize light
Once seedlings emerge, remove the humidity dome and get them under light right away. This is not the moment to rely on wishful thinking and a dim windowsill. Most seedlings need bright supplemental light for about 14 to 16 hours a day to stay compact and strong.
Keep grow lights close to the tops of the seedlings, usually just a few inches above them, adjusting upward as the plants grow. When lights are too far away, seedlings stretch, lean, and develop weak stems. That lanky look is not charming. It is a cry for help.
Do seedlings need a sunny window?
A bright south-facing window can help, but for many gardeners it is not enough by itself. Grow lights are usually the difference between sturdy seedlings and floppy green noodles.
Step 6: Water Carefully and Prevent Common Problems
Water is essential, but overwatering is one of the fastest ways to sabotage indoor seedlings. Keep the mix evenly moist, not soggy. Let the surface begin to dry slightly between waterings if the crop allows, and always avoid leaving pots sitting in standing water for too long.
Bottom watering can be a smart move
Many gardeners like to water from the bottom by adding water to the tray and letting the mix absorb it. This helps reduce splashing, keeps foliage drier, and can lower disease risk. Just drain any excess so roots are not left soaking.
Watch for damping-off
Damping-off is the notorious seedling problem where stems thin, collapse, or rot near the soil line. It is more likely in cool, wet, poorly ventilated conditions. To prevent it:
- Use clean containers and fresh seed-starting mix
- Provide good air circulation
- Avoid overwatering
- Remove humidity covers once seeds sprout
- Give seedlings enough light so they do not stay weak and stressed
A small fan set on low nearby can help strengthen stems and improve airflow. Think of it as a gentle training montage for baby plants.
Step 7: Thin, Feed, and Pot Up Seedlings as Needed
Once seedlings are up and growing, your job shifts from “wake up, seeds” to “all right, everyone stay civilized.”
Thin crowded seedlings
If more than one seedling comes up in a cell, keep the strongest one and snip the extras at the soil line with scissors. Pulling them out can disturb roots. It feels ruthless, but it is kinder than forcing three plants to live in one tiny apartment.
Start fertilizing at the right stage
Seedlings do not need fertilizer the second they emerge. They begin with food stored in the seed. Once true leaves appear and the seedlings are growing well, you can begin feeding with a diluted liquid fertilizer, usually at quarter- to half-strength, depending on the product and your growing mix.
Go easy. Too much fertilizer can burn young roots and push overly soft growth. You are trying to raise sturdy plants, not leafy divas that faint at the first breeze.
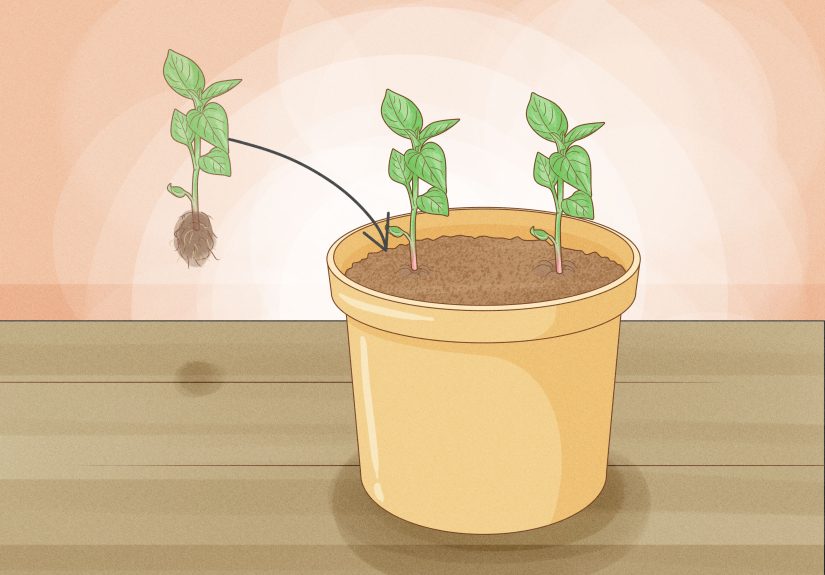
Pot up if roots need more room
If seedlings outgrow their original cells before planting time, transplant them into slightly larger containers. Handle by the leaves rather than the stems whenever possible. Leaves can regrow. Crushed stems are a much sadder story.
Step 8: Harden Off Before Transplanting Outdoors
Indoor-grown seedlings cannot go straight from cozy grow-light life to full sun, wind, and fluctuating outdoor temperatures without an adjustment period. That transition is called hardening off, and it is essential.
How to harden off seedlings
About 7 to 14 days before transplanting, start placing seedlings outdoors in a sheltered, shady spot for a few hours each day. Gradually increase the time outside, along with their exposure to sun and wind. Bring them in or protect them if cold weather threatens.
Be especially careful with warm-season vegetables like tomatoes, peppers, squash, and melons. They do not appreciate chilly temperatures, and exposing them too early can stunt growth or cause damage.
Transplant on a calm day if possible
When planting time arrives, choose a mild or cloudy day, or transplant in late afternoon. Water seedlings well before and after transplanting. A little temporary droop is normal. Full existential collapse is not.
Quick Troubleshooting for Indoor Seed Starting
Problem: Seedlings are tall and floppy
Cause: Not enough light, lights too far away, or temperatures too warm. Fix: Move lights closer, increase light duration, and avoid overly warm conditions after germination.
Problem: Seeds never germinate
Cause: Old seed, incorrect temperature, planted too deep, or inconsistent moisture. Fix: Check seed viability, keep mix evenly moist, and review crop-specific requirements.
Problem: Mold or fungus on the mix
Cause: Excess moisture and poor airflow. Fix: Reduce watering, remove the dome, and add airflow.
Problem: Yellow seedlings
Cause: Low fertility, poor drainage, or insufficient light. Fix: Adjust watering, improve light, and begin light feeding if true leaves are present.
Common Vegetables to Start Indoors vs. Direct Sow
Good candidates for indoor seed starting
- Tomatoes
- Peppers
- Eggplant
- Broccoli
- Cabbage
- Cauliflower
- Lettuce
- Onions
- Basil
Usually better direct sown outdoors
- Carrots
- Beets
- Radishes
- Beans
- Peas
- Corn
- Turnips
This simple distinction can save you time, supplies, and one surprisingly emotional moment with a tray of unhappy carrot seedlings.
The Real-Life Experience of Starting Vegetable Seeds Indoors
Starting seeds indoors sounds wonderfully wholesome on paper. You imagine neat rows of labeled trays, cheerful green sprouts, and the quiet satisfaction of being the kind of person who owns a spray bottle specifically for seedlings. In real life, the experience is even better, but also messier, funnier, and more educational than most seed catalogs admit.
The first experience many gardeners have is surprise at how fast things change. One day the tray looks like a pan of damp mix doing absolutely nothing. Two mornings later, a dozen seedlings appear like they have been holding a secret meeting overnight. It is thrilling. You will check them too often. You will speak to them at least once. This is normal behavior and should not be documented.
The second experience is learning that seedlings are excellent at exposing weak setups. A sunny window that seemed bright enough for reading turns out to be less impressive when tomatoes start leaning like they are trying to escape. This is the moment many gardeners discover the power of grow lights, adjustable chains, and timers. It is also the moment your indoor gardening operation starts to look just organized enough to justify itself.
Then comes the humbling part: not every seedling becomes a masterpiece. Some seeds germinate unevenly. Some trays dry out faster than expected. Some peppers take their sweet time, apparently operating on island time while lettuce pops up like an overachiever. Indoor seed starting teaches patience in a very specific way. You cannot rush germination by staring at the tray, though many of us have attempted this method.
Another common experience is realizing that small mistakes are usually fixable. Forgot to label a tray? You may still figure it out when the leaves develop. Let the mix get a little too dry once? Most seedlings forgive you if you correct it quickly. Started too many basil plants? Congratulations, you now have gifts for neighbors and a pesto-heavy future. Seed starting has a nice way of rewarding effort even when execution is not flawless.
Perhaps the best part is watching your confidence grow along with the seedlings. The first season, every sprout feels miraculous. By the second or third, you begin to notice patterns. You learn that broccoli is usually easier than pepper, that airflow matters more than people think, and that hardening off is not optional no matter how impatient you feel. You also learn that successful gardening is not about controlling every variable. It is about observing, adjusting, and staying curious.
When those indoor-grown seedlings finally move into the garden, there is a special kind of satisfaction in seeing them settle in. They are no longer anonymous plants from a store bench. You started them from seed. You managed the light, water, warmth, and timing. You probably worried about them more than necessary. And now there they are, standing in the soil like they have been preparing for this moment all along.
That is why so many gardeners come back to indoor seed starting every year. Yes, it saves money. Yes, it opens up more varieties. But it also creates a closer relationship with the garden season from the very beginning. Spring does not start when you buy a tomato plant. It starts when the first seed tray lands on the table and you decide, once again, to trust a tiny seed with a very big plan.
Conclusion
Learning how to start vegetable seeds indoors is one of the best ways to level up your garden. The process is straightforward once you break it into steps: choose the right crops, time them from your frost date, use clean containers and seed-starting mix, sow correctly, provide warmth for germination, give strong light after sprouting, water carefully, feed lightly, and harden seedlings off before planting outdoors.
You do not need perfection. You need a decent setup, a little consistency, and the willingness to learn as you go. Some trays will be gorgeous. Some will be weird. That is gardening. But with these eight steps, your indoor seed-starting season can go from chaotic experiment to productive spring ritual.