Table of Contents >> Show >> Hide
- What yoga can actually do for osteoporosis
- Before you start: the osteoporosis yoga safety rules that matter most
- 5 yoga poses that can help and how to do them
- Poses that usually need modification or avoidance
- A simple 10- to 15-minute osteoporosis-friendly yoga routine
- What people often experience when they start yoga with osteoporosis
- Final thoughts
- SEO Tags
If you have osteoporosis, the idea of doing yoga can sound either brilliant or mildly terrifying. On one hand, yoga has a reputation for improving balance, posture, body awareness, and calm. On the other hand, one dramatic forward fold at the wrong angle and your spine may file a formal complaint. The truth sits somewhere in the middle: yoga can absolutely be helpful for people with osteoporosis, but only when the practice is smart, modified, and built around bone-friendly movement.
This is where many articles get a little too cheerful and forget the fine print. Yoga is not a magic spell for bone density, and it is not a free pass to twist like a pretzel in expensive leggings. For people with osteoporosis, the goal is not to chase the deepest pose in class. The goal is to build strength, improve balance, protect the spine, and move with more confidence in daily life.
That matters because osteoporosis does not just affect bone numbers on a scan. It changes how you think about bending, lifting, reaching, and even standing upright for long periods. A good yoga routine can support better posture, steadier footing, stronger legs, and less fear around movement. A bad routine can overload the spine with forward bending, deep twisting, or overly aggressive stretching. That is a terrible trade.
In this guide, you will learn what yoga can realistically do for osteoporosis, how to practice more safely, and which five poses are often the most practical place to start. These are not flashy Instagram poses. They are better. They are useful.
What yoga can actually do for osteoporosis
Let us start with the honest version. Yoga may help people with osteoporosis by improving balance, posture, mobility, leg strength, back-body awareness, and confidence with movement. Those benefits matter because better balance and stronger muscles can reduce fall risk, and fewer falls can mean fewer fractures. That is a big win.
What yoga probably should not do is replace the rest of your bone-health plan. If your clinician has recommended strength training, walking, medication, calcium, vitamin D, or physical therapy, yoga belongs beside those tools, not on top of them wearing a superhero cape. Think of yoga as a support act that can make the whole plan work better.
For many people, the best osteoporosis-friendly yoga focuses on upright, weight-bearing positions, careful alignment, leg strength, gentle spinal extension, and balance practice. In plain English, that means learning how to stand well, hinge well, strengthen the hips and thighs, and avoid folding your spine like a beach chair.
Before you start: the osteoporosis yoga safety rules that matter most
Before we get to the poses, here are the rules worth taping to the wall near your mat.
1. Keep the spine long, not rounded
Rounded forward bending can put extra stress on the front of the spine, especially if you already have low bone density or a history of vertebral fracture. When you move forward, hinge from the hips with a long back instead of curling down from the waist.
2. Skip deep twists and dramatic end-range stretches
A gentle turn through the torso is one thing. A deep twist where you wrench yourself into enlightenment is another. With osteoporosis, moderation is the smarter choice.
3. Use support without shame
Chairs, walls, yoga blocks, folded blankets, and straps are not signs that you are bad at yoga. They are signs that you enjoy having functioning bones. Support lets you practice balance and strength more safely.
4. Pain is not a badge of honor
You should feel muscular work, mild effort, and maybe a gentle stretch. You should not feel sharp pain, pinching, zinging, or a sensation that makes you want to negotiate with the ceiling. Stop and adjust.
5. Get clearance if you have a recent fracture, severe osteoporosis, or new back pain
If you have had a recent compression fracture, unexplained back pain, significant kyphosis, or very low bone density, talk with your clinician or a physical therapist before starting. A trained yoga therapist or instructor who understands osteoporosis can also help modify poses safely.
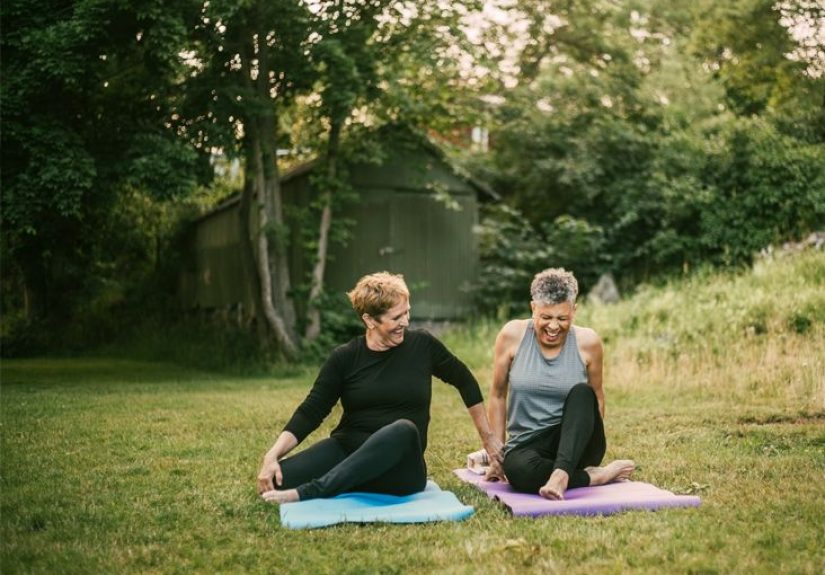
5 yoga poses that can help and how to do them
The five poses below were chosen because they support the qualities that matter most for people with osteoporosis: posture, balance, leg strength, body awareness, and gentle spinal extension. They are also easier to modify than a lot of traditional class favorites.
1. Mountain Pose (Tadasana)
Why it helps: Mountain Pose looks simple, but it teaches the foundation of safe movement: upright posture, neutral spine, steady feet, and awareness of where your body is in space. It is basically the “learn to stand like your future self will thank you” pose.
How to do it:
- Stand with your feet hip-width apart.
- Press evenly through both feet, especially the heels and the base of the big toes.
- Soften your knees instead of locking them.
- Lengthen through the crown of your head as if someone is gently lifting you upward.
- Keep your ribs stacked over your pelvis.
- Let your shoulders relax down and slightly back.
- Breathe slowly for 5 to 8 breaths.
Make it safer: Practice with your back near a wall so you can feel upright alignment without leaning.
Common mistake: Puffing the ribs forward and turning “stand tall” into “military statue with tension in the neck.” Think length, not stiffness.
2. Chair Pose (Utkatasana), modified
Why it helps: Chair Pose strengthens the thighs, hips, and glutes, which are all helpful for balance, stair climbing, and getting out of actual chairs without making weird sound effects. Stronger legs are a major asset for fall prevention.
How to do it:
- Start in Mountain Pose with feet about hip-width apart.
- Hinge slightly at the hips while keeping your chest lifted and spine long.
- Bend your knees as if you are about to sit back into a chair.
- Keep your weight mostly in your heels.
- Reach your arms forward or keep your hands on your hips if the shoulders complain.
- Hold for 3 to 5 breaths, then rise slowly.
- Repeat 5 to 8 times.
Make it safer: Stand in front of a chair and lightly tap the seat with your hips. You can also hold the back of a chair or practice a sit-to-stand version.
Common mistake: Turning it into a rounded forward fold. Keep the back long and the gaze slightly forward, not down into your soul.
3. Warrior II (Virabhadrasana II)
Why it helps: Warrior II builds leg strength, hip stability, and postural endurance. It also teaches how to stay upright while the lower body works hard, which is a valuable life skill whether you are gardening, carrying groceries, or pretending you are not tired.
How to do it:
- Step your feet wide apart.
- Turn your front foot forward and your back foot slightly inward.
- Bend the front knee so it tracks over the ankle.
- Keep your torso upright and centered over the pelvis.
- Extend your arms out to the sides at shoulder height.
- Look over the front hand and breathe for 3 to 5 breaths.
- Straighten the front leg and repeat on the other side.
Make it safer: Shorten your stance or place a chair beside you for balance support. Less drama, more control.
Common mistake: Leaning forward over the bent knee. The torso should stay tall rather than diving into battle.
4. Tree Pose (Vrksasana), supported
Why it helps: Balance training matters with osteoporosis, and Tree Pose is one of the most practical ways to work on it. Better balance can translate into more confidence on stairs, curbs, uneven sidewalks, and that mysterious rug corner that has been plotting against you for years.
How to do it:
- Stand next to a wall or sturdy chair.
- Shift your weight into one foot.
- Place the other toes lightly on the floor like a kickstand, or bring that foot to the inner calf.
- Avoid pressing the foot into the side of the knee joint.
- Keep the spine tall and the pelvis level.
- Bring your hands to prayer position or keep one hand on support.
- Hold for 3 to 5 breaths, then switch sides.
Make it safer: Keep the lifted toes on the floor. This still counts. Yoga is not a courtroom.
Common mistake: Letting the standing hip collapse to one side. Think tall through the waist and steady through the foot.
5. Sphinx Pose
Why it helps: Gentle spinal extension can help counter the rounded posture that often develops with osteoporosis. Sphinx also strengthens the upper back and encourages chest opening without the intensity of deeper backbends.
How to do it:
- Lie on your stomach on a mat or folded blanket.
- Place your forearms on the floor with elbows under shoulders.
- Press lightly into the forearms and lift your chest.
- Keep the neck long and the gaze forward or slightly down.
- Engage the lower belly gently so the low back does not take all the load.
- Hold for 3 to 5 slow breaths, then lower.
- Repeat 3 to 5 times if comfortable.
Make it safer: If lying on the floor is uncomfortable, try a standing chest-opening variation at the wall or a very gentle seated back extension.
Common mistake: Cranking the head up and collapsing into the lower back. The lift should feel broad through the chest, not like your spine is arguing with you.
Poses that usually need modification or avoidance
If you have osteoporosis, certain yoga poses deserve caution signs and a very skeptical eyebrow. The biggest red flags are deep forward bends, forceful spinal flexion, deep twists, and any pose where a teacher pushes you farther into range. That includes classic forward folds, Plow Pose, Shoulder Stand, aggressive seated twists, and deep hip-opening positions that encourage the spine to round or rotate under load.
Another sneaky issue is speed. Quick transitions, dramatic flows, and momentum-based movement can reduce control. Slower practice is often safer because it gives you time to organize your posture and notice what your body is doing.
A simple 10- to 15-minute osteoporosis-friendly yoga routine
If you want a basic starting plan, try this:
- Mountain Pose: 5 breaths
- Chair Pose: 5 repetitions
- Warrior II: 3 breaths each side, 2 rounds
- Tree Pose with wall support: 3 breaths each side, 2 rounds
- Sphinx Pose: 3 to 5 breaths, 3 repetitions
- Finish with quiet standing and slow breathing for 1 minute
Do that three or four times a week and focus on consistency. A practice you can repeat safely beats one heroic class that leaves you sore, scared, or convinced your mat is an enemy.
What people often experience when they start yoga with osteoporosis
One of the most common experiences is surprise. Many people assume osteoporosis means they should move less. Then they begin a careful yoga routine and realize the real goal is to move better. Not bigger. Not deeper. Better. That shift can feel empowering because it replaces fear with skill.
At first, people often notice how hard simple standing can be. Tree Pose with one finger on a wall may feel humbling. Chair Pose may light up the thighs in a way that suggests your legs have been quietly freeloading. Mountain Pose can reveal a head-forward posture that has been hanging around for years like an uninvited guest. This is normal. Bone-friendly yoga tends to expose habits before it improves them.
Another common experience is relief. When people stop trying to “perform yoga” and start practicing it in a way that matches their body, the routine becomes less intimidating. They realize they do not have to fold flat, twist like a corkscrew, or chase flexibility trophies. They can use a chair, shorten their stance, keep their toes on the ground, and still get meaningful benefits.
Confidence usually grows in small, unglamorous ways. You may notice that you rise from a chair more easily. You may feel steadier stepping off a curb. You may catch yourself standing taller while brushing your teeth or carrying laundry. These are not dramatic movie-montage moments, but they matter. For people with osteoporosis, better daily mechanics are a very big deal.
Some people also describe a mental shift. A diagnosis of osteoporosis can make movement feel risky, and that fear can shrink activity levels over time. A gentle yoga practice may help restore trust in the body. Not blind trust, but informed trust. You learn which movements feel supportive, which ones feel questionable, and how to adjust before a pose becomes a problem.
There can be frustrations too. Progress in balance is not always linear. One day Tree Pose feels steady; the next day your ankle behaves like it just heard shocking gossip. That does not mean the practice is failing. Balance depends on sleep, fatigue, medication effects, stress, vision, and plain old human inconsistency. Supported practice still counts.
Many people also discover that breathing changes everything. Slow breathing can reduce tension, help you organize posture, and keep you from rushing into sloppy movement. It sounds almost too simple, which is exactly why people ignore it until they realize it works. The breath is not decoration. It is part of the strategy.
Another real-world lesson is that teacher quality matters. An instructor who understands osteoporosis will encourage alignment, patience, and props. An instructor who loves dramatic assists and one-size-fits-all cues is not your soulmate. The best experience usually comes from classes labeled gentle, therapeutic, chair yoga, senior yoga, or private instruction with someone familiar with bone health.
Over time, the biggest win is often not flexibility. It is confidence paired with caution. That is the sweet spot. You feel stronger, steadier, and more capable, but you also know when to skip the deep twist, back off the range, or use the wall. That combination is not boring. It is wise. And for long-term bone health, wise beats impressive every single time.
Final thoughts
Yoga and osteoporosis can absolutely coexist, but they need good boundaries. The safest approach is not the deepest pose. It is the smartest one. Focus on posture, balance, leg strength, and gentle spinal extension. Use props freely. Avoid forward rounding, deep twists, and teacher-forced adjustments. And remember: the best yoga practice for osteoporosis is the one that leaves you feeling stronger, steadier, and more at home in your body, not the one that leaves you trying to negotiate peace with your spine.
In other words, your mat is not a stage. It is a training ground for everyday life. That is much more useful anyway.