Table of Contents >> Show >> Hide
- Why Transform Instead of Replace?
- Quick Reality Check: Are Your Doors Worth Saving?
- Prep Like You Mean It (Because Paint Is a Drama Queen)
- 8 Transform Ideas for Old Flat Cabinet Doors
- 1) Faux Shaker: Add Trim to Create a Frame
- 2) Slim Shaker: Modernize the Frame
- 3) Beadboard Overlay: Cozy, Cottage, and Surprisingly Versatile
- 4) Vertical Slats or Fluted Panels: The “Fancy Without Trying” Upgrade
- 5) Cane Webbing Insert: Airy, Light, and Instantly “Boutique”
- 6) Glass Insert: Classic Upgrade with “Hello, Light!” Energy
- 7) Wallpaper or Fabric Panels: Fast Drama, Low Commitment
- 8) Paint + Hardware Swap: The Highest ROI Combo
- How to Paint for a Pro Finish (Without a Pro Budget)
- When Refacing (or New Doors) Makes More Sense
- Safety Notes (Not the Fun Part, But the Smart Part)
- Conclusion: Your Cabinets Don’t Need a DemolitionThey Need a Plan
- Extra: Real-World Experiences People Have When Transforming Flat Cabinet Doors (About )
Flat cabinet doors are the plain white tee of the kitchen world: clean, simple, and… sometimes suspiciously boring. The good news? You don’t need a full kitchen remodel (or a second mortgage) to make them look custom. With a little strategyplus the right prep, a few clever upgrades, and a willingness to label your doors like you’re running a tiny cabinet libraryyou can turn “meh” slab doors into “wait, did you buy new cabinets?” doors.
This guide walks you through how to transform old flat cabinet doors using proven DIY approaches: faux Shaker trim, beadboard overlays, cane inserts, paint techniques, and hardware swaps that deliver maximum “wow” for minimum “why did I start this?”
Why Transform Instead of Replace?
Replacing cabinets is expensive, disruptive, and tends to reveal new problems behind the old ones (like that one mystery outlet no one remembers installing). Transforming existing doors is usually faster, less wasteful, and more budget-friendly. In many kitchens, the cabinet boxes are perfectly finethe doors are just… living in the past.
Translation: keep what works (the boxes), upgrade what everyone sees (the fronts). That’s the whole glow-up.
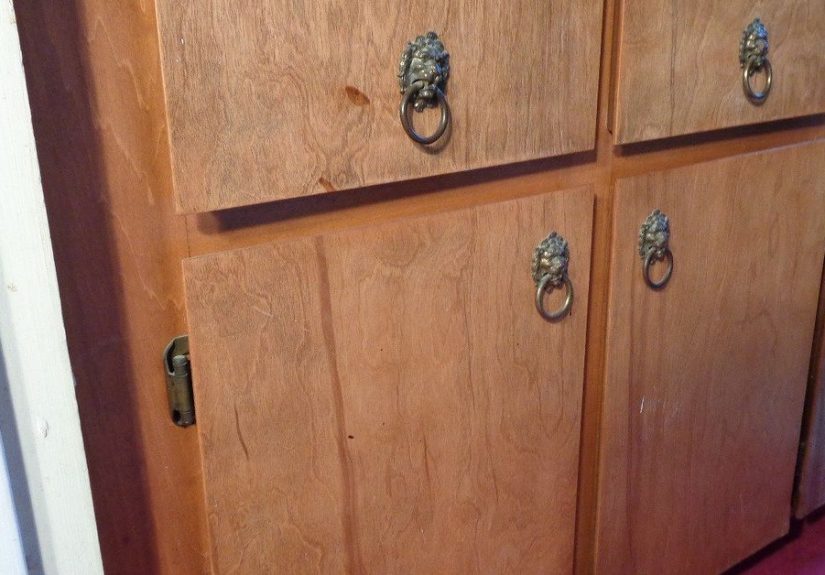
Quick Reality Check: Are Your Doors Worth Saving?
Most flat doors can be transformed, but take five minutes to inspect before you fall in love with a design idea:
- Warped doors: minor warp can sometimes be managed with new hinges, but major warp will fight you forever.
- Swollen MDF/particleboard edges: can be repaired if small; severe swelling usually means replacement is smarter.
- Grease saturation: not a deal-breaker, but prep will take longer (hello, degreaser).
- Old paint you can’t identify: treat carefullyespecially in older homes where lead paint is a possibility.
Prep Like You Mean It (Because Paint Is a Drama Queen)
If you want a durable finish that doesn’t chip the first time someone opens a door with a spoon in their hand, prep is non-negotiable. The goal: remove grime, dull the sheen, and create a surface primer and paint can actually bond to.
Step 1: Remove, Label, and Organize
- Take doors off and remove hinges/handles.
- Label everything (painter’s tape + a marker). Put hardware for each door in a bag.
- Set up a flat work area (sawhorses + boards work great).
Step 2: Degrease Thoroughly
Kitchens produce an invisible film of oil that laughs at regular soap. Use a dedicated cleaner/degreaser and rinse/wipe until the surface feels squeaky clean. This is the step people skipand then later blame “bad paint.” (It wasn’t the paint. It was the lasagna vapor.)
Step 3: Scuff Sand (Not Sculpt a Statue)
You’re not sanding to raw wood in most casesyou’re sanding to remove gloss and help primer grip. A common approach is medium grit for initial scuffing, then finer grit between primer and paint coats for smoothness. Vacuum dust and wipe with a tack cloth or a damp microfiber.
Step 4: Prime for Adhesion
Primer isn’t optional when you’re transforming cabinet doorsespecially if they’re slick, previously finished, or have stain/varnish. Use a bonding primer that matches your surface type (wood, laminate, etc.). Let it dry fully.
Step 5: Sand Lightly Again
This is the “chef’s kiss” move: once primer dries, a light sand with fine grit helps you avoid texture and creates that smooth, factory finish people associate with new cabinetry.
8 Transform Ideas for Old Flat Cabinet Doors
Here are eight proven approaches for a DIY cabinet door makeover. Pick one style and commitmixing five door looks in one kitchen is how you end up with a home that feels like a cabinet showroom had a breakup.
1) Faux Shaker: Add Trim to Create a Frame
This is the classic upgrade: turn a plain slab door into a Shaker-style door by adding a simple frame. It works because Shaker design is basically “clean lines + good proportions.”
How it works:
- Cut thin trim (often MDF or wood lattice) for two vertical stiles and two horizontal rails.
- Place them to form an inset-looking frame on the door face.
- Glue and pin-nail in place (or clamp if you’re avoiding nails).
- Fill nail holes, caulk seams lightly, then prime and paint.
Pro tip: Keep the frame width consistent and the margins even. Uneven spacing is the fastest way to make it look “DIY… in the way you didn’t mean.”
2) Slim Shaker: Modernize the Frame
Same concept as faux Shaker, but with narrower trim for a more modern, “custom European-ish” look. Slim Shaker works beautifully in small kitchens because it adds detail without visual bulk.
3) Beadboard Overlay: Cozy, Cottage, and Surprisingly Versatile
Beadboard adds texture and a vertical rhythm that makes doors feel more intentional. You can apply a thin beadboard panel over the slab door and frame it with trimor keep it minimal for a softer look.
Best for: farmhouse, coastal, cottage, and transitional kitchens.
Watch-outs: Beadboard grooves can collect grime near stoveschoose a durable paint and commit to occasional wipe-downs.
4) Vertical Slats or Fluted Panels: The “Fancy Without Trying” Upgrade
This trend looks high-end, but it’s approachable: you can use reed molding sheets, thin wood slats, or half-round dowels to create a fluted effect on flat doors.
- Cut slat material to size.
- Glue evenly with spacers for consistent gaps (or go tight for a solid reeded surface).
- Prime carefully (texture drinks primer), then paint.
Design note: Fluting pairs well with simple hardwarelet the texture do the talking.
5) Cane Webbing Insert: Airy, Light, and Instantly “Boutique”
If you want your kitchen to feel warmer and less boxy, cane inserts are a game changer. The idea is to cut out a center panel and replace it with cane webbing (rattan) set into a groove or attached behind a frame.
Why people love it: it adds texture, hides clutter better than glass, and makes a kitchen feel curated instead of purely functional.
Reality check: cane doesn’t love heavy grease zones, so use it on uppers away from the range or consider a good protective topcoat on the frame.
6) Glass Insert: Classic Upgrade with “Hello, Light!” Energy
Glass-front cabinets can make a kitchen feel larger and brighter. You can cut openings in flat doors, build a simple trim frame, and install glass (clear, frosted, or reeded for privacy). Great for uppers, coffee bars, or a single “display” section.
Tip: If you don’t want to stage your dishes like a magazine shoot, choose frosted or reeded glass. It’s the interior design equivalent of “soft focus.”
7) Wallpaper or Fabric Panels: Fast Drama, Low Commitment
Want impact without woodworking? Add a decorative panel to the door face:
- Apply peel-and-stick wallpaper to the center area.
- Frame it with thin trim so it looks intentional.
- Seal with a clear protective coat if it’s in a high-touch area (test first).
Best for: renters (with removable products), pantries, laundry rooms, and “I’m bored of white” moments.
8) Paint + Hardware Swap: The Highest ROI Combo
If you do nothing else, do these two: paint and new hardware. The doors can stay flat and still look modern if the finish is smooth and the hardware is sharp.
Hardware styles that instantly update slab doors: long bar pulls, simple knobs in brushed metal, or a modern edge pull for a sleek vibe.
How to Paint for a Pro Finish (Without a Pro Budget)
Cabinet paint success is about three things: durability, leveling, and patience. Durable enamel or cabinet-grade paint is designed to handle repeated touch and cleaning. Leveling means it dries smooth instead of showing brush marks. Patience means you don’t reinstall doors too early and weld them shut with half-cured paint. (Yes, this happens.)
Brush/Roller vs. Sprayer
- Brush/roller: easier setup, less masking, slower, but totally doable with a foam roller and careful technique.
- Sprayer: smoother, more “factory,” faster applicationbut requires more prep and masking.
Hybrid approach: Many DIYers spray doors and brush/roll frames (or vice versa) depending on space and comfort level.
Thin Coats Win
Two (or three) thin coats beat one thick coat every time. Thick coats drip, cure slowly, and are more likely to dent. Let each coat dry fully, then do a very light fine-grit sand between coats if needed for smoothness.
Don’t Skip Cure Time
Dry-to-touch is not the same as cured. Cabinets get handled constantly, so give the finish time to harden before heavy use. If you can baby the kitchen for a bit (or at least stop slamming doors like you’re auditioning for a drama series), your finish will last longer.
When Refacing (or New Doors) Makes More Sense
Sometimes, transforming flat doors is not the best move. Consider refacing or replacing doors if:
- Your doors are crumbling, badly warped, or water-damaged.
- You want a radically different door size or overlay style.
- Your kitchen layout is fine, but the fronts are beyond saving.
Cabinet refacing typically keeps the boxes and replaces doors/drawer fronts, often adding veneer to visible framesan option that can look brand new without a full tear-out.
Safety Notes (Not the Fun Part, But the Smart Part)
- Lead paint awareness: In homes built before 1978, disturbed paint can create hazardous dust. Use lead-safe practices and consider professional help if you suspect lead.
- Ventilation: Degreasers, primers, and paints can produce strong fumesventilate well.
- Dust control: Vacuum thoroughly, use a tack cloth, and keep your workspace clean to avoid grit in your finish.
Conclusion: Your Cabinets Don’t Need a DemolitionThey Need a Plan
To transform old flat cabinet doors, you don’t need magical tools or a design degree. You need a good idea, solid prep, and a finish system that actually bonds and cures. Whether you go faux Shaker, beadboard, cane, glass, or simply a smooth paint + hardware refresh, the goal is the same: make your kitchen look intentional, updated, and genuinely enjoyable to use.
And when someone says, “Wow, new cabinets?” you can smile and say, “Nope. Same cabinets. Just… emotionally evolved.”
Extra: Real-World Experiences People Have When Transforming Flat Cabinet Doors (About )
Ask ten homeowners about a cabinet door makeover and you’ll hear ten different storiesbut the themes are hilariously consistent. First: everyone underestimates how much time they’ll spend cleaning. People start out excitedPinterest boards ready, paint color picked, playlist queuedand then they meet the sticky reality of kitchen grease. The common “aha” moment is realizing that degreasing isn’t a quick wipe; it’s a process. Many DIYers report doing a first clean, sanding, and then discovering new grease “ghosts” they somehow missed the first time. The lesson: clean like you’re preparing the surface for a NASA launch. Your future self will thank you.
Second: labeling doors feels unnecessary… until it becomes the hero of the project. Folks often say the easiest way to turn a weekend makeover into a weeklong headache is to remove everything and assume you’ll “remember” where it goes. Hinges can be slightly different, doors can be subtly different sizes, and cabinet openings can be imperfectly squared. People who label early tend to finish calmer. People who don’t label tend to learn creative new words while trying to make Door #7 fit Opening #4.
Third: faux Shaker trim is wildly satisfyingand surprisingly unforgiving. Many DIYers love the transformation the moment trim goes on. Suddenly the doors look custom. But they also discover that spacing matters: uneven margins or slightly crooked trim becomes more noticeable after paint, not less. A common experience is redoing one or two doors after realizing a small misalignment looks huge when the kitchen light hits it. The fix most people land on is simple: measure carefully, use spacers, dry-fit before gluing, and check for square like it’s your job (even if your actual job is not “professional cabinet squarer”).
Fourth: paint technique is a confidence rollercoaster. Right after the first coat, many people panic because things look streaky or uneven. Then the second coat goes on and everything suddenly looks amazing. The bigger emotional twist is cure timelots of folks reinstall doors too soon because the paint feels dry. Then they notice fingerprints, sticking, or soft dents. Experienced DIYers often say the best “tool” they used was patience: giving paint time to harden, handling doors gently, and resisting the urge to aggressively clean for the first couple weeks.
Finally: the small upgrades feel disproportionately good. New hardware, soft-close bumpers, and hinge adjustments are frequently described as the moment the kitchen starts feeling “finished.” Even people who keep slab doors often report that fresh pulls plus a smooth, durable finish can make the kitchen feel completely different. The overall takeaway from real-world cabinet makeovers is clear: the transformation isn’t just visualit’s the feeling of turning something old and overlooked into something you’re proud to see every day.