Table of Contents >> Show >> Hide
- Table of Contents
- Why Leaf Propagation Works (and When It Doesn’t)
- What You’ll Need
- How to Propagate Succulents from Leaves: 14 Steps
- Step 1: Pick a plant that actually wants to be multiplied
- Step 2: (Optional but helpful) Water the parent plant a few days before
- Step 3: Choose mature leaves from the lower part of the plant
- Step 4: Remove the leaf with a gentle twistno ripping
- Step 5: Inspect the leaf base like a tiny quality-control inspector
- Step 6: Let the leaves callus (dry) in a warm, ventilated spot
- Step 7: Prep a shallow tray with well-draining soil
- Step 8: Add a gritty top layer (optional, great for humid homes)
- Step 9: Place leaves on the soil surface with the base touching the mix
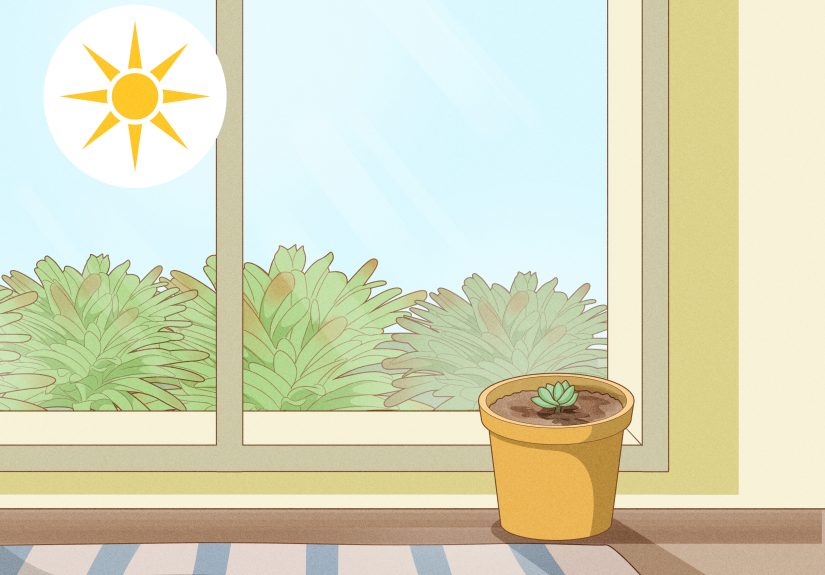
- Step 10: Put the tray in bright, indirect light
- Step 11: Keep airflow decent (humidity is helpful; stale air is not)
- Step 12: Don’t water until roots beginor use the lightest touch possible
- Step 13: Once roots appear, “tuck” them gently and start light watering
- Step 14: Transplant pups when they’re sturdy
- What to Expect: A Simple Timeline
- Common Mistakes (and How to Fix Them)
- FAQ
- Real-World Experiences and Lessons
- Final Thoughts
Propagating succulents from leaves is basically nature’s version of “copy, paste”except slower, cuter, and
way more likely to make you stare at dirt like it’s a live sports broadcast. If you’ve ever seen a tiny rosette
pop up beside a shriveling leaf and thought, “Wait… that’s illegal,” good news: it’s not illegal. It’s
succulent leaf propagation, and you can do it at home with minimal supplies, a little patience,
and a healthy respect for the number-one killer of baby succulents: too much love (a.k.a. overwatering).
This guide breaks down how to propagate succulents from leaves in 14 practical steps,
with clear expectations, troubleshooting, and specific examplesso you can grow your collection for free and feel
like a botanical wizard while doing it.
Why Leaf Propagation Works (and When It Doesn’t)
Succulents are built for survival. Many store water and nutrients in their leaves, and certain types can create
new roots and buds from a single leafas long as the leaf base stays intact. That “base” (the
spot where the leaf attaches to the stem) is the magic zone where new growth can form.
Best succulents to propagate from leaves
If you want quick wins, start with classic leaf-propagation champions like echeveria, jade,
sedum, ghost plant, and donkey’s tail. These are widely considered
among the easiest to propagate from leaf pieces. (Some others, like string of pearls, usually do better from stems.)
When leaf propagation won’t work
- The leaf is torn at the base (no intact “attachment point,” no new plant).
- The leaf is damaged or mushy (rot spreads fast, especially in humid setups).
- The species doesn’t propagate well by leaf (some prefer pups/offsets or stem cuttings).
Bottom line: leaf propagation is simple, but it’s not a guaranteed cloning machine. Your success rate improves
dramatically when you choose the right plant and treat water like a spice: use sparingly.
What You’ll Need
Gather this once, and you’ll be “leaf-propping” like you own a tiny nursery.
- A healthy succulent (the parent plant, a.k.a. the “mother plant”).
- A shallow tray or pot with drainage (or a tray plus a thin nursery pot).
- Well-draining succulent/cactus soil (store-bought or amended).
- Optional gritty top layer (pumice, perlite, or coarse grit) to keep leaves off wet soil.
- Bright, indirect light (a sunny window with filtered light or a grow light setup).
- Clean scissors or snips (mostly for tidying; leaves usually twist off by hand).
- Patience (not sold in stores; try the internet).
Soil quick tip
The goal is fast drainage and airflow. If your succulent soil feels “too potting-soil-ish,” amend it with mineral
grit (like perlite, pumice, or coarse sand). Many growers use a heavier mineral ratio for humid indoor conditions
so the mix doesn’t stay wet too long.
How to Propagate Succulents from Leaves: 14 Steps
These steps follow the most common and reliable approach: soil propagation. (Water propagation exists,
but soil is usually simpler and less drama-prone for beginners.)
Step 1: Pick a plant that actually wants to be multiplied
Choose a healthy succulent with plump, firm leaves. Avoid plants that are stretched (etiolated), mushy,
infested, or recently overwatered. Healthy leaves are your propagation “starter pack.”Step 2: (Optional but helpful) Water the parent plant a few days before
If your plant is very dry, a normal watering a few days before harvesting leaves can produce plumper leaves
with better stored energy. Don’t do this if the soil is already wet or the plant has rot issues.Step 3: Choose mature leaves from the lower part of the plant
Look for fully grown leaves (often lower on the stem) that are firm and unwrinkled. Tiny new leaves may not
have enough stored energy; old, half-dehydrated leaves often stall out.Step 4: Remove the leaf with a gentle twistno ripping
Hold the leaf close to the stem and wiggle/twist gently until it pops off cleanly. This is the moment where
most propagation attempts live or die. Ripped leaf bases usually won’t produce pups.Step 5: Inspect the leaf base like a tiny quality-control inspector
You want a clean, complete baseno torn tissue, no missing “attachment” area. If it looks jagged or ripped,
compost it and grab another leaf. (Yes, it feels harsh. Nature is harsher.)Step 6: Let the leaves callus (dry) in a warm, ventilated spot
Lay leaves on a paper towel or dry tray out of direct sunlight. Let the end dry and form a callustypically a
few days. This reduces rot risk once the leaf is near soil.Step 7: Prep a shallow tray with well-draining soil
Fill your tray with a gritty succulent mix. Aim for something that doesn’t stay soggy. Lightly moisten the
mix only if it’s bone-dry dustyour goal is “barely damp,” not “swamp.”Step 8: Add a gritty top layer (optional, great for humid homes)
Sprinkle pumice, perlite, or coarse grit over the top. This helps keep the leaf off wet soil while still
letting new roots reach moisture. It’s a small tweak that can seriously reduce rot.Step 9: Place leaves on the soil surface with the base touching the mix
Lay each leaf flat. Make sure the callused end (the base) is in contact with the soil surface. Don’t bury the
whole leaf. Think “resting on a mattress,” not “submerged in quicksand.”Step 10: Put the tray in bright, indirect light
Bright, indirect light is the sweet spot. Direct sun can scorch leaves and dry them too fast; low light can
slow rooting and encourage weak, leggy growth later. If you use a grow light, keep it bright but not baking-hot.Step 11: Keep airflow decent (humidity is helpful; stale air is not)
Airflow reduces fungus and rot. If your home is very dry, a loose humidity dome with ventilation holes can
help, but avoid sealed “terrariums” unless you love mold as a hobby.Step 12: Don’t water until roots beginor use the lightest touch possible
Here’s where advice varies by climate. Many successful growers keep the tray mostly dry until roots show,
because leaves can rot if kept too wet. If your air is extremely dry and leaves are shriveling fast, mist
the soil lightly around the base (not the leaf) once in a while. The rule is consistent:
no soaking, no puddles, and no daily mist-marathons.Step 13: Once roots appear, “tuck” them gently and start light watering
When you see pink or white roots reaching for soil, lightly cover the roots with a pinch of gritty mix so
they don’t dry out. Water lightly only when the top layer driesthink “sip,” not “bath.”Step 14: Transplant pups when they’re sturdy
When the baby plant has a small rosette (or cluster) and a real root system, move it to a small pot with
well-draining soil. Keep it in bright, indirect light for a bit, then gradually introduce more sun. The
original leaf will often shrivel as it feeds the babythis is normal and not a tragedy.
Pro tip: Start more leaves than you think you need. Even experienced growers have a few “no-shows,”
and having extras makes the process more forgiving (and more fun).
What to Expect: A Simple Timeline
Propagation is slowuntil it’s suddenly not. Here’s a realistic timeline for many common varieties:
- Days 1–4: Callusing (leaf end dries and seals).
- Weeks 2–4: Root nubs appear (sometimes sooner, sometimes later).
- Weeks 4–8: Tiny pups/rosettes begin forming on many types.
- Weeks 8–12+: Babies become pot-ready, depending on light and temperature.
Example: Echeveria leaf propagation
With echeveria, you’ll often see roots first, then a miniature rosette. If your leaf makes roots but no baby for
a while, don’t panic. Some leaves “root up” early and “baby up” laterlike they’re paying off student loans
before having kids.
Common Mistakes (and How to Fix Them)
1) Overwatering (a.k.a. The Great Leaf Melt)
If leaves turn mushy or translucent, moisture is probably too high. Back off watering, increase airflow, and
consider a gritty top layer to keep leaves off wet soil.
2) Misting the leaves directly
Misting sounds gentle, but water sitting on leaf tissue can encourage rot, especially indoors. If you mist at
all, mist the soil surface near the base, not the leaf itself.
3) Using heavy, moisture-holding soil
Standard potting soil often stays wet too long for propagation trays. Add grit (perlite/pumice/coarse sand) to
improve drainage and reduce fungus/rot problems.
4) Too much direct sun too fast
Direct sun can scorch leaves and dry them before they root. Give bright, indirect light at first, then increase
sun gradually as pups mature.
5) Trying to propagate torn or damaged leaves
A leaf with a missing base is usually a dead end. Start with clean, intact leaves for the best chance of success.
6) Giving up too early
Some leaves take weeks before doing anything visible. If the leaf is still firm and not rotting, you’re still in
the game.
FAQ
How long does it take to propagate succulents from leaves?
Many varieties show roots within a few weeks, with pups often appearing after that. Timing depends on species,
warmth, and light. Some can establish in under a month; others take longer.
Do I need to water succulent leaves while propagating?
Often, noat least not at first. The leaf has stored water and doesn’t “drink” like a rooted plant. Once roots
appear, light watering helps keep those roots alive. If you live in a very dry environment, minimal moisture on
the soil surface may help, but avoid keeping things wet.
Can I propagate a leaf that fell off on its own?
Sometimes, yesif it’s still firm and the base is intact. If the leaf is wrinkled, damaged, or fell because the
plant was stressed (over/underwater), success rates can drop.
Why did my leaf grow roots but no baby plant?
Some leaves root first and pup later. Ensure bright, indirect light and stable warmth. If the leaf stays firm,
it may still produce a pup with time.
Why did my baby plant die when the mother leaf shriveled?
The mother leaf often shrivels as it feeds the pup. If the pup doesn’t have enough roots or moisture at that
point, it can stall. Once roots appear, gently tuck them into soil and water lightly when the surface dries.
Real-World Experiences and Lessons
The internet makes succulent propagation look like a magical time-lapse: leaf goes down, baby plant pops up,
everyone claps. Real life is more like: leaf goes down, nothing happens for three weeks, you question your
choices, then one day you spot a microscopic root and feel like you just discovered a new planet.
One of the biggest “aha” moments many growers have is learning that propagation advice depends heavily on
the room you’re doing it in. In a dry climate (or a heated winter apartment), leaves can dehydrate fast.
The tray dries out quickly, roots may crisp up, and babies can stall unless there’s occasional moisture. In that
setting, growers often succeed by giving the soil a light mist after roots appearor by keeping a little
humidity around the tray with lots of ventilation. The trick is keeping moisture available for roots without
keeping leaf tissue wet.
In humid homes, the opposite happens: trays stay damp forever, and you can lose half your leaves to rot before
anything roots. Many successful humid-climate propagators swear by a gritty top dressing (pumice/perlite) and a
near-dry approach until roots show. In other words, they treat the tray like a desert spa: airy, bright, and not
soaked. If rot is a recurring villain in your story, airflow and drainage are the plot twist that saves the season.
Another common experience: not every leaf is a good leaf, even on a healthy plant. Leaves that
come off with a torn base are frequent “no-shows.” New growers often try anyway (because hope is strong), but
the most consistent results come from leaves removed with a clean twist that preserves the base. Over time,
people develop a feel for itlike peeling a sticker off glass in one perfect sheet.
Light is also a learning curve. Many growers place propagation trays in a dim corner “so it won’t burn,” then
wonder why progress is slow. Bright, indirect light is the sweet spot: enough energy to drive growth, not so much
that leaves bake. If you’re using a grow light, distance matters. Too close can dry leaves; too far can lead to
weak growth later. A simple habitrotating the trayhelps keep babies from leaning like they’re
trying to eavesdrop on your conversations.
Finally, there’s the emotional experience: learning to stop poking. Leaf propagation rewards the
“set it and forget it” mindset. The more you move leaves, tug on roots, or “just check real quick,” the more you
break the delicate new roots that took weeks to appear. A good compromise is a weekly “inspection day” where you
check for rot, look for roots, and then walk away like a responsible plant parent.
If you take nothing else from these real-world lessons, take this: start more leaves than you need,
keep them warm and bright (but not sunblasted), and let the process be slow. One day you’ll look down and realize
you’ve accidentally built a tiny succulent army. And honestly? That’s the dream.
Final Thoughts
Propagating succulents from leaves is one of the most satisfying “small wins” in gardening. You learn how plants
manage moisture, how light changes growth, and how patience is secretly the most powerful tool in your kit.
Follow the 14 steps, keep conditions bright and breathable, and remember: if your leaf is rotting, it’s too wet;
if it’s shriveling instantly, it may be too dry. Adjust slowly, take notes, and you’ll get better with every tray.
Soon you’ll be the person handing out baby succulents like party favorsbecause you have more than you can fit
on your windowsill. (A “problem,” technically.)


