Table of Contents >> Show >> Hide
- What “No Boundaries” Actually Means in Plotter World
- The Three Plotter “Species” and What Each One Is Best At
- How Plotters Turn “Math Lines” into Real Output
- Color Without the Drama: Why ICC Profiles Matter
- Plot Styles, Line Weights, and the Secret Sauce of Readable Plans
- Choosing the Right Plotter: Boundaries You Should Respect (So You Don’t Suffer Later)
- Maintenance: The Unsexy Reason Great Plotters Stay Great
- Where Plotters Shine: Specific Use Cases That Feel Like Cheating
- How to Get “Boundary-Free” Results: A Quick, Reliable Workflow
- 500+ Words of Real-World “No Boundaries” Plotter Experiences
- Experience #1: The architect who stopped shrinking everything “just to fit”
- Experience #2: The GIS analyst who turned a wall map into a manageable project
- Experience #3: The sign shop that made small jobs profitable again
- Experience #4: The professor who used a plotter to teach design thinking
- Experience #5: The maker who discovered that “drawing” can be manufacturing
- Conclusion: The Plotter Advantage Is Freedom You Can Measure
There are office machines that do one job and politely wait for the next. And then there’s the plotterthe
unapologetic overachiever that prints a construction set at breakfast, cuts vinyl decals at lunch, and draws
an oddly emotional geometric masterpiece before everyone leaves for the day.
“Plotter” used to mean a pen-on-paper robot that literally plotted lines. Today, the word often covers a
whole family of large-format and precision machines: wide-format printers for CAD/GIS and posters, cutting
plotters for vinyl and heat-transfer films, and modern pen plotters that can write or draw on surprisingly
large surfaces. Different tools, same vibe: crisp output, big ambitions, and a total refusal to stay inside
anyone’s imaginary boundaries.
What “No Boundaries” Actually Means in Plotter World
When people talk about a plotter having “no boundaries,” they’re usually reacting to three kinds of freedom:
size freedom, material freedom, and workflow freedom. A good plotter doesn’t just print biggerit lets you
move faster, stay more accurate, and ship a result that looks like you meant it (not like your printer
guessed).
1) Size freedom: from “poster” to “wall map” without panic
Wide-format plotters commonly handle roll media that makes ordinary printers look like they’re working in
miniature. The practical win isn’t just “bigger paper”it’s being able to output full-scale drawings, large
maps, or presentation boards without awkward shrinking, endless taping, or that one coworker who insists the
staples “add character.”
And when your layout is truly enormous, many professional print workflows support tiling: splitting one giant
design into multiple pages while preserving the original scale. That’s how wall maps, site plans, or exhibit
graphics go from “that’s impossible” to “that’s Tuesday.”
2) Material freedom: paper, film, vinyl, and beyond
Plotters aren’t picky in the way basic office printers are. Depending on the class of machine, you can run
everything from bond paper (perfect for technical drawings you’ll mark up) to matte films and coated media
(for crisp lines and dense graphics), plus specialty materials like adhesive vinyl or heat-transfer films
for cut applications.
The boundary-breaking moment is when you stop thinking “print” and start thinking “output.” Need temporary
job-site signage? A clean set of plans for a client meeting? Vinyl lettering for a door? A plotter is a
production tool, not a document machine.
3) Workflow freedom: accurate lines, predictable color, repeatable results
A plotter shines when precision matters. Technical output isn’t forgiving: a line weight that’s too heavy can
hide detail; a faint line can vanish in the field; a color that shifts can miscommunicate intent. The “no
boundaries” part is building a workflow where what you design is what you getconsistentlyacross multiple
print runs, media types, and team members.
The Three Plotter “Species” and What Each One Is Best At
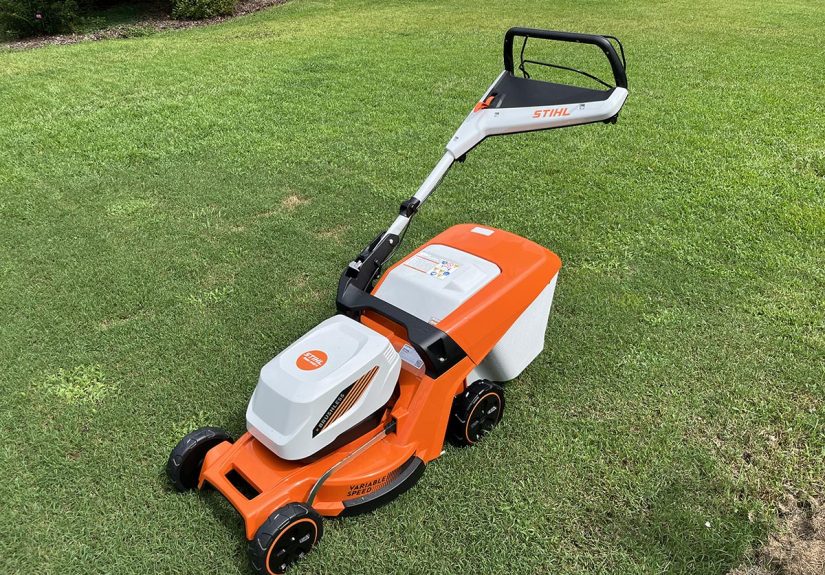
Wide-format technical plotters (CAD/GIS, plans, posters)
These are the machines most people picture: wide-format inkjet printers engineered for sharp linework,
readable text, and large sheets or rolls. They’re popular in architecture, engineering, construction, design
studios, campuses, and print shops that handle technical and presentation work.
Their superpower is balancing two things that don’t always get along: line precision and graphic punch. The
best workflows can output fine line drawings, subtle grayscale screening, and high-contrast presentation
posters without making you choose a favorite child.
Cutting plotters (vinyl, decals, heat transfer, stencils)
A cutting plotter doesn’t “print” in the traditional senseit uses a blade to cut shapes from a roll of
material. Think vinyl decals, window lettering, wall graphics, garment transfers, labels, and stencils.
The boundary it breaks is production flexibility: once you have a clean vector design, you can cut it at
different sizes, repeat it in batches, and apply it to real-world surfaces. Suddenly your “design file” turns
into a product.
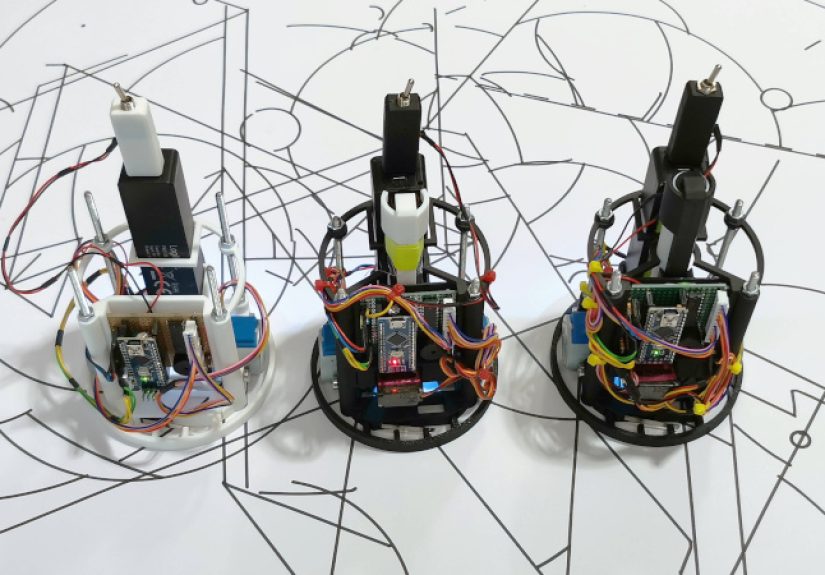
Pen plotters (drawing, writing, and art that feels weirdly alive)
Pen plotters are the original plotters’ modern descendants: machines that move a pen (or marker, brush pen,
even certain technical pens) to draw vector paths on paper. Artists love them for generative art, lettering,
and anything that benefits from the unmistakably human look of ink on paperminus the hand cramps.
The boundary they break is creative: you can output pieces larger than the machine’s footprint (depending on
the mechanism), experiment with different pens, and create work that sits in the sweet spot between digital
and handmade.
How Plotters Turn “Math Lines” into Real Output
Plotter work lives at the intersection of two worlds: vectors and rasters. Vectors are shapes described by
mathpaths, points, curves. Rasters are pixelsimages made of dots. Modern plotter workflows often handle
both, but they behave differently.
Vector-friendly jobs: crisp lines, clean typography, scalable detail
Technical drawings and cut files thrive as vectors because they scale without losing sharpness. That’s why
CAD exports, signage lettering, and logo-based graphics are usually vector-first. A plotter can reproduce fine
linework and small labels without turning them into fuzzy pixel soup.
Raster-heavy jobs: photos, shaded relief maps, gradients, and textures
When your design includes photos, complex shading, or imagery, you’re in raster territory. The key is using
an appropriate resolution for the final output size. You don’t need “infinite DPI”you need enough detail at
viewing distance so images look smooth, edges don’t crumble, and text remains readable.
Practical tip: large-format graphics are often viewed from farther away than a brochure. That means a smart
file can be lighter than you think while still looking excellent on the wall.
Color Without the Drama: Why ICC Profiles Matter
If you’ve ever printed a deep blue and watched it come out “mystery purple,” you’ve met the color-management
gremlin. Plotters don’t eliminate that gremlinbut a good workflow keeps it on a short leash.
The backbone of predictable color is color management using ICC profiles: standardized descriptions of how a
device reproduces color, so software can translate colors from your screen into the printer’s real-world ink
behavior on a specific media. In plain English: the profile is your interpreter, and it’s fluent in “monitor,”
“ink,” and “coated paper.”
What helps most in real teams
- Use the right color space on purpose. Know whether your workflow expects RGB, CMYK, or a managed conversion.
- Match the profile to the media. A matte bond behaves differently than glossy photo mediaprofiles exist for a reason.
- Proof when it matters. For client-facing color, a small test print saves expensive reprints (and awkward meetings).
The “no boundaries” feeling shows up when you can switch media or re-run a job weeks later and still land on
consistent color.
Plot Styles, Line Weights, and the Secret Sauce of Readable Plans
In technical plotting, readability is king. A plan set isn’t a poster; it’s an information system. Plot styles
(often managed through plot style tables in CAD workflows) control how colors map to line weights, screening,
and output behaviors. Done right, your drawings become consistent across different sheets and different
contributors.
When teams skip this step, they pay laterwith muddy prints, illegible details, and the classic “why is this
wall thicker than that wall” argument that nobody wins.
A practical checklist for clean technical output
- Standardize line weights. Define a hierarchy: heavy for major cuts, lighter for minor details, thinnest for hatches and annotation.
- Protect small text. Use fonts and sizes that survive printing and photocopying, not just screen viewing.
- Control grayscale screening. Light hatches should stay light; dark fills should not swallow labels.
- Preview before you commit. If your workflow offers a true plot preview, use it like it’s your last checkpoint before the point of no return.
Choosing the Right Plotter: Boundaries You Should Respect (So You Don’t Suffer Later)
A plotter may know no boundaries, but budgets and deadlines absolutely do. Picking the right machine is less
about brand prestige and more about matching specs to your real workload.
For wide-format printing
- Print width: Choose based on your most common sheet size (and the occasional “oh no” job that shows up uninvited).
- Ink type: Pigment inks are common for technical and graphics output because they’re durable and sharp on many media types.
- Speed vs. quality modes: Fast drafts for internal review, higher quality for client-facing sets.
- Media handling: Roll feed, sheet trays, and easy loading matter more than you think when you’re busy.
- Total cost of ownership: Ink, heads, maintenance items, and media add upplan for the long game.
For cutting plotters
- Cut width and tracking: Long runs require stable feeding so shapes don’t drift.
- Cut force: More force helps with thicker or specialty materials (but technique still matters).
- Blade management: Expect to swap blades and keep sparesdull blades are how good designs become sad confetti.
- Workflow integration: Make sure your design-to-cut pipeline is smooth, especially for teams.
Maintenance: The Unsexy Reason Great Plotters Stay Great
Plotters are reliable when you treat them like production tools, not magical wish-granting boxes. Most issues
come down to media, calibration, and routine upkeep.
Keep your output consistent
- Store media correctly. Humidity and heat can warp rolls, curl edges, and ruin alignment.
- Run nozzle checks (and fix problems early). Catching clogs early avoids banding and wasted ink.
- Clean smart, not aggressively. Over-cleaning can waste ink and time; clean with purpose.
- For cutters: check blade depth and pressure. The goal is a clean cut through material, not through backing paper and your will to live.
The best plotter experience is boring in the best way: you hit “go,” it outputs, and nobody has to become an
emergency technician.
Where Plotters Shine: Specific Use Cases That Feel Like Cheating
Architecture, engineering, and construction
Plotters let teams produce review sets fast, keep linework crisp, and create presentation boards that don’t
look like they were printed on a toaster. The “no boundaries” moment is when revisions stop being painful:
you can output the updated sheets immediately instead of waiting on someone else’s queue.
GIS and mapping
Large maps demand legibility: fine text, clear symbology, and consistent scale. Tiling oversized layouts can
turn truly massive designs into manageable prints, and scaling choices help preserve detail without producing
files so large they develop their own weather system.
Signage and branding
Cutting plotters turn vector files into physical graphicsdecals, lettering, labels, stencilsfast. That speed
changes the economics of small-batch production: you can personalize, iterate, and deliver on tight timelines.
Education and makerspaces
Plotters are secretly excellent teaching tools. They force clean design thinking (vectors! hierarchy! margins!)
and reward careful planning with professional-looking results. Also, they make students feel like they run a
mini print shopwhich, honestly, is a confidence boost you can’t buy by the ream.
How to Get “Boundary-Free” Results: A Quick, Reliable Workflow
- Start with intent. Is this a mark-up set, a final client set, a wall graphic, or a cut decal?
- Build for the final size. Design at scale when possible; avoid last-minute resizing chaos.
- Use vectors for shapes and text. Keep logos, type, and linework vector whenever you can.
- Manage images intelligently. Use appropriate resolution for viewing distancedon’t overshoot and bog down.
- Control color with profiles. Match settings to the media; proof critical colors.
- Preview and test. One small test print or cut can prevent an entire “why is this wrong” spiral.
- Document settings. Save presets so the next job is repeatable, even on a chaotic Tuesday.
500+ Words of Real-World “No Boundaries” Plotter Experiences
The best way to understand a plotter’s superpower is to watch it solve problems that used to require
compromises. Here are a few field-tested experiences (the kind that show up in studios, shops, and classrooms
all over the country) that capture what “no boundaries” looks like in practice.
Experience #1: The architect who stopped shrinking everything “just to fit”
A small architecture team used to print reduced sets on office printers for reviews, then outsource full-size
output for client milestones. That split workflow created a constant mismatch: details readable at full size
were cramped at reduced size, and line weights that looked “fine” on letter paper turned into heavy black
noodles when enlarged. Once the team brought wide-format plotting in-house, the review set became the real set.
They could print at true scale early, catch legibility issues sooner, and standardize line weights and plot
styles across the whole project. The surprise benefit? Fewer meetings about “printing problems,” because the
drawings finally looked consistent from sketch through permit.
Experience #2: The GIS analyst who turned a wall map into a manageable project
A county mapping group needed a massive wall map for a public meetinglarge enough for a room to read from a
distance, detailed enough to answer “what’s happening on my street?” without squinting. The layout was far
larger than any single sheet, so they used a tiled print approach: the plotter output multiple aligned pages
that preserved the intended scale. After assembly, the map looked continuous and intentional, not like a
frantic collage. The real win wasn’t only sizeit was control. They could revise one section and reprint only
the affected tiles instead of recreating the entire output.
Experience #3: The sign shop that made small jobs profitable again
In signage, the “small” jobs can be the biggest headache: a few door numbers, a handful of decals, a short run
of window lettering. Outsourcing is slow; hand-cutting is risky and inconsistent. With a cutting plotter, the
shop could take a clean vector file and cut multiple variants in minutesdifferent sizes, different names,
different placementswithout reinventing the process. They built simple presets for common vinyl types and
learned that “dialing in” blade depth was half science, half art. Once tuned, the machine delivered
repeatability: the tenth decal matched the first, and nobody had to apologize to a customer for a wobbly edge.
Experience #4: The professor who used a plotter to teach design thinking
In a university studio course, students designed informational posters and wayfinding graphics. On screens,
everything looked “fine.” In print, the truth arrivedpolitely and immediately. Tiny text vanished, light
grays became invisible, and margins that felt generous on a monitor turned into crowded chaos at full size.
Printing on a plotter transformed critique sessions: students could stand back, evaluate hierarchy and
readability, and iterate like professionals. The plotter didn’t just output workit made design decisions
visible in the real world.
Experience #5: The maker who discovered that “drawing” can be manufacturing
A maker experimenting with pen plotting found that the machine’s precision made repeatable “hand-drawn”
aesthetics possible. They tested different pens, papers, and speeds, then built a small product line of
plotted cards and prints. The breakthrough wasn’t artistic talentit was process. By keeping the artwork
vector-based, they could scale designs, adjust line density, and swap pen types to create variations without
redesigning from scratch. The plotter turned creative experimentation into a reliable workflowproof that
sometimes “no boundaries” means you can make art like an engineer and still keep the soul.
Put these stories together and you get the real plotter promise: it’s not one machine doing one job. It’s a
platform for outputprinting, cutting, drawingwhere scale, media, and repeatability stop being barriers and
start being choices.