Table of Contents >> Show >> Hide
- Before You Start: 5 Minutes Now Saves 5 Hours Later
- Method 1: Partner Sharing (Fastest and Most “Google-native”)
- Method 2: Shared Albums (Perfect for Selective Transfers)
- Method 3: Google Takeout (Most Complete Export, Most Chaotic Packaging)
- Method 4: Download & Upload (Simple, Manual, Surprisingly Effective)
- Edge Cases & Gotchas (AKA “Why is this harder than it should be?”)
- Which Method Should You Use?
- Final Checklist: Don’t Hit “Delete” Yet
- Conclusion
- Real-World Transfer Experiences (Extra)
- Experience 1: The “My university account is expiring next month” scramble
- Experience 2: The “Why did my screenshots not transfer?” mystery
- Experience 3: The “I just want one clean account, forever” consolidation
- Experience 4: The “Takeout gave me a landfill of files” situation
- Experience 5: The “I need to keep metadata and dates accurate” perfectionist path
- SEO Tags (JSON)
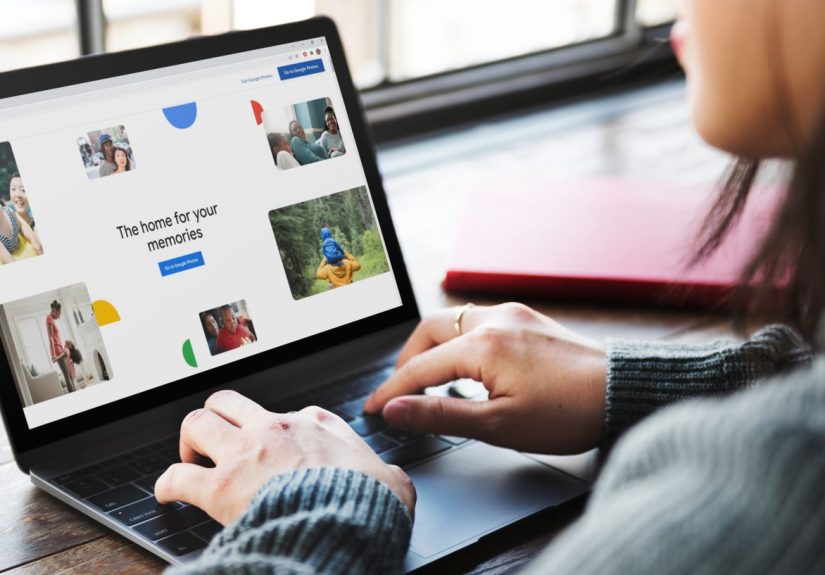
Switching Google accounts sounds like it should be as easy as moving houses: pack boxes, label them, drive away, done.
But Google Photos doesn’t “move” your library the way a USB drive moves files. It copies, shares, and rebuilds.
Which is fineuntil you realize your “boxes” include 12 years of birthday parties, 4,000 screenshots of parking spots, and exactly one photo of your tax documents (that you will definitely need later).
This guide walks you through the best, safest ways to transfer Google Photos to another accountwhether you’re migrating from a school/work account,
consolidating accounts, or just trying to escape the chaos of “oldemail2009@” forever.
Before You Start: 5 Minutes Now Saves 5 Hours Later
1) Decide what “transfer” means for you
Most people want one of these outcomes:
- Full migration: Everything in Account A should appear in Account B (including future uploads).
- One-time copy: Copy the old library once, then stop thinking about it forever (a beautiful dream).
- Selective transfer: Only albums, specific years, or “important stuff” moves over.
2) Check storage on the destination account
If Account B is near its storage limit, uploads may fail or stop mid-transfer.
Partner Sharing can reduce storage pain in certain situations, but don’t assume everything is “free forever.”
3) Know what won’t transfer perfectly
Google Photos features like face grouping, Memories, and search suggestions are partly “account intelligence.”
Even if the photos arrive, Account B may take time to re-index and re-learn your life (including your dog’s many hairstyles).
4) If you’re leaving a work/school (Google Workspace) account
Do not wait until your account is deactivated. If your organization is sunsetting accounts, your access can end fast.
Start the transfer while you can still sign in and while Photos is still accessible.
Method 1: Partner Sharing (Fastest and Most “Google-native”)
If you want the smoothest migration from one Google Photos account to another, Partner Sharing is usually the winner.
It’s designed for families, but it works beautifully for “me, myself, and my new email address.”
Why it’s great
- Minimal downloading: No giant zip files. No “where did I put that folder?” spiral.
- Preserves cloud organization better: Photos stay in Google Photos’ ecosystem.
- Can keep future photos flowing: Great if you’re gradually transitioning accounts.
Big limitation (yes, it’s annoying)
Partner Sharing is limited to one partner at a time. So if you already use it with a spouse,
you’ll need to plan around that.
Step-by-step: Transfer Account A → Account B with Partner Sharing
- Sign in to Account A on the web at Google Photos.
Go to Settings → Partner sharing → Get started. - Choose Account B as your partner (enter the email).
You can usually select:- All photos (recommended for full migration)
- Photos from a date onward (useful if you’re splitting old vs new life)
- Photos of specific people (available in some regions)
- Accept the invitation in Account B.
Open Google Photos while signed into Account B, find the invitation, and accept. - Turn on “Save to your account” in Account B.
This is the magic move. In Account B: Settings → Partner sharing → under Save to your account choose:- All photos (saves everything shared)
- Or a filtered option if you want to keep it curated
- Wait for the library to populate.
If you have tens of thousands of photos, it can take a while for everything to appear and for search to catch up.
Important note about screenshots and “photos from other apps” (Android)
If you notice that camera photos transfer but screenshots, downloads, or WhatsApp images don’t, you’re not imagining things.
Google has adjusted Partner Sharing behavior over time, and on Android there may be a setting to include (or exclude) content from other apps.
If your “missing” items are mostly screenshots or downloaded images, check Partner Sharing settings carefully.
Storage question everyone asks
“If I save my partner’s photos to my account, does it use my storage too?”
The practical answer: often not immediately, but it can depend on whether the original remains shared/available.
The safest mindset is: Partner Sharing is excellent for transfer, but always keep an eye on storage usage if you later stop sharing or delete originals.
Method 2: Shared Albums (Perfect for Selective Transfers)
Shared albums are your best friend when you don’t want to move your entire library.
Think: “I only need family albums, travel photos, and that one folder called ‘Receipts DO NOT DELETE’.”
How it works
In Account A, you create an album (or use an existing one), share it with Account B, and then in Account B you save those photos into the library.
Step-by-step: Transfer an album
- In Account A: Open Google Photos → Albums → choose an album (or create one).
- Share the album with Account B (invite by email).
- In Account B: Open the shared album and use Save / Save photos to add items to Account B’s library.
Pro tip: Use albums as “transfer batches”
If Partner Sharing is unavailable (because you already use it with someone else), you can still do a structured migration:
create albums by year (e.g., “2016,” “2017,” “2018”) or by category (“Kids,” “Trips,” “Work Stuff”), share them, save them,
then move on. It’s slower than Partner Sharing, but much faster than downloading everything manually.
Method 3: Google Takeout (Most Complete Export, Most Chaotic Packaging)
Google Takeout is the “give me everything” option. It’s also the “here are 37 zip files and a mysterious pile of JSON”
option. Powerful? Yes. Elegant? Not exactly.
When Takeout is the best choice
- You want an offline backup in addition to transferring accounts.
- You’re leaving an organization and want a local archive.
- You want to import into another platform or a personal storage system.
What you’ll see in a Takeout export
- Your photos/videos in folders (often organized by year or albums)
- Extra .json sidecar files containing metadata that may not be embedded the way you expect
- Potential duplicates if photos appear in multiple albums (Takeout can export them more than once)
How to do it (high level)
- In Account A, go to Google Takeout and select Google Photos only.
- Create the export and download the zip files.
- Unzip to a folder on your computer.
- Upload the photos/videos to Account B via Google Photos upload.
Reality check: metadata and duplicates
If you care deeply about preserving timestamps, locations, and edits, Takeout can be a bit of a puzzle because metadata may be provided in separate JSON files.
Some people ignore the JSON and live happily; others need tools or extra steps to reconcile metadata before importing elsewhere.
Also, if your library is heavily album-organized, expect duplication in the export because the same photo can be included multiple times in different album folders.
Method 4: Download & Upload (Simple, Manual, Surprisingly Effective)
If you prefer a straightforward approachand you don’t mind some manual labordownload and re-upload works.
Google even acknowledges this as a way to move all photos to a different account.
How it works
- Download photos/videos from Account A to your device/computer.
- Upload them into Account B using Google Photos.
Downsides you should know
- File timestamps can get weird: depending on your operating system and download method,
the file itself may get a new “downloaded” timestampeven though embedded photo metadata is still there. - Storage impact: uploading creates new copies that count against Account B’s storage (in most cases).
- It’s easy to miss things: especially if you try to do it in chunks without a plan.
Edge Cases & Gotchas (AKA “Why is this harder than it should be?”)
1) “I used Locked Folderwill those photos transfer?”
Locked Folder content is intentionally hidden from most of Google Photos (search, grid, albums, etc.).
If you’re migrating accounts, double-check what’s in Locked Folder.
In many cases, you’ll want to temporarily move items out (or ensure they’re backed up appropriately) before transferring.
2) “Do albums transfer?”
Not cleanly, depending on the method.
Partner Sharing is about the library.
Shared albums can be recreated if you manually share/save them.
Takeout can export album folders, but re-importing into Google Photos doesn’t always rebuild album structure automatically the way you’d hope.
3) “What about edits, favorites, and people labels?”
Expect some rebuilding. Photos should come over, but account-level featureslike how your Photos app categorizes, searches,
and suggestsmay take time to regenerate in Account B.
4) “I’m doing this because my old account is being shut down.”
Use Partner Sharing first if possible, because it’s the fastest way to get the library into Account B without giant downloads.
Then consider Takeout as a second safety net for an offline archive.
Which Method Should You Use?
| Goal | Best Method | Why |
|---|---|---|
| Move everything fast (cloud-to-cloud) | Partner Sharing | Minimal effort, Google-native, good for large libraries |
| Move only certain photos/albums | Shared Albums | Selective transfer without exporting everything |
| Keep an offline backup too | Google Takeout | Most complete archive, even if messy |
| Simple DIY copy | Download & Upload | Works anywhere, but can be time-consuming |
Final Checklist: Don’t Hit “Delete” Yet
- Confirm Account B has the photos: spot-check multiple years and albums.
- Search for “screenshots,” “downloads,” and “WhatsApp”: confirm non-camera media transferred if you need it.
- Verify videos: they’re larger, slower, and more likely to reveal transfer problems.
- Wait for indexing: search results and Memories can lag after a big migration.
- Only then consider deleting anything from Account A (if that’s part of your plan).
Conclusion
Transferring Google Photos to another account is less like “moving out” and more like “cloning your life.”
If you want the cleanest, fastest path, Partner Sharing with “Save to your account” is usually the MVP.
If you’re selective, shared albums are a smart way to move only what matters.
And if you want a belt-and-suspenders approach (or you’re leaving a Workspace account), Takeout is your offline insurance policy.
Pick the method that matches your goal, run a few sanity checks, and thenonly thenretire the old account with confidence.
Bonus: you’ll finally stop paying for extra storage on the email address you made in high school. Probably.
Real-World Transfer Experiences (Extra)
Below are a few “this happens all the time” scenarios that come up when people transfer Google Photos between accounts. Think of these as field notes
from the front lines of digital decluttering.
Experience 1: The “My university account is expiring next month” scramble
This is the most common high-stakes transfer. The best outcome usually comes from doing Partner Sharing first, because it moves your library without
the download-and-upload bottleneck. People who start with Takeout sometimes underestimate how large their library is, then end up with dozens of zip files and a hard drive that
suddenly feels emotionally judgmental.
What works well: set Partner Sharing from the school account to the personal account, enable “Save to your account,” and then leave it alone overnight.
The next day, spot-check key years and important events (weddings, graduations, baby photosaka the stuff you’d actually cry over).
After that, do Takeout only if you want a local archive. That two-step approach reduces panic and adds safety.
Experience 2: The “Why did my screenshots not transfer?” mystery
Many users notice a pattern: camera photos show up, but screenshots and images saved from apps are missing.
The fix is usually not “reinstall everything and pray.” Instead, it’s checking Partner Sharing behavior/settings on Androidbecause Google has adjusted what counts as shareable
content from “other apps” over time. In practice, people solve this by:
- Confirming screenshots are actually backed up in Account A (not just sitting locally on the phone).
- Reviewing Partner Sharing settings and any “include content from other apps” controls (if available).
- Using Shared Albums as a manual workaround for specific missing categories (Screenshots, Downloads, Messaging images).
Experience 3: The “I just want one clean account, forever” consolidation
Consolidators are usually happiest with Partner Sharing because it’s the least hands-on. But there’s a catch:
some people already use Partner Sharing with a spouse or family member. Since it’s limited to one partner at a time, they do a “batch transfer”:
share the library with the new account for a few days, let it save everything, then switch Partner Sharing back to the original family setup.
The key lesson: don’t rush the switch back. Let the new account fully populate and index, then do a few targeted checks:
search for “videos,” “favorites,” specific years, and random events. If you can find that one blurry photo of a whiteboard from 2018, the rest is probably there too.
Experience 4: The “Takeout gave me a landfill of files” situation
Takeout is powerful, but it often surprises people with duplicates and sidecar JSON files. The most common mistake is assuming Takeout is a perfect “export then import” loop.
It’s not. It’s an exportperiod. If you upload everything back into Google Photos, you can end up with duplicates unless you de-dupe carefully.
People who do best with Takeout typically:
- Use Takeout as a backup, not the primary transfer method (unless they truly need offline control).
- Upload in smaller chunks and spot-check duplicates.
- Accept that albums/organization may need some rebuilding.
Experience 5: The “I need to keep metadata and dates accurate” perfectionist path
If dates and locations matter deeply (photographers, archivists, people who label everything), Partner Sharing usually causes the fewest headaches,
because it keeps media inside Google Photos’ system. Download-and-upload can introduce file timestamp confusion, and Takeout can separate metadata into JSON.
The best “perfectionist” play is often:
- Partner Sharing with auto-save for the main transfer.
- Takeout for offline backup.
- Download/upload only for edge cases (like certain hidden categories) where needed.
The big takeaway from all these experiences: you don’t have to pick one method forever. Most successful transfers use one “primary highway” (Partner Sharing)
and one “safety rope” (Takeout), with shared albums as the flexible tool for anything that doesn’t behave nicely.