Table of Contents >> Show >> Hide
- Before You Start: What a Magic Bullet Does Best
- How to Use a Magic Bullet: 14 Steps
- Step 1: Unpack the parts and learn who’s who
- Step 2: Wash the removable parts before first use
- Step 3: Set the base on a flat, dry, stable surface
- Step 4: Inspect the blade and gasket
- Step 5: Choose the right cup for the job
- Step 6: Add ingredients without going past the max line
- Step 7: Build the blend with liquid and flow in mind
- Step 8: Screw on the cross blade tightly
- Step 9: Flip the cup, align it, and place it on the motor base
- Step 10: Press down to blend in short bursts
- Step 11: Use the lock-on mode carefully
- Step 12: Stop immediately if ingredients stall, leak, or stop moving
- Step 13: Open carefully and never treat the blade as a storage lid
- Step 14: Clean it right away
- Important Magic Bullet Mistakes to Avoid
- Best Things to Make in a Magic Bullet
- Real-World Experiences: What People Usually Learn After a Week with a Magic Bullet
- Final Thoughts
- SEO Tags
If you just pulled a Magic Bullet out of the box and are staring at the cups, lids, and blade like you’ve opened a tiny spaceship, relax. This little blender is designed to be simple. The trick is using it the way it was meant to be used: for small batches, quick blending jobs, and recipes that do not ask it to behave like a full-size smoothie cannon. Once you understand the rhythm, it becomes one of those kitchen gadgets you reach for constantlymorning smoothies, quick sauces, salsa, pancake batter, whipped dips, even breadcrumbs when you’re feeling ambitious and slightly chaotic.
This guide breaks down exactly how to use a Magic Bullet in 14 clear steps, plus practical tips for avoiding leaks, pressure problems, sad chunky smoothies, and that classic beginner move of stuffing the cup like it’s a carry-on bag. By the end, you’ll know how to set it up, blend efficiently, clean it fast, and actually enjoy owning it. Spoiler alert: the Magic Bullet loves soft ingredients, enough liquid, and a user who knows when to stop blending before the machine starts auditioning for a meltdown.
Before You Start: What a Magic Bullet Does Best
The Magic Bullet is a compact personal blender, which means it shines at quick, small jobs. Think smoothies, protein shakes, salad dressings, marinades, salsa, light dips, chopped aromatics, and single-serve sauces. It is not happiest when asked to crush lots of hard ice, blend steaming-hot soup in a sealed cup, or power through huge amounts of dense ingredients without enough liquid. In other words, it’s a sprinter, not a marathon runner.
That’s actually good news. Because the machine is small and straightforward, there isn’t much of a learning curve once you know the basic rules. Use the right cup, don’t overfill, tighten the blade securely, blend in short bursts, and clean it right away. Do those things, and your Magic Bullet will stop feeling mysterious and start feeling like the hardest-working little gadget on your counter.
How to Use a Magic Bullet: 14 Steps
Step 1: Unpack the parts and learn who’s who
Take everything out of the box and identify the motor base, blending cups, cross blade, lids, and any lip rings or to-go tops. This takes about two minutes and saves you from the deeply unnecessary experience of trying to put the wrong piece on the base while muttering, “Why is this not clicking?” The cross blade is the sharp attachment that screws onto the cup for blending. The motor base is the heavy part with the cord. The cups are where the magic, or at least the smoothie, happens.
Step 2: Wash the removable parts before first use
Before your first blend, wash the cups, lids, and rings in warm, soapy water or on the top rack of the dishwasher if your model allows it. Wipe the motor base with a damp cloth onlynever dunk it in water. Dry everything well, especially the blade assembly. This is not just a hygiene step; it also gives you a chance to get familiar with the parts before breakfast pressure kicks in.
Step 3: Set the base on a flat, dry, stable surface
Put the motor base on a level countertop with enough room around it for airflow. Do not wedge it against a toaster oven, pile mail around it, or let the cord dangle where it can get snagged. A stable surface matters because the Magic Bullet works by locking the cup into the base, and you want that setup steady and secure every time you blend.
Step 4: Inspect the blade and gasket
Before adding ingredients, check that the cross blade is clean, the gasket is seated properly, and nothing looks cracked, cloudy, loose, or damaged. If the blade assembly is not in good shape, you can end up with leaks, weak blending, or general countertop betrayal. Think of this as a two-second safety habit that prevents a ten-minute cleanup and a lot of dramatic sighing.
Step 5: Choose the right cup for the job
Use a cup size that matches your recipe. For a quick sauce or a small amount of chopped ingredients, use the smaller cup. For a smoothie or shake, use the larger cup. The goal is not to cram every ingredient you own into one vessel. The goal is to leave enough room for the contents to circulate. The Magic Bullet blends better when it has space to create movement, not when it is packed tighter than a holiday airport.
Step 6: Add ingredients without going past the max line
This is one of the most important rules. Never fill the cup past the maximum line. The machine needs headroom for circulation, and overfilling can cause leaking, poor blending, and pressure buildup. If you’re making a smoothie, cut larger ingredients into smaller pieces first. That helps the blades catch and move the food instead of just spinning dramatically beneath a stubborn fruit boulder.
Step 7: Build the blend with liquid and flow in mind
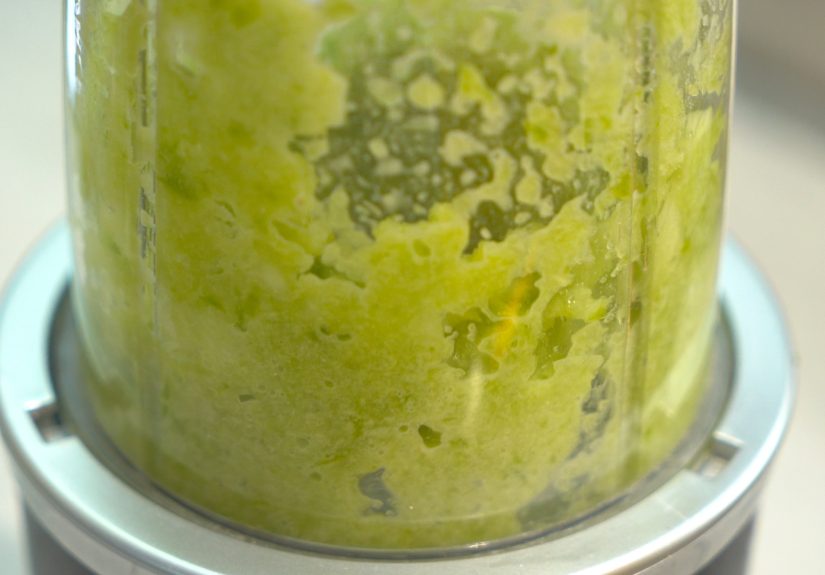
For the smoothest results, use enough liquid and layer ingredients so the blades can actually do their job. Many smoothie guides recommend a liquid base to help draw ingredients downward, while Magic Bullet guidance also emphasizes ingredient order and enough liquid for proper blending. In real kitchen life, the rule is simple: don’t pack the cup dry. Add your greens, fruit, powders, nut butters, liquid, and then ice or frozen items last if you’re making a smoothie. If the mixture looks thick enough to patch drywall, add more liquid before blending.
Step 8: Screw on the cross blade tightly
Place the cross blade on the cup and twist until it is snug and securely sealed. Not “kind of on.” Not “probably fine.” Tight. A loose blade assembly is one of the easiest ways to end up with leaks. But do not go full superhero and over-tighten it into another dimension. Firm and secure is the sweet spot.
Step 9: Flip the cup, align it, and place it on the motor base
Once the blade is attached, carefully flip the cup upside down and line up the tabs with the motor base. Set it into place so it sits properly before you start blending. If it feels crooked, do not force it. Lift it off, realign it, and try again. The machine should feel secure, not precarious.
Step 10: Press down to blend in short bursts
The Magic Bullet turns on when you press the cup down into the base. Start with short pulses. This helps break up ingredients, keeps the blend moving, and gives you more control over texture. Short bursts are perfect for chunky salsa, chopped onions, or a smoothie that just needs a gentle nudge before a longer blend. It is also a smart way to avoid overheating the motor or overprocessing the ingredients into mysterious beige mush.
Step 11: Use the lock-on mode carefully
If your model has a hands-free lock-on mode, you can press down and gently twist the cup clockwise to keep the motor running. This is helpful for smoothies and sauces, but it is not an invitation to walk away and answer emails. Stay nearby and keep blending sessions short. Personal blenders are made for quick cycles, not extended workouts. If the mixture is not blending well, the answer is usually more liquid, smaller pieces, or a quick shakenot endless runtime.
Step 12: Stop immediately if ingredients stall, leak, or stop moving
If the blade stops spinning, the mixture gets stuck, or you notice leaking, stop right away. Unplug the unit before doing anything else. Then remove the cup, shake the ingredients loose, add a little more liquid if needed, and try again. The Magic Bullet is not a fan of dense clumps, oversized frozen chunks, or cups stuffed with mostly ice. If it sounds strained, believe it. Your blender is not being dramatic. It is communicating.
Step 13: Open carefully and never treat the blade as a storage lid
After blending, remove the cup from the base only once the motor has fully stopped. Then slowly untwist the blade assembly, keeping the cup pointed away from your face in case pressure has built up. This matters especially if you blended thicker mixtures. Once you’re done, transfer leftovers to a vented container or use a proper lid. Do not store blended food with the blade assembly attached, because sealed mixtures can build pressure over time.
Step 14: Clean it right away
Magic Bullet cleanup is easiest when you do it immediately. Rinse the cup and blade after use before smoothie residue turns into kitchen cement. For quick cleaning, fill the cup partway with warm water and a drop of dish soap, blend briefly, then rinse thoroughly. Wash the blade carefully by hand because it is sharp. Wipe the motor base with a damp cloth only. Let all parts dry completely before reassembling or storing. Future-you will be grateful, and future-you deserves nice things.
Important Magic Bullet Mistakes to Avoid
There are a few errors that almost every new user makes at least once. The first is overfilling. The second is not using enough liquid. The third is expecting a small personal blender to bulldoze through hard ice and frozen bricks of fruit without complaint. Another big one is blending hot or carbonated ingredients in the cup. Don’t do that. Hot ingredients can create steam and pressure, while carbonated liquids can build gas pressure fast. Neither outcome belongs in a peaceful kitchen.
You should also avoid running the machine empty, microwaving the cups, freezing the cups if the manufacturer says not to, or leaving mixtures in a sealed cup with the blade attached for a long time. And if a part looks worn or cracked, replace it instead of trying to get one more heroic week out of it. Kitchen appliances rarely reward denial.
Best Things to Make in a Magic Bullet
Once you know how to use it properly, the Magic Bullet becomes surprisingly versatile. It is excellent for fruit smoothies, protein shakes, yogurt drinks, salad dressings, marinades, pesto-style sauces, pancake or waffle batter for one or two people, quick salsa, hummus in small amounts, and finely chopped garlic, onions, or herbs. It can also help with grinding breadcrumbs or small amounts of nuts, depending on the recipe and your model’s accessories.
What it does less well is ultra-smooth frozen drinks loaded with ice, large-batch soups, and very thick mixtures with almost no liquid. That is not a flaw so much as a personality trait. Every appliance has one. The Magic Bullet’s personality is “fast, compact, and helpful,” not “bench-presses frozen pineapples for sport.”
Real-World Experiences: What People Usually Learn After a Week with a Magic Bullet
The first real-life lesson most people learn is that the Magic Bullet rewards moderation. On day one, many users load it with a whole banana, a mountain of spinach, a cup of frozen berries, two spoonfuls of peanut butter, protein powder, chia seeds, half a tray of ice, and about three tablespoons of milk. Then they press down and act surprised when the blender protests. By day three, they’ve figured out that smaller batches and a little more liquid create a much better result. Suddenly the smoothie is smoother, the motor sounds happier, and nobody is prying spinach paste off the sides with a spoon while muttering about false advertising.
Another common experience is discovering that the Magic Bullet is more useful for quick kitchen tasks than people expect. Plenty of owners buy it for smoothies and end up using it even more for sauces and dressings. A fast vinaigrette? Easy. A quick salsa for taco night? Done. Need to blitz garlic, olive oil, herbs, and lemon juice into a marinade in under a minute? That is exactly the kind of small-batch job where this machine feels like a tiny genius.
There’s also a learning moment around texture. New users often expect restaurant-level smoothie silk on the first try, even when using hard frozen fruit, not enough liquid, and ingredients cut into giant chunks. Then they realize the Magic Bullet is at its best when soft fruits, yogurt, milk, nut butter, and leafy greens are balanced properly. Once they start thawing frozen fruit for a few minutes or cutting ingredients smaller, the results get dramatically better. The machine did not suddenly become smarter. The user did. That’s growth.
Cleaning is another place where experience changes everything. The people who hate their Magic Bullet after two uses are often the same people who leave a used smoothie cup in the sink until later, which turns into tomorrow, which turns into an archaeological dig. The people who love it usually rinse the cup immediately or do a quick soap-and-water blend right after pouring. That tiny habit makes the machine feel easy rather than annoying. In kitchen terms, that is the difference between “I use this every day” and “I think it’s somewhere behind the slow cooker.”
One more real-world truth: users quickly learn not to force the blender to be something it isn’t. It is not a giant party blender. It is not ideal for a frozen drink buffet. It is not the machine you choose when making soup for six. But for one or two servings, one fast breakfast, one quick sauce, one small prep task, or one “I do not want to wash a full-size blender for this” situation, it is incredibly handy. That is why so many owners keep it within arm’s reach. The Magic Bullet earns its place not by doing everything, but by doing the everyday little things fast enough that you actually bother to make them.
And maybe that is the real charm of it. The Magic Bullet lowers the effort barrier. A smoothie feels easy. A dressing feels easy. A sauce feels easy. You stop thinking of blending as a project and start thinking of it as a two-minute decision. Once an appliance pulls that off, it usually sticks around for a long time. Probably right there on the counter, looking smug and justified.
Final Thoughts
If you remember only a handful of things, remember these: use the right cup, stay below the max line, tighten the blade properly, add enough liquid, blend in short bursts, and clean it immediately. That is the whole game. The Magic Bullet is simple, but like most simple tools, it works best when you respect its limits. Treat it like a quick, compact helper for small batches, and it will save time, dishes, and a surprising number of weekday breakfasts.
So yes, using a Magic Bullet really can be easy. Just don’t ask it to crush an iceberg, blend boiling soup in a sealed cup, or survive your “everything in the fridge goes in” smoothie experiment. Even magic has boundaries.