Table of Contents >> Show >> Hide
- Step 1: Decode the Exam Like a Detective (Format, Rubric, and “What They Really Want”)
- Step 2: Build a “Question Bank” Instead of a Mountain of Notes
- Step 3: Study for Speaking, Not for Reading (Active Recall + Spaced Review)
- Step 4: Practice Out Loud Under Real Conditions (Yes, Even If It Feels Awkward)
- Step 5: Use a Simple Answer Structure (So You Don’t Ramble Into the Sun)
- Step 6: Train Your Nerves (So Adrenaline Works For You)
- Step 7: Control the Room During the Exam (Without Being Weird About It)
- Step 8: Have a Recovery Plan for When You Blank (Because It Happens)
- Step 9: Finish Strong (and Leave a “Competent Adult” Aftertaste)
- Conclusion: You’re Not “Surviving,” You’re Demonstrating
- 500+ Words of Real-World Oral Exam Experiences (What Actually Happens and What Helps)
Oral exams have a special talent: they turn perfectly intelligent people into humans who suddenly forget their own name. (You’re not alone. Even seasoned students have had the “my brain just unplugged” moment.) The good news is that oral exams are trainable. They reward clear thinking, structured answers, and calm communication not theatrical confidence or having a voice that sounds like a documentary narrator.
This guide breaks the whole experience into nine practical stepsfrom how to study in a way that actually sticks, to what to say when you blank, to how to finish without accidentally ending your answer with “So… yeah.” Whether it’s a language speaking test, a graduate oral comp, a dissertation defense, or a course-based oral exam, the mechanics of “surviving” are surprisingly similar.
Step 1: Decode the Exam Like a Detective (Format, Rubric, and “What They Really Want”)
The fastest way to feel calmer is to remove uncertainty. Before you study another minute, get clarity on the exam’s shape. Oral exams come in different flavors: rapid-fire Q&A, structured prompts, case-based reasoning, presentation + questioning, or a conversation-style discussion. Each format rewards different prep.
What to find out (ask your instructor or check the syllabus)
- Length: 10 minutes? 20? An hour? Your pacing depends on it.
- Structure: Set questions, random topics, or “pick one question and go deep”?
- Grading: Accuracy only, or also clarity, reasoning, organization, and professionalism?
- Materials: Can you use notes, a formula sheet, or any references?
- Follow-ups: Will they interrupt? Can they ask “why” and “how” questions?
- Logistics: In-person or on Zoom? Any tech requirements?
If you’re allowed to ask for one thing, ask for the rubric or evaluation criteria. If no rubric exists, ask: “What makes an answer excellent versus average?” That single question tells you what to practice.
Step 2: Build a “Question Bank” Instead of a Mountain of Notes
Oral exams don’t test how many pages you highlighted. They test what you can explain out loud under pressure. So flip your prep: don’t start with notesstart with questions.
How to create your question bank in 20 minutes
- Look at lecture headings, learning objectives, study guides, and past exams (if available).
- Turn each big topic into 2–4 questions that require explanation, not just definitions.
- Add “why” and “compare/contrast” versions (these show deeper understanding).
- Star the 10–15 questions you’d bet actual money will show up.
Examples of high-value oral-exam questions
- Biology: “Explain how enzyme inhibitors change reaction ratesand how you’d recognize that in data.”
- History: “Compare two causes of the Great Migration and argue which mattered more.”
- Economics: “Walk me through what happens when interest rates riseshort term and long term.”
- Language: “Describe a challenge you overcame, then answer follow-up questions naturally.”
- Engineering: “Defend your design choice and explain what trade-offs you accepted.”
When you study from a question bank, you’re rehearsing the exact skill the exam demands: retrieving, organizing, and explaining.
Step 3: Study for Speaking, Not for Reading (Active Recall + Spaced Review)
If your study plan is mostly rereading, you’re training your eyesnot your mouth. Oral exams reward retrieval: pulling ideas from memory and shaping them into coherent speech.
The “blank page” method (simple, brutal, effective)
- Take one question from your bank.
- On a blank page, write your answer outline from memory: 3–5 bullets max.
- Then speak it out loud using only that outline.
- Check notes only after you finish. Patch gaps. Repeat later.
Use spacing so you don’t “cram-and-forget”
Instead of one marathon session, do shorter rounds across multiple days: Day 1 (learn), Day 2 (retrieve), Day 4 (retrieve), Day 7 (retrieve). Your goal is to make recall feel boringin the best way.
Bonus trick: explain a concept as if you’re tutoring someone who missed class. Teaching forces structure. If you can teach it, you can survive it.
Step 4: Practice Out Loud Under Real Conditions (Yes, Even If It Feels Awkward)
Oral exams are performance + knowledge. You can know the content and still stumble if you haven’t practiced delivery. The fix is exposure: controlled practice that gradually feels more like the real thing.
Three levels of practice
- Level 1: Alone, speaking to a wall (a loyal audience that never interrupts).
- Level 2: Record yourself. Listen once. Fix one thing (pace, clarity, filler words).
- Level 3: Mock oral with a friend/classmate/tutor who can ask follow-ups.
Make your practice “annoyingly specific”
- Time your answers (aim for 60–120 seconds unless the format demands longer).
- Practice with interruptions (“Waitwhy?” “Define that term.”).
- Practice one hard thing daily: a tough concept, a case, or a question you dread.
If you’re doing a remote oral exam, do at least one full mock on the same device, camera, and setup. Your brain shouldn’t be debugging your microphone while answering questions.
Step 5: Use a Simple Answer Structure (So You Don’t Ramble Into the Sun)
Rambling usually isn’t a knowledge problemit’s an organization problem. The easiest way to sound confident is to sound structured.
Try the “Headline → 3 Points → Example → Wrap” formula
- Headline (1 sentence): Your main answer.
- Three points: The support beams of your explanation.
- Example: Data, scenario, or concrete illustration.
- Wrap: A closing sentence that ties back to the question.
Mini script you can steal
“In short, the main idea is ____. There are three parts to that: first ____, second ____, and third ____. For example, ____. So overall, ____.”
For “compare/contrast” questions
Use parallel structure: similarities first, then differences, then the “so what.” “They’re similar because ____. They differ in ____ and ____. That matters because ____.”
For “defend your choice” questions (projects, research, design)
Lead with criteria: “I chose ____ because my priorities were ____ and ____. The trade-off is ____, but I accepted that because ____.” That’s adult-level reasoning.
Step 6: Train Your Nerves (So Adrenaline Works For You)
Feeling nervous doesn’t mean you’re unprepared. It means your body thinks something important is happening. Your job is to keep nerves in the “alert and focused” zonenot the “my soul has left the building” zone.
A 90-second reset you can do anywhere
- Inhale slowly through your nose.
- Exhale longer than you inhale (this is the calming part).
- Drop your shoulders on the exhale (seriouslyyour shoulders are not earrings).
- Say one cue phrase: “Slow is smooth.” or “One question at a time.”
Reframe the story in your head
- Instead of: “If I mess up, I’m doomed.”
- Try: “I only need to answer this question clearly. Then the next one.”
Practice your calming routine during prep, not just on exam day. You’re building a reflex.
Step 7: Control the Room During the Exam (Without Being Weird About It)
“Control” doesn’t mean dominating the conversation. It means guiding your answers so the examiner can follow youand score you. The best oral-exam skill is not speed. It’s clarity.
Do these five things every time
- Listen fully. Don’t start answering mid-question unless you’re 100% sure.
- Confirm the target. “So you’re asking about ____ specifically, right?”
- Take a beat. A two-second pause feels long to you, normal to everyone else.
- Answer directly first. Give the headline before the details.
- Signpost your structure. “There are three parts…” buys you time and reduces rambling.
Phrases that buy time (without sounding like a robot)
- “Let me think about the best way to frame that.”
- “I’m going to start with the big picture, then zoom in.”
- “I want to make sure I’m answering what you’re askingdo you mean ____ or ____?”
If it’s a formal oral exam and you want to add extra information, you can politely ask: “Would you like the related detail, or should I stay focused on the main answer?” That shows judgment, not insecurity.
Step 8: Have a Recovery Plan for When You Blank (Because It Happens)
Blanking is common under pressure. The difference between a derailment and a smooth recovery is having a script. You don’t need a perfect answeryou need a composed response.
If you forget a detail
“I’m not recalling the exact term, but the concept is ____.” Then explain the concept clearly. Often, understanding scores better than a memorized label.
If you don’t know the answer
Don’t invent nonsense. Try: “I’m not sure, but here’s how I would reason through it based on what we’ve covered.” Then lay out assumptions and logic. Many examiners reward your method.
If you realize you answered the wrong question
Correct quickly: “Let me restartwhat you’re asking is ____. Here’s the answer.” A clean pivot is better than stubbornly continuing.
Step 9: Finish Strong (and Leave a “Competent Adult” Aftertaste)
The last 30 seconds matter. A strong close can rescue a shaky middle, because it signals control and comprehension.
How to close any answer
- Summarize in one sentence: “So overall, ____.”
- Offer the next step: “If we had more time, the next thing I’d examine is ____.”
- Invite follow-up: “Happy to go deeper on any part of that.”
After the exam (do this once you’re out of the room)
- Write down what you were asked while it’s fresh.
- Note what worked: structure, calm phrases, examples.
- Note what to fix next time: one thing only (not a personal roast).
Conclusion: You’re Not “Surviving,” You’re Demonstrating
Oral exams can feel intense because they’re personal: it’s your voice, your thinking, in real time. But that’s also the advantageunlike a written test, you can clarify, correct, and show your reasoning. If you decode the format, study through retrieval, practice out loud, use a simple structure, and manage nerves with a routine, you’ll walk in sounding like someone who belongs there (because you do).
Remember: the goal isn’t to perform “perfect confidence.” The goal is to deliver a clear, organized explanation one question at a time. That’s how you survive an oral examand how you quietly crush it.
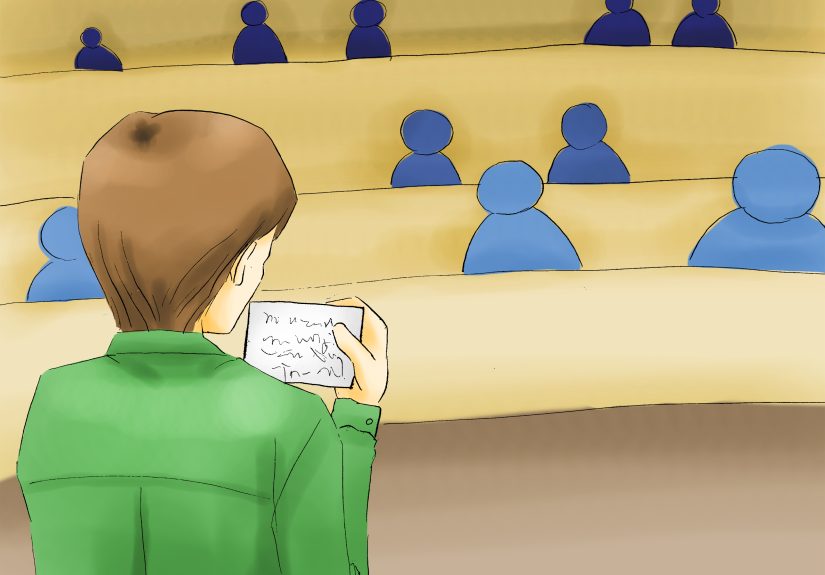
500+ Words of Real-World Oral Exam Experiences (What Actually Happens and What Helps)
Here’s the part nobody tells you until after you’ve lived it: most oral exams feel less like a courtroom drama and more like a slightly intense conversation where you’re trying to be both the tour guide and the GPS. Students often walk in expecting a single “right answer” moment. What they get instead is a chain of follow-ups: “Why?” “How do you know?” “What if that assumption changes?” That can feel like the examiner is poking holes in your brain. In reality, they’re usually checking whether you understand the idea deeply enough to move it around, not just repeat it.
One common experience: the first question is easy, you answer quickly, and then your brain says, “Cool, we’re done,” even though the exam has 18 minutes left. That’s when follow-ups arrive. The students who do best aren’t the ones who talk fasterthey’re the ones who slow down, label their structure (“There are two reasons…”), and use examples. In a history oral, that might mean naming a specific event or policy. In a science oral, it might mean describing what the data would look like. In a language oral, it might mean giving a quick real-life detail (“Last summer, I…”) to make the answer concrete.
Another very normal experience: you blank on something you absolutely knew yesterday. Students report that this happens most often with small detailsdates, names, formulasbecause stress loves stealing trivia. What helps is having a recovery habit that feels natural. For example: “I’m forgetting the exact term, but the mechanism is…” Then you explain the mechanism clearly. Examiners can usually tell the difference between “I’m lost” and “I’m temporarily missing a label.” The second one is recoverable, and your calm delivery can actually earn trust.
Students also learn that “confidence” is mostly a sound effect. People who feel shaky can still sound steady by doing small things: sitting still (or at least not vibrating like a phone on silent), speaking a beat slower than usual, and landing each answer with a summary sentence. Even a simple closing line like “So overall, it increases X because Y” makes you sound in control. That “in control” feeling is contagiousyour examiner follows your logic instead of searching for your weak spots.
Remote oral exams bring their own plot twists. Students often discover that eye contact is confusing on camera, and that looking at the examiner’s face on-screen can make it seem like you’re not looking at them. The fix is simple: glance at the camera when you give your headline sentence, then look back at the screen for the conversation. Also, do a tech rehearsal. A surprising number of “bad oral exams” are actually “bad audio plus panic.” A stable setupquiet room, charged device, tested micremoves an entire category of stress.
Finally, one of the biggest mindset shifts students describe is realizing that oral exams reward reasoning. When you don’t know, the best move is often to show how you would approach the problem. “Here’s what I’d assume based on the lecture… here’s what I’d check next… here’s the trade-off.” That’s not dodgingit’s demonstrating expertise-in-progress. And that’s the hidden truth: surviving an oral exam is less about never stumbling and more about showing you can think your way back to solid ground.