Table of Contents >> Show >> Hide
- Why Painting a Window Frame Is Worth It
- Know What You’re Painting Before You Start
- Tools and Materials You’ll Want Nearby
- Step-by-Step: How to Paint a Window Frame
- 1. Check the Age of the House First
- 2. Clean the Window Frame Thoroughly
- 3. Scrape Loose Paint and Sand the Surface
- 4. Fill, Repair, and Caulk the Gaps
- 5. Protect the Glass and Remove Hardware
- 6. Prime Bare or Problem Areas
- 7. Use the Right Paint
- 8. Paint in the Correct Order
- 9. Special Technique for Double-Hung Windows
- 10. Let the Paint Dry Without Sealing the Window Shut
- 11. Apply a Second Coat
- Best Color and Finish Choices for Window Frames
- Common Mistakes to Avoid
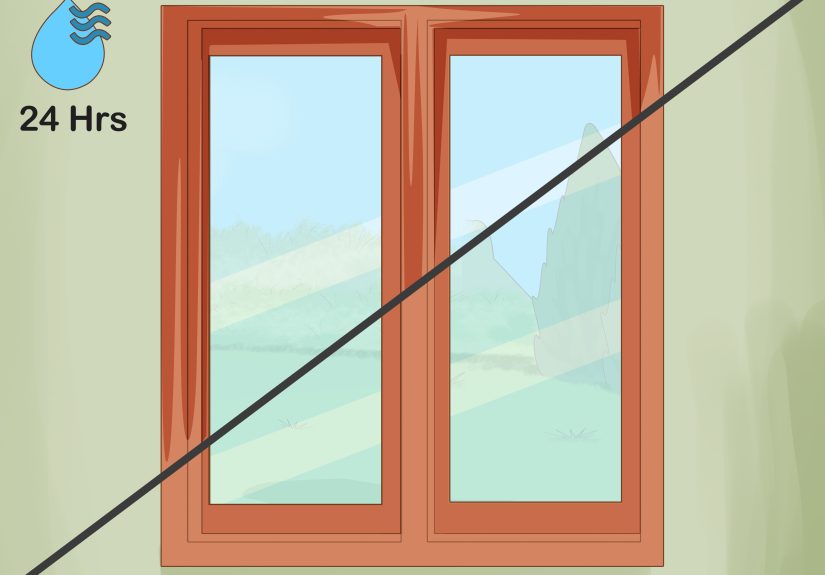
- How Long Does It Take to Paint a Window Frame?
- Experience-Based Tips That Make the Job Easier
- Final Thoughts
Painting a window frame sounds like one of those tiny weekend jobs that should take “maybe an hour.” Then you start, find old caulk, mystery drips, one stubborn latch, and suddenly your “quick refresh” has become a very personal battle with a brush. The good news? It is still an easy DIY project when you know the right order, the right products, and the few mistakes that cause most messy finishes.
This guide walks you through exactly how to paint a window frame the smart way. Whether you are touching up interior wood trim, freshening up an exterior frame, or giving an aging sash a new lease on life, the process is mostly about preparation, patience, and resisting the urge to slap paint on before the surface is truly ready. In other words, the glamorous stuff.
If you do it right, a painted window frame can make the whole room look cleaner, brighter, and more finished. If you do it wrong, your window may stick shut like it is holding a grudge. Let’s avoid that.
Why Painting a Window Frame Is Worth It
A freshly painted window frame does more than improve looks. It helps protect wood from moisture, slows down wear, hides minor cosmetic damage, and gives a tired room a crisp, finished edge. On the exterior, the right paint system also adds a layer of defense against sun, rain, and changing temperatures.
Even better, this project has a surprisingly high visual payoff. You can leave the wall color exactly as it is and still make the space feel cleaner and more polished just by updating the window frame. It is basically the home-improvement version of putting on a good blazer.
Know What You’re Painting Before You Start
Not every window frame should be painted the same way. Before you open the can, identify the material.
Wood Window Frames
Wood is the most common and the most paint-friendly option. If the surface is bare, stained, peeling, patched, or worn, primer is your friend. A durable trim paint, especially a latex semi-gloss or a smooth waterborne alkyd, usually gives the best finish indoors.
MDF or Composite Interior Trim
Some interior window trim is MDF rather than solid wood. It can be painted beautifully, but it does not love excess moisture. Keep prep gentle, prime well, and avoid soaking the material while cleaning.
Metal Window Frames
Metal frames often need a metal-friendly primer, especially if there is any bare spot or surface rust. A standard wood primer is not always enough here.
Vinyl, Clad, or Specialty Windows
This is where you slow down and read the manufacturer’s instructions. Some vinyl or factory-finished components should not be painted at all, and certain moving parts, weatherstripping, gaskets, and sliding edges should definitely stay paint-free. When in doubt, check the product documentation first instead of turning your window into an accidental art experiment.
Tools and Materials You’ll Want Nearby
- Drop cloth or plastic sheeting
- Painter’s tape or liquid masking product for glass
- Putty knife or paint scraper
- Sandpaper in medium and fine grits
- Sanding sponge or sanding block
- Mild cleaner, sponge, and clean rags
- Wood filler for small dents or gouges
- Paintable caulk for gaps and seams
- Primer suited to the frame material
- Trim paint or exterior paint, depending on location
- 1.5- to 2.5-inch angled sash brush
- Screwdriver for hardware removal
- Dust mask and safety gear
A small angled brush really is the MVP here. It helps you reach tight corners and paint clean lines without flooding the glass or the tracks.
Step-by-Step: How to Paint a Window Frame
1. Check the Age of the House First
If your home was built before 1978, old paint may contain lead. That does not mean you have to panic and move out immediately, but it does mean you should treat scraping and sanding with more caution. Use lead-safe practices, contain dust, and do not dry-sand old coatings aggressively unless you know what you are dealing with.
Also inspect the frame for rot, deep cracks, water stains, and peeling caulk. Paint is not a magic disguise for structural damage. If wood is soft or crumbling, repair or replace the damaged section before painting.
2. Clean the Window Frame Thoroughly
Dust, grease, old grime, and chalky paint residue can ruin adhesion. Wipe the frame down with a mild cleaner, then rinse or wipe again with clean water if needed. Let everything dry fully before moving on.
This step is easy to rush because it is boring. Unfortunately, paint loves to expose rushed prep. Every skipped crumb of dirt will somehow become emotionally visible later.
3. Scrape Loose Paint and Sand the Surface
Use a scraper or putty knife to remove loose, flaking, or bubbled paint. Then sand the frame until the edges between old paint and bare spots feel smooth. You do not need to strip every inch down to raw wood unless the finish is failing badly. Your goal is a stable, even surface, not a dramatic reinvention.
For previously painted trim, a medium grit helps level rough edges and a finer grit smooths things out before priming. Always remove sanding dust with a tack cloth, vacuum, or clean rag before moving forward.
4. Fill, Repair, and Caulk the Gaps
If the frame has nail holes, dents, or shallow gouges, fill them and sand smooth once dry. Then check the seams where the trim meets the wall or where joints have opened up. A thin, neat bead of paintable caulk can make a huge difference in the final look.
Caulk is not just cosmetic. It also helps block out moisture and drafts. On exterior frames, cracked caulk is one of the big reasons paint starts failing early, especially on sills and exposed edges.
5. Protect the Glass and Remove Hardware
You have two basic options around the glass: tape it, or use a liquid masking product. Painter’s tape works, but liquid mask can be faster on windows with multiple panes or narrow muntins. Remove handles, locks, and any hardware you do not want painted if possible. It is easier to spend five minutes with a screwdriver than to spend twenty minutes pretending dried paint on a latch looks intentional.
If you keep the hardware in place, mask it carefully. Also make sure any weatherstripping, gaskets, or moving tracks remain unpainted.
6. Prime Bare or Problem Areas
Primer is essential on bare wood, patched sections, stained areas, or spots where old paint has been scraped away. It improves adhesion, evens out porosity, and helps the topcoat look smoother and last longer.
If the frame is already in great condition and you are just refreshing the color, you may not need full-surface primer. But spot-priming repairs and sand-throughs is still a smart move.
7. Use the Right Paint
For interior wood window frames, a durable trim paint in semi-gloss or satin is a popular choice. Semi-gloss is especially common because it is easy to clean, resists wear, and highlights the trim nicely. Water-based products are easier to work with and clean up, while waterborne alkyds are prized for their extra-smooth, hard-cured finish.
For exterior frames, use an exterior-rated paint system made for outdoor exposure. Exterior acrylic latex is a strong all-around option for many wood trim projects because it dries relatively quickly and handles weather well. For metal frames, use a paint and primer system suited to metal.
8. Paint in the Correct Order
This is where the project stops being “painting” and starts becoming “tiny choreography.” Work from the top down and from the inside edges outward.
For a standard interior frame, follow this order:
- Start with the inner frame or recessed areas
- Paint the top section first
- Move to the side jambs
- Finish with the sill or bottom rail
- Then paint the surrounding trim or casing
Use light, even strokes and paint with the grain where applicable. Avoid overloading the brush. A brush that is too full tends to drip into corners and along the glass, which is how “freshly updated” becomes “why is there a paint stalactite on my sill?”
9. Special Technique for Double-Hung Windows
If you are painting a double-hung window, position the sashes so you can reach the hidden sections. A common method is to lower the upper sash slightly and raise the lower sash slightly. Paint the upper sash first, beginning with the muntins if there are any, then the rails and stiles. Move to the lower sash next.
Be careful not to paint sliding edges, tracks, weatherstripping, or the parts of the sash that rub against the frame during operation. Those areas are notorious for causing sticky windows later.
Some pros also allow the paint to overlap the glass by a hairline amount to help seal the edge. If you do this, keep it neat and consistent. If you prefer a razor-clean line, mask the glass carefully and score the edge before removing the masking once the paint sets.
10. Let the Paint Dry Without Sealing the Window Shut
Follow the paint can for dry and recoat times. If you are working on an operable window, leave it slightly open while the paint dries so it does not bond shut. Then close it gently only after it is dry enough to handle. Full cure can take longer than surface dry time, so do not immediately slam it shut and declare victory.
For exterior work, avoid painting in direct hot sun, during high humidity, or when rain is expected too soon. Moderate weather gives the best results and helps reduce lap marks, flashing, and slow drying.
11. Apply a Second Coat
Most window frames look best with two coats. The second coat evens out brush marks, boosts durability, and deepens color consistency. Let the first coat dry fully before recoating. Rushing here often lifts the first coat or leaves streaks, which is a very annoying way to create more work for yourself.
Best Color and Finish Choices for Window Frames
Classic white is still the safest choice because it brightens a room and pairs with nearly everything. Soft off-white, warm cream, greige, charcoal, and black are also popular depending on the style of the home. For modern interiors, matching the trim to the wall color can create a clean, custom look. For traditional homes, a contrasting trim color makes architectural details stand out.
As for finish, here is the simple version:
- Semi-gloss: durable, easy to wipe clean, very common for trim and window frames
- Satin: slightly softer look, still durable, good when you want less shine
- Gloss: bold and reflective, useful for statement trim but less forgiving of flaws
Common Mistakes to Avoid
- Painting over dirt, dust, or chalky residue
- Skipping primer on bare wood or patched spots
- Using interior paint on an exterior frame
- Painting weatherstripping, tracks, or moving sash edges
- Caulking over active rot or severe damage instead of repairing it
- Applying paint too heavily and creating drips
- Recoating before the first coat is ready
- Closing the window too soon and gluing it shut
How Long Does It Take to Paint a Window Frame?
For one average-size interior window in decent condition, plan on a few hours spread across prep, priming, and painting, plus drying time between coats. If the frame has peeling paint, failed caulk, or old damage, prep can easily take longer than painting itself. That is normal. Annoying, yes. Normal, also yes.
If you are doing multiple windows, create a rhythm: clean and prep all of them first, then prime all of them, then paint all of them. It is faster than completing one window from start to finish while your brush slowly develops trust issues.
Experience-Based Tips That Make the Job Easier
People often think the hard part is painting neatly around the glass. In reality, the hardest part is slowing down enough to prep well. Most DIY regrets happen long before the brushwork begins. The first big lesson many homeowners learn is that a frame can look “basically fine” until it is wiped clean. Suddenly you can see every crack in the caulk, every rough paint ridge, and every little spot where moisture has been quietly causing trouble. The upside is that catching those details early usually makes the final result look far more professional.
Another common experience is discovering that windows have far more tiny surfaces than logic suggests. One minute you are painting a simple frame. The next, you are delicately navigating corners, trim profiles, inner jambs, narrow ledges, and small edges that seem to have appeared just to humble you. That is why a good angled sash brush matters so much. It gives you control, helps you paint with lighter pressure, and makes it easier to keep paint where it belongs.
Many first-time painters also realize that less paint on the brush often leads to a better result. It feels slower at first, but it cuts down on drips, ridges, and overloaded corners. Thin, controlled strokes almost always beat heavy-handed “I’ll fix it later” passes. Spoiler: later usually means sanding.
One of the most repeated lessons from real DIY projects is that operable windows have zero patience for sloppy technique. If you paint the wrong edge, let paint gather in the track, or close the sash too soon, the window can stick immediately. Even when you do everything right, it is smart to check the movement gently before the paint fully cures. Small adjustments are much easier when the coating is fresh than after it has hardened into a stubborn seal.
There is also a strong case for doing one practice window before tackling the most visible one in the room. Start with a guest room, laundry area, or less prominent space. By the second window, your cutting-in will be steadier, your brush will feel more natural in your hand, and your timing between coats will make more sense. The first window teaches you the routine. The second window lets you look competent. By the third, you may even start offering opinions about “finish quality” like a person on a renovation show.
Color choice creates its own learning curve too. Bright white looks clean, but it can highlight every nick and wave in older trim. A slightly softer white or warm off-white can be more forgiving while still feeling fresh. Dark colors look dramatic and stylish, but they can emphasize brush marks if the surface was not prepped carefully. That does not mean avoid them. It just means respect them.
Finally, the biggest experience-based truth is this: window frame painting rewards patience more than talent. You do not need extraordinary skills. You need decent prep, steady brushwork, the right paint, and enough discipline to let each stage dry properly. That is what turns a frustrating little chore into one of the most satisfying upgrades in the house.
Final Thoughts
If you have been putting off painting a window frame because it seems fussy or easy to mess up, that instinct is not wrong. It is a detail-heavy project. But it is also one of the most manageable DIY upgrades once you break it into steps. Clean first, scrape what is loose, sand what is rough, repair what is damaged, prime what is bare, and paint in the right order. That is the whole game.
Take your time, keep paint off the moving parts, and trust prep more than shortcuts. The result is a cleaner-looking room, a better-protected frame, and a window that looks refreshed instead of merely survived. Not bad for a project that mostly involves a brush, a rag, and a little self-control.