Table of Contents >> Show >> Hide
- Before You Start: What Makes a Comic Strip “Work”?
- How to Make a Simple Comic Strip: 12 Steps
- Step 1: Pick a “Small Enough” Idea
- Step 2: Choose Your Strip Format (3–4 Panels Is Perfect)
- Step 3: Create One Main Character (and One Clear Want)
- Step 4: Write a Micro-Script (Beats First, Dialogue Second)
- Step 5: Thumbnail Your Panels (Tiny Sketches Save Big Time)
- Step 6: Plan Reading Order (Your Reader Shouldn’t Need GPS)
- Step 7: Sketch the Rough Art (Stick Figures Are Allowed)
- Step 8: Lettering First, Then Balloons (Protect Your Future Self)
- Step 9: Place Balloons Clearly (Who’s Talking? Make It Obvious)
- Step 10: Ink or Clean Up the Final Lines
- Step 11: Add Simple Color, Shading, or Sound Effects (Optional, But Fun)
- Step 12: Do a Final “Reader Test” and Share It
- Common Beginner Problems (and Fast Fixes)
- Tools and Materials (Simple on Purpose)
- Simple Practice Prompts (Pick One and Start)
- Conclusion
- Real-World Experiences: What It Feels Like to Make Your First Comic Strip (and Why That’s Normal)
- SEO Tags
Comic strips are the snack-size version of storytelling: quick to make, easy to share, and surprisingly powerful.
In just a few panels, you can set up a moment, build a tiny bit of tension, and land a punchlineor a heartfelt beat
without writing a whole novel or drawing a movie’s worth of frames.
The secret? Keep it small on purpose. A simple comic strip isn’t “less creative.” It’s creative with a speed limit.
And honestly, speed limits save livesespecially the lives of your deadlines.
Before You Start: What Makes a Comic Strip “Work”?
A comic strip is usually a short sequence of panels (framed pictures) separated by gutters
(the spaces between panels). The magic happens in those gutters, where your reader’s brain connects the moments and fills
in what you don’t show. That “fill in the blanks” effect is why comics can feel fast, funny, dramatic, or emotionaleven
with simple drawings.
Most strips also use text containers like speech balloons (dialogue), thought bubbles (private thoughts),
and captions (narration or scene notes). These tools aren’t decoration. They’re part of the storytelling engine:
they control pacing, clarify meaning, and keep your joke from accidentally becoming a confusing art puzzle.
How to Make a Simple Comic Strip: 12 Steps
Step 1: Pick a “Small Enough” Idea
Aim for a single moment you can explain in one sentence. If your idea needs a family tree, a map, and an 8-episode streaming series,
it’s not a comic strip idea. It’s a “later” idea.
Try a premise like:
- “A dog thinks the vacuum is a monster… until it drops a snack.”
- “A kid tries to look cool in class while their backpack zipper slowly fails.”
- “A coffee mug gives motivational speeches… to a sleepy human.”
Step 2: Choose Your Strip Format (3–4 Panels Is Perfect)
For beginners, 3 or 4 panels is the sweet spot. It’s enough room for setup and payoff, but not so much space that you
get lost wandering around your own plot like you’re in a corn maze.
- 3-panel structure: Setup → Complication → Punchline/Payoff
- 4-panel structure: Setup → Build → Twist → Punchline/Payoff (great for comedy and surprises)
Step 3: Create One Main Character (and One Clear Want)
Simple strips thrive on clarity. Give your main character:
- A recognizable trait: anxious, overconfident, curious, dramatic, stubborn, overly polite, etc.
- A clear want: win, hide, impress, relax, eat, escape, understand, or be left alone (relatable).
Example: Your main character is a cat who wants peace and quiet. The problem is the human has discovered bubble wrap.
Congratulationsyou have a plot and a sound effects budget.
Step 4: Write a Micro-Script (Beats First, Dialogue Second)
Before you draw, write what happens in each panel in plain language. This is your beat sheet.
Keep it short and visualwhat we see matters more than what we explain.
Example (4 panels):
- Character proudly sets a “New Year Routine” planner on desk.
- Phone buzzes: “Emergency group chat.”
- Character stares at planner, then at phone, sweating.
- Planner gets gently slid into a drawer: “We’ll try again… in March.”
Now add dialogue only where needed. If the drawing already says it, let the drawing talk.
Step 5: Thumbnail Your Panels (Tiny Sketches Save Big Time)
Thumbnails are quick, messy mini-sketches of each panel. Think of them as your comic’s rehearsal.
You’re testing composition, pacing, and whether you accidentally put the punchline in panel 2.
Rule of thumb: If you can’t understand the strip from thumbnails, the final version won’t magically become clearer
just because you drew better eyebrows.
Step 6: Plan Reading Order (Your Reader Shouldn’t Need GPS)
Most American readers scan left-to-right, top-to-bottom. Arrange your panels and speech balloons to match that flow.
Keep the action and eye movement moving forward.
- Place the first balloon higher/left; the next balloon lower/right within the same panel.
- Don’t make readers jump around the panel to find what to read next.
- Use gutters and panel arrangement to control pacing (wider space can feel slower; tighter can feel faster).
Step 7: Sketch the Rough Art (Stick Figures Are Allowed)
Draw lightly and focus on clarity:
- Make characters readable at a glance (silhouette matters).
- Show emotion with simple faces and body language (a slouch can be funnier than a paragraph).
- Keep backgrounds minimaljust enough to show where we are.
Pro tip: If the joke relies on a tiny object (like a key, a cookie, a phone), draw it bigger than real life.
Comics are allowed to cheat. That’s part of the job.
Step 8: Lettering First, Then Balloons (Protect Your Future Self)
A classic beginner mistake is drawing beautiful art and then realizing there’s no room for the words.
Write your text first. Then draw speech balloons around it.
- Keep dialogue short. If a character needs five sentences, you might be writing a screenplay.
- Use captions for quick context (“Later…”, “Meanwhile…”, “Five minutes earlier…”) when helpful.
- Use different balloon styles sparingly (thought bubbles, jagged “yell” balloons, whisper balloons).
Step 9: Place Balloons Clearly (Who’s Talking? Make It Obvious)
Make balloon tails point clearly toward the speaker. If two characters are in a panel, separate their dialogue and position balloons
near the speaker’s side. Readers should never have to play detective just to learn who said “Uh-oh.”
If your panel is crowded, simplify the art or split the moment into two panels. In comics, space is storytelling.
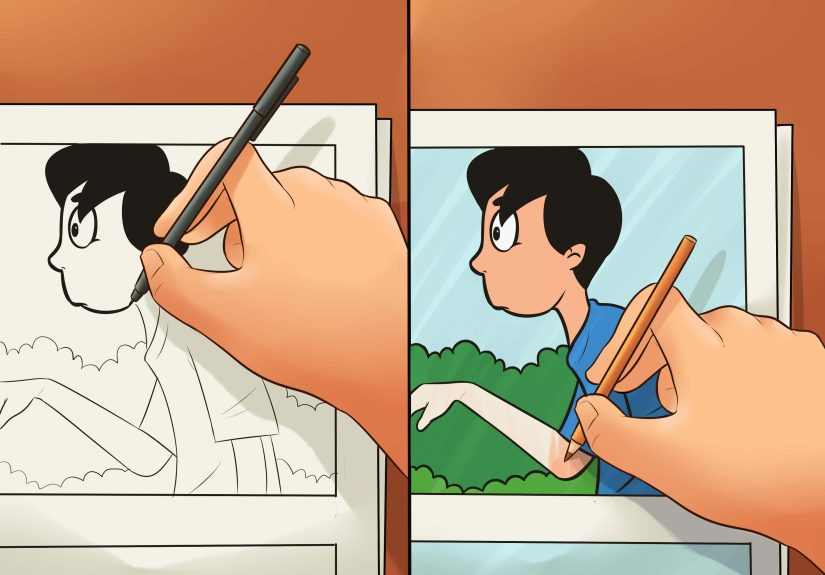
Step 10: Ink or Clean Up the Final Lines
Once the rough version works, strengthen the lines:
- Trace your final lines with a pen or a darker pencil.
- Erase sketch lines gently after ink dries (patience is a skill; smudges are a lifestyle).
- Use line weight to guide attention: thicker lines for the main character, lighter lines for background details.
Your goal isn’t “perfect art.” Your goal is readable storytelling.
Step 11: Add Simple Color, Shading, or Sound Effects (Optional, But Fun)
You can finish in black-and-white and still look professional. If you add extras, keep them purposeful:
- Sound effects: “BAM,” “tap tap,” “crinkle,” “SPLAT” (use them like seasoning, not soup base).
- Simple color coding: One accent color can highlight the important object or emotion.
- Shading: A shadow under a character can anchor them; a dark background can make a moment feel dramatic.
Step 12: Do a Final “Reader Test” and Share It
Before you declare victory, do a quick test:
- Can someone understand it in 5–10 seconds?
- Is the reading order obvious?
- Does the punchline land where you intended?
- Is any text too small to read on a phone screen?
Then digitize it:
- Photo: Use natural light, avoid harsh shadows, hold your phone parallel to the page.
- Scan: Great for crisp lines; adjust contrast so whites look clean and lines look bold.
- Export: Save as a high-quality PNG/JPG for sharing.
Common Beginner Problems (and Fast Fixes)
“My comic feels confusing.”
- Reduce the number of ideas. One strip = one main beat.
- Add a caption for time/place if needed (“After school…”).
- Make character actions bigger and clearer (exaggeration helps).
“My dialogue doesn’t fit.”
- Cut words aggressively. Keep only what changes the moment.
- Split the panel into two smaller moments.
- Let facial expression replace a sentence.
“The joke isn’t landing.”
- Move the punchline to the final panel.
- Make the setup simpler so the payoff has room to surprise.
- Try a twist based on character personality (proud → embarrassed, confident → confused).
Tools and Materials (Simple on Purpose)
Traditional
- Pencil + eraser (a classic duo)
- Black pen or fineliner for clean lines
- Ruler (optional) for panel borders
- Markers or colored pencils (optional)
Digital
- Tablet + stylus (nice, but not required)
- Any drawing app with layers (helps with sketch → ink → text)
- Use templates if you want speedjust keep your story original
Simple Practice Prompts (Pick One and Start)
- A superhero whose power is extremely inconvenient at school
- A pet that believes it’s the household manager
- A vending machine that gives life advice instead of snacks
- A robot learning human small talk (“So… weather?”)
- A character trying to act normal while carrying something ridiculous
Conclusion
A simple comic strip is a tiny machine: panels control time, gutters create motion, and a few well-placed words steer the reader’s brain
exactly where you want it. When you keep the idea small, plan the beats, thumbnail your panels, and letter with care, you’ll get a strip that’s
clear, funny (or meaningful), and easy to share.
Most importantly: finish one. A finished simple comic strip teaches you more than ten “almost done” masterpieces living in your notebook like
shy little gremlins. Pick a prompt, do the 12 steps, and ship it.
Real-World Experiences: What It Feels Like to Make Your First Comic Strip (and Why That’s Normal)
When people make their first comic strip, they often expect the hardest part to be drawing. Surprise: it’s usually deciding.
Decision-making is the real boss battle. You’ll start with an idea that feels hilarious in your head, then you’ll try to fit it into
three or four panels and suddenly it’s like trying to park a bus in a space meant for a bicycle.
That “wait, why doesn’t this fit?” moment is a good sign. It means you’re learning the most important comic skill: editing.
Beginners commonly discover that the funniest version of the joke isn’t the one with the most wordsit’s the one with the cleanest setup and
the clearest visual turn. Often, the “extra explanation” you were going to write becomes a facial expression instead. A raised eyebrow can do
the work of a paragraph, and it never needs spellcheck.
Another common experience is the speech-bubble surprise: you finish a nice drawing, go to add dialogue, and realize the only place your words
can go is directly on top of the character’s facelike you’re censoring them with their own thoughts. That’s why “lettering first” feels like
a cheat code once you try it. People who switch to writing text first usually notice that their panels instantly look more professional, even
if the art is still simple. The comic becomes easier to read, and readability is what makes readers stick around long enough to enjoy the humor.
You’ll also likely feel the pacing lesson in your bones. In early attempts, panel 1 might be doing too much heavy lifting: introducing the
character, setting the scene, explaining the situation, and hinting at the punchlineall at once. Then you discover the calm power of a single,
quiet setup panel. A simple image like “character holding a tiny trophy” creates curiosity. Your reader leans in. Now your next panel can twist
it: the trophy says “Participation.” Your final panel can land the reaction. That shiftletting panels breatheis when your strip starts feeling
like an actual comic instead of illustrated notes.
Many first-time creators also notice how much the gutter does for them. You don’t have to draw every micro-moment. You can show “before” in one
panel and “after” in the next, and the reader’s brain politely fills in the chaos in between. That’s not “skipping.” That’s comics working
correctly. Once people trust the gutter, their strips get faster to make and funnier, because the reader participates in the timing.
Finally, there’s the sharing experience: the moment you show your strip to someone and they read it in a way you didn’t expect. Sometimes they
laugh earlier than you planned. Sometimes they pause at a panel you thought was obvious. This feedback is gold. It teaches you where your visuals
are clear and where they need a stronger cue (a bigger gesture, a clearer balloon tail, a cleaner reading path). Over time, you start designing
your panels for that real reading momentespecially on phones, where tiny text and cramped panels get exposed immediately.
If your first strip feels a little awkward, congratulationsyou’re experiencing the normal path. Finish it anyway. Then make a second one and apply
one improvement: fewer words, clearer flow, bigger expressions, or a cleaner final panel. In comics, small upgrades compound fast. Before long,
you’ll have a stack of finished stripsand that’s how you actually get good.


