Table of Contents >> Show >> Hide
- What Is a Roblox Group?
- What You Need Before You Create a Roblox Group
- How to Make a Group on Roblox: Step-by-Step
- How to Set Up Your New Roblox Group for Success
- Common Problems When Making a Roblox Group
- How to Grow a Roblox Group Without Being Annoying
- FAQ: How to Make a Group on Roblox
- Extra Experiences and Practical Lessons From Making Roblox Groups
- Conclusion
If you have ever wanted your own little corner of Roblox to rally friends, organize a dev team, launch a fan club, or build the next digital empire one role at a time, creating a Roblox group is the move. Technically, Roblox now calls groups Communities, but plenty of players still search for “how to make a group on Roblox,” so let’s speak both languages without starting a civil war in the comments.
The good news is that making a Roblox group is not rocket science. The slightly less good news is that it does cost Robux, and if you rush through the setup, your shiny new group can end up looking like it was assembled at 2 a.m. after three energy drinks and one questionable idea. This guide walks you through the full process, explains what to do after your group is created, and shows how to avoid the most common mistakes that trip up new owners.
What Is a Roblox Group?
A Roblox group, now called a Community, is a shared space where players and creators can gather around a common purpose. That purpose might be a game studio, a clothing brand, a roleplay world, a guild, a fan club, a friend group, or a project team. In plain English, it is your home base inside Roblox.
A group can help you organize members, assign roles, post updates, manage who gets in, moderate discussions, and connect a Roblox experience to a specific team. If your goal is collaboration, branding, or building something bigger than a solo profile page, a Roblox group gives you structure.
It is also useful for creators who want multiple people working under one banner. Instead of every project living under one person’s account forever, a group can become the shared identity behind the experience. That makes the setup feel a lot more professional and a lot less “my cousin made the logo in Paint five minutes ago.”
What You Need Before You Create a Roblox Group
Before you click anything, make sure you have the basics ready:
1. A Roblox account
This sounds obvious, but every great tutorial needs at least one “yes, water is wet” step. You need to be logged in before you can create a group.
2. Enough Robux
Creating a Roblox group is not free. There is a one-time cost of 100 Robux, so make sure your balance is ready before you start. Nothing kills momentum like designing the perfect group and then getting stopped at checkout by an empty wallet.
3. A strong group concept
Know what the group is for before you create it. A clear purpose helps you choose a better name, write a sharper description, and attract the right members. “Cool People Club 47” may sound legendary in the moment, but a focused identity usually performs better.
4. A name, description, and emblem idea
Your group name should be memorable, easy to spell, and tied to what your group actually does. Your description should explain who the group is for and what members can expect. Your emblem should be clean enough to still look good at a small size. In other words, do not design it like a movie poster with twelve fonts and a dragon in the background unless your group is literally about twelve-font dragons.
How to Make a Group on Roblox: Step-by-Step
Step 1: Log in to your Roblox account
Start by logging into Roblox on the website or app. If you are using a desktop or laptop, the menu is usually easier to navigate there, especially if you plan to manage settings right after creation.
Step 2: Go to the Communities section
On the Roblox website, look for Communities in the left-side navigation. On the Roblox app, tap the More button and then open Communities. This is the modern version of the old Groups area.
Step 3: Click the Create button
Inside the Communities section, click or tap Create. This opens the setup page where you will build your new Roblox group.
Step 4: Fill in your group details
Now comes the part where your group gets a personality.
Enter your group name, write your description, and upload an emblem. Keep the name concise and readable. The description should answer three questions quickly: what the group is about, who it is for, and why someone should join.
For example, instead of writing something vague like “Welcome to our epic group!!!,” you could write something like:
“Pixel Forge Studios is a Roblox creator group focused on building action-adventure experiences, sharing updates, and recruiting testers, builders, and scripters.”
That tells people what the group does in one shot. Clean. Useful. Not mysterious in the bad way.
Step 5: Choose your entry settings
Before you finalize the group, decide how people will join.
If you want maximum control, choose Manual Approval. That way, people request to join and you approve them. If you want easier growth, allow open joining. Roblox also lets owners set verification-related requirements for who can join, which can be helpful if you want a more controlled community.
This decision matters more than people think. An open group can grow faster, but it can also become a magnet for spam, trolls, and chaos goblins. Manual approval is slower, but often smarter for serious teams or niche communities.
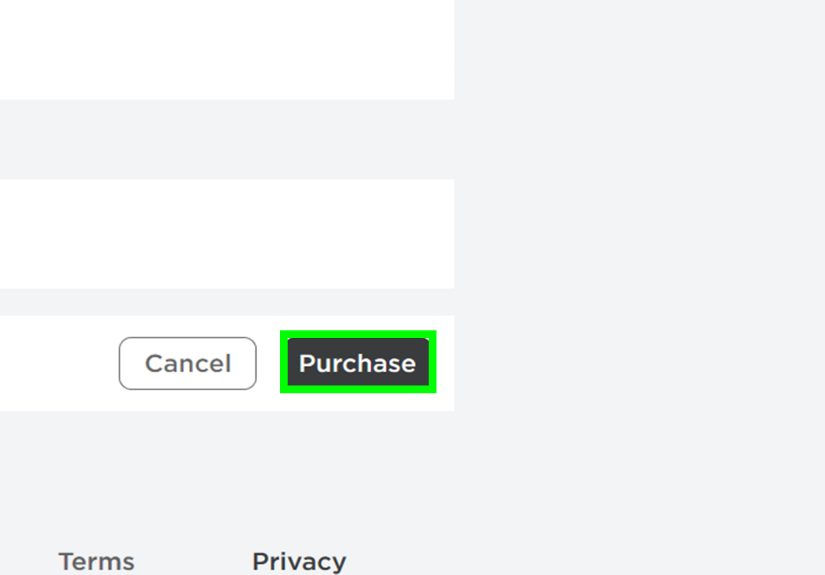
Step 6: Pay the 100 Robux fee
Once everything looks right, click the Purchase button to create the group. Roblox charges 100 Robux as a one-time creation fee.
Congratulations. You now own a Roblox group. Please resist the urge to immediately promote everyone to admin. History suggests that rarely ends well.
Step 7: Open Configure Community right away
After your group is live, go straight to Configure Community. This is where the real setup begins. Creating the group is only the front door. The admin settings are the furniture, the locks, the lighting, and the sign that says “please do not set the couch on fire.”
How to Set Up Your New Roblox Group for Success
Create roles with intention
Roblox includes default roles like Owner, Admin, Member, and Guest, and you can create custom roles too. This is useful if your group has builders, artists, moderators, testers, recruiters, or event hosts.
Do not hand out powerful permissions just because someone said “trust me.” Build a role structure that matches actual responsibilities. A good setup might look like this:
Owner: full control
Lead Developer: project management and experience oversight
Moderator: member review and content moderation
Tester: access to previews and bug reporting
Member: standard participation
Write a better description and group rules
Your description is not filler. It is your pitch. Add a short mission statement, who the group welcomes, basic expectations for behavior, and any important links or update notes that Roblox allows in your settings.
Even a simple rule block helps:
“Be respectful. No spam. No harassment. Stay on topic. Follow Roblox rules. Breaking group rules may result in removal.”
Simple rules save a surprising amount of drama later.
Use moderation tools early, not after disaster strikes
Roblox gives community owners tools to manage posts, roles, join settings, blocked words, and member behavior. If your group has a wall or forum activity, set moderation standards from day one. Waiting until your group becomes messy is like buying a smoke alarm after the kitchen is already on fire.
Blocked words can help filter unwanted phrases on the Wall and in Forums. That extra layer is especially useful if your group starts growing fast or attracts younger members.
Turn on forums only if you can manage them
Forums can be great for announcements, planning, and discussion. They can also become a digital junk drawer if no one is moderating them. If you enable forums, assign trusted moderators and set clear posting expectations.
Connect a group experience if you are building games
If your Roblox group is tied to a game or studio, create or connect a group-owned experience. This allows the project to live under the group identity instead of one individual profile. It is cleaner for branding and better for long-term collaboration.
This setup is especially helpful for teams. If a builder, scripter, and UI designer are all contributing, the group can act as the umbrella for the project rather than turning everything into one person’s kingdom.
Common Problems When Making a Roblox Group
You do not have enough Robux
This is the most common roadblock. If you do not have 100 Robux available, the group creation process will stop there. Easy fix, annoying timing.
Your group name is too long or too weak
Roblox places limits on naming, and beyond the technical rules, weak names are just hard to grow. Choose something short, clear, brandable, and relevant. If it sounds like a placeholder, it probably is.
Your description feels empty
A blank or lazy description makes the group look abandoned, even if you created it five minutes ago. Give members a reason to care.
You forgot to configure join settings
Some owners create a group and leave everything on default. Then random join requests, spam, or member confusion arrive like uninvited party guests. Set your preferences immediately.
You created a group with no real purpose
This is the silent killer. A group without a mission tends to fade fast. People join for identity, value, updates, or participation. If your group offers none of those, it becomes digital wallpaper.
How to Grow a Roblox Group Without Being Annoying
Growth is not only about numbers. It is about attracting the right people and giving them a reason to stay.
Share updates consistently
Post progress, events, teaser images, recruiting needs, and milestones. A group that looks active feels worth joining.
Offer a reason to join
Maybe members get sneak peeks, testing access, community events, or a real role in your project. Give them something more exciting than “we exist.”
Keep branding consistent
Use the same tone, emblem style, and naming across your game, group, and social spaces. Consistency makes your Roblox group feel intentional.
Promote quality, not noise
Do not spam every wall, comment section, or friend list. Instead, tie your group to an actual project, experience, or identity people care about. Useful groups grow more naturally than loud ones.
FAQ: How to Make a Group on Roblox
How much does it cost to make a group on Roblox?
It costs 100 Robux to create a Roblox group, now called a Community.
Are Roblox groups and Communities the same thing?
Yes. Roblox renamed Groups to Communities, but many players still use the old term.
Can I make a Roblox group on mobile?
Yes. Roblox lets users access Communities from the app, though some owners still prefer desktop for easier setup and management.
Can I control who joins my group?
Yes. You can use Manual Approval and other join requirements to decide who gets in.
Can a Roblox group be used for a dev team?
Absolutely. That is one of the best uses for a Roblox group. It helps organize members, assign permissions, and support group-owned experiences.
Extra Experiences and Practical Lessons From Making Roblox Groups
One thing new owners often discover is that creating the group is the easy part. The real challenge starts after the button is clicked. At first, there is usually a burst of excitement. You upload the emblem, polish the description, invite a few friends, and suddenly it feels like you are the CEO of a tiny digital startup. Then real life hits: nobody knows what to post, half the members never check updates, and one friend immediately asks for admin powers “just to help.” Welcome to group ownership.
A common experience is realizing that clarity beats hype. Groups with a very specific purpose often do better than groups with a vague “we do everything” identity. A roleplay kingdom, UGC art crew, obby testing team, or small development studio tends to attract better-fit members than a general-purpose hangout. People join when they understand what the group is about within seconds.
Another big lesson is that permissions matter more than people expect. Many owners start out generous and hand out higher ranks too quickly. It feels friendly in the moment, but a sloppy role structure can create confusion fast. Suddenly, too many people can edit settings, approve members, or moderate content. Smart owners usually learn to keep important permissions limited until trust is earned over time.
There is also the branding lesson. A lot of first-time Roblox groups look unfinished because the name, emblem, and description do not match. You might see a serious studio name, a goofy meme icon, and a description written like a late-night text message. That mismatch makes the group feel temporary. The groups that look established usually have a consistent identity from day one, even if they are still tiny.
Owners also learn quickly that activity creates momentum. Even a small group feels alive when there are updates, plans, polls, or progress posts. On the other hand, a silent group feels abandoned almost immediately. Members often decide whether to stay based less on group size and more on whether anything interesting seems to be happening.
For creators, one of the best experiences is using the group as a real collaboration hub. A builder can share previews, a scripter can announce fixes, testers can report bugs, and moderators can keep the space clean. When that system clicks, the group stops being just a badge on a profile and starts functioning like an actual team space.
There is also a personal lesson in patience. Not every Roblox group becomes huge, and that is perfectly fine. A smaller, active, focused community often feels better than a giant group full of random members who never interact. In practice, the strongest groups are not always the loudest ones. They are usually the ones with a clear purpose, solid rules, helpful leaders, and members who feel like they belong there.
So if your first Roblox group starts small, do not panic. That is normal. Build the foundation, treat the setup seriously, and improve it over time. Groups rarely become memorable because they were created quickly. They become memorable because someone kept showing up and gave people a reason to care.
Conclusion
If you want to know how to make a group on Roblox, the process is pretty straightforward: log in, open Communities, click Create, add your name, description, and emblem, choose your join settings, and pay the 100 Robux fee. After that, the real work is setting up roles, rules, moderation, and a reason for people to join.
The best Roblox groups are not just created. They are managed well. They have a clear identity, helpful structure, and enough activity to make members feel like they joined something real. Whether you are launching a game studio, building a fan club, or organizing friends for a project, a thoughtful Roblox group can give your ideas a proper home.
In other words, do not just make a group. Make one that people actually want to come back to.