Table of Contents >> Show >> Hide
- What “Garden Plans” Really Means (And Why It Works)
- Step 1: Pick a Goal That Matches Your Life
- Step 2: Read Your Yard Like a Detective
- Step 3: Start With SoilBecause Plants Don’t Eat Good Vibes
- Step 4: Choose Your Garden Style (Beds, Rows, Containers, or a Mix)
- Step 5: Make a Layout You Can Actually Follow
- Step 6: Build a Planting Schedule Around Frost Dates
- Step 7: Plan for Crop Rotation (Even in Small Gardens)
- Step 8: Add “Infrastructure” to Your Plan (Paths, Trellises, Water)
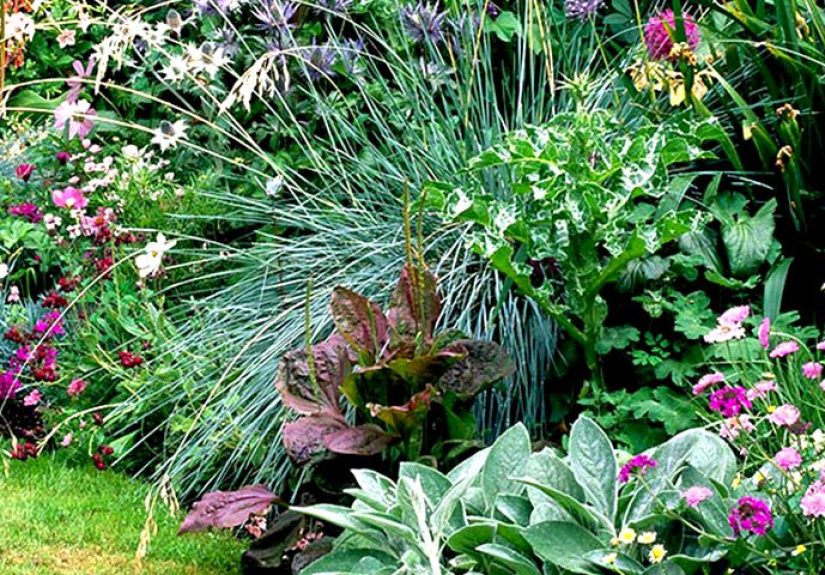
- Step 9: Design for Beauty and Function at the Same Time
- Step 10: Plan Your Maintenance Like It’s a Subscription
- Troubleshooting: Common Garden Plan Mistakes (And Fixes)
- Three Garden Plans You Can Copy This Season
- Conclusion: Your Best Garden Plan Is the One You’ll Use
- Experiences: What Making Garden Plans Taught Me (So You Don’t Have to Learn the Hard Way)
A garden plan is basically a friendly agreement between You and Future You. Present You says,
“I’ll put the tomatoes where they get sun.” Future You says, “Thank you, because I do not want to discover in July
that the ‘sunny spot’ is actually the shadow realm of your garage.”
Whether you want a salad bar you can walk to, a backyard that looks like a magazine spread, or a pollinator party
that makes butterflies RSVP “yes,” garden plans help you spend your time gardening instead of guessing. The best
part: planning doesn’t have to be complicated. It just needs to be honest, readable, and built around real life
(including your schedule, your climate, and your tolerance for weeding).
What “Garden Plans” Really Means (And Why It Works)
A solid garden plan is a simple system that answers four questions:
Where will things go? When do you plant? How will you care for it?
and What will you do when nature freelances? (Spoiler: nature will freelance.)
Planning pays off because it reduces the two classic garden problems: (1) overcrowding and (2) overwhelm. When you
map your layout and timing, you can give plants the space they need, keep harvests coming steadily, and avoid the
annual “why do I have 47 zucchini at once?” situation.
Step 1: Pick a Goal That Matches Your Life
Before you sketch a single bed, choose a goal you can maintain on your busiest week. Here are a few realistic
garden plan “themes”:
Option A: The Weeknight Veggie Garden
Focus on 6–10 reliable crops you’ll actually eat: leafy greens, herbs, cherry tomatoes, peppers, green beans,
cucumbers, scallions, and a “fun” crop (like strawberries or snap peas).
Option B: The Low-Maintenance Flower Plan
Prioritize perennials, mulch, and repeat bloomers. Add a small annual section for color therapy (and for the joy of
trying something new each year).
Option C: The Pollinator & Wildlife Garden
Choose native or region-adapted plants, stagger bloom times, include a shallow water source, and skip broad-spectrum
pesticides. Your yard becomes a rest stop for bees, butterflies, and helpful insects.
Option D: The “I’m New Here” Starter Plan
Start small: one or two raised beds or a cluster of containers. This is the gardening version of “don’t buy a
treadmill before you’ve tried walking.”
Step 2: Read Your Yard Like a Detective
Great garden plans begin with site reality. Here’s what to check in under 30 minutes:
- Sun: Most vegetables and many flowering plants do best with about 6–8 hours of direct sun.
- Water access: If hauling a hose feels like a part-time job, your plan needs a different spot.
- Drainage: After rain, does water pool? If yes, raised beds, berms, or a different area may help.
- Wind: Hot wind dries plants fast. Consider fences, hedges, or trellises as wind breaks.
- Convenience: The closer the garden is to your daily path, the more you’ll use it.
Step 3: Start With SoilBecause Plants Don’t Eat Good Vibes
Garden plans live or die on soil quality. The smartest first “purchase” isn’t a fancy trowelit’s a soil test (or at
least a plan to get one). A soil test helps you learn what to add and what to stop adding. It can guide lime and
fertilizer needs and reduce wasted effort.
Quick Soil Plan Basics
- Test first: Especially if you’re planting edibles or you’ve had disappointing results.
- Aim for balance: Many garden crops do well in a slightly acidic to neutral pH range (often around 5.5–7.5).
- Build organic matter: Compost improves structure, drainage, and moisture holdingyour soil’s “all-season tires.”
If you’re using raised beds, remember that the soil mix is the engine. Annual compost top-offs and occasional
testing keep things productive over time.
Step 4: Choose Your Garden Style (Beds, Rows, Containers, or a Mix)
Raised Bed Garden Plan
Raised beds are beginner-friendly, easy to reach, and quick to warm in spring. A classic planning guideline is to
keep beds narrow enough to reach the middleoften about 4 feet wide if you can access both sides. Plan paths that
fit your reality: narrow for walking-only, wider if you’ll use a wheelbarrow or garden cart (often around 2–3 feet).
Raised beds also make it easier to organize by plant families for crop rotation and to keep the garden tidy.
In-Ground Row Plan
Rows can be efficient for larger spaces. If you like growing bigger crops (corn, pumpkins) or you want a classic
farm-garden feel, rows may be your style. Plan for paths, access, and maintenanceespecially weeding and watering.
Block Planting Plan
Block planting (growing in wider blocks rather than single rows) can improve space use and, for certain crops like
corn, can improve pollination when planted in a block rather than a lone row. It’s also excellent for raised beds.
Container Garden Plan
Perfect for patios, balconies, and renters. The planning secret is matching container size to the plant. Small pots
dry out fast, so build your plan around your watering scheduleor add self-watering planters.
Step 5: Make a Layout You Can Actually Follow
This is where garden plans get fun. Grab graph paper (or a simple digital grid) and map your space. Use a key:
squares = 1 square foot (or 6 inches, or whatever keeps you sane).
Layout Rules That Save Your Sanity
- Tall goes north (usually): Put trellises, corn, and tall plants where they won’t shade shorter crops.
- Keep frequently harvested plants close: Herbs and salad greens should be easy to reach.
- Group by water needs: Thirsty plants together, drought-tolerant plants together.
- Leave space for you: The plan isn’t just for plants. You’re part of the ecosystem.
Example: A Simple 4×8 Raised Bed Garden Plan
Here’s a starter layout that balances harvest and manageability:
- Trellis side: cucumbers or pole beans (vertical growth saves space)
- Middle zone: peppers and basil (sun lovers, easy harvest)
- Front edge: lettuce, spinach, scallions (quick crops, frequent picking)
- Corner: one cherry tomato with support (because tomatoes are always invited)
Add a second bed later for heavier feeders or sprawling crops. Starting with one bed helps you learn your conditions
and your habits.
Step 6: Build a Planting Schedule Around Frost Dates
The planting schedule is the time-travel part of garden plans. Instead of guessing, you plan around your average
last spring frost and first fall frost. Those dates help you time seed-starting, transplanting, and succession
planting so you can stretch harvests across the season.
Three Timing Buckets
- Cool-season crops: lettuce, peas, radishes, spinachoften planted before hot weather arrives.
- Warm-season crops: tomatoes, peppers, squashplanted after frost risk drops and soil warms.
- Fall crops: greens, carrots, brassicasplanted late enough to avoid peak heat but early enough to mature before hard freezes.
Succession Planting: The Anti-Glut Strategy
Succession planting means sowing small amounts at intervals (instead of all at once) so you harvest steadily. For
some crops, planting every 7–10 days or every couple of weeks can spread out the harvest and reduce waste. This is a
game-changer if you’d like “salad all summer” and not “salad for two weeks, then nothing.”
Step 7: Plan for Crop Rotation (Even in Small Gardens)
Crop rotation sounds like something only large farms do, but even small gardens benefit. Many diseases and pests
specialize by plant family, so rotating what you grow in each bed can reduce recurring problems over time.
A Simple 4-Family Rotation Plan
- Nightshades: tomatoes, peppers, eggplant, potatoes
- Brassicas: cabbage, broccoli, kale, cauliflower
- Legumes: beans, peas (often helpful for soil nitrogen dynamics)
- Cucurbits: cucumbers, squash, melons
In a small space, rotation might mean swapping crops between beds or between sections of one bed year to year. The
goal is “not the same family in the same spot every season,” not perfection.
Step 8: Add “Infrastructure” to Your Plan (Paths, Trellises, Water)
A garden plan isn’t just plantsit’s the setup that makes gardening easier. Infrastructure is the difference
between “a relaxing hobby” and “a muddy obstacle course.”
Paths
Plan paths wide enough for your body, your tools, and your future self carrying a basket of produce like you’re in a
wholesome movie montage. If you use carts or wheelbarrows, build that into the plan.
Trellises
Vertical growing boosts yield per square foot and improves airflow. It also keeps fruits cleaner and makes
harvesting easier. Trellises are especially useful for cucumbers, pole beans, peas, and some squash varieties.
Watering Plan
Decide how you’ll water before the heat arrives. Options include hand watering, soaker hoses, drip irrigation, and
timed systems. The “best” plan is the one you’ll actually do consistently.
Step 9: Design for Beauty and Function at the Same Time
Your garden plan can be productive and pretty. In fact, blending the two often makes gardens easier to maintain
because you’ll enjoy spending time there.
Easy Beauty Upgrades That Don’t Add Much Work
- Border planting: line beds with herbs or flowers that attract beneficial insects
- Repeat shapes: matching bed sizes or symmetrical paths make spaces feel intentional
- Seasonal color: include early bloomers, mid-season standouts, and late-season performers
- Edible landscaping: mix kale, chard, and herbs into flower beds for color and function
Step 10: Plan Your Maintenance Like It’s a Subscription
Gardens thrive on small, consistent actions. The secret is to plan maintenance in bite-size pieces so it doesn’t
feel like a weekend-consuming saga.
A Simple Weekly Routine
- 10 minutes: quick harvest + check for pests and wilting
- 10 minutes: spot-weed while you’re already there
- 10 minutes: water check (and adjust if heat spikes)
- Optional: replant a small area for succession crops
Mulch: The Quiet Hero of Garden Plans
Mulch helps reduce weeds, smooths soil moisture swings, and keeps beds looking tidy. Include mulch in your plan
from the start, especially for pathways and around larger plants.
Troubleshooting: Common Garden Plan Mistakes (And Fixes)
Mistake 1: Planning Too Big
If your plan requires you to weed for three hours every weekend, it’s not a planit’s a plot twist. Fix: shrink the
footprint, increase mulch, and choose fewer high-demand plants.
Mistake 2: Overcrowding
Crowding reduces airflow, increases disease risk, and shrinks yields. Fix: follow spacing guidelines, trellis
climbers, and accept that plants are not collectiblesyou don’t need one of everything.
Mistake 3: Ignoring Timing
Planting everything on the first warm weekend is a traditionjust not always a productive one. Fix: plan by frost
dates, use a planting calendar, and stagger sowings for steady harvest.
Mistake 4: Forgetting Access
If you can’t reach it, you won’t weed it, prune it, or harvest it. Fix: keep beds narrow enough to reach, and build
workable paths.
Three Garden Plans You Can Copy This Season
Plan 1: “Salad and Salsa” Small-Space Vegetable Plan
- Cherry tomatoes + basil (container or raised bed)
- Peppers + cilantro
- Lettuce + spinach succession plantings
- Green onions + radishes (fast fillers between slower crops)
- Cucumbers on a trellis
Plan 2: Beginner Pollinator Plan (Sunny Bed)
- Early season: coneflower-friendly companions and region-appropriate spring bloomers
- Mid season: long-blooming natives or hardy perennials suited to your region
- Late season: fall-blooming plants so pollinators have fuel heading into cooler weather
- Structure: one shrub or grass clump for habitat + a shallow water dish with stones
Plan 3: “Pretty and Practical” Front-Yard Edible Landscaping
- Chard or kale as colorful “ornamental” edibles
- Herbs as borders (thyme, oregano, chives)
- Marigolds or similar companions for color
- A small trellis with flowering vines or beans as a focal point
Conclusion: Your Best Garden Plan Is the One You’ll Use
The perfect garden plan doesn’t existbecause weather, pests, and life will always improvise. But a smart, simple
plan gives you a strong starting point: the right location, improved soil, a layout that fits your space, and a
schedule that respects your climate.
Start small, keep notes, and adjust one thing at a time. A garden plan is not a test you can fail. It’s a tool that
gets better every seasonjust like you.
Experiences: What Making Garden Plans Taught Me (So You Don’t Have to Learn the Hard Way)
The first time I made “serious” garden plans, I acted like I was drafting blueprints for a tiny botanical empire.
I measured everything. I drew neat little squares. I picked varieties with names that sounded like royalty. Then
reality showed up wearing muddy boots.
Lesson one: the best plan is the one that survives your busiest week. My early layouts assumed I’d
water like a devoted plant butler twice a day. That was adorable. When life got hectic, the containers on the sunny
patio dried out faster than my motivation. Now, when I plan, I match plant choices to my routine. If I know I’m
not going to baby-sit basil in July, I put it where the hose reaches easily or I choose a larger container that
holds moisture longer. Planning is less about being ambitious and more about being honest.
Lesson two: paths are not optional. I used to think, “I’ll just squeeze between beds.” Then the
tomatoes hit their growth spurt and the squash started doing squash things (sprawling like it owns the place).
Suddenly, my “path” became a shin-bashing maze. Now I plan walking space the way a grocery store plans aisles:
wide enough to carry something and still turn around without apologizing to every plant I brush past.
Lesson three: succession planting is the difference between ‘nice harvest’ and ‘vegetable avalanche.’
One year I planted all my lettuce at once because it seemed efficient. For two weeks I ate salads like it was a job.
Then the heat arrived, the lettuce bolted, and my garden switched to “crunchy disappointment.” Now I plan smaller
sowings in intervals. The garden stays productive, and I don’t feel like I’m speed-running a farmers’ market.
Lesson four: write things down. I thought I’d remember what I planted where. I did not. By mid-season
I was looking at mystery sprouts like they were strangers on a bus. These days, my garden plan includes a simple
note system: what went where, when it was planted, and how it performed. It’s not fancysometimes it’s literally a
scribble on a phone notebut it turns gardening into a learning loop instead of annual amnesia.
Lesson five: your plan needs a “weather clause.” Some springs are cold and stubborn. Some summers
are hotter than expected. Rain might vanish for weeks. A good plan includes backup moves: shade cloth for heat waves,
mulch for dry spells, row covers for surprise chills, and a willingness to replant when something flops. When I stopped
treating my plan as a rigid script and started treating it like a flexible playbook, gardening got calmerand the
results got better.
The biggest takeaway? Garden plans aren’t about controlling nature. They’re about giving yourself fewer surprises and
more wins. And if you still get surprisescongratulations, you are officially gardening.