Table of Contents >> Show >> Hide
- Before You Start: The Budget Wall Art Game Plan
- 15 DIY Wall Art Projects That Look Way More Expensive Than They Are
- 1) Watercolor Swirl Abstract on Canvas (a.k.a. “I’m artsy now”)
- 2) Painter’s Tape Geometric Canvas (crisp lines, zero regrets)
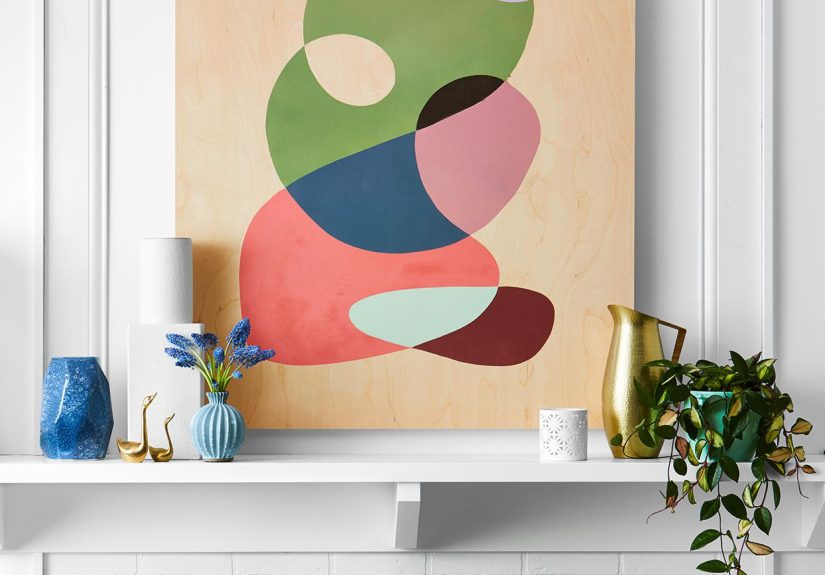
- 3) Half-Painted Thrifted Art “Rescue” (color-block to the rescue)
- 4) Wallpaper-Wrapped Frame or Mat Hack (luxury pattern, tiny price)
- 5) DIY Floating Frame for Canvas (instant “gallery” energy)
- 6) Pressed Flower Frame Gallery (nature, but make it chic)
- 7) Shadow Box “Mini Museum” (souvenirs that aren’t drawer clutter)
- 8) Framed Fabric Panels (looks custom, costs like a sandwich)
- 9) Embroidery Hoop Art Trio (texture that feels collected)
- 10) Mini Woven Wall Hanging (fiber art without the fancy loom)
- 11) Beginner Macramé Wall Hanging (boho vibes, basic knots)
- 12) Photo Transfer to Wood (personal art that doesn’t scream “college dorm”)
- 13) Oversized “Quilt Block” Painted Plywood (big art, big payoff)
- 14) String Art Monogram or Shape (retro technique, modern look)
- 15) Rope Star Mirror (a statement piece that bounces light)
- How to Make Your DIY Wall Art Look “Store-Bought” (In a Good Way)
- DIY Wall Art Experiences: What People Learn After They’ve Made (and Hung) a Few Pieces
Blank walls have a special talent: they make even the nicest couch look like it’s waiting for its real furniture. The good news?
You don’t need a $600 “minimalist blob” painting to fix it. With a few budget-friendly supplies (and a little confidence),
you can make DIY wall art that looks custom, feels personal, and doesn’t leave your bank account whispering, “Why?”
Below are 15 cheap wall art ideas that deliver big style on a small budgetmodern, boho, rustic, colorful, and renter-friendly.
You’ll find quick wins (hello, wallpaper hacks) and weekend projects (hello, giant quilt-block panel) plus practical tips to make everything look
intentionally expensive (the best kind of expensive).
Before You Start: The Budget Wall Art Game Plan
1) Pick a “rule” so your wall looks designed, not random
A rule can be as simple as: “all black frames,” “all warm neutrals,” “only circles,” or “two accent colors.”
Even mismatched thrift finds look curated when they share one common thread.
2) Shop your house first, then thrift second
The easiest DIY home decor upgrade is repurposing what you already own: extra fabric, old books, leftover paint,
picture frames, even that random plywood in the garage that’s been “saving for a project” since 2019.
3) Make it bigger than you think
Oversized art looks high-end because it fills visual space. Three small pieces can work, but one large piece often looks more “designer”
and costs about the same when you DIY it.
4) Plan your hanging like a pro (and protect your walls)
Lay everything out on the floor first. Use removable adhesive strips if you’re renting or if you want to swap art seasonally.
Keep the center of your arrangement near eye level for the most polished look.
15 DIY Wall Art Projects That Look Way More Expensive Than They Are
1) Watercolor Swirl Abstract on Canvas (a.k.a. “I’m artsy now”)
Style: modern, airy, minimalist | Budget: $10–$30 | Time: 30–60 minutes
This is the ultimate “expensive gallery” look without the expensive gallery part. Watercolor swirls feel organic and calm, and the best part is:
no one can tell if you meant to do it. (That’s not shade. That’s freedom.)
- Use a large canvas (16×20 or bigger) for maximum impact.
- Wet sections of the canvas with a clean brush and water.
- Add watercolor in loose swirls, letting colors blend naturally.
- Let it dry flat, then frame it (or hang the canvas as-is).
Pro tip: Stick to 2–3 colors that match your room’s palette for a cohesive, designer-style finish.
2) Painter’s Tape Geometric Canvas (crisp lines, zero regrets)
Style: modern, graphic | Budget: $10–$25 | Time: 1–2 hours
Painter’s tape is basically a cheat code for clean geometry. You can create triangles, stripes, grids, or a bold “color-block” moment
without needing a steady hand.
- Paint the canvas a base color and let it dry completely.
- Apply painter’s tape in a geometric pattern (press edges down firmly).
- Paint over the taped sections with one or two accent colors.
- Peel tape while the paint is slightly tacky for sharp edges.
Pro tip: Use sample-size paint potscheap, easy, and plenty for canvas work.
3) Half-Painted Thrifted Art “Rescue” (color-block to the rescue)
Style: contemporary, playful | Budget: $5–$20 | Time: 45–90 minutes
Find a dusty landscape painting at a thrift store and give it a modern glow-up by painting a bold block across part of it.
It’s upcycling, but make it fashion.
- Pick a thrifted framed print or painting with a decent frame.
- Tape off a clean line across the piece (diagonal looks extra modern).
- Paint the taped area with a solid color that matches your decor.
- Remove tape, let dry, and hang like you paid real money for it.
Pro tip: A muted color (sage, clay, navy) looks high-end and hides minor brush marks.
4) Wallpaper-Wrapped Frame or Mat Hack (luxury pattern, tiny price)
Style: elevated, boutique | Budget: $5–$25 | Time: 30–60 minutes
Wallpaper samples are the unsung heroes of budget wall decor. Use them to wrap a mat, line a frame, or become the “art” itself.
The result looks custom-framed and intentional.
- Choose a frame with a mat (or add an inexpensive mat insert).
- Cut wallpaper to fit the mat opening area or backing.
- Adhere with glue stick or spray adhesive, smoothing bubbles as you go.
- Reassemble and hangpattern does the heavy lifting.
Pro tip: If the wallpaper is bold, use a simple frame. If the wallpaper is subtle, use a statement frame.
5) DIY Floating Frame for Canvas (instant “gallery” energy)
Style: polished, professional | Budget: $15–$40 | Time: 1–2 hours
A floating frame makes even simple canvas art look upscale. You’re basically giving your art a tailored suit instead of sweatpants.
- Measure your canvas depth and width.
- Cut thin wood strips to build a shallow frame “box.”
- Stain or paint the frame, then attach the canvas from behind.
- Hang and enjoy the “wow, where’d you buy that?” reactions.
Pro tip: Black or natural wood tones work with almost any style, from modern to farmhouse.
6) Pressed Flower Frame Gallery (nature, but make it chic)
Style: romantic, cottagecore, calm | Budget: $10–$35 | Time: 20 minutes + drying time
Pressed botanicals feel timelesslike you live in a sunlit studio and casually drink herbal tea while journaling in perfect handwriting.
(You don’t have to do the handwriting part.)
- Press flowers in a heavy book between clean paper for a couple of weeks.
- Arrange dried blooms on cardstock or within a floating frame.
- Use tiny dots of craft glue or archival tape to secure pieces.
- Frame and hang in a cluster for a mini botanical museum wall.
Pro tip: Stick to one flower type or a single color family for a clean, curated look.
7) Shadow Box “Mini Museum” (souvenirs that aren’t drawer clutter)
Style: personal, eclectic | Budget: $10–$30 | Time: 45–90 minutes
Shadow boxes are perfect when you want wall art with depth: ticket stubs, shells, postcards, small toys, dried flowers, even vintage keys.
It’s sentimental without being messy.
- Pick a shadow box deep enough for your objects.
- Wrap the backing in fabric or wallpaper for a polished background.
- Arrange items before gluing anything (layout first = fewer tears later).
- Secure with hot glue or museum putty, then close and hang.
Pro tip: Repeat one material (gold clips, black labels, white backing) to keep it cohesive.
8) Framed Fabric Panels (looks custom, costs like a sandwich)
Style: cozy, modern, boho | Budget: $10–$35 | Time: 30–60 minutes
Fabric can read like high-end textile art when it’s framed cleanly. Use leftover yardage, a scarf, or even pretty wrapping paper in a pinch.
This is especially great for renters because it’s lightweight and easy to swap.
- Choose 2–4 fabrics that share a color palette.
- Stretch fabric over foam board or thick cardstock (pull it taut).
- Tape or staple the back neatly, then place it in frames.
- Hang as a grid or a mini gallery wall.
Pro tip: For a “designer set,” repeat the same frame size and vary only the fabric pattern.
9) Embroidery Hoop Art Trio (texture that feels collected)
Style: vintage, farmhouse, soft boho | Budget: $8–$25 | Time: 30–90 minutes
Embroidery hoops turn fabric, lace, and even old napkins into wall-worthy art. The circular shape reads intentionallike you planned it,
even if you made it while watching a show.
- Select three hoops in different sizes.
- Layer lace over a solid fabric for depth.
- Tighten the hoop, trim excess fabric, and glue edges on the back.
- Hang in a cluster with about 2–3 inches between hoops.
Pro tip: Use neutral fabrics for a calm look, or bright patterns for a fun, eclectic wall.
10) Mini Woven Wall Hanging (fiber art without the fancy loom)
Style: boho, Scandinavian, cozy | Budget: $10–$25 | Time: 1–3 hours
Weaving looks boutique, but it’s surprisingly beginner-friendly. If you can wrap yarn and tie knots, you can make fiber art.
- Use a small piece of cardboard (or a simple frame) as a DIY loom.
- Create a warp by wrapping string vertically and tying it off.
- Weave yarn through the warp, mixing textures (chunky + thin = chef’s kiss).
- Finish with fringe and hang from a dowel or branch.
Pro tip: Add one unexpected texture (rope, ribbon, strips of fabric) to make it look more “artisan.”
11) Beginner Macramé Wall Hanging (boho vibes, basic knots)
Style: boho, warm minimalism | Budget: $12–$35 | Time: 2–4 hours
Macramé is basically stylish knot-tying. Start with a simple pattern and you’ll get a wall hanging with texture, movement,
and that “handmade” character you can’t buy in a big-box store aisle.
- Cut cotton cord into lengths (longer than you thinkcord math is sneaky).
- Attach cords to a dowel with simple lark’s head knots.
- Use a few basic knots to create rows and patterns.
- Trim the bottom into fringe, a V shape, or a straight line.
Pro tip: Hang it slightly lower than framed art so the textile texture becomes a focal point.
12) Photo Transfer to Wood (personal art that doesn’t scream “college dorm”)
Style: rustic, sentimental, modern farmhouse | Budget: $10–$30 | Time: 1–2 hours + drying
Turning a photo into a wood print instantly feels speciallike a boutique gift shop find, but with your own memories.
Great for family photos, pets, travel pics, or a moody black-and-white portrait.
- Print your photo on regular paper using a laser printer (best results).
- Apply transfer medium to the wood surface and press the image face-down.
- Let it dry completely, then dampen and rub away the paper backing.
- Seal with a clear coat for durability.
Pro tip: Slight imperfections look “vintage.” Call it character and move confidently.
13) Oversized “Quilt Block” Painted Plywood (big art, big payoff)
Style: modern rustic, graphic farmhouse | Budget: $20–$60 | Time: 3–6 hours
If you want maximum impact for minimal cost per square foot, this is it. A large painted plywood panel with a quilt-block style pattern
reads bold, graphic, and custom.
- Cut plywood to size (try 36–48 inches square if your wall can handle it).
- Sketch a quilt-block design (stars, diamonds, or a simple grid).
- Tape lines for crisp edges, then paint sections in 2–4 colors.
- Add trim around edges or sand for a clean, finished look.
Pro tip: Repeat one color from your room (throw pillows, rug, curtains) so the art feels “built in.”
14) String Art Monogram or Shape (retro technique, modern look)
Style: playful, graphic | Budget: $10–$25 | Time: 2–4 hours
String art has a throwback reputation, but a clean monogram, heart outline, or geometric animal can look surprisingly modern.
The key is a simple silhouette and a limited color palette.
- Trace your letter or shape onto a wood board.
- Hammer nails along the outline, evenly spaced.
- Tie embroidery floss to a nail and wrap around nails in a consistent pattern.
- Finish with a neat knot on the back and hang.
Pro tip: Use one neutral string (cream or black) for a clean, grown-up vibe.
15) Rope Star Mirror (a statement piece that bounces light)
Style: boho-glam, coastal, eclectic | Budget: $15–$45 | Time: 1–2 hours
Mirrors count as wall artand they pull double duty by reflecting light and making spaces feel larger. A rope “starburst” design turns a basic mirror
into a statement without the boutique price tag.
- Start with a simple round mirror.
- Cut and shape jute rope into radiating “spokes” around the mirror.
- Attach with hot glue (work in sections so it stays aligned).
- Let it cure fully before hanging.
Pro tip: Pair this with a small gallery wall nearbymixing reflective + framed art adds dimension.
How to Make Your DIY Wall Art Look “Store-Bought” (In a Good Way)
Use repetition for instant polish
Repeat a frame finish, a color, or a shape across multiple pieces. This is the simplest way to make budget wall decor feel cohesive.
Three different DIY projects can still look like a collection if they share a palette (like black + cream + brass).
Spacing matters more than you think
Whether it’s a gallery wall or a trio of hoops, keep spacing consistent. If you’re eyeballing it, use two fingers as a rough spacer
and commit. Wobbly spacing is how a wall goes from “curated” to “chaotic bulletin board” in 0.2 seconds.
Scale your art to your furniture
Hanging art above a sofa or console table? A good rule of thumb is to aim for art that spans roughly two-thirds the furniture width.
It helps your wall art feel integrated rather than floating awkwardly like it got lost.
DIY Wall Art Experiences: What People Learn After They’ve Made (and Hung) a Few Pieces
DIY wall art is one of those hobbies that starts with “I just want something cute for that empty wall” and quickly becomes “I have opinions
about matte versus satin paint.” A few common experiences tend to show up once you’ve made a handful of piecesespecially when you’re trying to
get a stylish look on a budget.
First, most DIYers discover that planning the layout is not optional. The floor layout step feels skippable until you’ve put
two holes in the wall and realize your “balanced” gallery wall is drifting uphill like it’s chasing better lighting. People who take ten minutes
to arrange frames on the floor almost always end up with a cleaner final result. It’s also when you notice weird stufflike two frames that are
nearly the same size but not quite, which reads more “accident” than “eclectic.” The good news: switching one frame for a slightly larger or smaller
one fixes that fast.
Another universal moment is learning that bigger looks pricier. Many folks start with small canvases because they’re cheaper,
then wonder why the wall still looks empty. Once you try one oversized piecelike a quilt-block plywood panel or a big watercolor abstractyou get it.
Large-scale art anchors a room. It also lets simple techniques shine because you can see the movement of brushstrokes, the texture of weaving,
or the crispness of taped lines from across the room. It’s the same effort, just more visual payoff.
People also tend to get pleasantly surprised by “non-art” materials. Fabric in a frame? Wallpaper as art? Pressed flowers? These feel fancy because
they bring pattern and texturetwo things that make a space look layered and intentional. The experience here is usually: “Why didn’t I do this sooner?”
followed by “I will now save every pretty scrap of fabric I ever meet.” (You’ll want to set boundaries with yourself. Your closet deserves peace.)
Then there’s the lesson about finishing touches. DIY art often looks homemade when the edges and backing are messy. Clean backs,
neat staples, trimmed fabric, and a quick coat of sealer can upgrade the final look dramatically. A lot of DIYers develop a routine: tidy the back,
add hanging hardware that feels secure, and do a final wipe-down so there are no fingerprints or glue smudges. It’s not glamorous, but it’s the difference
between “cute craft” and “wow, where’d you buy that?”
Finally, most people find that the best DIY wall art is the kind that can evolve. Swapping fabric panels seasonally, rotating prints on a ledge,
changing a shadow box theme, or updating a gallery wall one piece at a time keeps your space feeling fresh without constant spending. The experience
becomes less about making one perfect piece and more about building a wall that reflects your lifephotos, patterns you love, colors that make you happy,
and small creative experiments that turn a house into a home.


