Table of Contents >> Show >> Hide
- Why a Brick Works So Well as a Candleholder
- Pick the Right Brick (Your Future Self Will Thank You)
- Tools and Materials
- Method 1: The 10-Minute No-Drill Brick Candleholder
- Method 2: Drill a Tealight Recess in a Solid Brick
- Design Ideas That Look Like a Designer Did It
- Candle Safety (Because We Like Cozy, Not Chaos)
- Cleaning and Caring for Your Brick Candleholder
- Quick Troubleshooting
- Real-World Experiences: What DIYers Learn After Making One
- Conclusion: Low Effort, High Glow
Every DIYer has that pile: the leftover brick from a patio project, a mysterious single brick that has followed you through three moves,
or a “temporarily stored” stack you swear you’ll use “someday.” Today is someday. Because the humble brickyes, the same block that spends its life
being stepped on, mortared, or ignoredmakes a surprisingly stylish candleholder.
Done right, a brick candleholder looks intentional: earthy, minimal, a little industrial, a little rustic. It’s stable, heat-friendly, and
has that “designer centerpiece on a budget” vibeespecially when you line up a few bricks and add candlelight down the middle of a table.
(Translation: it photographs like a million bucks, but costs roughly one dusty trip to the garage.)
In this guide, you’ll learn two easy approaches: a fast no-drill version using bricks with holes, and a drilled
version that creates neat recesses for tealights or votives. We’ll also cover candle safety, brick-cleaning tips, and styling ideas so your creation
looks charmingnot like an emergency lighting plan.
Why a Brick Works So Well as a Candleholder
Bricks were born for tough jobs. They’re made to handle heat, sit solidly on surfaces, and survive decades of weather and wear. For candle duty,
that translates into three big wins:
- Stability: A brick is heavy and hard to tip, which is exactly what you want under open flame.
- Heat tolerance: Brick won’t scorch like wood, and it won’t melt like plastic or some coatings.
- Style: The color and texture instantly read “warm,” “textural,” and “collected,” especially with brass, glass, linen, or greenery nearby.
The only downside? Brick is porous and can be dusty. That’s manageablejust plan a quick clean and use a drip-catching setup so wax doesn’t soak
in like a stain on a white t-shirt at spaghetti night.
Pick the Right Brick (Your Future Self Will Thank You)
Not all bricks are equal, and your candleholder will behave better if you start with one that’s clean and structurally sound.
Best choices
- Bricks with holes (often called “cored” bricks): perfect for tapers, slim LED candles, or small containers.
- Solid clay bricks: great for drilling neat tealight recesses.
- Reclaimed bricks: beautiful patina, slightly imperfect edgesideal for rustic decor.
Skip these
- Crumbly, cracked, or spalling bricks: they shed grit and can break while drilling.
- Bricks coated in mystery sealers/paint: coatings can smoke or discolor under heat.
- Bricks that smell strongly of chemicals: if you’re unsure where it came from, don’t put flame on it.
Tools and Materials
Choose your adventure: no-drill (fast) or drilled (clean, custom fit). Either way, keep safety gear on the listbrick dust is not a cute accessory.
For the no-drill brick candleholder
- 1–5 bricks with holes (cored bricks)
- Tea lights, votives in glass, or slim taper candles
- Metal tealight cups or small glass holders (recommended)
- Optional: sand (for leveling candles), felt pads (to protect furniture)
- Stiff brush + mild dish soap + water
For the drilled tealight/votive version
- 1–3 solid bricks
- Measuring tape + pencil/marker
- Clamp(s) or a non-slip mat
- Drill (a hammer drill helps) + masonry bit(s)
- Optional (best for clean circles): masonry hole saw/diamond core bit sized for your candle cup
- Safety glasses, gloves, and a dust mask/respirator
- Vacuum (ideally with good filtration) for dust cleanup
Method 1: The 10-Minute No-Drill Brick Candleholder
If your brick already has holes, congratulationsyou’re basically holding a candleholder that just needs better PR.
This method is perfect for dinner parties, mantels, and outdoor tables.
Step 1: Clean it (quickly, not obsessively)
Brush off loose grit outdoors. Wash with warm water and a small amount of mild dish soap, then rinse and let it dry completely.
If you’re using reclaimed brick and want to keep the patina, don’t scrub it into a “brand-new” personality.
Step 2: Add surface protection
Stick felt pads underneath if your brick will sit on wood, stone, or anything you’d cry over if scratched. (So… basically anything in your house.)
Step 3: Fit your candles safely
- For tea lights: place them in metal cups or small glass holders and set them over or inside the holes if they sit level.
- For votives: use votives in glass and place the glass in a hole only if it fits without forcing.
- For tapers: test the fit. If the candle wobbles, add a little sand in the hole to stabilize it.
Step 4: Style it like you meant it
Line up three bricks down the center of a table. Alternate candle heights. Add greenery or a linen runner nearby (not touching the flame).
The effect is “warm modern rustic,” not “I lit a brick because the power went out.”
Method 2: Drill a Tealight Recess in a Solid Brick
Want that clean, intentional tealight lookwhere each candle sits snug in its own little “nest”? Drilling is the move.
The key is going slow, controlling dust, and matching the hole size to your candle cup.
Step 1: Decide your layout
Common layouts that look good:
- Single center hole: minimalist, great on a bedside table or mantel.
- Three holes in a row: classic centerpiece spacing.
- Five holes: longer brick “runway” for a dining table.
Mark your centers with pencil. Keep at least 1 inch from edges to reduce cracking.
Step 2: Secure the brick
Clamp the brick to a sturdy surface or place it on a non-slip mat. Do not “handhold and hope.”
Brick wins that argument every time.
Step 3: Gear up and manage dust
Wear eye protection and a dust mask. Drill outdoors if possible. Brick and mortar can contain crystalline silica,
and drilling creates fine dustkeep it out of your lungs and off your floors.
Step 4: Drill slowly (let the tool do the work)
- Start small: use a smaller masonry bit to create a pilot hole at each marked point.
- Size up: move to a larger masonry bit or a masonry hole saw/diamond core bit for the final diameter.
- Go steady: begin at a low speed so the bit doesn’t skate.
- Clear dust: pull the bit out occasionally and vacuum away dust so the hole stays clean and the bit stays cooler.
- Control depth: aim for a recess deep enough that the candle cup sits stable, but not so deep it becomes hard to remove.
Step 5: Test fit, then refine
Drop in your tealight cup or votive holder. If it’s too tight, widen slightly. If it’s too loose, don’t panic:
you can use a metal cup that’s slightly larger, or simply place the tealight in a glass cup that sits on top of the recess.
Design Ideas That Look Like a Designer Did It
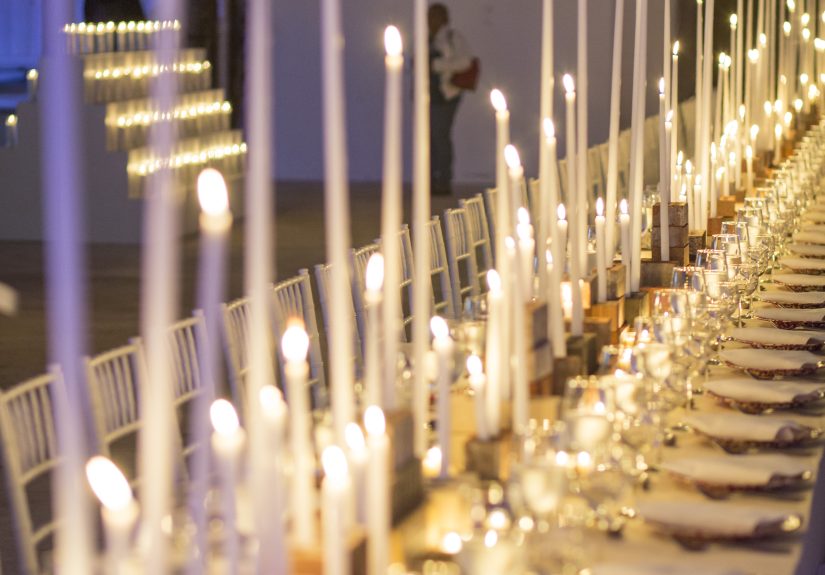
1) The “Brick Runway” centerpiece
Arrange 3–7 bricks in a straight line down the center of a table. Use tealights in drilled recesses or tapers in brick holes.
Keep the rest of the table simple: linen napkins, one small vase, maybe a bowl of citrus. Candlelight will do the heavy lifting.
2) Stacked bricks for height
Stack two bricks per “station” (like mini pedestals) and top with a candle holder or a glass votive.
This creates height variation without complicated florals or fancy stands.
3) Outdoor citronella brick holders
Using bricks with holes outdoors is a smart way to hold citronella candles to help deter bugs.
Place the bricks on a stable, non-flammable surface and keep them away from foot traffic.
4) Brick + greenery (the soft-and-hard contrast)
Tuck eucalyptus or rosemary sprigs near the bricks for scent and texturenot touching the flame.
The brick provides structure; the greenery provides softness. Together: “effortless.”
Candle Safety (Because We Like Cozy, Not Chaos)
A brick candleholder is sturdy, but it doesn’t magically make open flame risk-free. Use these habits every time:
- Never leave burning candles unattended. If you leave the room, blow them out.
- Keep flames away from anything that can burn (curtains, paper, decor, sleeves, pets’ tails).
- Trim wicks (about 1/4 inch is a common rule) for a cleaner burn and less soot.
- Avoid drafts (vents, open windows) that can flicker flames and splatter wax.
- Limit burn sessions so candles don’t overheat containers or surfaces; follow maker guidance when available.
- Use heat-safe placement and consider a trivet or stone base under the brick if you’re on delicate surfaces.
Cleaning and Caring for Your Brick Candleholder
How to remove wax from brick
- Freeze method: put the brick in a plastic bag and freeze it; hardened wax often pops off more easily.
- Warm-and-blot method: gently warm the wax with a hair dryer and blot with paper towels (go slowly).
- Prevention: use metal cups or small glass holders to keep wax from soaking into the brick in the first place.
How to clean dusty or sooty brick
For everyday dust, a stiff brush and mild soapy water is usually enough. For deeper cleaning, many people use gentle solutions like diluted vinegar
on brick, but avoid harsh chemicals and always rinse well. Never mix vinegar with bleach or other cleaners.
Should you seal it?
Sealing can help reduce staining and make cleanup easier, but be selective. If you plan to burn real candles directly on the brick,
test any sealer first and keep flame away from coated surfaces. A simple alternative is skipping sealer and relying on candle cups/glass holders.
Quick Troubleshooting
“My candle wobbles.”
Use sand in the hole, switch to a candle cup, or choose a slimmer candle. For tealights, use a glass holder that sits flat.
“The hole chipped while drilling.”
Slow down, drill at lower speed, and don’t force the bit. Small chips can be embraced as “rustic,” or smoothed with light sanding
(wear a mask and clean up dust thoroughly).
“It looks like… a brick.”
Excellent observation. Add contrast: pair it with linen, greenery, brass, or a simple tray. A brick candleholder shines when it’s part of a scene,
not abandoned like a lone potato on a baking sheet.
Real-World Experiences: What DIYers Learn After Making One
Most brick candleholder projects are “easy” in the way that making toast is easy: simple steps, but you can still set off a smoke alarm if you ignore
the basics. Here are common experiences DIYers run intoand how they typically solve themso your first brick candleholder feels satisfying instead
of strangely educational.
1) The brick you own is never the brick you pictured. Many people start with reclaimed brick because it looks gorgeous online
weathered edges, old-world character, the whole vintage romance. Then they pick it up and realize it sheds grit, has stubborn mortar stuck to it,
or is slightly uneven on the bottom. The usual fix is refreshingly low-drama: brush it off outdoors, do a gentle wash, and add felt pads underneath.
If it still rocks on the table, a thin cork sheet or a discreet trivet can level it without changing the look.
2) Candle fit becomes a whole thing. Bricks with holes are convenient, but the hole diameter varies. Some tapers slide in like they
were custom-made; others wobble like a baby giraffe. A common trick is to add a little sand in the hole to stabilize the candle, or switch to a
candle cup insert so the candle sits upright. For tealights, people often discover that “a tealight” is not a universal sizesome aluminum cups are
wider than others. If a recess is slightly off, the most painless workaround is to use small glass tealight holders that sit on top or nest gently
in the opening.
3) The first drilling attempt is usually too ambitious. DIYers often want that perfect, clean circle on try one. The brick has other
plans. The most common learning moment is that brick rewards patience: slow speed, steady pressure, and clearing dust often makes the difference
between a neat recess and a chipped crater. Many people find that making a pilot hole first reduces slipping, and that clamping the brick prevents
little “jump scares” when the bit grabs.
4) Dust management matters more than expected. On paper, drilling one brick sounds like a tiny job. In reality, it can create a fine
powder that travels further than your motivation to clean it. DIYers who do this once usually do it outside forever after. If it’s indoors, they
tend to put down a drop cloth, wear eye protection, and vacuum dust frequently while drilling. It’s also common to discover that wiping brick dust
with a dry rag just redistributes itdamp wiping (after vacuuming) usually works better.
5) Styling is where it stops looking like a construction leftover. People often report that their first version felt “unfinished”
until they placed it intentionally: centered on a table runner, paired with a tray, or repeated in multiples. The most popular “aha” moment is that
three bricks in a row looks like a design choice, while one brick by itself can look like you forgot to finish cleaning up the patio. Adding a few
simple elementslinen napkins, a small bowl of citrus, a low bundle of herbshelps the candlelight read as warm and curated.
6) Everyone becomes a candle safety person. Once you have open flame on the table, you notice drafts, pets, sleeves, and decor in a
whole new way. DIYers frequently end up switching to shorter burn sessions, trimming wicks more often, and keeping candles farther from greenery than
they originally planned. The brick makes a sturdy base, but the best “experience upgrade” is consistent safety habits so the centerpiece stays cozy
instead of becoming the most memorable part of the evening for the wrong reason.
Conclusion: Low Effort, High Glow
A brick candleholder is the kind of DIY that feels clever because it’s so simple. You’re not building furniture, rewiring a lamp,
or learning geometry against your willyou’re taking a sturdy, overlooked material and giving it a new job. Whether you go no-drill with holed bricks
or drill clean recesses for tealights, you end up with decor that’s stable, heat-friendly, and surprisingly elegant.
Keep it safe, keep it tidy, and don’t overthink the styling. Candlelight is famously forgiving. Even a humble brick can look like a centerpiece
when it’s glowing on purpose.


