Table of Contents >> Show >> Hide
- Why Use Silicone Molds for Concrete Planters?
- Materials You’ll Need
- Step-by-Step: How to Make a Silicone Mold for Concrete Planters
- How to Cast Concrete in Your Silicone Mold
- Common Problems (and How to Fix Them)
- Design Ideas for Your Concrete Planters
- Real-Life Lessons & Experiences with DIY Silicone Molds
If you’ve ever scrolled through Hometalk or Pinterest and thought, “I could totally make those chic concrete planters,”
you’re absolutely right. The real secret behind those perfectly smooth, beautifully shaped planters isn’t magic –
it’s a good silicone mold that you can actually make yourself at home.
Learning how to create your own silicone mold for concrete planters gives you total creative control: you can copy a
favorite container, design your own shape, or even turn a thrift-store find into your next mold. Plus, once you’ve
made the mold, it’s reusable, flexible, and surprisingly beginner-friendly. Add some concrete, a little patience, and
you’ve got custom planters that look boutique, not “first-time DIY.”
In this guide, we’ll walk through what materials you need, how to make a silicone mold step by step, and how to cast
concrete planters that are durable, stylish, and ready for your favorite greenery.
Why Use Silicone Molds for Concrete Planters?
You can technically pour concrete into all kinds of recycled containers, but silicone molds are in a different league.
They’re flexible, non-stick, and pick up fine surface textures, which is perfect if you want crisp edges and clean
details on your planters.
- Flexibility: Silicone bends without cracking, so you can peel it away from cured concrete without fighting it.
- Durability: A good-quality RTV (room-temperature-vulcanizing) silicone mold can be used many times before it wears out.
- Detail: Silicone captures textures like ribbed glass, carved patterns, or geometric lines, so your planter looks professionally made.
- Easy release: Most concrete mixes pop out of silicone molds easily, often with little or no release agent if the mold is properly made.
Once you create one good silicone mold, you can cast multiple planters in different colors, finishes, and sizes
the mold does the heavy lifting while you just keep mixing and pouring.
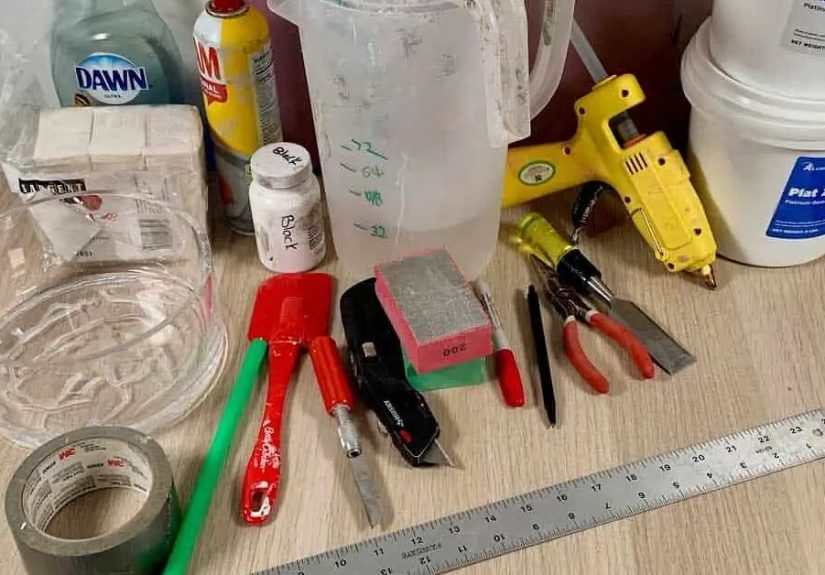
Materials You’ll Need
You don’t need a workshop full of tools to make your first mold. Here’s a simple shopping list to get you started:
For the Silicone Mold
- Master object: The item you want to copy (a glass, ceramic cup, plastic pot, or a planter you already love).
- Two-part liquid silicone: A pourable RTV silicone mold-making kit (usually mixed 1:1 by volume or weight).
- Mold box / container: A nonporous container slightly larger than your master (plastic food container, acrylic box, or a DIY foam board box).
- Hot glue gun or strong tape: To secure the master and seal the mold box.
- Clay or putty: To plug holes and build a little bump where you want a drainage hole in the planter.
- Mold release (optional but helpful): A spray or brush-on release made for silicone, or a thin coat of petroleum jelly in a pinch.
- Mixing cups and sticks: For combining the silicone parts.
- Kitchen scale (if needed): Some silicones require precise measuring by weight.
- Gloves and protective surface covering: Silicone is forgiving, but not fun to peel off a wood table.
For the Concrete Planter
- Concrete or mortar mix: A fine, sand-based mix works best for small planters and picks up details well.
- Water: To reach a pourable, “thick oatmeal” consistency.
- Optional pigments or cement dye: For colored planters.
- Small inner form: A plastic cup or smaller container to create the cavity inside the planter.
- Sandpaper or a sanding block: To smooth edges once the planter is cured.
Once you’ve gathered these basics, you’re ready to move from “scrolling DIY inspo” to actually making something.
Step-by-Step: How to Make a Silicone Mold for Concrete Planters
Step 1: Choose and Prep Your Master
Start with the shape you want to duplicate. A small glass tumbler, a modern ceramic cup, or a simple cylinder are all
great beginner choices. Avoid objects with deep undercuts (think handles or hooks) for your first try they make
demolding trickier.
- Clean the master thoroughly so there’s no dust, oil, or sticky residue.
- If the surface is porous (like unglazed ceramic), lightly seal it with a clear acrylic spray or a thin coat of glue, then let it dry.
- If it has a logo or texture you don’t want, consider sanding it or covering it with a thin layer of clay.
Remember: however your master looks, your mold and your finished concrete planter will copy it very faithfully, flaws included.
Step 2: Build Your Mold Box
The mold box is just a container that holds your master and the liquid silicone. It needs to be:
- At least 0.5–1 inch (1.3–2.5 cm) bigger than the master on all sides.
- Leak-resistant so silicone doesn’t escape.
- Nonporous on the inside (plastic, acrylic, melamine, or foam board sealed with tape).
If you’re making your own box from corrugated plastic or foam board:
- Cut panels to size and tape or hot glue the joints from the outside.
- Seal all seams on the inside with hot glue or packing tape so the silicone can’t seep out.
- Make sure the base is flat so your mold cures level.
Step 3: Attach the Master and Create the Drainage Bump
Flip the master upside down and glue its top (which will become the inside of the planter) to the base of the mold box.
You want it firmly attached so it won’t float when you pour silicone.
To create a drainage hole in your finished concrete planter:
- Press a small piece of clay onto the center of the master’s “bottom” (now facing up) to form a tiny dome.
- Alternatively, hot glue a short piece of straw or skewer and seal around the base with clay so silicone doesn’t leak underneath.
This raised bump will later become the hole or channel where water can drain out of your planter a small detail that
makes a big difference once plants move in.
Step 4: Seal and Apply Mold Release
Before you pour any silicone, inspect the mold box from every angle. Any gaps? Seal them with more hot glue or tape.
It’s easier to over-seal now than to try to clean up a silicone leak later.
Lightly coat the master and inside of the mold box with mold release if recommended by your silicone manufacturer.
Some silicones will release easily from most surfaces, but using a proper release (or a whisper-thin coat of petroleum
jelly) can make demolding smoother and protect your master for future use.
Step 5: Measure, Mix, and Degas (as Best You Can)
Carefully read the instructions on your silicone kit. Most home DIY kits are mixed 1:1 by volume or weight. Accuracy
matters: if you’re off by too much, the silicone may stay sticky or cure too soft.
- Measure both parts into a clean mixing cup.
- Mix slowly, scraping the sides and bottom, until the color is uniform.
- If you see lots of bubbles, tap the cup on the table to help them rise. Some makers gently vibrate the mold box or cup to release trapped air.
If you don’t have a vacuum chamber (most home DIYers don’t), working slowly and tapping the container is the next best
thing to minimize air bubbles in your mold.
Step 6: Pour the Silicone Like a Pro
Here’s the part that feels very official and extremely satisfying.
- Pour the silicone in a thin stream into one corner of the mold box, not directly onto the master.
- Let the silicone slowly rise and flow around the master, pushing air out as it fills the space.
- Gently tap the sides of the mold box to help trapped bubbles escape.
Keep pouring until your master is covered by at least 0.5–1 inch of silicone above its highest point. This extra depth
gives your finished mold strength and helps it keep its shape when filled with heavy concrete.
Step 7: Let the Silicone Cure Fully
Set the mold on a level surface where it won’t be bumped. Follow the cure time on the package some silicones cure in
a couple of hours; others may take overnight.
Resist the urge to poke, prod, or peel early. If the silicone is under-cured, it can tear or stay tacky, which ruins
the mold and wastes materials. Give it the full recommended cure time, and if your space is cool, add a little extra
time for good measure.
Step 8: Demold the Silicone
Once the silicone is firm and no longer sticky:
- Remove or cut away the mold box walls.
- Gently flex the silicone and pull out the master object.
- Remove any clay or straw pieces you used to create the drainage bump.
You now have a custom silicone mold ready for casting beautiful concrete planters. Rinse it with mild soap and water
if needed, then dry completely before pouring concrete.
How to Cast Concrete in Your Silicone Mold
Step 1: Prep the Mold
Before you mix concrete:
- Set the silicone mold in a supportive container so it stays upright and doesn’t bulge when filled.
- Apply a light mist of mold release if you want extra insurance and longer mold life.
- Check that the drainage bump is clear and not blocked by debris.
If your mold is flexible and tall, you can also pack sand or rice around it inside a bucket to help it hold its shape.
Step 2: Mix the Concrete
Follow the instructions on your concrete or mortar mix, but aim for a consistency similar to thick pancake batter or
oatmeal. Too dry and it won’t flow into details; too runny and it may weaken the final planter.
- Add water gradually while stirring.
- Break up any dry clumps and scrape the sides of your bucket.
- Add pigments at this stage if you want colored planters.
Work in small batches until you get a feel for how fast your mix sets. Fast-setting mixes are great, but they don’t
wait around while you hunt for a misplaced stir stick.
Step 3: Pour and Vibrate
Carefully pour the concrete into the silicone mold, aiming for the lowest point first so it naturally fills from the bottom up.
- Fill halfway, then gently tap or shake the mold to bring up air bubbles.
- Press your inner cup or form into the center if you’re creating a hollow planter, keeping it centered and level.
- Continue filling around the inner form to the desired height.
To reduce surface bubbles, you can tap the container on the table, gently vibrate it, or lightly poke along the edges
with a stick to release hidden air pockets.
Step 4: Cure and Demold
Let the concrete cure undisturbed according to the bag instructions often at least 24 hours for small planters and
up to 48 hours for thicker pieces.
Once it’s firm and cool to the touch:
- Gently peel the silicone away from the planter, stretching rather than yanking.
- Pop out the inner form.
- Inspect the drainage hole; if it’s narrow, you can widen it with a masonry bit or a small tool.
Let the planter continue curing in the open air for several days before planting. Concrete keeps gaining strength as it
dries, and letting it fully cure helps prevent cracking later.
Step 5: Finish and Seal (Optional)
Use fine-grit sandpaper or a sanding block to smooth any sharp edges or small imperfections on the rim or sides of the planter.
If you want a specific look:
- Matte modern: Leave the raw concrete as is it already looks chic and minimal.
- Faux ceramic: Apply a concrete sealer or outdoor-safe paint for a glossy, pottery-style finish.
- Marbled or speckled: Swirl in different pigment colors or sprinkle a bit of stone or sand in the mix.
Once sealed and fully dry, your planter is ready for soil, succulents, herbs, or whatever green friend you want to show off.
Common Problems (and How to Fix Them)
Air Bubbles on the Surface
Small pinholes or bubble marks are one of the most common issues. To reduce them:
- Pour concrete slowly and tap the mold repeatedly.
- Avoid overusing mold release too much can sometimes cause tiny surface defects.
- Use a finer mix (like mortar) for small, detailed planters.
A few tiny bubbles can be sanded or embraced as “artisan texture” no one will know you didn’t mean to do it.
Concrete Sticking to the Mold
If your planter doesn’t want to let go:
- Make sure the concrete is fully cured before demolding.
- Use a proper mold release next time, especially if the concrete mix has additives.
- Wash and dry the mold between casts so residue doesn’t build up.
Silicone Mold Tearing
A thin wall or aggressive demolding can tear the silicone:
- Design your mold with at least 0.5 inch of silicone thickness all around.
- Peel gently and stretch the silicone around the concrete instead of pulling on one weak spot.
- Avoid deep undercuts or complex shapes until you’re comfortable with basic molds.
Design Ideas for Your Concrete Planters
Once you know how to make your own silicone mold, the design possibilities multiply quickly:
- Modern geometric shapes: Copy faceted vases or angular cups for sculptural planters.
- Textured glass impressions: Use a patterned glass as your master to get raised designs in the concrete.
- Tall tube planters: Use PVC or tube-shaped objects as masters for slim, vertical planters that look stunning with trailing plants.
- Mini succulent forests: Make a series of small molds and cast coordinating planters in different heights and colors.
Mix and match molds, colors, and plants, and you can style an entire shelf or windowsill that looks like it came from a
designer shop without the designer price tag.
Real-Life Lessons & Experiences with DIY Silicone Molds
The first time most people try making a silicone mold, they have the same thought halfway through: “This is either going
to be genius or a squishy disaster.” The good news? With a bit of practice and some realistic expectations, you’ll get
consistently better results, and the process itself becomes oddly relaxing.
One common experience is underestimating how much silicone you need. You mix a batch, start pouring, and realize the
mold box is only half full. The fix is simple but worth knowing ahead of time: before mixing silicone, fill your mold
box with water (with the master already inside), then pour that water into a measuring cup. That gives you a close
estimate of how much silicone volume you’ll need. Just make sure everything is completely dry before you switch to
actual silicone.
Another typical lesson comes from rushing the cure time. It’s tempting to peel back a corner “just to check,” but
silicone that’s even slightly under-cured can stretch, deform, or tear. Many DIYers learn the hard way that giving the
mold a full night or the full time recommended on the package protects both the mold and the investment in
materials. A little patience on day one means you get a mold that lasts for dozens of casts instead of just one.
You’ll also notice that each planter teaches you something about mix consistency. On one batch, you may find the
concrete too thick, creating trapped air and rough edges. On another, it might be so runny that it takes forever to
set, and edges chip easily. Over time, you’ll develop an instinct: you’ll stir the concrete and just know, “Okay, this
is the good oatmeal stage.” That feel for the mix is one of the big rewards of repeating the process.
A fun discovery many makers share is how customizable the final look can be. The same mold can produce:
- A raw, industrial planter with no pigment and minimal sanding.
- A soft, Scandinavian-style piece in a pale gray with rounded edges.
- A bold, color-blocked planter using cement pigments or paint on cured concrete.
Even small tweaks like sprinkling a bit of sand on the bottom of the mold for texture, or adding tiny stones for a
terrazzo effect can change the entire personality of the planter. Once you see how much freedom you have, you’ll
start looking at everyday objects as potential masters for your next mold: candle jars, snack bowls, thrift-store mugs,
even toy figures for tiny novelty planters.
Finally, there’s the satisfaction of reuse. Unlike a cardboard form you tear off and throw away, a silicone mold
becomes part of your creative toolkit. You can cast planters as gifts, make matching sets for your patio, or even sell
a small batch at a local market. Every time you pour another planter from the same mold, the cost per piece drops, and
your skills go up. It’s a very satisfying balance: a little upfront effort, a bit of learning, and a whole lot of
long-term payoff in beautiful, custom concrete planters.
So the next time you see a sleek concrete planter in a shop with a not-so-sleek price tag, remember: with a homemade
silicone mold, some concrete, and a free afternoon, you can create your own version at home and probably enjoy the
process as much as the finished piece.


