Table of Contents >> Show >> Hide
- Why Hairpin Legs Are a DIY Cheat Code (And When They’re Not)
- Plan the Table: Size, Height, and Stability
- Materials and Tools Checklist
- Step-by-Step: Build a Hairpin Leg Table That Doesn’t Wobble
- Step 1: Prep your tabletop (flat, smooth, and ready for compliments)
- Step 2: Mark leg placement (measure twice, stub your toe never)
- Step 3: Drill pilot holes (the tiny step that prevents big regrets)
- Step 4: Attach the legs (snug, not “I’m bench-pressing this screw”)
- Step 5: Add bracing if your table is large, thin, or used like a wrestling ring
- Finish Like You Mean It: Protect the Top (and Your Effort)
- Common Mistakes (and How to Fix Them Without Crying)
- Design Upgrades That Make It Look Store-Bought
- Budget Snapshot
- Quick FAQ
- Real-World Experiences: Lessons From Actually Building a DIY Hairpin Leg Table (About )
- Conclusion
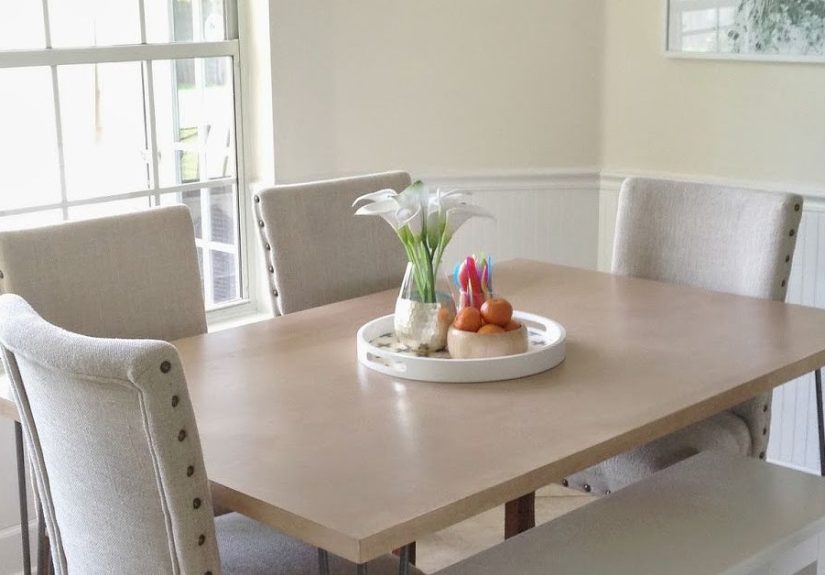
Hairpin legs are the little black dress of DIY furniture: simple, flattering, and somehow they make everything look more expensive than it was.
Pair them with a solid wood top (or a “solid-ish” topno judgment), and you’ve got a table that screams mid-century cool without requiring
a mid-century budget.
This guide walks you through planning, building, and finishing a hairpin leg table that’s sturdy, level, and not secretly plotting to wobble
the moment you set down a cup of coffee. We’ll keep it practical, a little witty, and very “you can actually do this.”
Why Hairpin Legs Are a DIY Cheat Code (And When They’re Not)
Why people love them
- Easy install: Most hairpin legs have a mounting plate with pre-drilled holesattach them with screws and you’re basically done.
- Instant style upgrade: They add that airy, modern look even if your tabletop came from the “cut wood, ask questions later” aisle.
- Flexible designs: Coffee tables, desks, console tables, nightstandshairpin legs don’t play favorites.
When hairpin legs need backup
- Long tops + thin material: A wide desk made from thin plywood can flex or “rack” (side-to-side wobble) without added support.
- High-use surfaces: Dining tables and work desks need a durable finish and solid attachment hardware.
- Soft or crumbly wood: Some reclaimed wood and particleboard won’t hold screws well without reinforcement.
Plan the Table: Size, Height, and Stability
Before you buy anything, decide what you’re building and how it will be used. The best DIY tables start with a plannot a panic purchase of
“mystery legs” at 1:00 a.m.
Pick a table type (and a target height)
- Coffee table: Often built with legs around 16–18 inches, depending on your sofa height.
- Desk or dining table: Many land around 28–30 inches total height (top included).
- Console table: Typically taller and narrowergreat for entryways.
Your final height = leg height + tabletop thickness. So if your legs are 28 inches and your top is 1.5 inches thick, your table ends up
about 29.5 inches tall.
Choose the right legs for the job
- Two-rod vs. three-rod: Three-rod legs usually feel sturdier for larger or heavier tops.
- Mounting plate size: Bigger plates spread the load and can feel more stable on wide tops.
- Leg placement: A little inset from the edges improves stability and saves your toes from surprise meetings with metal.
Pick a tabletop that matches your lifestyle
- Butcher block: Looks premium, takes finishes well, great for desks and dining tables.
- Solid wood boards: Classic and strong, but may need edge-gluing and careful sanding.
- Furniture-grade plywood: Budget-friendly and stablebest with edge banding or a hardwood trim frame.
- Pre-cut rounds or slabs: Fast and stylish. Live edge is gorgeous if you have the patience (and sandpaper).
- Repurposed tops: Old doors, suitcase lids, reclaimed planksfun, but inspect for warping and weak spots.
Materials and Tools Checklist
Materials
- Tabletop material (butcher block, plywood, boards, slab, etc.)
- Set of 4 hairpin legs (and mounting screws, if included)
- Wood screws (if not included) sized to your top thickness
- Optional: threaded inserts + machine screws (for removable, stronger attachment)
- Wood filler (optional, for knots or small gaps)
- Sandpaper (80/120/180/220 grits are common)
- Finish: polyurethane/wipe-on topcoat, or an oil/varnish blend
- Felt pads or adjustable feet (highly recommended for floors and sanity)
Tools
- Measuring tape
- Pencil
- Square or straightedge
- Drill/driver
- Drill bits (for pilot holes and optional inserts)
- Clamps (helpful if you’re gluing boards)
- Sander (orbital sander is a nice upgrade, but hand sanding works)
- Safety glasses and hearing protection
Step-by-Step: Build a Hairpin Leg Table That Doesn’t Wobble
Step 1: Prep your tabletop (flat, smooth, and ready for compliments)
- Check for flatness: Set it on a level surface and see if it rocks. Minor issues can be corrected later with adjustable feet.
- Sand smart: Start rough if needed (80–120 grit), then move up gradually (180–220) for a finish-ready surface.
- Fill gaps (optional): Use wood filler for cracks, knots, or old hardware holesthen sand smooth once dry.
- Ease the edges: Lightly round over sharp edges with sandpaper so your table is pleasant to touch and less likely to splinter.
If you’re using plywood, consider adding edge banding or a hardwood trim frame. Plywood edges can look cool in a modern way,
but “cool” is subjectiveand sometimes “cool” looks suspiciously like “unfinished.”
Step 2: Mark leg placement (measure twice, stub your toe never)
Flip the tabletop upside down. Position a leg near each corner, but inset from the edges. A common range is about
1.5 to 3 inches from the edge of the top to the edge of the mounting plate. The goal is a balance:
enough inset for stability and comfort, but not so far that the table feels tippy.
- Keep it consistent: Use a square or a measuring tape to align all four plates evenly.
- Watch the corners: If your top is round, create a consistent inset by measuring from the edge to the same point on each plate.
- Plan for aprons (if needed): If you’ll add bracing, leave space for it now.
Once you like the layout, trace the mounting holes (or mark their centers) with a pencil.
Step 3: Drill pilot holes (the tiny step that prevents big regrets)
Pilot holes help your screws go in cleanly and reduce splittingespecially in hardwoods or dry reclaimed boards.
Choose a drill bit slightly smaller than the screw’s core diameter. For depth control, wrap painter’s tape around your bit as a “stop” marker,
so you don’t drill through the top and invent a new “distressed” design.
Drill straight down at each marked hole. Keep the drill perpendicular to the surface so the screws pull the plate in evenly.
Step 4: Attach the legs (snug, not “I’m bench-pressing this screw”)
- Set the legs back in place, aligning the holes with your pilot holes.
- Drive screws until the plate is firmly seated. Stop when it’s snugover-tightening can strip the wood.
- Repeat for all legs, then do a quick “tightness check” around the table.
Optional upgrade: If you want a table you can disassemble (moving day, storage, swapping legs later),
use threaded inserts + machine screws. Inserts create durable machine threads in wood, and the legs bolt on securely.
It’s a more “furniture-grade” approach, especially for desks and dining tables that get moved or bumped often.
Step 5: Add bracing if your table is large, thin, or used like a wrestling ring
Hairpin legs look minimal, but minimal doesn’t automatically mean stiff. For long tabletops (especially desks) or thinner tops,
consider one of these stability boosters:
- Apron frame: A simple rectangular frame under the top (made from 1×2 or 1×3 lumber) increases stiffness dramatically.
- Center cleat: A single board running across the underside can reduce flex.
- Subtop panel: A thin plywood panel underneath (like a hidden “backer”) can add strength without changing the look.
Tip: If you add an apron, make sure it doesn’t interfere with your leg mounting plates. Plan spacing so everything fits like it was meant to be there.
Finish Like You Mean It: Protect the Top (and Your Effort)
A hairpin leg table can look great unfinished for about five minutesright up until someone sets a cold drink down and the wood absorbs it like a sponge.
Finishing isn’t just for looks; it’s for durability.
Pick a finish based on how the table will be used
- Oil/varnish blend: Easy to apply and forgiving, with a natural look. Protection is better than oil alone, but generally less than a film finish.
- Wiping varnish / wipe-on urethane: Great for DIYersbuilds real protection with fewer brush marks.
- Brush-on polyurethane: Very durable, but brush technique matters (or you’ll get streaks and bubbles).
A simple wipe-on finish routine
- Remove dust (vacuum + tack cloth or a slightly damp lint-free cloth).
- Apply a thin, even coat with the grain.
- Let it dry per label instructions (don’t rushfinishes punish impatience).
- Lightly sand between coats with fine grit (like 220–320) to knock down dust nibs.
- Apply 2–3 coats for a tabletop that can handle real life.
After the final coat, give the finish time to cure before heavy use. Dry-to-touch and fully cured are not the same thingone is “seems fine,”
the other is “actually fine.”
Common Mistakes (and How to Fix Them Without Crying)
Problem: The table wobbles
- Fix: Add felt pads or adjustable feet. Check that the mounting plates are fully seated and screws are snug.
- Also check: Your floor. Some floors are basically abstract art.
Problem: The tabletop flexes (especially on a desk)
- Fix: Add an apron frame or a center cleat underneath. Longer spans need structure, not just optimism.
Problem: Wood splits near screw holes
- Fix: Pilot holes. Always. If it already split, back out the screw, wick in wood glue, clamp if possible, and re-drill properly.
Problem: Screws strip out (they spin forever, like they’re trying to start a podcast)
- Fix: Use slightly longer screws if you have thickness to spare, or switch to threaded inserts for a stronger, repeatable hold.
Problem: The finish looks rough or dusty
- Fix: Sand lightly between coats, keep your workspace clean, and avoid finishing directly under a ceiling fan that’s shedding mysteries.
Design Upgrades That Make It Look Store-Bought
Edge details
- Rounded edges: Softens the look and feels great on hands and knees (if you have kids or pets).
- Beveled edges: More modern and crisppairs beautifully with hairpin legs.
Color and contrast
- Two-tone: Dark legs + warm wood top is a classic.
- Painted top: A bold color can look amazingjust use a durable topcoat.
- Stain tricks: Test stain on scraps first. Wood has opinions.
Functional add-ons
- Felt pads: Protect floors and reduce micro-wobbles.
- Cable management (for desks): Add a hidden power strip tray or cable clips underneath.
- Lower shelf (for consoles): A slim shelf between legs adds storage and stiffness.
Budget Snapshot
Costs vary by materials, but hairpin leg tables are popular because they scale well:
splurge on a premium top if you want, or keep it simple and still end up with something that looks intentional.
- Hairpin legs: Often the biggest line item (especially thicker, three-rod sets).
- Tabletop: Butcher block costs more; plywood costs less but may need trim.
- Finish + sandpaper: Small but essential costs.
- Optional hardware upgrades: Threaded inserts and machine screws add cost, but also upgrade durability.
Quick FAQ
Do I need threaded inserts?
Not always. For smaller coffee tables or side tables, screws into solid wood are often fine. Inserts shine when:
you want removable legs, your table is heavy, the top is thinner, or you expect lots of movement and re-tightening.
What screws should I use?
Use screws that fit the mounting plate holes and are short enough not to poke through the top. If screws came with the legs,
use those unless they’re obviously wrong for your thickness. When in doubt, choose a screw that grabs well but stays safely inside the tabletop.
Can I use plywood for a hairpin leg table?
Yesfurniture-grade plywood can work great. Use a thick sheet (and consider an apron or stiffener for long spans),
and finish it well. If you hate the edges, cover them with edge banding or hardwood trim.
How do I avoid the “wobbly café table” vibe?
Use good leg placement, pilot holes, snug hardware, and add adjustable feet if your floor is uneven. For large tops, add bracing.
Wobble is usually a structure problem, not a luck problem.
Real-World Experiences: Lessons From Actually Building a DIY Hairpin Leg Table (About )
The first hairpin leg table I ever built looked incredible from exactly one angle: the angle where you couldn’t see it wobble.
I had grabbed a nice-looking plywood panel, slapped on four hairpin legs, and stood back like I’d just opened a boutique furniture studio.
Then I set a mug on it, and the mug did a tiny little shimmy that said, “So… are we doing a dance routine now?”
Here’s what I learned: hairpin legs are easy, but “easy” isn’t the same as “mindless.” My biggest mistake was assuming the tabletop
didn’t need any structure. Plywood is stable, sure, but a wide top can still flexespecially if it’s thinner than you think it is
(and many store panels are). The fix was simple: I added a basic apron frame underneath using slim boards. Suddenly the table stopped
acting like it had stage fright.
The second lesson was about pilot holes. I used to treat pilot holes like optional side quests. But once you drive screws into hardwood
(or cranky reclaimed wood), you learn fast: pilot holes are not optional, they’re the bouncer at the club keeping chaos out.
After one tiny split near a screw hole, I switched to careful pilot drilling with painter’s tape on the bit for depth control.
That one small habit made the whole build feel cleaner and more professional.
Then there was the “toe factor.” If you mount hairpin legs too close to the edges, the table looks sleekuntil you walk past it half-asleep.
I started insetting the plates a bit more, and it helped in two ways: fewer toe collisions and better stability.
The table felt less like it was balancing and more like it was planted.
Finishing was my final glow-up. My early tables had that “raw wood vibe” that lasted until the first water ring appeared.
Once I switched to a wipe-on topcoat routinethin coats, light sanding between, patience during dry timesthe tables held up
like real furniture. The surface felt smoother, looked richer, and didn’t flinch when someone set down a drink.
The best part? Each build got faster and calmer. Hairpin legs turn furniture into a friendly project: you can keep the design simple,
invest effort where it matters (solid attachment + durable finish), and end up with a table that looks custom because it is custom.
Also, it’s deeply satisfying to say, “Oh this? I made it,” and then casually pretend you didn’t celebrate by staring at it for 20 minutes.
Conclusion
A DIY hairpin leg table is one of the quickest ways to build something that looks modern, intentional, and genuinely useful.
Plan your size, choose a top that matches how you’ll use it, attach the legs with care (pilot holes are your best friend),
and finish the surface so it can handle everyday life. Add bracing when you need it, and don’t be afraid of small upgrades
like threaded inserts or adjustable feetthose details are what separate “cute weekend project” from “this is staying in my house forever.”