Table of Contents >> Show >> Hide
- Before You Start: Know What You’re Replacing
- Tools You’ll Need
- How to Change a Rear Cassette in 15 Steps
- Step 1: Shift Into the Smallest Rear Cog
- Step 2: Remove the Rear Wheel
- Step 3: Remove the Skewer or Axle Hardware
- Step 4: Fit the Cassette Lockring Tool
- Step 5: Secure the Cassette With a Chain Whip
- Step 6: Loosen the Lockring
- Step 7: Remove the Lockring and Slide Off the Old Cassette
- Step 8: Inspect the Old Cassette for Wear
- Step 9: Clean the Freehub Body
- Step 10: Check Compatibility Before Installing the New Cassette
- Step 11: Align the Splines
- Step 12: Install Every Cog and Spacer in the Correct Order
- Step 13: Thread the Lockring by Hand
- Step 14: Tighten the Lockring to Spec
- Step 15: Reinstall the Wheel and Test the Shifting
- Common Mistakes to Avoid
- When Should You Replace a Rear Cassette?
- Final Thoughts
- Real-World Experience: What Changing a Rear Cassette Actually Teaches You
- SEO Tags
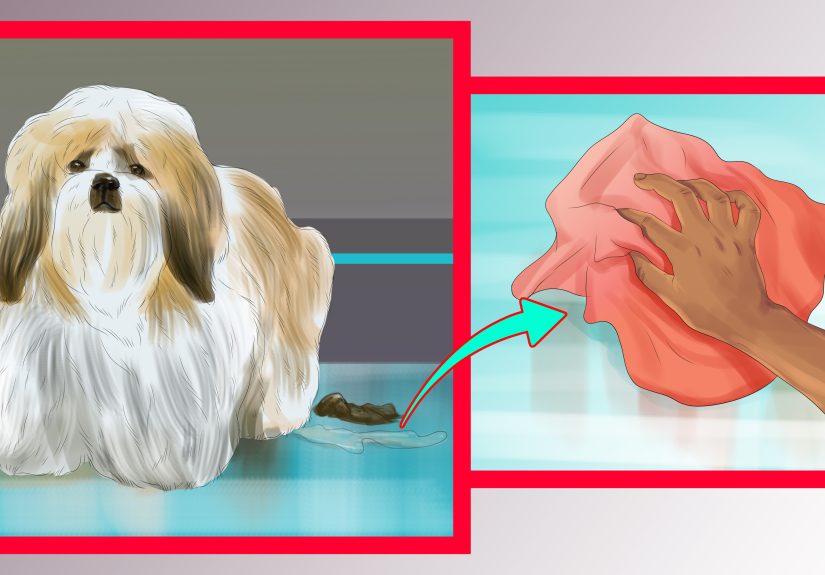
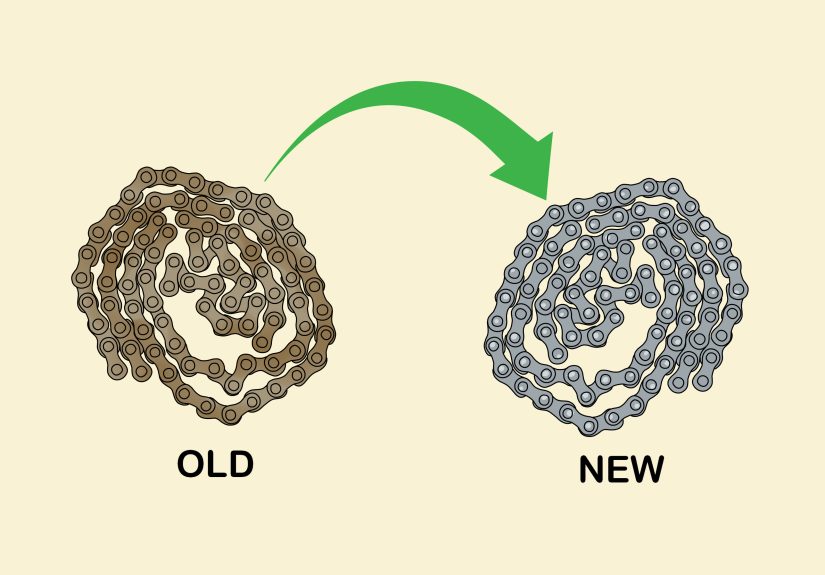
If your bike has started sounding crunchy, skipping under load, or shifting like it woke up on the wrong side of the garage, your rear cassette may be asking for retirement. The good news is that changing a rear cassette is one of those bike-maintenance jobs that looks intimidating right up until you do it once. After that, it feels less like black magic and more like unscrewing one stubborn ring while trying not to decorate your hands with chain grease.
This guide walks you through exactly how to change a rear cassette in 15 clear steps. Along the way, you’ll learn how to spot cassette wear, avoid compatibility mistakes, and put everything back together without leaving an “extra” spacer on the floor and wondering whether it was spiritually important. Whether you ride road, gravel, hybrid, or mountain bikes, the basic process is similar: remove the wheel, remove the lockring, slide off the old cassette, install the new one correctly, and make sure the drivetrain shifts smoothly afterward.
Before You Start: Know What You’re Replacing
A rear cassette is the stack of cogs attached to the freehub body on the back wheel. It works with your chain and derailleur to give you your gear range. It is not the same thing as a freewheel, even though plenty of people use the words interchangeably. If you have an older or very budget-friendly bike, especially a 5-, 6-, or 7-speed setup, you might have a freewheel instead of a cassette. That matters because the removal process is different.
You also need to match your new cassette to your drivetrain. Speed matters. A 10-speed cassette belongs with a 10-speed drivetrain, 11-speed with 11-speed, and so on. Driver body standards matter too. Depending on your wheel and groupset, your cassette may fit Shimano HG, SRAM XD/XDR, or Shimano Micro Spline. Buying the wrong cassette is a quick way to turn a simple maintenance job into an expensive lesson in online returns.
Tools You’ll Need
- Cassette lockring tool
- Chain whip or cassette pliers
- Large adjustable wrench or ratchet, depending on the tool
- Clean rag
- Degreaser
- Light grease
- Gloves, unless you enjoy looking like you arm-wrestled a chimney
- Torque wrench, if you want to finish like a pro
How to Change a Rear Cassette in 15 Steps
Step 1: Shift Into the Smallest Rear Cog
Before removing the rear wheel, shift your bike into the smallest cog on the cassette. This reduces chain tension and makes wheel removal easier. It also puts the derailleur in a friendlier position so you are not fighting spring tension and gravity at the same time.
Step 2: Remove the Rear Wheel
Open the quick-release skewer or remove the thru-axle, then guide the rear wheel out of the frame. If you have rim brakes, you may need to release the brake first. Take a second to notice how the wheel comes out so reinstalling it later does not feel like solving a puzzle under pressure.
Step 3: Remove the Skewer or Axle Hardware
If your wheel uses a quick-release skewer, remove it from the axle so the cassette tool can seat properly. If you have a thru-axle system, make sure nothing blocks the lockring tool from fitting fully into the lockring.
Step 4: Fit the Cassette Lockring Tool
Insert the lockring tool into the cassette lockring. It should sit flush and engage cleanly. Do not force it at an angle. If it feels wrong, double-check that you have the correct tool for your cassette standard. A tool that only kind of fits is the mechanical equivalent of “close enough” and usually ends in regret.
Step 5: Secure the Cassette With a Chain Whip
Wrap the chain whip around one of the larger cogs so it holds the cassette from rotating. Position it so you can counter the force you’ll use on the wrench. Without a chain whip, the cassette simply spins while you accomplish nothing except an upper-body warmup.
Step 6: Loosen the Lockring
Use your wrench on the lockring tool and turn counterclockwise while holding the chain whip steady. The lockring may be tight, especially if it has been in place for a long time. Apply controlled pressure. When it breaks loose, it usually does so with a satisfying snap that says, “Fine, you win.”
Step 7: Remove the Lockring and Slide Off the Old Cassette
Once the lockring is loose, unthread it completely and set it aside somewhere safe. Then slide the cassette cogs and spacers off the freehub body. Some cassettes come off as a tidy cluster; others separate into individual cogs and spacers like they are auditioning for a chaos-themed magic trick. Keep the pieces in order if you plan to compare them to the new cassette.
Step 8: Inspect the Old Cassette for Wear
Look for teeth that appear hooked, pointed, or shark-fin shaped. Also think about how the bike rode. If the drivetrain skipped under load, especially with a newer chain, the cassette may be worn out. Cassettes and chains wear together, so this is a smart time to evaluate the whole drivetrain instead of pretending the problem lives in just one part.
Step 9: Clean the Freehub Body
Wipe the freehub body with a rag and degreaser to remove grime, old grease, and metal dust. A clean freehub makes installation easier and helps you notice damage, burrs, or deep gouges. If the freehub splines are heavily chewed up, especially on aluminum bodies, address that before installing a shiny new cassette onto a tired foundation.
Step 10: Check Compatibility Before Installing the New Cassette
Now is the moment to confirm speed, gear range, and freehub standard. Make sure the cassette matches your drivetrain and actually fits your hub. Some setups also require spacers, while others have them built in. If your cassette came with instructions, this is the perfect time to read them instead of discovering the crucial part after everything is already tightened.
Step 11: Align the Splines
Most cassette systems have one wider spline or keyed section that lines up with a matching wide groove on the freehub body. That design keeps you from installing the cogs in the wrong orientation. Slide the cogs on carefully, paying attention to any markings and making sure the printed side typically faces outward. The cassette should slide on smoothly; if it does not, stop and realign it.
Step 12: Install Every Cog and Spacer in the Correct Order
This step deserves patience. If your cassette uses separate cogs and spacers, install them in the right sequence and orientation. Missing just one spacer can wreck shifting quality and create mysterious noises that make you question your life choices. Lay the old cassette next to the new one if you need a visual reference.
Step 13: Thread the Lockring by Hand
Once all cogs are seated correctly, thread the lockring in by hand first. This helps prevent cross-threading. If it does not spin in smoothly, back it out and try again. Never bully fine threads. Threads have long memories and expensive consequences.
Step 14: Tighten the Lockring to Spec
Use the lockring tool and wrench, or preferably a torque wrench, to tighten the lockring to the manufacturer’s specification. Many lockrings list the torque on the part itself. Tightening it properly matters because too loose can cause movement and poor shifting, while too tight can turn the next service job into a dramatic event.
Step 15: Reinstall the Wheel and Test the Shifting
Put the wheel back in the frame, secure the axle, and shift through all the gears. Listen for hesitation, ticking, or skipping. If the new cassette is a different size than the old one, you may need a small rear derailleur adjustment. A quick indexing tune can make the difference between “new parts installed” and “bike feels amazing.”
Common Mistakes to Avoid
Confusing a cassette with a freewheel
This is the classic trap. If your bike has a freewheel, this process is not the one you need. Always identify the system first.
Buying the wrong cassette standard
Speed compatibility is only half the story. Freehub compatibility matters too. Shimano HG, SRAM XD/XDR, and Micro Spline are not interchangeable just because they all live near your rear wheel and look expensive.
Forgetting spacers
A missing spacer can make a drivetrain sound like a coffee grinder full of bolts. Keep the old cassette layout nearby and follow the new cassette’s instructions carefully.
Ignoring chain wear
If your chain is badly worn, replacing only the cassette may not fix skipping. In many cases, a worn chain is what accelerated the cassette’s wear in the first place. Healthy drivetrains are team projects.
When Should You Replace a Rear Cassette?
There is no magical mileage number that applies to every rider because conditions matter. Rain, grit, climbing, power output, cleaning habits, and chain maintenance all affect cassette life. In general, replace the cassette when the teeth are visibly worn, the drivetrain skips with a fresh chain, or shifting stays rough even after proper adjustment.
The smartest habit is replacing chains before they become severely worn. That usually helps the cassette last longer, saves money, and prevents the kind of drivetrain drama that shows up halfway through a ride when the climb gets steep and your legs are already filing complaints.
Final Thoughts
Changing a rear cassette is one of those satisfying bike repairs that pays off immediately. The tools are specialized but not exotic, the process is logical, and the result can make your bike feel sharper, quieter, and far more eager to get moving. Once you understand how the lockring, spacers, and splines work together, the whole job becomes much less intimidating.
Take your time, match the parts carefully, and do not rush the install. A rear cassette replacement done properly can restore crisp shifting and make every ride feel a little more civilized. And honestly, there is something deeply rewarding about solving drivetrain problems with your own hands instead of just glaring at the bike and hoping it sorts itself out overnight.
Real-World Experience: What Changing a Rear Cassette Actually Teaches You
The first time most riders change a rear cassette, they expect the hard part to be the tools. In reality, the hard part is confidence. The chain whip looks mildly medieval, the lockring feels tighter than expected, and everything on the rear wheel seems engineered by someone who had a strong opinion about leverage. But after one good cassette swap, something clicks. You realize the job is not especially complicated; it just rewards careful observation.
One of the biggest lessons riders learn is that the cassette is rarely the whole story. A bike that shifts poorly may have a worn chain, dirty drivetrain, bent derailleur hanger, weak cable tension, or an incompatible replacement part. That is why experienced home mechanics do not just rip off the old cassette and slap on a new one. They inspect the chain, look at the chainrings, clean the freehub, and pay attention to how the old parts wore out. The cassette becomes a clue, not just a part.
Another real-world truth is that cleanliness matters more than people think. A filthy drivetrain can hide wear and make installation annoying. Greasy grit gets everywhere, spacers become slippery little escape artists, and it becomes much easier to install a cog backward or drop something important. Mechanics who have done this a few times tend to clean first and wrench second. It is not glamorous, but it saves time and sanity.
There is also a quiet art to noticing patterns. Riders who replace cassettes regularly start seeing which cogs wear fastest, which gears they live in, and whether their riding style is chewing through parts unnecessarily. A commuter might wear the middle cogs first. A climber may punish the biggest cogs. A powerful rider who delays chain replacement may discover that the cassette and chainrings decided to age dramatically together. Suddenly, rear cassette replacement becomes part repair and part detective work.
Then there is the emotional side, which sounds silly until you experience it. Few things in bike maintenance are as satisfying as the first test ride after a successful cassette change. You shift across the range, the chain moves cleanly, and the bike feels quiet in a way that almost seems smug. It is a small victory, but it feels big because you fixed something tangible. The bike responds better, and you understand it better.
Perhaps the best experience-related lesson is this: bike maintenance gets less mysterious every time you touch it. A rear cassette looks technical, but it is really just a well-organized stack of cogs with a fastening system. Once you stop seeing the drivetrain as a scary machine and start seeing it as a collection of serviceable parts, a lot changes. You become more willing to clean the bike, check the chain, monitor wear, and solve small problems before they become wallet-sized problems.
In that sense, learning how to change a rear cassette is bigger than one repair. It teaches patience, part compatibility, tool handling, and the value of paying attention. It teaches you that smooth shifting is not luck. It is the result of good parts, correct installation, and a little mechanical curiosity. And yes, it also teaches you to respect the chain whip, because that tool absolutely has a personality.