Table of Contents >> Show >> Hide
- Before You Start: A 60-Second Safety Checklist
- What Makes a Temporary Tattoo Look “Real”?
- Method 1: Cosmetic Body Markers (Fastest + Most Beginner-Friendly)
- Method 2: Waterproof Eyeliner Tattoo (The Makeup-Artist Cheat Code)
- Method 3: “Draw It, Print It, Apply It” Tattoo Paper (Crisp + Professional-Looking)
- Method 4: Stencil + Body Paint (Clean Lines Without Freehand Panic)
- Method 5: Jagua Gel or Natural Henna (Longest-Lasting “Stain” Tattoos)
- Design Ideas That Always Work
- Troubleshooting: When Your Temporary Tattoo Misbehaves
- How to Remove a Temporary Tattoo (Without Scrubbing Like You’re Sanding a Deck)
- of Real-World Experience (A.K.A. What People Don’t Tell You Until You’re Already Wearing It)
- Conclusion
Want the vibe of a tattoo without the lifetime commitment? Same. Temporary tattoos are basically the “date night” of body art:
fun, low-stakes, and totally okay to regret the next morning.
This guide walks you through five reliable, DIY-friendly ways to draw your own temporary tattoofrom quick
makeup hacks to longer-lasting botanical stainsplus design tips, troubleshooting, and removal tricks so you can experiment
like a responsible ink goblin.
Before You Start: A 60-Second Safety Checklist
Temporary doesn’t mean risk-free. A little prep keeps your skin happy and your design crisp.
- Patch test first (especially if you have sensitive skin or allergies). Test on the inner arm and wait 24 hours when possible.
- Skip broken or irritated skinno fresh cuts, rashes, or sunburn.
- Avoid “black henna” products. Some contain PPD (a hair-dye chemical) that can cause serious reactions and scarring.
- Use skin-intended products when you can: cosmetic-grade body markers, face paint, or tattoo paper made for skin.
- Keep it away from eyes and mouth, and be extra careful with kids’ skin.
What Makes a Temporary Tattoo Look “Real”?
Realistic temporary tattoos usually nail three things: clean lines, strategic shading, and
the right placement. Linework looks sharpest on flatter areas (forearm, outer bicep, shoulder blade). If you
draw over high-motion zones (fingers, inner wrist, elbow crease), expect faster fading and more smudgingbecause your skin is
doing skin things (moving, sweating, existing).
Method 1: Cosmetic Body Markers (Fastest + Most Beginner-Friendly)
If you want the simplest path from “idea” to “I totally meant to do this,” grab cosmetic-grade body markers
or temporary tattoo pens. They’re designed to sit on skin, dry down, and fade without drama.
Best for
- Clean line art, doodles, and minimalist designs
- Trying placements before a real tattoo
- Last-minute events (concerts, parties, festivals)
What you’ll need
- Cosmetic body markers or face-safe liners
- Rubbing alcohol or micellar water (for cleanup)
- Optional: stencil, cotton swabs, translucent powder, setting spray
Step-by-step
- Clean the skin with soap and water. Let it dry completely.
- Degrease the area with a small swipe of rubbing alcohol (especially if you’re oily or sweaty).
- Sketch lightly with the marker. Start with simple shapes, then add detail.
- Let it dry for at least 60 seconds before touching clothing or hair.
- Optional: set it by dusting a tiny bit of translucent powder, then misting setting spray from a distance.
Pro tips for realism
- Vary line weightthicker outer lines, thinner interior details.
- Add micro-shading with stippling (tiny dots) instead of rubbing, which can smear.
- Use “skin breaks” (small gaps) in heavy black areas so it doesn’t look like a sticker blob.
Method 2: Waterproof Eyeliner Tattoo (The Makeup-Artist Cheat Code)
Waterproof eyeliner is basically a tiny ink pen that was trained for chaos. It’s made to resist tears, sweat, and the emotional
pain of trying to get a wing symmetricalso it also works beautifully for small, detailed temporary tattoos.
Best for
- Fine-line designs, tiny symbols, faux micro-tattoos
- Short-term wear (a night out, a photoshoot, a “just to see” trial run)
What you’ll need
- Waterproof liquid liner or gel liner + brush
- Optional: matte black or brown eyeshadow for shading
- Optional: translucent powder + setting spray
Step-by-step
- Prep the skin (clean + fully dry). If you’re oily, swipe lightly with alcohol and let it evaporate.
- Draw the outline with eyeliner. Keep the skin gently taut for smoother lines.
- Refine with a cotton swab dipped in micellar water to sharpen edges.
- Add depth by tapping a tiny bit of eyeshadow along one side for a soft shadow effect.
- Set it with a whisper of translucent powder, then a light mist of setting spray.
Pro tips
- Choose matte finishesshiny “tattoos” look like you drew on yourself (because you did).
- Keep it small. Eyeliner can crack if you try to fill a huge solid area.
- Make it look aged by lightly diffusing a tiny edge with a clean brush (super subtle).
Method 3: “Draw It, Print It, Apply It” Tattoo Paper (Crisp + Professional-Looking)
This is the method for people who want their temporary tattoos to look like they came out of a vending machineclean, sharp,
and suspiciously legit. You can draw your design by hand (paper + pen), scan it, print it onto tattoo paper,
then apply with water.
Best for
- High-detail designs, color artwork, logos, illustrations
- Matching sets (team events, parties, bridal crews, kid birthdays)
What you’ll need
- Printable temporary tattoo paper (for inkjet or lasermatch your printer)
- Scissors (or a cutting machine if you’re fancy)
- A damp cloth or sponge
- Optional: a blow dryer on cool/low to dry printed ink faster
Step-by-step
- Create your artwork. Draw on paper, then scan/photograph it. Clean it up digitally if you want.
- Mirror the design before printing (most tattoo paper needs this so it faces correctly on skin).
- Print on the correct side of the tattoo sheet. Let the ink dry fully.
- Apply the clear adhesive layer (if your kit includes one) and smooth out bubbles.
- Cut out your design close to the edge.
- Apply to skin face-down. Press a thoroughly damp cloth over the back for about 20–35 seconds.
- Peel the backing gently and let the tattoo set for a minute before rubbing it.
Pro tips for better transfers
- Flat skin wins. Avoid elbows, knees, and knuckles for crisp results.
- Don’t flood it. The cloth should be very damp, not dripping like a sad sponge.
- Seal edges by pressing down the perimeter before you start wetting.
Method 4: Stencil + Body Paint (Clean Lines Without Freehand Panic)
Love the look of tattoo flash but your hands turn into cooked spaghetti the second you try to draw a straight line?
Stencils are your friend. With cosmetic body paint (or face paint), you can stamp or sponge in the design,
then detail it.
Best for
- Geometric patterns, bold shapes, repeatable designs
- Group events where you need consistency
What you’ll need
- Cosmetic-grade face/body paint (water-based is easiest)
- Stencil (store-bought or DIY cut from stencil plastic)
- Makeup sponge or stippling brush
- Optional: setting powder and setting spray
Step-by-step
- Prep skin (clean + dry). Lightly swipe alcohol if needed.
- Position stencil and press it flat. If it lifts, your edges will blur.
- Stipple paint with a spongetap, don’t swipe.
- Lift stencil carefully straight up.
- Detail with a thin brush or body marker once dry.
- Set with translucent powder and a light mist of setting spray.
Pro tips
- Less paint is more. Heavy paint cracks and transfers onto clothes.
- Build in thin layers for a smoother finish.
- Try negative space designs. They look surprisingly “real tattoo” with minimal effort.
Method 5: Jagua Gel or Natural Henna (Longest-Lasting “Stain” Tattoos)
If you want your temporary tattoo to last beyond the weekend, you’re looking for a skin stain, not surface
ink. Two popular options:
- Natural henna (typically stains reddish-brown)
- Jagua gel (often develops into a deep blue-black stain)
These don’t just sit on top of the skinthey stain the upper layers, so they can last around 1–2 weeks
depending on placement and aftercare.
Best for
- Festival looks, vacations, extended “try it out” tattoo placement tests
- Designs you want to develop/darken over time
What you’ll need
- Natural henna paste (body-safe) or jagua gel from a reputable seller
- Applicator cone/bottle with a fine tip
- Tissue/cotton swabs for quick cleanups
Step-by-step
- Patch test. Especially important for anyone with a history of allergies.
- Clean + dry the skin. Skip lotions beforehand.
- Draw slowly. If you mess up, wipe immediately before it stains.
- Let it dry fully and keep it dry while it sets. Many artists recommend leaving it on for at least a couple of hours for a deeper stain.
- Gently remove dried paste/gel (rinse carefully), then let color develop over the next day or so.
Critical safety note
Avoid “black henna.” Some products marketed as black henna may contain PPD, which can cause severe allergic reactions, blistering,
scarring, and long-term sensitization. If it smells like hair dye, dries unusually fast, or looks inky-black immediatelywalk away.
Design Ideas That Always Work
If you’re not sure what to draw, borrow from classic tattoo motifsthen personalize them.
- Micro-symbols: tiny stars, moons, lightning bolts, initials
- Botanicals: olive branches, daisies, ferns, little mushrooms
- Geometry: triangles, fine-line bands, dotwork constellations
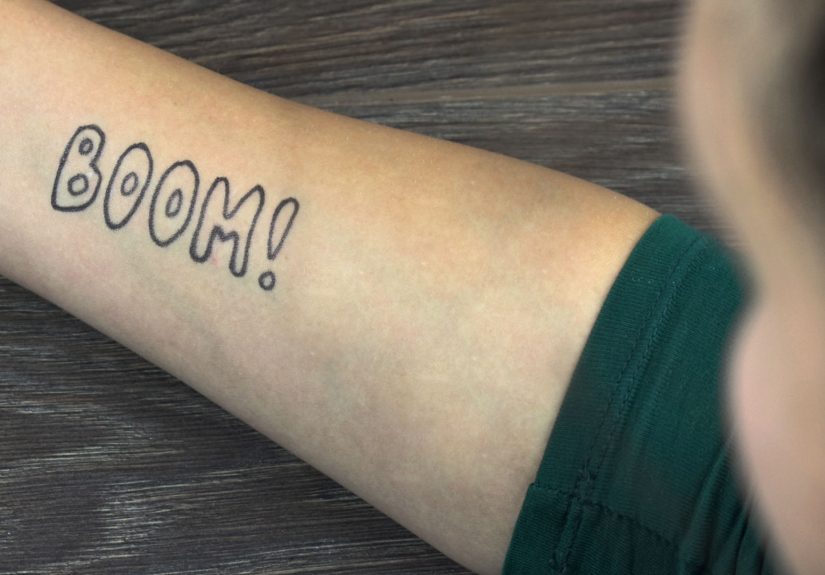
- Word tattoos: one short word in a clean font (keep it simple for realism)
- “Sticker” fun: tiny cartoons, retro icons, playful fruit
Troubleshooting: When Your Temporary Tattoo Misbehaves
Problem: It smudges immediately
- Skin wasn’t fully dry. Clean, dry, then try again.
- You used too much product. Build in thinner layers and allow more dry time.
- Placement is too high-friction (inner wrist, fingers). Move it to a flatter zone.
Problem: It looks patchy
- For tattoo paper: the cloth wasn’t damp enough or you peeled too early.
- For paint: you swiped instead of stippled. Tap with a sponge instead.
- For henna/jagua: you removed it too soon or got it wet during setting.
Problem: My skin gets itchy or bumpy
- Wash it off gently with mild soap and cool water.
- Stop using the product and avoid reapplying until your skin settles.
- If swelling, blistering, or significant pain occurs, seek medical advice promptly.
How to Remove a Temporary Tattoo (Without Scrubbing Like You’re Sanding a Deck)
Removal depends on what you used:
- Body marker / eyeliner: micellar water, makeup remover, or gentle soap + warm water.
- Tattoo paper transfers: baby oil, coconut oil, or an oil-based remover. Let it soak for 30–60 seconds, then wipe.
- Body paint: warm water + gentle cleanser; oil helps if it’s stubborn.
- Henna/jagua stains: you can’t instantly erase a stain, but gentle exfoliation and time will fade it faster.
of Real-World Experience (A.K.A. What People Don’t Tell You Until You’re Already Wearing It)
The first time most people draw a temporary tattoo, they expect it to behave like ink on paper: you draw it, it stays, end of story.
Skin is not paper. Skin is a living, moving, sweating, occasionally dramatic surface that has its own opinionsespecially in humid weather,
during workouts, or when you decide to wear a tight sleeve over your fresh masterpiece.
A super common experience: you draw something adorable on your inner wrist, admire it for ten seconds, and then immediately ruin it by checking
your phone like a raccoon checking a shiny object. Inner wrists bend constantly, rub against desks, and come into contact with water more than you
realize. People who fall in love with the look usually end up relocating the design to a calmer neighborhoodouter forearm, shoulder, or ankle.
Another classic moment happens with the “I’ll just do a tiny design” plan that turns into “why do I suddenly have an entire garden on my arm?”
Temporary tattoos make it easy to escalate. The psychological safety of “it’ll wash off” is powerful. Many people discover their actual style
preference this way: some realize they love minimalist fine lines; others learn they want bolder shapes that read clearly from a distance.
It’s basically a low-cost style test, like trying on a haircut in a filterexcept more fun and less emotionally risky.
If you try printable tattoo paper, the “wow” moment is real. The first crisp transfer feels like magic, and people often get ambitious fast:
matching sets for a bachelorette weekend, themed tattoos for a kids’ party, or custom designs for a sporting event. The learning curve is usually
about patienceletting ink dry, smoothing the adhesive layer, and not peeling too early. Once you nail the timing, the results can look shockingly
professional in photos.
For henna or jagua, the experience is more like baking than drawing: the application is only half the story. People often forget the “setting time”
part, accidentally smudge a line, and then learn the hard way that stains develop over hours. The payoff is worth it, thoughwatching the color
deepen can be oddly satisfying, like your tattoo is slowly deciding to show up to work. And because it lasts longer, many people become more
thoughtful about placement, symmetry, and aftercare.
The biggest real-world takeaway? Temporary tattoos are a skill, not just a craft. The more you do them, the better you get at line control,
choosing placements that last, and designing artwork that looks “tattoo-like” instead of “marker-on-skin at summer camp.” Start simple, learn how
your skin behaves, and you’ll be shocked how quickly your DIY work starts looking intentionalin the best way.
Conclusion
Drawing your own temporary tattoo is the perfect way to experiment with placement, style, and size without making a forever decision. Whether you
want a quick eyeliner micro-tat, a crisp printed transfer, or a longer-lasting jagua stain, the best method is the one that fits your timeline,
your tools, and your skin’s sensitivity. Keep it clean, patch test when you can, and remember: the best part of temporary ink is that it lets you
change your mindand still look cool doing it.