Table of Contents >> Show >> Hide
- Why Raspberry Bushes Are So Persistent
- What You Will Need
- Simple Ways to Remove Raspberry Bushes: 11 Steps
- Step 1: Choose the Right Time
- Step 2: Dress Like the Bush Is Already Mad at You
- Step 3: Cut All Canes Down to Ground Level
- Step 4: Mark the Main Crowns and Thick Root Areas
- Step 5: Dig Wide, Not Just Deep
- Step 6: Follow the Suckers and Side Roots
- Step 7: Rake the Area and Remove Debris Thoroughly
- Step 8: Smother What You Cannot Dig
- Step 9: Do Not Let Regrowth Get Comfortable
- Step 10: Dispose of Removed Material the Smart Way
- Step 11: Restore the Area So the Bushes Do Not Return
- Common Mistakes to Avoid
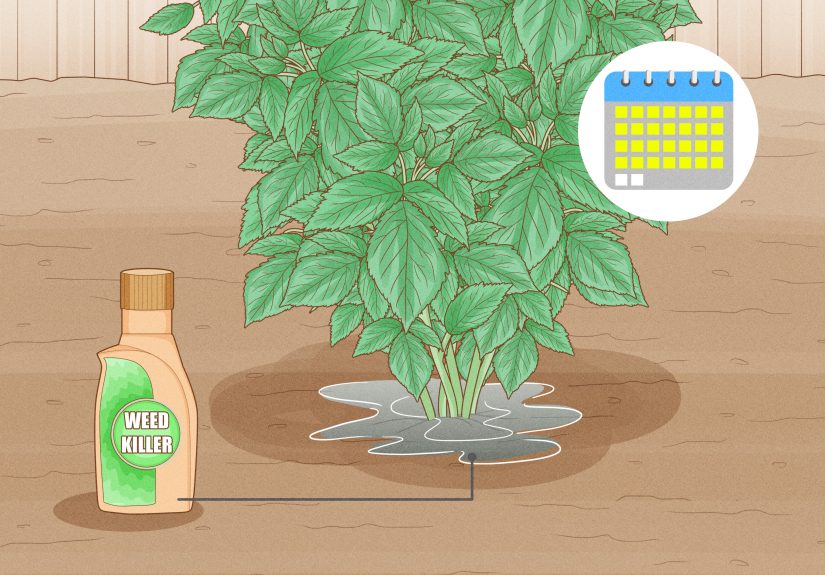
- What If the Raspberry Bushes Keep Coming Back?
- Experiences Homeowners Often Have When Removing Raspberry Bushes
- Final Thoughts
Raspberry bushes sound charming until they stop acting charming. One day you have a tidy berry patch. The next, you have a thorny little empire marching across your yard like it pays property taxes. If you are trying to reclaim a garden bed, open up a fence line, or prepare a clean space for something new, removing raspberry bushes takes more than one heroic yank and a hopeful shrug.
The good news is that you do not need a dramatic backyard excavation scene worthy of a disaster movie. You just need a smart plan. Raspberry plants spread through crowns, roots, and suckers, which is why they often come back when gardeners remove only the visible canes. The trick is to combine cutting, digging, cleanup, and follow-up. In other words, you are not just removing a plant. You are politely but firmly ending a very pushy relationship.
This guide walks you through 11 simple steps to remove raspberry bushes with practical advice, realistic expectations, and a few sanity-saving tips along the way. Whether you are dealing with a small clump or a full-on bramble patch, these steps can help you clear the area without making the problem worse.
Why Raspberry Bushes Are So Persistent
Before you grab the shovel, it helps to know why raspberry removal can feel like gardening whack-a-mole. Many raspberry types, especially red and yellow raspberries, spread by sending up new canes from underground roots. That means the leafy growth you see above ground is only part of the story. If the root system and crown stay in place, new shoots can return with suspicious confidence.
That is why the best way to remove raspberry bushes is rarely just cutting them down. Cutting is step one. Finishing the job means going after the roots, watching for suckers, and smothering or digging out whatever tries to stage a comeback.
What You Will Need
- Thick gloves
- Long sleeves and sturdy pants
- Hand pruners or loppers
- A spade or digging shovel
- A garden fork
- A rake
- Heavy-duty yard bags or a tarp
- Mulch, cardboard, or an opaque tarp for smothering
- Optional: clear plastic if you plan to solarize the area in hot weather
Simple Ways to Remove Raspberry Bushes: 11 Steps
Step 1: Choose the Right Time
You can remove raspberry bushes any time the soil is workable, but cool weather usually makes the job easier. Late fall, winter in mild climates, or early spring are often ideal because the canes are less leafy, the weather is kinder, and you can see the structure of the patch more clearly. If the ground is muddy enough to swallow your shoes like a swampy villain, wait for a drier day.
Step 2: Dress Like the Bush Is Already Mad at You
Raspberry canes may look innocent from a distance, but up close they can scratch, snag, and generally make you regret your life choices. Wear thick gloves, long sleeves, and sturdy pants. Closed-toe shoes are a must. This is not the day for sandals and optimism.
Step 3: Cut All Canes Down to Ground Level
Start by cutting the canes down as close to the soil as possible. This clears the top growth and gives you room to see where the crowns are located. If the patch is dense, work in sections instead of trying to tackle the whole thing at once. Bundle the canes on a tarp as you go so the area does not turn into a thorny obstacle course.
If any canes look diseased, brittle, discolored, or badly spotted, keep them separate from general garden waste. They should be removed from the site rather than casually tossed into a compost pile where plant disease can linger.
Step 4: Mark the Main Crowns and Thick Root Areas
Once the canes are gone, you will usually see the crowns at the base where multiple canes emerged. These are the plant’s headquarters, and they matter. Removing the crowns is one of the most important parts of the job. Use the tip of your shovel to mark the center of each clump and identify the thickest root zones.
In a neglected patch, you may not have one neat crown per plant. You may have an underground network that behaves like one giant berry conspiracy. That is normal.
Step 5: Dig Wide, Not Just Deep
Here is where many people accidentally create next month’s problem. If you stab straight down at the middle and yank, you often leave root sections behind. Instead, dig a wide circle around each crown, usually 8 to 12 inches or more from the center depending on the size of the clump. Loosen the soil first, then lift the crown and attached roots as a unit when possible.
A garden fork can help tease roots out of the soil with less chopping. The goal is not perfect elegance. The goal is to remove as much of the root system as possible without shredding it into tiny bits that may resprout later.
Step 6: Follow the Suckers and Side Roots
Raspberry bushes love side quests. Follow visible roots and suckers beyond the main clump and dig those out too. If you notice small shoots popping up a foot or two away from the original planting, that is not random. That is the plant extending its lease.
Trace those shoots back if you can. In small beds, it helps to sift through loosened soil by hand or with a rake to remove obvious root pieces. In larger areas, focus on crowns and major roots first, then commit to follow-up removal of any regrowth.
Step 7: Rake the Area and Remove Debris Thoroughly
After digging, rake the bed carefully. Pull out loose canes, thorny stems, and exposed root fragments. This makes future monitoring easier and reduces the chance that hidden debris will trip you, puncture bags, or poke through gloves later. Tiny leftover roots can still matter, so cleanup is not just cosmetic. It is part of the removal process.
If the area was weedy before you started, now is also the time to clear competing growth so you can spot fresh raspberry suckers quickly in the coming weeks.
Step 8: Smother What You Cannot Dig
If the patch is large, runs under a fence, or extends into compacted soil where digging every root is unrealistic, use a smothering method after mechanical removal. Cover the area with overlapping cardboard, then top it with several inches of mulch, or use a heavy opaque tarp to block light. This method, often called occultation, helps weaken regrowth by starving it of sunlight.
If you are working during the hottest part of summer and the site gets strong sun, solarization can also help. For that technique, clear plastic is used to trap heat in the soil. Opaque black coverings are better for light-blocking, while clear plastic is better if your goal is solar heat. Different jobs, different costumes.
Step 9: Do Not Let Regrowth Get Comfortable
This is the step that separates “I removed the raspberry bushes” from “Why are they back and acting smug?” Watch the site for several weeks and then for several months. New shoots may appear from overlooked root pieces. When they do, cut them off immediately at ground level or dig them out while they are still small.
Repeated cutting can eventually exhaust the remaining roots because the plant keeps spending stored energy to push up new growth. The longer you let those shoots leaf out, the more they recharge the system. Think of it as denying the plant its comeback tour.
Step 10: Dispose of Removed Material the Smart Way
Healthy canes can go to municipal yard waste if your local system accepts them. Diseased or pest-damaged material should be bagged and removed according to local guidance. Avoid moving rooted pieces to another corner of the yard unless your dream is to start the same argument somewhere else.
If you are dividing and saving healthy raspberry plants intentionally, that is a different project entirely. But if your goal is removal, be ruthless about disposal. Half-hearted cleanup is how accidental replanting happens.
Step 11: Restore the Area So the Bushes Do Not Return
Once the patch is gone, do not leave bare soil unattended. That is an engraved invitation for weeds and overlooked raspberry roots to wake up. Replant with turf, annual flowers, vegetables, ground cover, or a new shrub bed once you are confident regrowth is under control. If you are not ready to plant yet, keep the area mulched and continue monitoring.
In spots where raspberries previously spread into nearby beds, a root barrier or clearly defined edging can help reduce future wandering from neighboring plants. This is especially useful if the original raspberry patch is only partially removed or if a nearby planting remains in place.
Common Mistakes to Avoid
- Only cutting the canes: This makes the area look better fast, but it rarely removes the plant.
- Ignoring suckers away from the main clump: Those “bonus shoots” are part of the problem.
- Tilling first and asking questions later: Chopping roots through the whole bed can spread pieces around.
- Skipping follow-up: Regrowth is normal. Ignoring it is optional, but unwise.
- Composting diseased canes: Better to remove them from the site.
What If the Raspberry Bushes Keep Coming Back?
If raspberry bushes keep returning, that usually means some roots or crowns were left behind or the patch extends beyond the area you cleared. Start by identifying where the new shoots are emerging. If they are clustered, dig again and remove the root source. If they are scattered, consistent cutting may be the better strategy, especially in places where digging would damage nearby plants or structures.
For very old patches, fence-line thickets, or overgrown areas mixed with blackberries and other brambles, total removal may take more than one season. That is not failure. That is horticultural reality wearing muddy boots.
Experiences Homeowners Often Have When Removing Raspberry Bushes
One of the most common experiences people have with raspberry bush removal is underestimating how much plant is hiding underground. The canes above the soil make the patch look manageable, almost polite. Then the digging starts, and suddenly there are crowns, runners, and surprise shoots showing up in places where no one remembers planting anything. A homeowner may begin with a five-foot patch and discover that the roots have quietly wandered under edging, through mulch, and into a nearby flower bed like nosy neighbors peeking over the fence.
Another familiar experience is the emotional roller coaster of false victory. Day one feels fantastic. The canes are gone. The bed looks clean. The yard seems larger. Everyone celebrates a little too early. Then, two or three weeks later, tiny red-tinged or green shoots begin popping up from the soil as if the patch had simply changed costumes. That moment can be deeply annoying, but it is also very normal. Many gardeners learn that removing raspberry bushes is less like flipping a switch and more like managing a campaign. You win through persistence, not one dramatic afternoon.
People also often report that working in small sections feels far less overwhelming than tackling the entire patch at once. A huge thicket can look impossible, especially if it has not been maintained in years. But clearing one square section, digging one crown cluster, and bagging one pile of canes at a time makes the job feel doable. The biggest mental shift is realizing that progress counts even when perfection does not happen in a single weekend.
There is also the very practical experience of learning which tools actually help. Many first-timers start with pruners and a regular shovel, then quickly realize that a garden fork is excellent for loosening roots without chopping everything into pieces. Thick gloves become non-negotiable. A tarp becomes the unsung hero of the operation because dragging thorny cut canes by hand is an excellent way to become angry at fruit.
Some homeowners are surprised by how much easier the job becomes after a rain, when the soil is soft enough to lift crowns cleanly. Others discover the opposite lesson by working in soggy clay and spending the afternoon dragging around mud that seems determined to keep every root fragment forever. Timing matters more than most people expect.
Perhaps the most encouraging experience is what happens after the follow-up period. Once regrowth is cut down promptly and the site is mulched, tarped, or replanted, the area finally begins to feel reclaimed. Gardeners often say the space looks brighter, easier to maintain, and much more useful. A patch that once felt unruly can become a vegetable bed, a clean walkway, or a calm corner with shrubs and perennials. In that moment, the battle with the berry thicket starts to feel worth it. Not glamorous, exactly, but deeply satisfying in the way only successful yard work can be.
Final Thoughts
If you want to remove raspberry bushes successfully, the simplest strategy is also the smartest one: cut the canes, dig the crowns, chase the roots, smother what remains, and stay alert for regrowth. That combination works better than any single shortcut. Raspberry plants are persistent, but they are not invincible. With patience and a little follow-through, you can clear the patch and keep it from staging a leafy reunion tour.


