Table of Contents >> Show >> Hide
- Why Stencil a Dog Bed Instead of Buying One?
- Supplies You’ll Need to Stencil a Dog Bed
- Step-by-Step: How to Stencil a Fabric Dog Bed
- Step-by-Step: How to Stencil a Wooden Dog Bed Base
- Safety Tips When Stenciling a Dog Bed
- Decorating Ideas to Inspire Your Dog Bed Makeover
- Pro Stenciling Tips from Experienced DIYers
- Extra: Real-World Lessons From Stenciling Dog Beds
- Wrapping Up: Your Dog’s Bed, Your Style
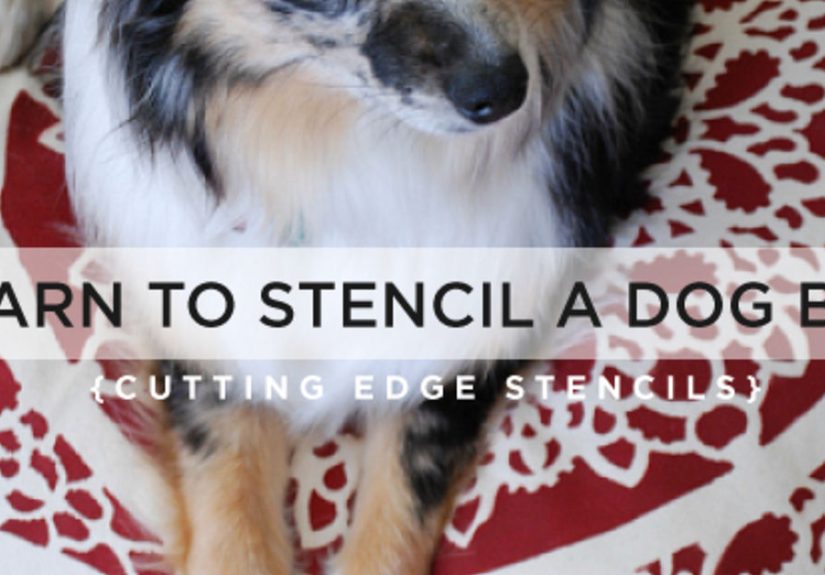
If your dog’s bed looks like it’s survived one too many zoomies, treat it like a blank canvas instead of clutter. Stenciling a dog bed is an easy, budget-friendly DIY that lets you match your pet’s hangout spot to your decor and your pup’s personality. Think farmhouse florals for the couch cuddler, bold geometrics for the high-energy herder, or a simple bone and paw print combo for the treat-obsessed good boy.
Inspired by the kind of projects you’d see on Hometalk, this guide will walk you through everything: choosing the right bed and paint, basic stenciling techniques, sealing and washing, plus a few real-life project ideas. You don’t need advanced sewing skills or fancy equipmentjust some paint, a stencil, and the willingness to get a little fur on your clothes.
Why Stencil a Dog Bed Instead of Buying One?
1. Custom look without the boutique price
Designer dog beds can be surprisingly expensive, especially if you want something that looks good in your living room rather than like a random blob in the corner. By stenciling your own, you can start with an inexpensive plain bed or a homemade cushion and turn it into something that looks custom-made. DIYers often start with duck cloth, canvas, or cotton covers and simple stuffing or foam to cut costs while still getting a high-end look.
2. Perfectly matched to your decor
Stencils make it easy to echo patterns from your rug, pillows, or wall art. Use a damask or allover floral pattern for a cottage-style space, bold stripes for a modern home, or alphabet stencils to add your dog’s name. Stenciling companies and DIY blogs showcase dog beds with medallion patterns, stars, chevron, and even faux tile looksthere’s a pattern for every style.
3. Pet-safe and washable
When you make and stencil your own dog bed, you control what materials touch your pet. You can use washable cotton or canvas and choose paints and finishes that are low- or zero-VOC and labeled non-toxicimportant if your dog loves to lick everything. Pet experts note that milk-based paints and kid-safe washable acrylics are generally safer choices, while oil-based paints and those with heavy solvents should be avoided around pets.
4. It’s a genuinely fun weekend project
Stenciling is one of those DIYs that looks advanced but is beginner-friendly. With a bit of patience, light paint loading, and the right technique, the pattern does most of the work for you. And unlike a wall, a dog bed is portableyou can spin, rotate, and reposition it while you stencil, which makes things a lot easier if you’re new to it.
Supplies You’ll Need to Stencil a Dog Bed
You can stencil either a fabric dog bed cover or a wooden dog bed base (like an upcycled drawer or pallet bed). The basic stenciling supplies stay the same, with small tweaks depending on the surface.
For a fabric dog bed cover
- Plain dog bed with removable fabric cover or DIY sewn cover (canvas, duck cloth, or cotton works great)
- Reusable stencil (allover pattern, border design, or alphabet/paw prints)
- Fabric paint or acrylic paint mixed with fabric medium (pet-safe, non-toxic where possible)
- Foam roller or stencil brush
- Painter’s tape or low-tack spray adhesive
- Piece of cardboard or plastic to slip inside the cover so paint doesn’t bleed through
- Iron and thin pressing cloth for heat setting (if required by your paint)
For a wooden dog bed base
- Wooden bed frame (pallet bed, crate, drawer, doll bed, or custom build)
- Sandpaper and primer (if needed)
- Non-toxic or low-VOC paint and/or stain for the base color
- Stencils for decorative details (stars, bones, your dog’s name, patterns)
- Small foam roller or stencil brush
- Water-based clear sealer that’s pet-friendly once cured
Many DIY tutorials use simple alphabet stencils and small accent designs like stars or bones to add personality to a plain IKEA doll bed or pallet base turned dog bed.
Step-by-Step: How to Stencil a Fabric Dog Bed
1. Prep the cover
Remove the cover from the bed (if possible) and wash it without fabric softener. This removes sizing, oils, and fur so the paint adheres better. Let it dry completely, then iron it so the surface is smooth. Wrinkles are the enemy of crisp stencil lines.
Slide a piece of cardboard, plastic, or a garbage bag inside the cover so paint doesn’t bleed through to the back. Zip or pin the opening closed to keep the insert from shifting.
2. Plan your stencil layout
Spread the cover out on a flat surface and decide how you want the pattern to fall. For an allover pattern, start in the center and work outward. For a simple border or name stencil, lightly mark a straight guideline with a fabric-safe marking pen or chalk.
Use painter’s tape or temporary adhesive to secure the stencil. The tighter it’s held to the fabric, the less likely you’ll get bleeding under the edges.
3. Load your roller or brush the right way
When it comes to stenciling, less paint is more control. Pour a bit of paint onto a plate, load your roller or stencil brush, then offload excess onto a paper towel until it looks almost dry. A nearly dry roller creates a soft, buildable coverage that won’t seep under the stencil.
4. Stencil in light layers
Apply paint using gentle, straight up-and-down dabbing for brushes or light rolling for foam rollers. Don’t push hard. It’s better to do two or three light passes than one heavy, drippy coat. Let each section sit for a minute before lifting the stencil so the paint can start to set.
Carefully lift the stencil straight up to avoid smearing. If your design repeats, align the built-in registration marks or edges of the pattern with the area you just painted, tape again, and keep going until the bed cover is fully decorated.
5. Fix small mistakes (because they happen)
Even experienced DIYers get a bit of bleed-through here and there. Keep some cotton swabs, a damp cloth, and a small detail brush nearby. While the paint is still wet, you can usually clean up fuzzy lines by gently dabbing with a damp cloth or nudging edges back into place with a tiny brush.
6. Heat set and cure the paint
Once the design is fully dry (check your paint’s instructions, usually several hours), heat set if required. Typically, you’ll place a thin cloth over the stenciled area and iron on medium heat for a few minutes, keeping the iron moving. This helps make the design more durable and washable.
Most fabric paints and acrylics mixed with fabric medium need about 24–72 hours to cure before washing. During that time, keep your dog off the bedyes, they’ll absolutely try to test the “wet paint” sign for you.
Step-by-Step: How to Stencil a Wooden Dog Bed Base
1. Prep and paint the base color
If you’re using a pallet, crate, or old drawer, sand any rough edges and wipe away dust. Add a primer if the wood is very raw or glossy. Then paint or stain the base in your chosen color using pet-safe, low- or zero-VOC products whenever possible. Natural and eco-focused paints are increasingly marketed as pet-friendly once dried and fully cured.
Let the base coat dry completely before stencilingif it’s even slightly tacky, your stencil may stick and peel the paint.
2. Position your stencil
Common spots for stenciled designs on wooden dog beds include:
- The front board (perfect for your dog’s name)
- The side rails (very cute with small repeating motifs)
- The inside base under the cushion (a secret pattern just for you when changing bedding)
Center the stencil where you want it, then secure it with painter’s tape. On uneven or slatted surfaces, press the stencil firmly into any grooves so paint won’t sneak underneath.
3. Apply paint and add character
Use the same “almost dry” painting technique as with fabric: load and offload your brush or roller, then apply in thin layers. For a rustic or vintage look, many DIYers use chalk-style paints and then lightly sand over the stenciled design after it dries to soften edges and create a distressed finish.
4. Seal for durability
Once your stenciled design is dry, seal the wood with a water-based, non-yellowing topcoat rated as low- or zero-VOC. Follow manufacturer cure times before allowing your dog to use the bed; even safe finishes can off-gas while curing. After that, you get a durable, wipe-clean base that stands up to muddy paws and happy tail thumps.
Safety Tips When Stenciling a Dog Bed
- Choose pet-safe products: Look for non-toxic labels, low- or zero-VOC claims, and paints that are kid-safe or explicitly marketed as pet-friendly. Avoid old oil-based paints that may contain lead or heavy solvents.
- Ventilate the space: Work in a well-ventilated area, especially if you’re painting indoors. Open windows, use a fan, or paint outside in good weather.
- Let everything fully cure: “Dry to the touch” is not the same as “safe to chew.” Follow cure times on both paint and sealers before letting your dog nap, dig, or nibble on their new bed.
- Watch chewers: If your dog is known for gnawing on furniture, skip heavy paint on chewable edges and stick to fabric stenciling or covers you can easily replace.
Decorating Ideas to Inspire Your Dog Bed Makeover
1. Classic “hotel-style” bed
Choose a crisp white or neutral fabric cover, then stencil a subtle geometric or damask pattern in a soft gray or taupe. Add your dog’s name in an elegant script on the front edge. This look works beautifully in minimalist or modern homes and reads more like a decorative floor cushion than a typical pet bed.
2. Rustic farmhouse crate bed
Turn a wooden crate or pallet into a raised dog bed by adding short legs and a cut-out front opening. Paint the crate in a creamy white or soft gray, then stencil paw prints, stars, or a bone motif along the sides. Pop in a stenciled cushion with coordinating patterns, and you’ve got a farmhouse-style dog bed that looks like it came straight out of a decor magazine.
3. Upcycled drawer bed
Old dresser drawer? New dog throne. Remove the hardware, sand, paint, and stencil the front panel with your dog’s name and a small pattern. Add new knobs and a thick cushion inside. DIY communities love this approach because it keeps old furniture out of landfills and gives pets a cozy, low-profile bed that’s easy for older dogs to step into.
4. Playful kid-room bed
In a child’s bedroom or playroom, coordinate the dog bed with the room’s theme. If the decor features stars or clouds, stencil similar shapes on the dog bed. If the room has a sports theme, use number stencils and stripes. Kids love seeing their pup “match” their space, and it helps the bed feel intentional rather than like a last-minute addition.
Pro Stenciling Tips from Experienced DIYers
- Always test first: Do a quick test on scrap fabric or a hidden area of your wood base. This lets you check how heavily to load your brush, how long the paint takes to dry, and how crisp the stencil lines look.
- Work from the flattest areas to trickier ones: On wood, stencil the smooth front and sides before attempting inside corners or slats. On fabric covers, start with the broad center area before wrapping patterns around seams or edges.
- Clean your stencil often: Dried paint buildup along stencil edges makes bleeding more likely. Wipe your stencil periodically with a damp cloth so designs stay sharp.
- Embrace imperfection: Tiny variations and slightly wobbly lines are part of the handmade charm. Your dog will not leave a bad review because one paw print is a bit fuzzy.
Extra: Real-World Lessons From Stenciling Dog Beds
Once you’ve stenciled one dog bed, a funny thing tends to happenyou start seeing every plain cushion, crate, or box as a potential “before” photo. DIYers who have gone through the process a few times share similar takeaways, which can save you time, frustration, and maybe even a little paint.
Lesson 1: Size and silhouette matter more than pattern
Many people obsess over the perfect stencil design, only to realize later that the bed’s size and shape have a bigger impact on daily life. A beautifully stenciled bed that’s too small, too tall, or awkwardly placed becomes a decorative object, not a functional one. Experienced makers often suggest measuring your dog in their favorite sleep position (curled, sprawled, or donut) and adding generous extra room. A medium dog that happily stretches out may need a “large” bed even if the tag says otherwise.
Once the size is right and the bed fits your spacebetween the sofa and coffee table, next to your desk, at the foot of the bedthen the stencil really shines as the finishing touch.
Lesson 2: Think about washing before you paint
Dogs do not care that you spent all Saturday coaxing perfect damask swirls onto their bed. They will still hop on after a muddy walk, chew a treat into the corners, and drool with enthusiasm. That’s why seasoned DIYers put “washability” at the top of their planning list.
Removable covers with zippers or envelope-style closures are much easier to live with than permanently stuffed beds. Some people even sew an inner liner for the stuffing and a separate outer cover for the stenciled design, so they can swap covers for washing without wrestling foam or loose filling. When choosing paint, they lean toward flexible fabric paints and follow heat-setting instructions carefully so designs survive repeated trips through the washer on gentle cycles.
Lesson 3: Your dog’s habits should influence the design
If your pup loves to dig and nest, dense allover patterns tend to hide wear marks better than large single motifs. If they’re a big-time shedder, lighter hair will show less on mid-tone fabrics than on very dark or stark black backgrounds. Chewers may do better with a minimally painted fabric cover rather than a heavily painted wood edge that could tempt them.
Some owners discover that raised stencil textures bother ultra-sensitive dogs, especially on areas where they rest their face. In those cases, they keep the main sleeping surface lightly patterned or even plain and use bolder stenciling on the sides, borders, or the wooden base instead.
Lesson 4: Plan for “version 2.0” from the start
One of the joys of stenciling is that it’s easy to change. Many DIYers approach the first stenciled dog bed as a learning piece. They pick inexpensive materials, practice layout and paint loading, and learn what they’d tweak next timemaybe a slightly larger pattern, a bolder color, or a different stencil style.
You can design with upgrades in mind: sew the cover with a zipper so you can swap to a new stenciled design later, choose neutral base colors and experiment with accent colors through stenciling, or keep the wood base classic while rotating different stenciled cushions seasonally. Think buffalo check in winter, breezy stripes in summer, or even holiday-themed covers with snowflakes or hearts.
Lesson 5: The process is bonding time, not just a project
Finally, there’s the simple joy of making something for a creature that has absolutely no idea what a stencil is, but knows you’re doing something special. People often share stories of dogs napping under the table while they paint, or curiously “helping” by nosing the stencil or sitting directly on the fabric mid-project. It’s messy, it’s imperfect, and it’s exactly what makes a handmade dog bed feel so special once it’s in use.
When you step back and see your pup curled up on a bed you designedpattern chosen, colors mixed, edges taped and re-tapedit’s hard not to feel a little proud. The bed becomes more than just a pet accessory. It’s a tiny piece of your home’s story, one that says: “Yes, the dog absolutely counts as part of the decor plan.”
Wrapping Up: Your Dog’s Bed, Your Style
Stenciling a dog bed is a practical, creative project that lets you blend function, safety, and style. With a handful of supplies and a bit of patience, you can turn a plain cushion or simple wooden frame into a custom piece that reflects your home and your pet’s personality. Choose pet-safe paints, take your time with light layers, and remember that a few tiny imperfections only add to the charm.
Whether you’re making your first Hometalk-style DIY or your tenth, a stenciled dog bed is one of those projects that delivers a big visual payoff with a relatively small investment of money and timeand your dog gets a front-row seat to the transformation.


