Table of Contents >> Show >> Hide
- Choose the Right Kind of Stone Path (So You Don’t Build the Wrong One Perfectly)
- Planning: Layout, Size, and the “Future You” Test
- Tools and Materials for Laying Down a Stone Path
- Step-by-Step: How to Lay a Stone Path That Stays Put
- Step 1: Mark the path and check your “finished height”
- Step 2: Excavate to the correct depth
- Step 3: Install landscape fabric (optional, but helpful)
- Step 4: Add the crushed stone base (this is the “don’t skip leg day” part)
- Step 5: Install edging before you set stones (seriously)
- Step 6: Add a leveling layer and screed it smooth
- Step 7: Lay the stones/pavers and keep checking for wobble
- Stepping-stone spacing that actually feels good
- Step 8: Fill joints and lock everything in
- Specific Example: A Small Stone Walkway From Patio to Gate
- Common Mistakes (and How to Avoid Them)
- Maintenance: Keep Your Stone Path Looking Sharp
- Experiences & Real-World Lessons From Laying Down a Stone Path (Extra )
A stone path is basically your yard saying, “Let’s stop muddying up the vibe.” It guides feet, frames gardens, and makes your outdoor space feel intentionally designedeven if the rest of the landscaping plan is “we’ll deal with that later.”
The trick is that a good-looking stone walkway isn’t won by fancy stones. It’s won by what you don’t see: a base that drains, stays level, and doesn’t turn into a wobbly obstacle course after the first heavy rain. This guide walks you through laying down a stone path the right way, whether you’re building a stepping-stone garden path, a flagstone walkway, or a neat paver path from the patio to the gate.
Choose the Right Kind of Stone Path (So You Don’t Build the Wrong One Perfectly)
1) Stepping stones set into lawn or ground cover
This is the “cute and casual” option. Individual stones sit flush with the surrounding grass (so you can mow without inventing new curse words). It’s ideal for light foot trafficlike getting to the shed, compost bin, or your favorite “I’m pretending to weed” chair.
Best for: informal gardens, short routes, and people who don’t need a stroller-friendly runway.
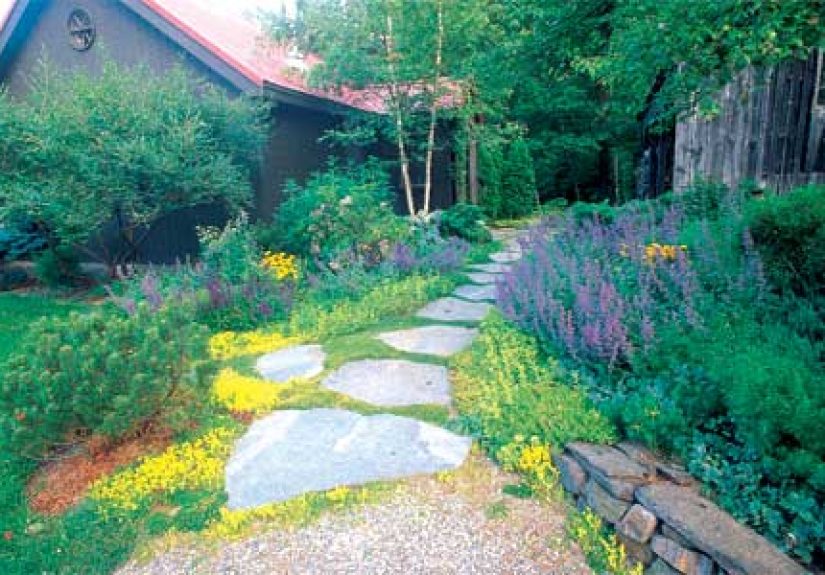
2) Dry-laid flagstone path
Flagstone looks natural, a little rustic, and very “I definitely have my life together.” The stones are set on a compacted base with a leveling layer, then the joints are filled with stone chips, gravel, sand, or even creeping plants. It’s durable, forgiving, and easy to repair later.
Best for: curving garden paths, organic designs, and homeowners who want a natural stone walkway without mixing mortar.
3) Paver stone path (brick-style pavers or concrete pavers)
This is the clean, crisp option. Pavers create a uniform surface, handle frequent foot traffic well, and can look polished and modern. If you want a path that feels like a “real walkway,” this is it.
Best for: main routes, patios-to-doors, and anyone who likes straight lines, tidy edges, and fewer surprises.
Quick decision cheat-sheet
- Want the easiest DIY? Stepping stones.
- Want natural charm? Dry-laid flagstone.
- Want the most uniform and stable surface? Pavers with edging + joint sand.
Planning: Layout, Size, and the “Future You” Test
Pick a path line that feels natural
The best stone paths follow how people already walk. Lay a garden hose, rope, or even a line of flour (yes, flouruse what you have) to mock up the route. Walk it a few times. If you keep cutting the corner, adjust the line. Your path should serve humans, not the fantasy version of you who always takes perfectly centered steps.
How wide should a stone walkway be?
For a main walkway, about 36 inches wide is a comfortable starting point. Secondary garden paths can be narrower, but if two people ever walk side-by-side (or you carry groceries, a watering can, or a wriggly toddler), wider is nicer.
Think about drainage (before water thinks about your path)
A stone path needs a slight slope so water doesn’t pool. In most yards, you can follow the existing grade, but avoid creating a low spot that collects water. If your yard is heavy clay or stays wet, you’ll want extra attention to base prep and drainage.
Call before you dig
If you’re excavating for a full stone path base, contact your local utility locating service (in the U.S., that’s commonly 811) and wait for markings. “I think the cable line is over there” is not a plan. It’s a plot twist.
Tools and Materials for Laying Down a Stone Path
Tools
- Shovel (a flat shovel and a trenching shovel both help)
- Rake
- Hand tamper or plate compactor (renting is worth it for larger projects)
- Rubber mallet
- Level (2–4 ft is handy) and/or string line
- Measuring tape
- Wheelbarrow
- Broom (for sweeping joint sand)
- Masonry chisel or saw (only if cutting stones/pavers)
Materials
- Stone choice: stepping stones, flagstone, or pavers
- Base material: crushed stone / paver base / “¾-inch minus” (compacts well)
- Leveling layer: bedding sand (for pavers) or stone dust/fines (varies by system)
- Edging: paver restraints, metal edging, or stone border (highly recommended)
- Joint fill: polymeric sand (pavers), regular joint sand, gravel, or stone chips
- Landscape fabric (optional): helps reduce weed growth and separate soil from base
Step-by-Step: How to Lay a Stone Path That Stays Put
Step 1: Mark the path and check your “finished height”
Mark the edges with spray paint, stakes and string, or a hose outline. Decide where you want the finished surface to land: flush with surrounding lawn, slightly above mulch, or level with a patio edge. Knowing your finish height prevents the classic DIY problem: “Why is my path either a trench or a speed bump?”
Step 2: Excavate to the correct depth
For a full walkway (flagstone or pavers), excavate for: compacted base + leveling layer + stone thickness. A common approach for pedestrian paths is several inches of compacted base plus about an inch of bedding/leveling layer, then your stone on top. If you’re doing stepping stones in grass, you’ll excavate individual pockets instead of the whole corridor.
Pro move: dig a little wider than the finished path so edging and base have room. Keep the bottom fairly even and remove organic material (roots, loose sod).
Step 3: Install landscape fabric (optional, but helpful)
Lay fabric over the excavated area to help separate soil from your base material and reduce weed growth. Overlap seams so gaps don’t become tiny weed doorways. Fabric won’t make your path immortal, but it improves your odds.
Step 4: Add the crushed stone base (this is the “don’t skip leg day” part)
Pour in your crushed stone base and spread it evenly. Compact it thoroughly. If you need a deeper base, build it in layers (often called “lifts”) rather than dumping it all at oncecompaction works better in thinner layers.
Keep checking level and slope. You’re not aiming for perfectly flat; you’re aiming for consistently graded so the path drains and stays stable. If you’re working on a curve, don’t fight the curveshape the base to it and compact carefully along the edges.
Step 5: Install edging before you set stones (seriously)
Edging is what stops your beautiful stone walkway from slowly migrating into the lawn like it’s trying to escape. Install paver edging/edge restraints along both sides, anchored into the compacted base. If you’re using a stone border, set it firmly so the main stones can’t drift.
Step 6: Add a leveling layer and screed it smooth
For pavers, spread bedding sand (often around 1 inch) and screed it level using straight boards and guide pipes. For flagstone, some systems use sand, stone dust, or fine crushed material to fine-tune stone height.
The key: once screeded, don’t stomp around on it like you’re auditioning for a marching band. Work from one end and place stones carefully.
Step 7: Lay the stones/pavers and keep checking for wobble
Start from a straight edge or a fixed point (like a patio) and work outward. Set each stone, tap it gently with a rubber mallet, and check: does it rock? If it rocks, lift it and adjust the bedding layer under the low corner. Your goal is full support under the stonenot just “balanced like a café table.”
Stepping-stone spacing that actually feels good
For a stepping-stone path, comfort matters more than a perfect measurement. A common guideline is spacing stones so the center-to-center distance matches a natural stride (often around the mid-20-inch range for many adults). But your household might include shorter walkers or people who take bigger stepsso do a dry layout on top of the grass and walk it before digging.
Step 8: Fill joints and lock everything in
For pavers, sweep joint sand (or polymeric sand) into the joints until full. Then compact again to settle everything, and top up joints as needed. If using polymeric sand, follow product directions: remove excess from the surface and activate with water according to instructions.
For flagstone, fill joints with gravel, stone chips, decomposed granite, or plantable material depending on the look you want. If you want greenery, choose plants that tolerate foot traffic and your sun/shade conditions.
Specific Example: A Small Stone Walkway From Patio to Gate
Let’s say you’re building a 3-foot-wide, 20-foot-long paver path (60 square feet). You might plan for several inches of compacted crushed stone base plus a thin bedding sand layer. You’d excavate so your finished pavers sit at the right height (not sinking below the lawn or sitting so high you trip while carrying burgers).
The “why” behind the steps matters: the compacted base handles load and drainage, bedding sand helps you fine-tune level, edging keeps pavers from spreading, and joint sand reduces shifting. If you’ve ever seen a path that looks like it’s made of tiny stone dominoes falling in different directions, it usually failed in one of those four spots.
Common Mistakes (and How to Avoid Them)
“My stones are rocking.”
That’s almost always uneven bedding support. Lift the stone, add or remove bedding material, and reset. Don’t try to “tap it into submission” on a hollow spotyou’ll just create future settling.
“Water pools on the path.”
Re-check slope. A slight grade helps water move off the surface. In very wet areas, improving the base and ensuring water has somewhere to go (instead of into your path) is the long-term fix.
“Weeds are growing between stones.”
Even with landscape fabric, weeds can sprout in windblown debris that collects in joints. The best defense is proper joint fill, regular sweeping, and topping up joint material when it settles. If you want plant-filled joints, choose that intentionallydon’t let random weeds pick the design theme.
Maintenance: Keep Your Stone Path Looking Sharp
- Sweep it: Keeps joints from filling with soil and turning into a weed nursery.
- Top up joints: Add more joint sand or gravel when you notice low spots.
- Reset settled stones: Dry-laid systems are repair-friendlylift, re-level, replace.
- Watch edges: If edging loosens, fix it early before the whole path drifts.
Experiences & Real-World Lessons From Laying Down a Stone Path (Extra )
People who build a stone path for the first time usually expect the “stone” part to be the hard part. The real surprise is that the job is more like baking than building: the ingredients aren’t complicated, but the order mattersand skipping steps creates a disaster you’ll still be staring at next spring.
One common experience is the “I compacted it… I think?” moment. DIYers often tamp the base once and move on, only to notice the path settling unevenly after a few storms. The fix is almost always the same: lift stones, add base, compact in smaller layers, and rebuild that section. The lesson people share afterward is simple: if you’re tired of compacting, you’re probably almost done… but not quite done.
Another classic story is the “surprise sprinkler line” discovery. It’s amazing how many homeowners forget where the irrigation runs until a shovel finds it. The experience usually changes how they plan future projects: they start marking utilities, mapping irrigation, and doing shallow test digs before full excavation. It’s not glamorous, but it’s cheaper than turning your weekend project into a plumbing side quest.
Many first-timers also learn that stone selection is about your lifestyle, not just appearance. A gorgeous irregular flagstone path can be perfect through a garden bedbut if it’s the main route to the garage, slightly uneven stones can become annoying fast (especially in the dark, in a rush, or while carrying something awkward). People who’ve lived with their path for a season tend to recommend this: use the most stable, uniform surface for high-traffic routes, and save the artsy, organic stones for slower “stroll and admire” areas.
There’s also the experience of getting the spacing wrong on a stepping-stone path. On paper, it looks fine. In real life, everyone takes weird half-steps like they’re playing an invisible game of hopscotch. The fix is why dry layouts are so valuable: homeowners who test-walk their layout first (and adjust for the shortest walker) end up with a path that feels natural instead of “decorative but inconvenient.”
And then there’s the quiet victory moment: the first rainy day when you walk outside and stay clean. That’s when the base work feels worth it. People often describe a stone walkway as one of the most satisfying upgrades because it changes daily life in small waysless mud tracked indoors, fewer worn lawn ruts, a clearer flow through the yard, and a garden that looks more finished without needing a total landscape overhaul.
The big takeaway from experienced DIYers is refreshingly unromantic: take your time on the base, keep checking level and slope, and don’t rush the edging and joints. A stone path isn’t hard because it’s complicated. It’s hard because it demands patience. But once it’s done, it’s the kind of project that pays you back every time you step outside.


