Table of Contents >> Show >> Hide
- The quick version (for people who read instructions the way they eat salads)
- Why pressure-treated wood behaves differently
- When can you stain pressure treated wood?
- Choosing the right stain for pressure treated wood
- Tools and supplies checklist
- Step-by-step: How to stain pressure treated wood the right way
- 1) Let the wood dry (yes, this is step one on purpose)
- 2) Inspect and fix the “future regrets”
- 3) Clean the surface (stain doesn’t bond to dirt)
- 4) Rinse thoroughly, then let it dry again
- 5) Light sanding (only if needed, but often helpful)
- 6) Protect what shouldn’t be stained
- 7) Stir, don’t shakeand do a patch test
- 8) Apply stain in thin, even coats
- 9) Don’t forget end grain and cut ends
- 10) Let it dry and cure (your future self will thank you)
- Weather rules: timing matters more than your playlist
- Troubleshooting: what to do if things get weird
- Maintenance: how often should you re-stain?
- of real-world “been there” lessons (so you don’t learn the hard way)
- Conclusion
Pressure-treated wood is the overachiever of the lumber world: it survives weather, bugs, and questionable DIY decisions.
But when it comes to staining, it can also be a drama queen. Stain it too soon and it won’t soak in. Stain it in the wrong weather
and you’ll get blotches, sticky spots, or peeling that looks like your deck put on a bad fake tan.
The good news: staining pressure treated wood isn’t hard. The right way is mostly about patience, prep, and picking a stain that
actually plays nicely with treated lumber. Follow this guide and you’ll end up with a finish that looks sharp, resists water, and doesn’t
flake off the first time someone drags a patio chair like they’re auditioning for a furniture-moving Olympics.
The quick version (for people who read instructions the way they eat salads)
- Wait until the wood is dry enough (water-drop test or a moisture meter).
- Clean and let it dry again (dirt + stain = “why is it peeling?”).
- Choose a penetrating exterior stain made for decks/fences/outdoor wood.
- Apply in the right weather (mild temps, low wind, no rain in the forecast).
- Go thin, keep a wet edge, and back-brush if you spray.
- Let it cure before heavy traffic, furniture, or sprinklers.
Why pressure-treated wood behaves differently
Pressure-treated lumber is infused with preservative chemicals under pressure, and that process often leaves the boards wetter than regular lumber.
Even if it looks dry, the cells can be holding enough moisture to block stain from penetrating. That’s why staining too early tends to create
a surface film that fails laterpeeling, chipping, or wearing unevenly.
Another twist: not all pressure-treated boards are treated the same way. Some are sold fairly wet (“green” treated), while others are dried after
treatment (often labeled KDAT/KDHT in some markets). The drier the board, the sooner it can accept stainif the surface is clean and open.
When can you stain pressure treated wood?
Forget the one-size-fits-all answer. The real rule is: stain when the wood is dry enough to absorb it.
Depending on your climate, sun exposure, board thickness, and whether the lumber was wet-treated or dried after treatment, that could be a few weeks
or several months.
The water-drop test (simple, fast, surprisingly accurate)
Sprinkle a few drops of water on the wood. If the water beads up and just sits there looking smug, the wood is still too wet (or the surface pores are
closed). If it darkens the wood and soaks in fairly quickly, you’re much closer to stain-ready.
The moisture meter test (for people who love numbers and hate redo work)
If you want fewer guesses, use a moisture meter. Many pros aim for around 15% moisture content or lower before staining decks and outdoor
structures. That target helps stains penetrate and cure properly, especially on horizontal surfaces that take a beating from sun and foot traffic.
How long you may need to wait (realistic timelines)
- Wet pressure-treated boards: commonly a few weeks to a few months, depending on weather and sun exposure.
- Cool, humid, shaded builds: longer drying timesshade is great for reading, not for drying lumber.
- Dried-after-treatment boards (when available): sometimes stain-ready sooner, but still test first.
Pro tip: If your project is brand-new and you’re itching to stain, choose boards marketed as dried after treatment if available locally.
Otherwise, plan your staining date like you plan a beach day: you can’t control the weather, but you can pick the best window.
Choosing the right stain for pressure treated wood
Your stain choice determines two things: how it looks and how it fails if conditions aren’t perfect. For pressure treated wood, a
penetrating exterior stain is usually the safer bet because it soaks in instead of forming a thick film on top.
Transparent vs. semi-transparent vs. solid
- Transparent / clear: shows maximum grain, but typically offers less UV protection. Great if you’re okay with more frequent maintenance.
- Semi-transparent: a popular sweet spotkeeps visible grain while adding color and better UV resistance.
- Semi-solid / solid: more “paint-like” coverage and UV blocking. Can look amazing, but if applied over wood that’s too wet or poorly prepped,
it’s more likely to peel.
Oil-based vs. water-based
The labels can be confusing because modern products include hybrids, but here’s the practical takeaway:
- Penetrating/oil-leaning stains: often soak in well and wear gradually. Cleanup is typically harder and dry time can be longer.
- Water-based/acrylic stains: easier cleanup, often faster dry, and can be very durableespecially in higher-opacity formulas. Surface prep matters a lot.
Whatever you choose, make sure the can clearly says it’s intended for exterior decks, fences, or outdoor wood.
Interior stain on a deck is like wearing flip-flops in a snowstorm: brave, but not smart.
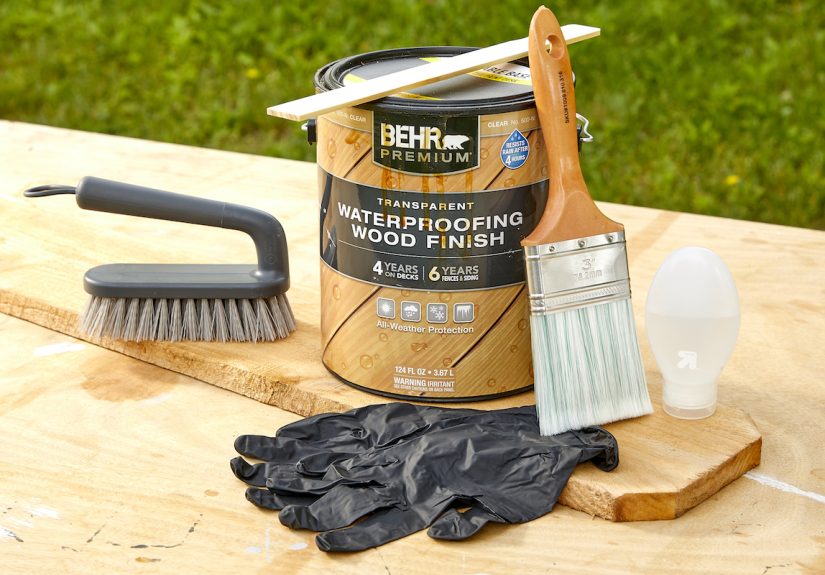
Tools and supplies checklist
- Broom and stiff brush
- Deck/wood cleaner (or oxygen-bleach-based cleaner for general grime and mildew staining)
- Garden hose or pressure washer (used carefullytoo much pressure can fuzz the wood)
- Sandpaper or sanding sponge (light sanding as needed)
- Painter’s tape + plastic sheeting/drop cloths for siding and plants
- Stain applicator: brush, staining pad, roller, or sprayer (with back-brush)
- Stir sticks (don’t shakebubbles are not a design feature)
- Disposable gloves, eye protection, and a mask/respirator for sanding or spraying
- Rags (and a safe plan for oily rag disposal)
Step-by-step: How to stain pressure treated wood the right way
1) Let the wood dry (yes, this is step one on purpose)
If the wood is fresh from the store, assume it’s holding extra moisture unless it’s specifically labeled as dried after treatment.
Test with water drops or a moisture meter. Staining too soon is the #1 cause of poor absorption and early failure.
2) Inspect and fix the “future regrets”
Replace boards that are twisted or cracked beyond reason. Set nails/screws slightly below the surface. If you have splinters or rough mill glaze,
knock them down. Stain highlights texturesometimes that’s charming, sometimes it’s “why does my deck feel like sandpaper?”
3) Clean the surface (stain doesn’t bond to dirt)
New wood that’s truly clean and stain-ready may need only light cleaning. But most outdoor builds collect pollen, dust, and jobsite grime fast.
Use a deck cleaner appropriate for your situation:
- General dirt/pollen: a mild cleaner and stiff brush.
- Mildew or organic staining: an oxygen-bleach-based cleaner can help lift it without being as harsh as some alternatives.
- Previously finished wood: you may need a stripper, then a cleaner/brightener step (follow product directions).
4) Rinse thoroughly, then let it dry again
Cleaner residue can interfere with stain penetration. Rinse well and give the project time to dryoften at least a couple days depending on weather.
If your deck sits in shade, add extra drying time. Damp wood is a stain’s worst enemy.
5) Light sanding (only if needed, but often helpful)
If the surface feels slick, fuzzy, or uneven, a light sanding can open the pores and improve absorption. Focus on:
- “Glazed” areas that feel shiny/smooth
- Raised grain after washing
- Handrails and high-touch zones for a smoother feel
Don’t overdo ityour goal is a clean, receptive surface, not a furniture-grade tabletop (unless you want your deck to be fancy enough for tea service).
6) Protect what shouldn’t be stained
Tape off siding, concrete edges, metal posts, and anything else that shouldn’t get tinted. Cover plants with plastic (and uncover them as soon as you can
plants also like air, not sauna conditions).
7) Stir, don’t shakeand do a patch test
Stir stain thoroughly and often. Pigments settle, and “surprise color” is rarely the vibe. Then test in an inconspicuous spot. Pressure-treated wood can
take stain differently than you expect, especially if boards vary in moisture or density.
8) Apply stain in thin, even coats
Work with the grain and keep a wet edge to avoid lap marks. For decks, many manufacturers recommend one good coat for penetrating stainsflooding on too much
can leave sticky areas that attract dirt.
If you’re using a sprayer, back-brush immediately to push stain into the wood and even out coverage. On railings and vertical surfaces, brushes give great control.
Staining pads are also popular for deck boards because they help distribute product evenly.
9) Don’t forget end grain and cut ends
End grain is thirsty and vulnerable. It absorbs water easily and can crack faster. Pay attention to stair stringers, board ends, and cutscoat them well.
It’s the difference between “nice build” and “why is that corner aging in dog years?”
10) Let it dry and cure (your future self will thank you)
Dry time depends on product type and weather. Many stains need at least 24–48 hours before normal use, and oil-leaning formulas can take longer.
Keep furniture off until it’s ready, and avoid rain during the early cure window if possible.
Weather rules: timing matters more than your playlist
Even the best stain can fail if the weather is wrong. Aim for conditions that support steady penetration and curing:
- Temperature: many manufacturers recommend staining when it’s roughly 50°F to 90°F.
- Sun: avoid direct, hot sunlight on the surfacestain can dry too fast and turn blotchy.
- Rain: pick a stretch with at least 48–72 hours of dry weather (more is safer in humid regions).
- Wind: windy days blow debris onto wet stain and can speed drying in a bad way.
A practical schedule many DIYers like: stain in late morning after dew dries, work in sections, and finish before evening humidity ramps up.
It’s not superstitionit’s just how outdoor finishes behave.
Troubleshooting: what to do if things get weird
Problem: The stain looks blotchy
Usually moisture differences or uneven prep. Lightly wash (or re-clean), let dry, and apply a maintenance coat if the product allows it.
If boards were unevenly wet when stained, you may need to wait it out and recoat later for uniformity.
Problem: The surface feels sticky days later
Common causes: too much stain, poor wiping/back-brushing, or staining in cool/humid weather. Give it more cure time first.
If it stays tacky, you may need to remove excess with the manufacturer-recommended method and reapply thinly.
Problem: Peeling or flaking
Often tied to film-forming products applied over damp wood or poorly cleaned surfaces. The fix is usually more involved:
remove failing coating (strip/sand), clean, dry, and restain with better conditions and a product suited to your wood and exposure.
Problem: Mildew spots keep returning
Clean with an exterior cleaner designed for mildew, improve airflow if possible (trim plants, reduce shade), and maintain the finish.
Mildew loves damp, shaded surfacesdon’t give it a free condo.
Maintenance: how often should you re-stain?
Stain is not a “one-and-done forever” productespecially on horizontal surfaces. A realistic maintenance schedule:
- Deck floors and stairs: often every 2–3 years, depending on sun exposure and product type.
- Fences, vertical boards, siding accents: often every 3–5 years.
The easiest way to keep a deck looking great is to recoat before it fully fails. When water stops beading (or the color looks tired),
clean it and apply a maintenance coat rather than waiting until it’s a full stripping project.
of real-world “been there” lessons (so you don’t learn the hard way)
If you talk to enough homeowners and deck pros, you’ll hear the same themes on repeatbecause outdoor wood has a talent for humbling confident people.
Here are the most common “experience-based” lessons that show up after someone stains pressure treated wood a few times.
Lesson #1: The calendar is a liar; the wood tells the truth. People love asking, “How many days should I wait?”
But the more reliable question is, “Does it absorb water yet?” Two decks built the same weekend can behave differently if one sits in full sun and the other
lives under a canopy of trees. The sunny one dries faster; the shaded one stays damp longer. That’s why the water-drop test and a moisture meter feel like
cheat codesbecause they cut through wishful thinking.
Lesson #2: “Just one more coat” is how sticky decks are born. When stain looks uneven while it’s wet, the temptation is to keep adding product.
With many deck stains, especially penetrating formulas, heavy application can leave extra pigment and binder on the surface instead of in the wood.
The result isn’t richer colorit’s tackiness, dirt magnet behavior, and footprints that become permanent art. Thin, even coats beat thick coats almost every time.
Lesson #3: Prep is not optionalit’s the whole game. Outdoor wood collects invisible trouble: pollen, dust, sunscreen residue, grill grease,
and that fine layer of “life happens.” Stain doesn’t bond to that stuff. People who skip cleaning often end up with patchy absorption and early wear
in traffic lanes. The experienced move is boring but effective: clean, rinse, dry, then stain.
Lesson #4: Direct sun can ruin a finish faster than bad tools. Hot boards make stain “flash dry,” which can lock in lap marks and prevent
proper penetration. Folks who stain at midday often report that the deck looks fine from far away, but up close it has darker overlaps and lighter dry patches.
Working earlier or later in the day (or chasing shade across the deck) is a surprisingly big upgrade.
Lesson #5: The small parts are where projects look professional. Rail tops, stair noses, cut ends, and the first few boards by the door are where
water and wear concentrate. Experienced DIYers take extra time there: careful brushing, smoothing rough spots, and making sure end grain is coated.
Those details don’t just look betterthey slow down cracking and premature aging in the most visible spots.
Lesson #6: Plan your “no rain” window like it mattersbecause it does. Even if the stain feels dry to the touch, early rain can spot or wash
uncured material. The real-world habit is to watch the forecast, then add a buffer day. If the weather can’t commit, it’s better to wait than to gamble.
Pressure-treated wood is patient. Your future finish should be, too.
Conclusion
Staining pressure treated wood the right way is a three-part recipe: dry wood, clean prep, and smart timing.
Do the water-drop (or moisture meter) test, clean and let it dry, pick an exterior stain designed for outdoor wear, and apply it in mild conditions with
enough dry weather to cure. You’ll get richer color, better protection, and a finish that ages gracefully instead of failing dramatically.


