Table of Contents >> Show >> Hide
- Why Replacing the Water Filter Matters
- Before You Start: What You Need
- Where Is the Water Filter on a Samsung Refrigerator?
- How to Replace a Samsung Refrigerator Water Filter Step by Step
- Step 1: Confirm the Correct Filter Type
- Step 2: Turn Off the Water Supply
- Step 3: Relieve Water Pressure if Needed
- Step 4: Remove the Old Filter
- Step 5: Prep the New Filter
- Step 6: Install the New Filter
- Step 7: Turn the Water Supply Back On
- Step 8: Flush the New Filter
- Step 9: Reset the Samsung Refrigerator Water Filter Light
- Troubleshooting Common Samsung Refrigerator Water Filter Problems
- Mistakes to Avoid
- How Often Should You Replace a Samsung Refrigerator Water Filter?
- Real-World Experiences Replacing a Samsung Refrigerator Water Filter
- Conclusion
If your Samsung refrigerator water suddenly tastes a little funky, trickles out like it is conserving every drop for a drought, or the filter light is glowing at you like a disappointed parent, it is probably time for a new water filter. The good news is that replacing a Samsung refrigerator water filter is usually a quick, no-drama DIY job. The better news? You do not need a toolbox, a plumber, or a motivational speech.
In most cases, the process takes only a few minutes: find the correct filter, remove the old one, install the new one, flush the system, and reset the indicator. Easy enough. The only thing that tends to trip people up is that Samsung uses a few different filter styles and placements depending on the model. So while one refrigerator wants a cover opened and a twist to the left, another wants a simple turn-and-lock move. Refrigerator design, apparently, enjoys variety.
This guide walks you through exactly how to replace a Samsung refrigerator water filter, how often to do it, what to do when the filter gets stuck, and how to reset the filter light without feeling like you are trying to crack a safe. Whether you own a French-door model, a side-by-side, or a Family Hub fridge that seems smarter than several people you know, this article will help you get fresh water flowing again.
Why Replacing the Water Filter Matters
Your refrigerator’s water filter is not just there for decoration. It helps reduce unwanted contaminants and improves the taste and smell of both drinking water and ice. Over time, though, filters get clogged with the very stuff they were hired to catch. That can lead to slower dispensing, odd flavors, cloudy ice, and in some cases, leaks or sputtering right after a filter change.
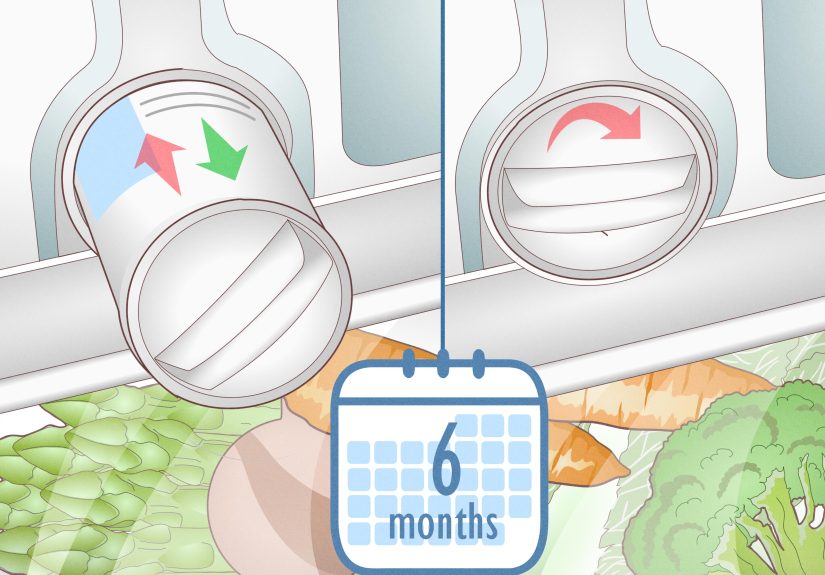
For most Samsung refrigerators, replacing the water filter about every six months is the standard recommendation. Some filters are also rated by water usage, so a busy household that fills bottles all day long may need to change it sooner. If your family treats the dispenser like a hydration pit stop at a marathon, do not be shocked if the filter gives up early.
Signs It Is Time to Replace Your Samsung Refrigerator Water Filter
- The filter indicator light is on
- Water flow is noticeably slower
- Water tastes stale, metallic, or unpleasant
- Ice smells odd or looks cloudy
- It has been roughly six months since the last replacement
Even if the light has not changed color yet, trust your senses. If the water tastes off or the flow drops, the filter may already be overdue.
Before You Start: What You Need
Replacing a Samsung refrigerator water filter is refreshingly low-maintenance. Here is all you usually need:
- The correct replacement Samsung refrigerator water filter
- A towel or paper towels for minor drips
- A pitcher or large container for flushing water afterward
- Your refrigerator model number, just in case you need to double-check filter compatibility
Samsung commonly uses filter models such as HAF-CIN, HAF-QIN, and HAFCU1, but the right one depends on your refrigerator. The safest move is to check the old filter’s model number or look up your fridge model in Samsung’s compatibility tool or owner’s manual. This is not the moment for guesswork. A filter that “looks close enough” is exactly how kitchen leaks become character-building experiences.
Where Is the Water Filter on a Samsung Refrigerator?
The filter location varies by model, which is why two Samsung owners can describe completely different replacement steps and both be right. Common filter locations include:
- Inside the upper right corner of the refrigerator compartment
- Inside the lower right section near the crisper drawers
- Behind a small filter cover inside the fresh food area
- In some older layouts, an easy-to-twist housing built into the interior wall
If you open your fridge and do not immediately spot the filter, do not panic and start interrogating the vegetable drawers. Look in the upper corners, lower interior walls, and behind any small labeled cover. If it still plays hide-and-seek, use the manual.
How to Replace a Samsung Refrigerator Water Filter Step by Step
Step 1: Confirm the Correct Filter Type
Before removing anything, verify the replacement filter matches your current one. Samsung refrigerators are not especially forgiving about filter compatibility. Using the wrong filter can lead to poor fit, leaks, or a filter that simply refuses to install. If possible, compare the new filter to the old one before you begin.
Step 2: Turn Off the Water Supply
Some homeowners skip this step, but turning off the water supply makes the job easier and can reduce pressure in the line. It is especially helpful if your old filter is stubborn or if you have had leak issues before. If your model or manual suggests it, do it. Your socks will appreciate the precaution.
Step 3: Relieve Water Pressure if Needed
If the filter feels stuck or the new filter is difficult to insert, dispense water until the flow stops or slows dramatically. This helps relieve pressure in the line. It is a simple trick, but it can save you from wrestling a plastic cartridge like it owes you money.
Step 4: Remove the Old Filter
The exact method depends on the filter style:
- HAF-CIN or HAF-QIN style filters: Open the filter cover if your model has one, then rotate the old filter counterclockwise to unlock it. Pull it straight out.
- HAFCU1 style filters: Twist the filter to the left to unlock it, then remove it from the housing.
- Push-button or enclosed styles: Press the release button or open the housing cover, then gently pull the filter out.
Keep a towel under the area to catch any small drips. Water usually does not come pouring out dramatically, but refrigerators enjoy surprising people at the worst possible moment.
Step 5: Prep the New Filter
Take the new filter out of its packaging and remove any protective cap, seal, or cover. If your old filter had a reusable cap or decorative piece, transfer it to the new filter if required. With Samsung genuine filters, you may also see an authentication tag. That is there to help verify you are using an authentic Samsung product.
Step 6: Install the New Filter
Insert the new filter into the housing and lock it in place:
- For HAF-CIN and HAF-QIN filters, insert the filter and turn it clockwise until it locks. Align the lock symbol with the indicator line if your model uses one.
- For HAFCU1 filters, insert the new filter and twist it to the right until secure. Align the notch with the arrow on the housing if your refrigerator has alignment marks.
Do not force it. If it does not go in smoothly, stop and recheck the model, the orientation, and whether water pressure still needs to be relieved. A correctly matched filter should fit snugly without requiring superhero-level grip strength.
Step 7: Turn the Water Supply Back On
If you shut off the water earlier, restore it now. Check around the filter housing for any obvious drips. A tiny drip right away may just be leftover water, but steady leaking means something is off. In that case, remove the filter and reinstall it carefully.
Step 8: Flush the New Filter
This step matters more than many people realize. After installing the new filter, dispense and discard water to flush out trapped air and any loose carbon fines from the fresh cartridge. Use a large pitcher and keep going until the sputtering settles down and the water runs clear and steady.
If the dispenser spits, gurgles, or dribbles for a bit, that is normal right after replacement. The system is clearing air. A proper flush also helps prevent dripping from the dispenser after the new filter goes in.
Step 9: Reset the Samsung Refrigerator Water Filter Light
Now for the step that makes people think the replacement did not work: the filter light stays on until you reset it.
Common reset methods include:
- Standard models: Press and hold the Filter Reset button for about 3 seconds.
- Family Hub models: Open Apps, then Fridge Manager, then Fridge Settings, then Water Filter, and tap Reset.
- Some other Samsung models: You may need a different button or button combination, such as a labeled secondary function on the control panel.
If the light does not reset on the first try, hold the button a little longer and make sure you are pressing the correct one. On some fridges, the filter reset is the secondary function of another control. This is one of those charming appliance moments where the button you need is technically there, but only if you already know the secret handshake.
Troubleshooting Common Samsung Refrigerator Water Filter Problems
The New Filter Will Not Fit
This is one of the most common complaints. First, make sure the new filter is the exact correct model. Next, relieve water pressure by turning off the supply and dispensing water until it stops. Then try again. If it still will not fit, check for packaging material, a missing cap removal step, or misalignment during insertion.
The Water Dispenser Drips After Filter Replacement
Usually, trapped air is the culprit. Dispense more water into a large pitcher until the air clears. If the dripping continues, remove the filter and reinstall it carefully, making sure it is fully locked into place. If a leak persists even after reinstalling, inspect the filter and housing for damage.
Water Flows Slowly After Replacing the Filter
Start by flushing longer. If the problem continues, confirm the water valve is fully open and make sure the filter is not defective or incompatible. Slow water can also point to low household water pressure or a separate dispenser issue.
The Filter Light Will Not Reset
Try holding the reset button for 3 to 5 seconds instead of tapping it quickly. Double-check your model’s instructions, especially if you have a Family Hub refrigerator or a control panel with secondary button functions. In some cases, the correct reset option is buried in the settings menu rather than sitting on the front display.
Mistakes to Avoid
- Buying a filter based only on appearance instead of model compatibility
- Skipping the flush step after installation
- Forcing a filter into place when alignment is off
- Ignoring a leak and hoping it becomes someone else’s problem
- Forgetting to reset the indicator light
- Waiting way past six months because “the water seems fine”
Replacing a Samsung refrigerator water filter is simple, but it still rewards a little patience. Most problems happen when people rush, skip compatibility checks, or assume the old filter and new filter will magically negotiate their differences.
How Often Should You Replace a Samsung Refrigerator Water Filter?
The general rule is every six months, though households with heavy water use may need to change it sooner. If your family uses a lot of ice, fills sports bottles daily, or entertains often, the filter can hit its effective limit faster. On the other hand, if your dispenser gets used only occasionally, you may still want to follow the six-month schedule because filters age over time, not just by gallons.
A good habit is to replace the filter when daylight saving time changes, at the start of summer and winter, or any other calendar reminder you will actually remember. Because trusting yourself to “just know when six months has passed” is how people end up discovering they last changed the filter during a completely different presidential administration.
Real-World Experiences Replacing a Samsung Refrigerator Water Filter
One of the most common real-world experiences with replacing a Samsung refrigerator water filter is realizing that the job is either laughably easy or strangely awkward, with very little middle ground. For some people, the old filter comes out with a smooth quarter-turn, the new one clicks in like it was happy to be there, and the whole job is over before the coffee finishes brewing. For others, it turns into a ten-minute staring contest with a plastic cylinder that refuses to budge.
Many homeowners say the most annoying part is not the filter itself but figuring out which filter model to buy. Samsung refrigerators look sleek and modern, but the filters are not always interchangeable. A lot of people assume any Samsung-branded refrigerator filter will work, only to find out their fridge wants a very specific model. That moment usually comes right after unboxing the new filter with confidence and right before muttering something not suitable for a family kitchen.
Another common experience is underestimating the flushing step. People install the new filter, fill one glass, see a few bubbles or dark specks, and immediately wonder whether they just made things worse. In reality, a little sputtering or cloudy water right after replacement is usually normal. Once the system is flushed properly, the water tends to clear up, the flow steadies, and everyone relaxes.
There is also the classic “the light is still on, so I must have done it wrong” moment. This happens all the time. The filter is installed correctly, the water tastes great, and the dispenser works fine, but the indicator keeps glowing because it needs a manual reset. It is a small thing, but it creates an outsized amount of panic. Once people learn that Samsung often requires a button hold or a settings-menu reset, the mystery disappears.
Some users also notice a genuine improvement after changing the filter: cleaner taste, faster flow, clearer ice, and fewer little drips from the dispenser. That is often the giveaway that the old filter had been overdue for longer than anyone wanted to admit. In busy homes, replacing the filter can feel less like maintenance and more like restoring peace to a very thirsty household.
The overall experience, though, is usually positive once you know the pattern. Check the model, use the right filter, do not force anything, flush the line, reset the light, and you are done. It is one of those satisfying home-maintenance tasks that feels oddly productive. You did not remodel the kitchen, sure, but you did improve the water, protect the fridge, and avoid calling for service over something you could handle in under fifteen minutes. That is a solid domestic win.
Conclusion
If you have been putting off replacing your Samsung refrigerator water filter, this is your sign to stop procrastinating. The job is usually quick, simple, and well worth doing. Once you know your filter type and location, the process becomes routine: remove the old filter, install the new one, flush the system, reset the light, and get back to drinking water that tastes like water instead of mystery.
The big takeaways are simple. Use the correct filter, do not ignore compatibility, flush the dispenser after installation, and remember that the reset step is part of the job, not an optional bonus round. Do that, and your Samsung refrigerator should keep delivering clean, fresh water and ice without unnecessary drama.