Table of Contents >> Show >> Hide
- Before You Start: What “Remove” Actually Means on a Mac
- How to Remove an App from the Mac Notification Center: 6 Steps
- Step 1: Catch the Culprit (and Confirm It’s the Right “App”)
- Step 2: Turn It Off Right from the Notification (Fastest Win)
- Step 3: Disable Notifications for That App in System Settings
- Step 4: Tame It Instead of Nuking It (Optional, But Often Smarter)
- Step 5: If It’s a Website Notification, Remove It in Safari (The #1 “Why Is This Here?” Problem)
- Step 6: Make It Disappear for Real (Uninstall, Clean Up, and Restart)
- Troubleshooting: When Notifications Won’t Take a Hint
- Pro Tips to Keep Notification Center from Becoming a Junk Drawer
- FAQ
- Conclusion
- Real-World Experiences (The “I Just Wanted Peace” Edition) 500+ Words
- Experience #1: The Slack Spiral (a.k.a. Death by a Thousand Pings)
- Experience #2: The “This Isn’t an App, It’s a Website” Plot Twist
- Experience #3: The “Ghost Entry” That Won’t Leave the List
- Experience #4: The “It Must Be Malware” Moment (Sometimes… It Is)
- Experience #5: The Healthy Middle Ground (Because Silence Isn’t Always the Goal)
Your Mac’s Notification Center is supposed to be helpfullike a polite assistant who taps you on the shoulder when something matters. But when one app decides it’s the main character (looking at you, “Daily Deals!!!”), Notification Center turns into a heckler. The good news: you can absolutely kick an app out of your attention spanwithout throwing your Mac out the window.
In this guide, you’ll learn how to remove an app from the Mac Notification Center in six clear steps, plus the sneaky fixes for website spam notifications, stubborn “ghost” entries, and apps that keep “politely” asking for permission like they didn’t hear you the first time.
Before You Start: What “Remove” Actually Means on a Mac
People say “remove an app from Notification Center,” but they usually mean one of these:
- Stop seeing notifications from the app (the practical goalpeace and quiet).
- Make the app disappear from the Notifications list in System Settings (the aesthetic goaltidy vibes).
On modern macOS versions, you can always turn off notifications on Mac for a specific app (easy). Completely removing the app from the list is usually only possible if you uninstall the app (or if it’s a website notification you revoke in Safari). Either way, your end result is the same: the app stops interrupting you.
How to Remove an App from the Mac Notification Center: 6 Steps
Step 1: Catch the Culprit (and Confirm It’s the Right “App”)
First, figure out what’s actually sending the notification. This matters because “notifications” can come from: a real app (Slack, Calendar, Zoom), a system feature (Software Update), or a website (via Safari).
- Open Notification Center (click the date/time area, depending on your macOS, or use the gesture/shortcut you normally use).
- Look at the notification headermacOS usually shows the app/site name at the top.
- If it says a website name (or something like “9to5mac” or “news-now.biz”), you’ll handle it in Safari settings later.
Quick tip: If the name looks suspicious (random letters, “Human Verification,” “Security Alert”), treat it like spam and jump to Step 5 and Step 6.
Step 2: Turn It Off Right from the Notification (Fastest Win)
When the notification is on-screen (banner) or sitting in Notification Center, you can often disable that app’s alerts immediatelyno digging required. Think of it like telling a chatty stranger, “I’m happy for you, but I’m not reading all that.”
- Find a recent notification from the offender.
- Click the small arrow / “Options” area (or right-click / Control-click the notification).
- Choose something like Turn Off (fully disables) or Deliver Quietly (still records notifications, but without the drama).
This is ideal when you’re in the middle of work and don’t want to go on a scavenger hunt through System Settings.
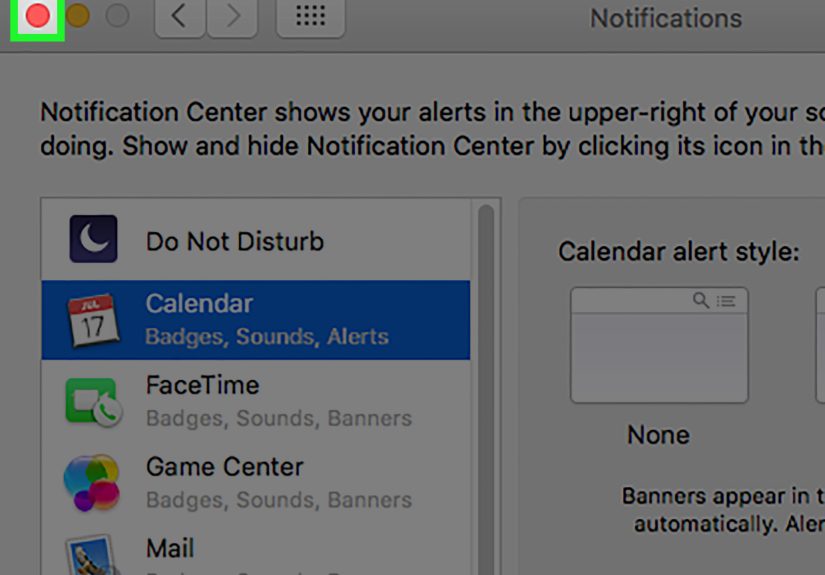
Step 3: Disable Notifications for That App in System Settings
This is the “official” way to disable notifications for specific appsand it gives you the most control. On macOS Ventura and later, it’s in System Settings. On macOS Monterey and earlier, it’s in System Preferences.
- Click the Apple menu → open System Settings (or System Preferences).
- Go to Notifications.
- Under Application Notifications, select the app.
- Turn off Allow notifications.
Congratsyou just removed that app from your life (emotionally, at least).
Step 4: Tame It Instead of Nuking It (Optional, But Often Smarter)
Sometimes you don’t want to fully remove an app from Notification Centeryou just want it to stop acting like a car alarm. Instead of turning notifications off completely, adjust how they show up.
Use these “less annoying” settings
- Alert Style: Choose banners instead of alerts, or pick “None” if you only want badges (or nothing at all).
- Sounds: Turn off sound so your Mac stops auditioning for a pinball machine.
- Badges: Disable badge app icons if you hate red circles that scream “You’re behind.”
- Previews: Set previews to “When Unlocked” or “Never” if privacy matters.
This approach is perfect for apps like Mail, Messages, or Calendar: you still want the important stuff, just not every “FYI” and “checking in” message.
Step 5: If It’s a Website Notification, Remove It in Safari (The #1 “Why Is This Here?” Problem)
Website push notifications are the party guests who weren’t invited, showed up anyway, and started rearranging your furniture. Turning off Safari notifications in System Settings sometimes helpsbut for many sites, you need to revoke permission inside Safari.
Remove website notifications in Safari
- Open Safari.
- Go to Safari → Settings (or Preferences).
- Click the Websites tab.
- Select Notifications in the left sidebar.
- Find the website and set it to Deny or remove it.
Bonus hygiene: disable the option that allows websites to ask for permission to send notifications. If you never want a site to pop the question again, this is your “do not propose to me” setting.
Step 6: Make It Disappear for Real (Uninstall, Clean Up, and Restart)
If your goal is not just “silence,” but “vanish,” you’ll usually need to remove the underlying thing that created the notification entry: the app itself, a login helper, or a website permission.
A) Uninstall the app (best for true removal)
- Quit the app.
- Move it from Applications to the Trash (or use the app’s uninstaller, if it has one).
- Restart your Mac (or at least log out/in) to refresh background services.
B) Check for notification “helpers” that keep coming back
Some apps install background items so they can notify you even when you’re not actively using them. If you disable notifications but the app still behaves weirdly, check:
- Login Items (background open-at-login entries)
- Browser extensions (especially if the “app” is really a web notification source)
C) If the name looks sketchy, treat it like malware
If an unknown “app” appears in Notifications and you can’t find it in Applications, don’t assume it’s just a quirky macOS feature. It may be adware or a browser-based spam permission. Revoke website notification permissions (Step 5), remove suspicious extensions, and consider reputable malware scanning if you suspect something shady.
Troubleshooting: When Notifications Won’t Take a Hint
“I turned it off, but I’m still getting notifications.”
- You disabled the app, but the source is a website. Fix it in Safari (Step 5).
- You have multiple versions of an app. Some apps (or app helpers) can register separately. Make sure you toggled the right one.
- Restart needed. It’s basic, but it works more often than we’d like to admit.
“The app won’t disappear from the list.”
Totally normal. The Notifications list can include apps/sites that have requested permission before. If notifications are disabled, that entry is basically a “mute button,” not a “delete button.” If you need it gone for aesthetic reasons, uninstall the app or revoke the website permission.
“I only want to stop pop-ups, not Notification Center history.”
Use Deliver Quietly (when available) or change the app’s alert style so banners/alerts don’t interrupt you. This way the notifications can still be available laterlike voicemail, but for your apps.
Pro Tips to Keep Notification Center from Becoming a Junk Drawer
Use Focus Modes for temporary silence (without breaking anything)
If you need peace for an hour, don’t permanently disable everything. Use a Focus like Do Not Disturb or Work. It’s the difference between “Please be quiet” and “I have moved to the woods and changed my name.”
Do a monthly “notification audit”
Once a month, open Notifications settings and ask, “Would I miss this if it vanished?” If the answer is “no,” toggle it off. Your future self will feel strangely…lighter.
Keep previews private
If you work in public or share your screen, notification previews can become accidental storytelling. Set previews to show only when unlockedor neverespecially for Messages and Mail.
FAQ
Can I remove all notifications at once on Mac?
You can silence them quickly with a Focus (like Do Not Disturb). For permanent, per-app control, you’ll need to adjust each app’s notification settings.
Is “Turn Off” the same as uninstalling the app?
No. Turning off notifications stops alerts but keeps the app installed. Uninstalling removes the app and usually removes its ability to show up as a notification source.
Why are website notifications so persistent?
Because once you allow them, the site can push alerts like it’s a tiny newsroom living in your menu bar. Revoke permission in Safari to fully shut it down.
Real-World Experiences (The “I Just Wanted Peace” Edition) 500+ Words
Let’s talk about what actually happens in the wild, because “just turn it off in settings” is like telling someone with a messy garage to “simply organize.” Helpful, surebut it ignores the chaos that got them there.
Experience #1: The Slack Spiral (a.k.a. Death by a Thousand Pings)
A common scenario: someone installs Slack (or Teams, or any app used by people who believe “urgent” is a lifestyle). For the first day, notifications feel useful. Then the channels multiply. Then the threads multiply. Then someone discovers emoji reactions and your Mac begins to “ding” like it’s trying to summon a submarine.
The fix usually isn’t to remove Slack from Notification Center completelyit’s to change the alert style. Banners without sound can be fine. Badges can be helpful. But alerts that sit on your screen until you click them? That’s not productivitythat’s a hostage situation. Step 4 (taming) is the hero here: keep the important stuff, ditch the noise.
Experience #2: The “This Isn’t an App, It’s a Website” Plot Twist
Another classic: someone swears an “app” is spamming them. The name looks like a brand (“Breaking-News Now!”) or a site (“9to5mac,” “sports-updates,” “coupon-buddy”). They go to Notifications settings, flip a switch… and the notifications still arrive like nothing happened. Cue frustration.
This is where Step 5 saves the day. Website push notifications live in Safari’s permission list, and if permission is still set to Allow, those alerts can keep popping up even if you’ve been toggling random switches elsewhere. Once you deny/remove the site in Safari’s Notifications permissions, the spam stops immediatelylike closing a door on a salesperson mid-sentence.
Experience #3: The “Ghost Entry” That Won’t Leave the List
Sometimes an item stays in the Notifications list even after you’ve disabled it. People interpret this as failure: “I wanted to remove the app from Notification Center, and it’s still staring at me.” But on many macOS setups, the list is more like a record of what has requested notification rightsnot a neat inventory you can curate like a playlist.
The practical test is simple: are you still getting notifications? If not, you’ve won. If you need the entry gone for cleanliness, uninstalling the app usually removes it (after a restart or a little time). If it’s a website, removing the permission in Safari usually cleans it up.
Experience #4: The “It Must Be Malware” Moment (Sometimes… It Is)
If a weird name appears in your notification sources and you can’t find a matching app anywhere, don’t shrug it off. A lot of modern “adware-ish” annoyances come from shady sites that trick people into allowing notifications. The fix often starts with Safari: revoke notification permissions, remove suspicious extensions, clear site data if needed, and restart. Most of the time, that’s enough. When it isn’t, you treat it like a security cleanupnot a settings tweak.
Experience #5: The Healthy Middle Ground (Because Silence Isn’t Always the Goal)
Here’s the most underrated truth: you don’t need to live at either extremeconstant alerts or total silence. The best Notification Center setup is tailored: important apps can stay on with quiet banners, unimportant apps get turned off, and Focus mode handles deep work. It’s less “remove everything” and more “only let the right people into the VIP section of my brain.”
If you take nothing else from these experiences, take this: when notifications feel out of control, the problem is usually permissionsnot your patience. Adjust the source (app vs website), pick the right level of strictness (quiet vs off), and your Mac goes back to being a toolnot a megaphone.