Table of Contents >> Show >> Hide
- First: A Quick Decision Guide
- Cherry Pitting Basics (So You Don’t Lose a Finger or Your Patience)
- How to Pit Cherries With a Cherry Pitter
- How to Pit Cherries Without a Cherry Pitter
- Method 1: The bottle + chopstick (or sturdy straw) method
- Method 2: The metal straw method (the “clean punch”)
- Method 3: The pastry tip method (surprisingly brilliant)
- Method 4: The paper clip method (oddly effective)
- Method 5: The paring knife twist-and-open method (for halves)
- Method 6: The “smash and pick” method (fastest, messiest)
- How to Pit Cherries Faster (Without Turning Your Kitchen Pink)
- What to Do With Pitted Cherries
- How to Store and Freeze Cherries After Pitting
- Frequently Asked Questions
- Conclusion: Pick Your Method and Get to the Good Part
- Real-World Cherry-Pitting Experiences ( of “What Usually Happens”)
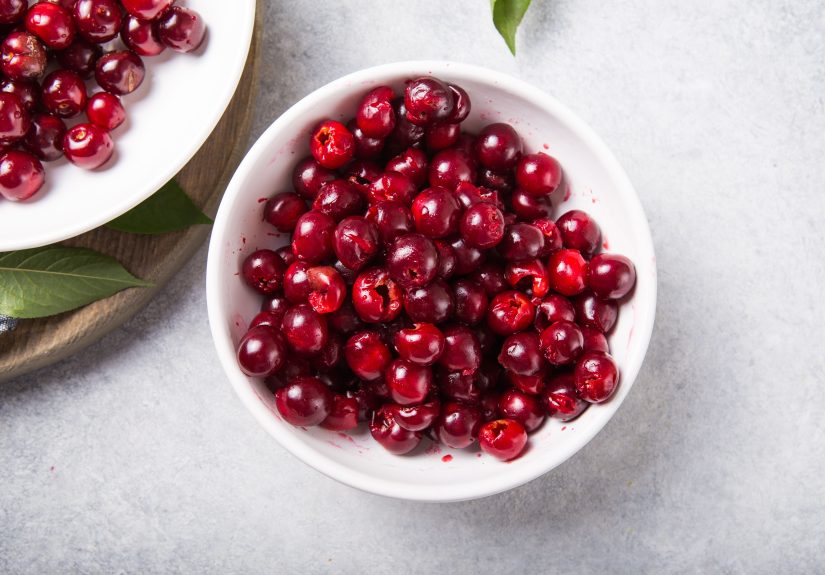
Pitting cherries is one of those kitchen tasks that looks innocentuntil your countertop resembles a tiny fruit-themed crime scene.
The good news: whether you own a cherry pitter or you’re armed with nothing but sheer determination and a reusable straw,
you can get the job done quickly, safely, and with minimal “cherry tattoo” staining on your hands.
This guide walks you through the best ways to remove cherry pits (with or without a tool), plus pro tips for choosing cherries,
preventing splatter, and storing or freezing pitted cherries for pies, cobblers, jam, cocktails, and snacking.
First: A Quick Decision Guide
- Need to pit a lot of cherries fast? Use a cherry pitter (single or multi-cherry style).
- Need mostly whole cherries (for baking, topping, or freezing)? Use a pitter, straw, chopstick + bottle, or pastry tip.
- Need pretty cherry halves (for salads, garnish, or plating)? Use the paring knife twist-and-open method.
- Working with very soft or delicate cherries? Chill them first, then consider the knife method.
Cherry Pitting Basics (So You Don’t Lose a Finger or Your Patience)
1) Wash, then dry
Rinse cherries under cool water and pat them dry. Wet cherries are slick, and slick cherries love launching themselves across the kitchen
at the exact moment you’re holding a sharp object.
2) Remove stems
Pull stems off right before pitting. It makes your tool easier to position and helps you see the natural opening where the stem used to be.
3) Set up a “splatter zone”
Cherry juice stains like it has a personal vendetta. To protect your counters (and your shirt), work over a rimmed baking sheet,
a cutting board with a moat, or a big bowl. An apron is not dramatic hereit’s practical.
4) Check your work
Even when you use a cherry pitter, a few pits can slip throughespecially if cherries vary in size or the pit sits slightly off-center.
Always do a quick “pit check” before you bake or serve.
How to Pit Cherries With a Cherry Pitter
A cherry pitter is the fastest, cleanest optionespecially if you’re pitting pounds of cherries for pie filling, preserves, or freezing.
Most handheld pitters work like a stapler: place cherry, squeeze, pit pops out. Multi-cherry pitters do several cherries at once.
Step-by-step: Handheld (single-cherry) pitter
- Place a bowl beneath your work area to catch pits and juice.
- Set a destemmed cherry in the cradle, stem end facing the plunger.
- Squeeze the handles firmly and smoothly.
- Lift out the pitted cherry and repeat.
Step-by-step: Multi-cherry pitter
- Load cherries into the hopper (follow your tool’s capacity and alignment marks).
- Press the plunger/lever in one controlled motion.
- Open and remove cherries; check for any missed pits.
Pro tips for cleaner pitting
- Use the splatter guard/shroud if your pitter has one. It helps keep juice from spraying sideways.
- Work in batches. If you’re doing a lot, pit into one bowl and drop finished cherries into another.
- Mind the angle. Off-center cherries are more likely to tear. Re-seat the cherry if it looks crooked.
Cleaning a cherry pitter (without hating your life)
- Rinse immediately after use; dried cherry sugar is basically edible glue.
- Use a small brush (a toothbrush works) to scrub the plunger area.
- If dishwasher-safe, place it on the top rackbut still rinse first.
How to Pit Cherries Without a Cherry Pitter
No tool? No problem. Your kitchen is full of objects that can push a pit through a cherry.
The best “no pitter” methods use gentle pressure, keep your hands out of the way, and avoid mangling the fruit.
Method 1: The bottle + chopstick (or sturdy straw) method
This is the classic hack because the bottle catches the pit neatly and helps reduce mess. It’s surprisingly efficient once you find your rhythm.
- Find a glass bottle with a narrow opening (soda, beer, or wine bottle works well).
- Place a destemmed cherry on the bottle opening, stem side up.
- Use a chopstick (flat end is best) or a sturdy reusable straw to press straight down through the center.
- The pit drops into the bottle; the cherry stays mostly whole.
Best for: whole pitted cherries for baking, freezing, and snacking.
Method 2: The metal straw method (the “clean punch”)
If you have a stainless-steel straw, you’ve basically got a mini cherry corer. A regular flimsy plastic straw often bends,
so reach for something sturdy.
- Hold a cherry over a bowl (or use the bottle setup above).
- Push the straw through the stem opening until you feel the pit.
- Continue pressing until the pit pops out the other side.
Best for: fast pitting with minimal equipment.
Method 3: The pastry tip method (surprisingly brilliant)
A metal piping tip (like the kind used for frosting) can remove pits cleanly because the pit lodges inside the tip.
This method can be less splattery than you’d expect, especially over a cutting board.
- Place a metal pastry tip upright on a cutting board (narrow end down).
- Press the cherry, stem side down, onto the wider opening of the tip.
- Push firmly until the pit stays behind in the tip and the cherry slides off.
- Tap the tip to release pits as needed.
Best for: small batches and people who own baking tools but not “single-purpose gadgets.”
Method 4: The paper clip method (oddly effective)
If you’re desperate and you’ve got clean paper clips, you can bend one into an “S” and scoop the pit out.
It’s slower, and cherries won’t stay perfectly round, but it works.
- Wash and sanitize a metal paper clip.
- Bend it into an “S” shape with a small hook on one end.
- Insert the hook into the stem opening and catch the pit.
- Wiggle and lift to pull the pit out.
Best for: very small batches and “I refuse to go to the store” moments.
Method 5: The paring knife twist-and-open method (for halves)
When you want neat cherry halvesthink salad toppings, yogurt bowls, or elegant garnishesuse a small paring knife.
This method is also useful for delicate cherries that might explode under pressure.
- Place the cherry on a cutting board and steady it with your fingertips.
- Cut around the cherry in a circle, tracing the pit (like you would an avocado or peach).
- Twist the two sides gently to separate.
- Pop the pit out with your fingers or the knife tip.
Best for: presentation, cherry halves, and softer fruit.
Method 6: The “smash and pick” method (fastest, messiest)
If you’re making sauce, jam, or anything where the cherries don’t need to look pretty, you can flatten cherries and pull pits out.
It’s effectivebut yes, juice will travel.
- Place cherries on a cutting board.
- Press down gently with the flat side of a chef’s knife (or the bottom of a sturdy cup) until the cherry splits.
- Remove the pit with fingers.
Best for: cooking projects where appearance doesn’t matter.
How to Pit Cherries Faster (Without Turning Your Kitchen Pink)
Chill the cherries
Cold cherries are firmer and easier to pit cleanly. If your cherries are very soft, a short chill can reduce tearing and splatter.
Work in a “pit station”
- One bowl for unpitted cherries
- One bowl for pitted cherries
- One small container for pits (or let the bottle catch them)
- Paper towels nearby for quick wipe-downs
Protect your hands and clothes
If you’re pitting a lot, consider food-safe gloves. Cherry juice can stain skin temporarily, and it’s especially clingy around fingernails.
Also: dark shirts are the unofficial uniform of cherry season.
Do a “final pit sweep”
Before baking, run your fingers lightly through the pitted cherries and look for suspiciously hard pieces.
Your molars will thank you.
What to Do With Pitted Cherries
Once you’ve got a bowl of pit-free cherries, the possibilities get dangerously delicious.
Here are a few common (and highly rewarding) uses:
- Baking: pies, crisps, cobblers, clafoutis, muffins, quick breads
- Sauces: cherry compote for pancakes, ice cream, or cheesecake
- Savory dishes: cherry pan sauce for pork or duck, salads with goat cheese and nuts
- Preserving: jams, freezer packs, or cherries in syrup
- Drinks: cocktails, mocktails, cherry-infused simple syrup
How to Store and Freeze Cherries After Pitting
Short-term storage (refrigerator)
For the best texture and freshness, store cherries cold. If you can, keep cherries unwashed and unpitted until close to when you’ll use them.
Once pitted, refrigerate in a covered container and use within a couple of days for best quality.
Freezing pitted cherries (the “flash-freeze” method)
Flash-freezing keeps cherries from clumping into one solid frozen brick. It’s the difference between “grab a handful” and “attack with a butter knife.”
- Pat pitted cherries dry.
- Spread them in a single layer on a parchment- or wax-paper-lined baking sheet.
- Freeze until firm.
- Transfer to a freezer bag/container, remove excess air, label, and store.
Tip: If you’re preserving texture for baking later, freezing in a syrup solution can help (especially for tart cherries).
Frequently Asked Questions
Do I really need to pit cherries for cooking?
If you’re baking, making jam, or serving cherries to kids, yesremove the pits. Pits are a choking hazard and can crack teeth.
Some traditional desserts use unpitted cherries for flavor, but that’s a deliberate choice and not a “surprise pit” situation.
Why do some cherries “explode” when I pit them?
Softer or very ripe cherries tear more easily, and pits can be off-center. Chilling helps, and the knife method is gentler when fruit is delicate.
What’s the best method if I need cherries to stay whole?
A cherry pitter is best. Without one, try the bottle + chopstick or sturdy straw method to keep the fruit mostly intact.
Can I pit cherries ahead of time?
You can, but quality is best when you pit close to use. If you do it ahead, keep them cold and covered, and plan to use them soonor freeze them.
Conclusion: Pick Your Method and Get to the Good Part
Pitting cherries doesn’t have to be a sticky slog. If you pit cherries often (or in large amounts), a cherry pitter is absolutely worth it.
If you only need a handful for a summer salad or a batch of muffins, you can get excellent results with a bottle and chopstick, a sturdy straw,
a pastry tip, or a paring knife.
Choose the method that matches your goalwhole cherries, neat halves, or “I’m making sauce, nobody’s judging”then protect your countertop,
double-check for rogue pits, and enjoy the payoff: everything from pies to popsicles to savory cherry pan sauce.
Real-World Cherry-Pitting Experiences ( of “What Usually Happens”)
Here’s the truth nobody tells you: the first time most people pit cherries, they learn three things immediately.
One, cherries contain more juice than seems physically possible. Two, that juice has a PhD in fabric staining.
And three, you will absolutelywithout failfind a pit you missed at the exact worst moment (usually after the pie is in the oven,
or while someone is mid-bite and you suddenly remember you were “pretty sure” you checked).
In a typical home kitchen, the experience starts optimistically: a bowl of glossy cherries, a cutting board, and a plan.
If you’re using a cherry pitter, the first few presses feel magicallike you’ve discovered a tiny fruit stapler that turns work into progress.
Then reality arrives: one cherry is smaller, another is softer, and suddenly the plunger hits off-center and the cherry tears.
This is normal. Cherries aren’t uniform widgets. They’re tiny nature-made water balloons with opinions.
Without a cherry pitter, people often try the bottle-and-chopstick method and get a satisfying “pop” when the pit drops cleanly into the bottle.
It feels like a party trick. But the learning curve is real: press too gently and nothing happens; press at an angle and you punch a new
exit hole that no recipe asked for. The workaround most cooks discover is simplego straight down, use a flat-ended chopstick (or a sturdy straw),
and let the bottle stabilize the cherry. Once that muscle memory clicks, the speed picks up dramatically.
Another common experience is “the cherry juice hand stain.” It’s not dangerous, just mildly comediclike you’ve been fingerpainting in magenta.
The practical solution is gloves, frequent hand rinses, or embracing the look as proof you’re doing something delicious with your day.
An apron is also a recurring lesson. Many people learn this after wearing a light-colored shirt and then wondering why they smell faintly of regret.
If you’re pitting for a big projectsay, preserves or a freezer stashpeople often discover the value of a proper setup.
A “pit station” reduces frustration: one bowl for unpitted cherries, one for pitted, and a dedicated place for pits (or a bottle that collects them).
It sounds basic, but it prevents that chaotic moment when pits and fruit start mingling and you can’t tell who’s who.
Finally, the most universal experience: the rhythm. Once you settle into a repeatable motion, pitting cherries becomes almost meditative.
You get into a groovepress, pop, drop, repeatand the pile of pitted cherries grows faster than you expect.
That’s when the task flips from “ugh, prep work” to “I’m basically a summer wizard turning fruit into pie filling.”
And honestly? That’s the energy cherries deserve.