Table of Contents >> Show >> Hide
- Microwave vs. Oven: Which Method Should You Use?
- Prep Like a Pro: Picking, Washing, and (Safely) Cutting Butternut Squash
- How to Microwave Butternut Squash
- Microwave Safety Basics (Yes, This Matters)
- Method 1: Microwave Whole Butternut Squash (Fastest “No-Chop” Option)
- Method 2: Microwave Halves or Quarters (Best Balance of Speed + Even Cooking)
- Method 3: Microwave Cubes (Great for Quick Bowls, Salads, and Meal Prep)
- How to Tell When Microwaved Squash Is Done
- How to Cook Butternut Squash in the Oven
- Seasoning Ideas That Don’t Taste Like “Sad Health Food”
- Specific Use Cases: What to Make With Your Cooked Squash
- Storage, Freezing, and Reheating
- FAQ: Microwave and Oven Butternut Squash Questions People Actually Ask
- Conclusion
Butternut squash is the introvert of the produce aisle: quiet, beige, and minding its own businessuntil you try to cut it and it suddenly becomes a
strength-training device. The good news? You don’t have to wrestle it raw. With the right approach, you can cook butternut squash fast in the
microwave or get that caramelized, roasty magic in the ovenwithout sacrificing flavor, texture, or your fingertips.
This guide walks you through both methods (plus prep shortcuts, timing, seasoning ideas, and storage tips) so you can choose the best option for your
dinner mood: “feed me in 12 minutes” or “I want browned edges and a cozy kitchen smell.”
Microwave vs. Oven: Which Method Should You Use?
Both microwave and oven methods can produce tender, delicious butternut squash. The difference is time and texture.
- Microwave butternut squash: fastest way to soften squash for mashing, purée, soup, or quick meal prep. Great when you’re short on time.
- Oven-roasted butternut squash: best for caramelization and deeper flavor (hello, golden edges). Ideal for salads, grain bowls, tacos, or a side dish that actually gets compliments.
Quick Decision Cheat Sheet
| Goal | Best Method | Why | Typical Time |
|---|---|---|---|
| Soft squash for soup/purée | Microwave (halves/quarters) | Steams quickly and evenly | ~9–12 min (1000W) |
| Caramelized cubes | Oven roast | Browning + flavor | ~25–35 min @ 400°F |
| Make cutting safer/easier | Microwave “soften first” hack | Less slippery, less force | ~3–5 min |
| Meal prep for the week | Either | Microwave is fast; oven is tastier | 10–50 min |
Prep Like a Pro: Picking, Washing, and (Safely) Cutting Butternut Squash
How to Choose a Good Squash
Look for a squash that feels heavy for its size with a firm, intact skin (no soft spots). Heavier usually means more dense flesh and less
disappointment when you slice it open.
Tools That Make Life Easier
- Non-slip cutting board (or place a damp towel underneath so it doesn’t skate away mid-chop)
- Sharp chef’s knife (dull knives are the real danger)
- Y-shaped vegetable peeler (fast and stable for thick skins)
- Spoon for scraping seeds
- Optional: rubber mallet for very stubborn squash (yes, really)
How to Cut Butternut Squash (Without a Dramatic Reenactment)
- Trim the ends (stem end and bottom) so it stands steady.
- Peel with a peeler in long strokes (or skip peeling if you’re roasting halves and scooping later).
- Separate the “neck” and “bulb”: the neck is solid, the bulb has the seed cavity.
- Scoop seeds with a spoon.
- Cube into roughly 1-inch pieces for even cooking.
The Microwave “Soften First” Hack (For Easier Cutting)
If your squash feels like it was grown in a gym, soften it before peeling/cutting: pierce or slit the skin so steam can vent, then microwave briefly.
This trick helps reduce the force needed (and the “knife slipped!” panic).
How to Microwave Butternut Squash
Microwaving butternut squash is basically controlled steaming. It’s fast, hands-off, and perfect for getting tender squash without heating your whole
kitchen. Bonus: microwaves cook food safely when used properly, just like other cooking methods.
Microwave Safety Basics (Yes, This Matters)
- Vent it. Whole or covered squash needs a way for steam to escapeslits in the skin or vented wrap keep pressure from building.
- Rotate or stir halfway. Microwaves can create cold spots; turning helps cook evenly.
- Use microwave-safe dishes and handle carefullysteam burns are sneaky.
- Check your microwave condition. A properly working microwave is designed to meet safety standards; don’t ignore broken door seals/latches.
Method 1: Microwave Whole Butternut Squash (Fastest “No-Chop” Option)
This method is the ultimate shortcut when you want cooked squash without peeling or dicing first. The key is venting: make several slits around the
squash so steam can escape.
- Wash and dry the squash.
- Use a paring knife to cut several shallow slits around the skin (don’t skip this).
- Place on a microwave-safe plate.
- Microwave on High, checking for doneness by sliding a knife into the flesh.
- Let it cool before cutting, seeding, and scooping.
Timing guide: A 3-pound butternut squash can take about 12 minutes, with checking around 10 minutes and finishing in short
bursts if needed.
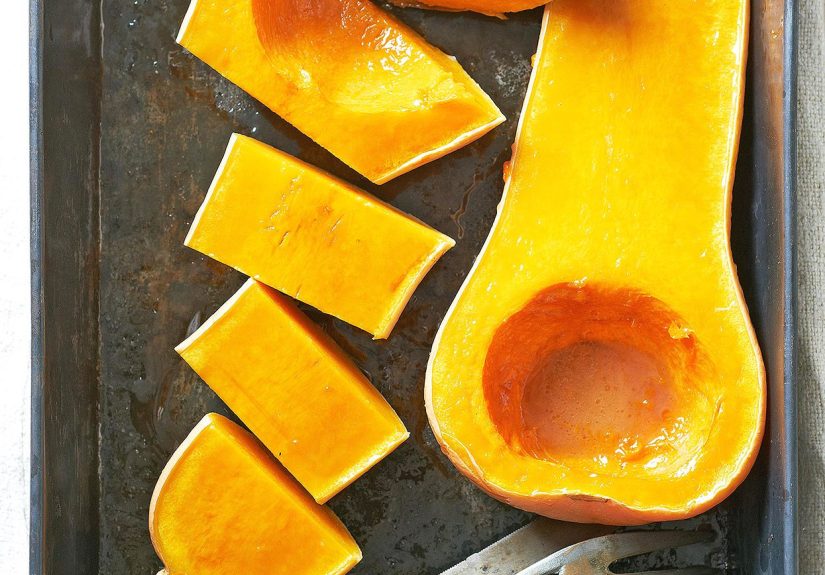
Method 2: Microwave Halves or Quarters (Best Balance of Speed + Even Cooking)
This is the sweet spot for most people: less time than the oven, more even than a fully whole squash, and easier to season afterward.
Place squash cut-side down in a microwave-safe dish with a little water, then cover with vented wrap or a lid.
- Peel if you want (optional), then cut in half lengthwise and scoop out seeds.
- Place cut-side down in a microwave-safe dish with a splash of water.
- Cover and vent (poke a few slits).
- Microwave on High for about 9–12 minutes in a standard 1000-watt microwave, until fork-tender.
- Rest 2–3 minutes, then season and serve.
Method 3: Microwave Cubes (Great for Quick Bowls, Salads, and Meal Prep)
Cut peeled squash into 1-inch cubes, add them to a microwave-safe bowl with a tablespoon or two of water, cover, and microwave until tender. Stir halfway
for even cooking. (Microwave times vary by quantity and power; start conservatively and add time in short bursts.)
How to Tell When Microwaved Squash Is Done
- A fork slides in easily with little resistance.
- The flesh looks deeper orange and slightly glossy.
- For purée: it should be very soft, not just “barely tender.”
How to Cook Butternut Squash in the Oven
Oven cooking is where butternut squash goes from “tender” to “tender and caramelized.” Heat pulls out natural sugars, browns the edges, and makes
your kitchen smell like you have your life together.
Oven-Roasted Cubes at 400°F (Classic, Reliable, Crowd-Pleasing)
For 1-inch cubes, roasting at 400°F typically takes 25–35 minutes, until lightly browned and fork-tender. Keep cubes in a
single layer so they roast instead of steam.
- Preheat oven to 400°F. Line a sheet pan (parchment helps).
- Toss 1-inch squash cubes with olive oil, salt, pepper, and any seasonings you love.
- Spread out in a single layer (space = browning).
- Roast 25–35 minutes, turning once, until browned and tender.
High-Heat Roasting at 425–450°F (For Maximum Browning)
If you’re chasing more caramelization, bump the heat. One approach is roasting cubes at 425°F for around 35 minutes.
Another general veggie-roasting guide recommends 450°F for 25–35 minutes for 1-inch pieces.
Translation: higher heat usually means better browning, but keep an eye on ityour oven might run hot, and nobody wants “butternut charcoal chic.”
Roasting Halves (Best for Purée, Mash, and “Scoop-and-Serve” Simplicity)
Roasting halves is the low-effort route to ultra-tender squash: cut lengthwise, remove seeds, oil the cut sides, and roast cut-side down until very soft.
A common timing range at 400°F is 40–50 minutes.
- Preheat oven to 400°F.
- Halve squash lengthwise and scoop out seeds.
- Rub cut sides with oil; season with salt and pepper.
- Place cut-side down on a sheet pan and roast 40–50 minutes, until very tender.
- Cool briefly, then scoop flesh and mash or blend.
Seasoning Ideas That Don’t Taste Like “Sad Health Food”
Butternut squash is naturally sweet and nutty, so it plays well with both savory and sweet seasonings. If you’re roasting cubes, add dry spices at the
start; if you’re using delicate herbs, consider adding them toward the end so they don’t scorch.
Simple Savory (Weeknight Reliable)
- Olive oil + garlic + salt + pepper
- Sage + rosemary + thyme (classic fall vibes)
- Smoked paprika + cumin + chili flakes (taco-night energy)
Sweet-Heat (Holiday-Adjacent, But Not Only for Holidays)
- Cinnamon + pinch of cayenne (sweet first, then a tiny wink of heat)
- Maple drizzle (add late so it doesn’t burn)
- Allspice + butter for mashable comfort
Specific Use Cases: What to Make With Your Cooked Squash
Microwaved Squash = Fast Meals
- 15-minute soup: Blend microwaved squash with warm broth, sautéed onion (optional), and a splash of cream or coconut milk.
- Quick mash: Stir in butter, salt, pepper, and a pinch of allspice. (It’s basically mashed potatoes’ sweeter cousin.)
- Meal-prep base: Fold into quinoa bowls with chicken, chickpeas, feta, or roasted pepitas.
Oven-Roasted Squash = Texture + Flavor
- Warm salad: roasted cubes + arugula + goat cheese + toasted nuts
- Taco filling: roasted squash + black beans + lime + cilantro
- Sheet-pan dinner: roast squash alongside chicken thighs or sausages (same pan, fewer dishes, more joy)
Storage, Freezing, and Reheating
Cooked butternut squash is meal-prep friendly. Store it in an airtight container in the fridge, and use it through the week for bowls, soups, and sides.
For longer storage, freeze cooked cubes (spread on a tray first so they don’t clump) or freeze purée in portions.
Reheating Tips
- Microwave: add a teaspoon of water and cover loosely to re-steam without drying out.
- Oven/toaster oven: re-crisp roasted cubes on a sheet pan for best texture.
FAQ: Microwave and Oven Butternut Squash Questions People Actually Ask
Can you microwave a whole butternut squash?
Yes, but you must vent it. Slits (or holes) allow steam to escape, which is crucial when microwaving thick-skinned produce.
How long does it take to microwave butternut squash?
It depends on size, cut, and microwave power. A halved squash can take around 9–12 minutes in a 1000-watt microwave, while a whole 3-pound squash can be
around 12 minutes (check early and finish in short intervals).
How long to roast butternut squash at 400°F?
For 1-inch cubes: about 25–35 minutes. For halves: roughly 40–50 minutes, until very tender.
Is it okay to soften squash in the microwave before cutting?
Absolutelyand it’s one of the safest ways to make prep easier. Brief microwaving (after piercing/slitting) can reduce the muscle-power factor and make
peeling simpler.
Conclusion
If you want speed, microwave butternut squash and get on with your life. If you want caramelized edges and deep roasted flavor, cook it in the oven and
let your kitchen do its cozy magic. Either way, the real win is this: you’re no longer negotiating with a rock-hard gourd using only hope and a chef’s
knife.
From My Kitchen: of Real-World Butternut Squash Experience
The first time I tried to prep a raw butternut squash, I learned an important life lesson: confidence is not the same thing as traction. The squash rolled,
I overcorrected, and suddenly we were both in a tense relationship with gravity. That’s why I’m now a devoted fan of the “make it stable first” approach:
trim the ends, plant it like a little beige tree, and give it a cutting board that doesn’t slide. A damp towel under the board is the simplest upgrade you
can make, and it feels like unlocking a secret kitchen level.
My second big lesson was about timingand not the “set a timer” kind, but the “choose the right method for the right goal” kind. When I’m making soup or
anything blended, I reach for the microwave. It’s not lazy; it’s strategic. I’ll quarter the squash, add a splash of water, cover, and let the microwave do
its steamy thing while I chop onions or pretend I’m cleaning as I go (I am not). The texture comes out soft and scoopable, which is exactly what you want
when you’re about to blitz it into purée anyway. And if the squash is being particularly stubborn to cut, I’ll soften it briefly firstthree minutes can
take a squash from “dangerous bowling pin” to “manageable dinner ingredient.”
When I want roasted cubes, though, I never microwave first. I used to think “I’ll microwave to speed things up and then roast,” but the texture can turn
a bit too soft and steamy before it ever hits the pan. For crispier edges, I go straight to the oven: hot sheet pan, enough oil to coat (not drown), and
plenty of space between cubes. Crowding is the sneaky villain of roasted vegetables. It doesn’t look like much at firstjust a cozy little pile of squash.
But in the oven, that “cozy pile” becomes a steam room, and your squash comes out pale and confused instead of browned and proud.
Seasoning-wise, I’ve learned to treat butternut squash like a friend who looks sweet but secretly loves drama. A pinch of cayenne with cinnamon is the
easiest way to make people ask, “What did you put on this?” (in a good way). For savory dinners, smoked paprika and cumin make roasted squash taste like it
belongs in tacos, grain bowls, or on top of a salad that’s trying harder than a salad usually does. And if you’re doing the halved-roast-and-scoop method,
don’t forget the seed cavity is prime real estate: a pat of butter or a drizzle of olive oil melts right into the flesh and basically seasons it from the
inside out. The main takeaway from years of squash encounters: pick the method that fits your end game, vent steam in the microwave, give cubes room in the
oven, and don’t be afraid to add bold flavorsthis squash can handle it.