Table of Contents >> Show >> Hide
- What Makes a Farmhouse Table and Chair Makeover Work?
- Before You Start: Figure Out What You’re Working With
- Tools and Materials You’ll Want Nearby
- Step-by-Step: How to Make Over a Farmhouse Table and Chairs
- Step 1: Clean Like the Previous Owner Was Butter
- Step 2: Disassemble What You Can
- Step 3: Repair the Surface
- Step 4: Sand for Adhesion, Not Punishment
- Step 5: Decide on Your Finish Strategy
- Option A: Painted Base and Chairs + Stained Top
- Option B: All-Over Painted Set
- Option C: Whitewashed or Softly Weathered Wood
- Step 6: Prime Only Where It Helps
- Step 7: Paint the Chairs and Base
- Step 8: Stain or Finish the Tabletop
- Step 9: Distress With Restraint
- Step 10: Seal for Real Life
- Best Farmhouse Color Ideas for Tables and Chairs
- Common Mistakes That Ruin the Look
- How to Style the Finished Set So It Looks Charming, Not Corny
- Experience: What a Farmhouse Table and Chairs DIY Really Feels Like
- Final Thoughts
- SEO Tags
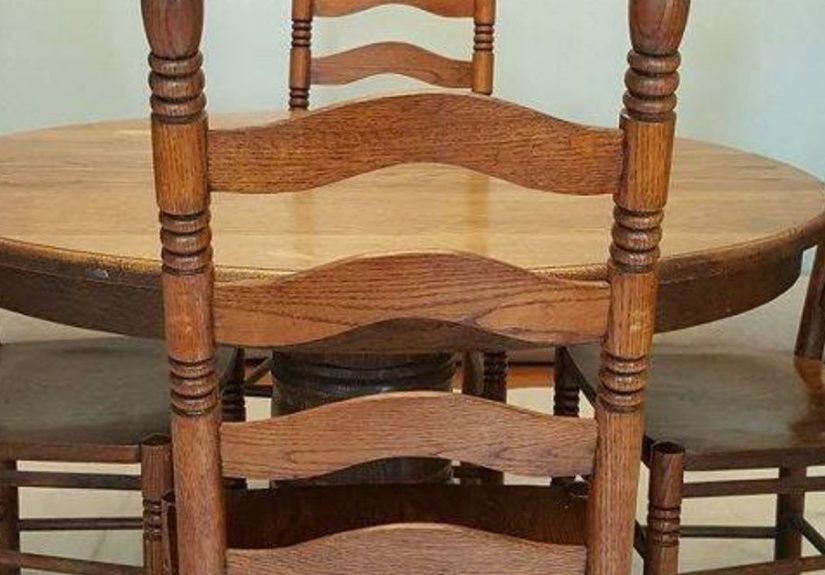
If your dining table and chairs currently look like they’ve survived three family holidays, two science projects, one glitter incident, and a mild emotional collapse, congratulations: you have the perfect candidates for a farmhouse makeover. Farmhouse style is forgiving, welcoming, and wonderfully unpretentious. It doesn’t demand perfection. In fact, it actively flirts with imperfections. A nick here, a weathered edge there, a soft matte finish that says, “Yes, I bake pies,” even if your signature dish is takeout in a ceramic bowl.
This DIY makeover is all about turning an ordinary or worn-out table-and-chair set into something warm, charming, and magazine-worthy without making it feel stiff or overly staged. The best farmhouse furniture balances function and personality. It should feel lived-in, useful, and a little storied, like it came from a country home with excellent biscuits and very strong opinions about paint colors.
In this guide, you’ll learn how to refinish, paint, distress, protect, and style your table and chairs so the final result looks intentional rather than “I got impatient halfway through.” Whether you’re working with a thrifted dining set, a hand-me-down oak table, or a basic builder-grade setup that needs more soul, this project can completely transform your space.
What Makes a Farmhouse Table and Chair Makeover Work?
A charming farmhouse look is not just “paint it white and hope for the best.” The real appeal comes from contrast, texture, and practicality. Farmhouse furniture usually mixes painted surfaces with natural wood tones, matte finishes with soft wear, and simple shapes with cozy, collected details. That means your makeover should feel relaxed and useful, not glossy and overly perfect.
One of the easiest ways to achieve that look is to combine a painted base or painted chairs with a stained or wood-look tabletop. This keeps the set grounded and gives it that classic gathered-around-the-table energy. Another winning option is a single-color painted set in a warm white, greige, muted sage, charcoal, or soft black with light distressing around edges and legs.
Farmhouse style also plays well with a little variety. If your chairs are not a perfect set, don’t panic. In many farmhouse-inspired spaces, slightly mismatched seating adds character. The goal is cohesion, not clone army energy.
Before You Start: Figure Out What You’re Working With
Before you open a can of paint and become emotionally attached to a vision board, inspect the furniture. Is the table solid wood, veneer, laminate, or some mysterious material that feels like compressed optimism? This matters because prep and product choice depend on the surface.
Solid Wood
This is the dream. Solid wood is durable, easy to sand, and great for staining or painting. If your table is solid oak, pine, maple, or rubberwood, you have plenty of options.
Veneer
Veneer can still be refinished beautifully, but it needs a lighter hand. Aggressive sanding can go from “refreshing the surface” to “well, now the particle board says hello” very quickly.
Laminate or Factory-Finished Surfaces
These can absolutely be painted, but they need a strong cleaning routine, a proper scuff-sand, and a bonding primer. This is not the moment for shortcuts.
Loose Joints or Structural Problems
Wobbly chairs are not charming. Tighten screws, reglue joints if needed, and repair obvious damage before you start the cosmetic work. A gorgeous farmhouse chair that buckles under Thanksgiving dinner is still a bad chair.
Tools and Materials You’ll Want Nearby
Keep your setup simple but smart. For most farmhouse table and chair makeovers, you’ll want the following:
- Drop cloths
- Screwdriver for removing hardware or seats if applicable
- Degreaser or mild soap and water
- Wood filler
- Sandpaper in a few grits
- Sanding block or orbital sander
- Tack cloth or lint-free rags
- Bonding or stain-blocking primer if needed
- Paint, stain, or both
- Quality brush and small roller
- Protective topcoat
- Painter’s tape
- Dust mask and eye protection
If you’re aiming for a two-tone farmhouse finish, plan on using paint for the base and chairs, plus stain or a natural clear finish for the tabletop. If you want a chalky vintage look, use a furniture paint designed for matte finishes and add a protective topcoat suited to dining use.
Step-by-Step: How to Make Over a Farmhouse Table and Chairs
Step 1: Clean Like the Previous Owner Was Butter
Furniture collects more grime than people expect, especially dining furniture. Wipe everything down thoroughly with a degreaser or soapy water. Pay attention to chair backs, lower rungs, carved details, and table edges. Paint does not bond well to mystery residue, cooking grease, or ten years of furniture polish.
After cleaning, let the piece dry completely. This is not glamorous, but it is the difference between a finish that lasts and one that peels the first time someone drags a placemat across it.
Step 2: Disassemble What You Can
Remove chair seats if they’re detachable. Take off hardware, leaf mechanisms if practical, and any decorative pieces that might get in the way. Label screws and parts in small bags. Future you will be thrilled. Current you may feel organized for approximately six minutes, and that still counts.
Step 3: Repair the Surface
Fill dents, gouges, and old hardware holes with wood filler if they don’t add character. Tighten joints. Reglue anything loose. If the tabletop has water rings or a flaky finish, now is the time to address them. A farmhouse look can be gently worn, but it should not look actively defeated.
Step 4: Sand for Adhesion, Not Punishment
Sand the surfaces enough to dull the existing finish and smooth out rough spots. On a stained or glossy table, focus on creating a surface that primer or paint can grip. On solid wood tops that you plan to stain, sand more thoroughly and follow the direction of the grain.
For many projects, medium grit helps remove the old sheen and finer grit smooths things out. Chair spindles and turned legs are where patience goes to test your character, so use sanding sponges or folded paper for those details. Once everything is sanded, vacuum and wipe away every speck of dust.
Step 5: Decide on Your Finish Strategy
Here are three farmhouse-friendly routes that work beautifully:
Option A: Painted Base and Chairs + Stained Top
This is the classic farmhouse winner. Paint the table apron, legs, and chairs in a soft neutral, then stain the tabletop in a medium brown, weathered oak, walnut, or warm driftwood tone. The contrast feels cozy, collected, and timeless.
Option B: All-Over Painted Set
Perfect for an older set with mismatched woods or heavy damage. Warm white, creamy mushroom, muted black, sage green, and soft greige all work well. Add light distressing if you want the vintage effect without turning the table into a theatrical prop.
Option C: Whitewashed or Softly Weathered Wood
If you want less paint and more grain, use a whitewash or thin paint technique to brighten the wood while still letting texture show through. This is ideal if you love farmhouse style but don’t want the full painted-furniture look.
Step 6: Prime Only Where It Helps
If you’re painting bare wood, patched areas, laminate, glossy finishes, or a dark old stain, primer is your best friend. It helps with adhesion, coverage, and durability. If you’re using a paint system designed to skip primer on already-prepped furniture, you may be able to move straight to paint on some surfaces, but don’t treat that as a universal rule.
Apply primer evenly, let it dry fully, and lightly sand if needed before paint. This is one of those unsexy steps that quietly makes everything look more professional.
Step 7: Paint the Chairs and Base
Use light, even coats. Don’t try to slather the whole transformation into one heroic pass. Thin coats dry better, level better, and chip less dramatically. Brush in the direction of the grain where possible, and use a small roller on flatter surfaces if you want a smoother finish.
Chairs usually take longer than the table because they have more angles, more nooks, and more opportunities to miss one weird underside rail that will reveal itself the second you declare the job done. Plan on at least two coats for good coverage, more if you’re going from dark to light.
Step 8: Stain or Finish the Tabletop
If you’re leaving the top natural or stained, apply stain evenly and wipe off the excess according to the product directions. For blotch-prone woods like pine, conditioner can help create a more even result. If you prefer a natural look, use a clear finish instead of stain to preserve the wood’s existing tone.
The tabletop is the part that gets all the abuse: plates, mugs, elbows, homework, craft glue, and someone inevitably deciding this is the perfect place to open a package with scissors. Treat it accordingly.
Step 9: Distress With Restraint
Farmhouse distressing works best when it looks believable. Think edges, corners, chair rungs, and places where natural wear would happen over time. Skip random giant bald spots in the middle of a chair back unless your design inspiration is “barn survived a tornado.”
Use fine to medium sandpaper and remove paint gently from high points. The goal is soft patina, not furniture cosplay. If you want more depth, a glaze or wax can warm up the finish and highlight texture, but keep it subtle.
Step 10: Seal for Real Life
This is where many cute makeovers go wrong. Decorative wax can look lovely, but a dining tabletop needs stronger protection. A clear matte, satin, or dead-flat topcoat designed for furniture is usually the better choice for high-use surfaces. Chairs also benefit from protection, especially on seats and front rungs where hands, shoes, and denim like to leave their opinions.
Apply multiple thin coats on the tabletop, allowing proper dry time between coats. Light sanding between coats can help create a smoother, more durable finish. If your finish needs curing time, respect it. “Dry to the touch” and “ready for spaghetti night” are not always the same thing.
Best Farmhouse Color Ideas for Tables and Chairs
If you want that charming farmhouse style without falling into overly trendy territory, these combinations work beautifully:
- Warm white chairs + medium walnut top: classic, bright, and welcoming
- Soft black base + weathered oak top: modern farmhouse with more contrast
- Sage green chairs + natural wood table: fresh and cozy without trying too hard
- Greige painted set + light distressing: subtle and versatile
- Cream base + dark stained top: ideal for traditional farmhouse kitchens
- Charcoal chairs + creamy table base: great for a collected mismatched look
If you’re nervous about going too rustic, remember this: the most timeless farmhouse rooms mix clean lines with warmth. Let the finish feel soft and lived-in, but keep the color palette controlled.
Common Mistakes That Ruin the Look
Skipping Prep
Paint does not stick well to grease, dust, glossy finish, or wishful thinking.
Over-Distressing
A little wear adds charm. Too much wear makes your dining set look like it lost a fight with a belt sander.
Using the Wrong Topcoat
A tabletop needs durability. Decorative finishes alone are often not enough for the abuse a dining surface takes.
Choosing a Cold, Stark White
Farmhouse style usually feels softer in warm whites, creams, and muted neutrals. A bright icy white can look more clinical than cozy.
Forgetting the Room Around It
Your makeover should connect with the space. Add textiles, lighting, and accessories that support the furniture so it looks intentional rather than random.
How to Style the Finished Set So It Looks Charming, Not Corny
Once the makeover is done, the right styling helps the table and chairs settle naturally into your space. A simple linen runner, a crock of branches or fresh flowers, a vintage-looking bowl, or a cluster of candlesticks can finish the look without overwhelming it.
If your chairs are mismatched, tie them together with the same paint color, same seat cushions, or the same wood tone. If your table is stained and the chairs are painted, repeat that wood tone elsewhere in the room with frames, shelving, or a mirror. Farmhouse charm works best when it feels layered and personal, not like a themed restaurant with one too many rooster signs.
Experience: What a Farmhouse Table and Chairs DIY Really Feels Like
The experience of making over a farmhouse table and chairs is usually equal parts excitement, sawdust, second-guessing, and weirdly intense pride. At the beginning, the furniture often looks rough enough that you wonder whether you’re being ambitious or simply delusional. The finish is scratched, the chairs feel tired, and the whole set has the energy of “I was nice in 2004.” Then the cleaning starts, the sanding begins, and you realize something important: old furniture almost always looks worse right before it starts looking wonderful.
There is a stage in every makeover where the piece turns dusty, patchy, and unattractive in a very committed way. This is normal. This is not the universe telling you to quit and order a new dining set online. This is the awkward middle. The tabletop looks stripped of its dignity, one chair somehow has three different tones on it, and you begin studying paint swatches like they contain secret life advice. Stay with it.
Then the transformation clicks. The first full coat of paint goes on the chair backs, and suddenly they look crisp and charming instead of tired. The wood grain on the tabletop starts to come alive under stain or clear finish. The edges you lightly distressed begin to look soft and authentic rather than accidental. The set starts telling a new story, and that story is much better dressed.
One of the most rewarding parts of this kind of DIY project is how personal it feels. A farmhouse makeover doesn’t require flawless factory perfection. In fact, the slight brush texture, the hand-finished corners, and the tiny variations from chair to chair are part of what make it feel warm. You begin to notice details that mass-produced furniture never gives you: the curve of a spindle, the depth of a stain, the way a matte painted leg softens the entire room. You stop seeing “just a table” and start seeing the place where people gather, work, snack, celebrate, and leave coffee cups they swear they were coming back for.
The emotional payoff is also surprisingly strong. A refinished table changes the feeling of a room because dining furniture is such a visual anchor. Once it’s updated, everything around it feels better. The rug looks more intentional. The light fixture suddenly makes sense. Even the plain wall nearby seems like it has improved its posture. A good farmhouse table and chair makeover doesn’t just refresh furniture; it makes the whole dining area feel more welcoming.
And then there is the practical satisfaction. You saved money, rescued a piece that still had plenty of life left, and ended up with something that looks custom to your home. That is a pretty great trade for a weekend of effort and a temporary relationship with sandpaper. Better yet, the next time someone compliments the set, you get to say, “Thanks, I did it myself,” which is one of the most enjoyable sentences in the English language.
So yes, the process can be messy. It can test your patience, your knees, and your ability to remember where you put the screwdriver five minutes ago. But it also gives you a dining set with character, charm, and a story. And honestly, that beats another flat-pack box and an allen wrench any day.
Final Thoughts
If you want a dining space that feels warm, approachable, and full of character, a farmhouse table and chairs DIY makeover is one of the smartest projects you can take on. The key is balancing rustic charm with thoughtful technique: clean well, prep properly, choose finishes that suit the surface, distress lightly, and protect the top like you actually plan to use it. Because you do.
The best part is that farmhouse style leaves room for personality. You can go brighter, moodier, more vintage, more modern, or somewhere in between. As long as the final set feels comfortable, cohesive, and genuinely lived-in, you’re doing it right. Charming farmhouse style is not about perfection. It’s about warmth, usefulness, and making everyday furniture feel special again.