Table of Contents >> Show >> Hide
- What Olive Oil Actually Is
- Can You Make Olive Oil at Home?
- What You Need to Make Olive Oil
- Step-by-Step: How to Make Olive Oil
- How to Get Better Flavor and Yield
- Common Mistakes When Making Olive Oil
- Is Homemade Olive Oil Really Extra Virgin?
- How Long Homemade Olive Oil Lasts
- What Making Olive Oil Feels Like in Real Life: of Experience
- Final Thoughts
- SEO Tags
Making olive oil sounds wonderfully old-world and cinematic. You picture sun-soaked groves, baskets of glossy fruit, and a magical stream of green-gold liquid pouring out like nature’s salad dressing. The good news is that olive oil really is made from fresh olives and mechanical extraction. The less romantic news is that it is also a race against time, temperature, oxygen, moisture, and fruit quality. In other words, olive oil is part agriculture, part food science, and part “please do not let the olives sit in the garage all weekend.”
If you want to learn how to make olive oil, this guide walks you through the real process from grove to bottle. You will learn what extra virgin olive oil actually means, whether homemade olive oil is realistic, what equipment matters, and how to get the best flavor possible from your fruit. Whether you are a curious backyard grower or just olive-oil-obsessed enough to read about malaxation for fun, you are in the right place.
What Olive Oil Actually Is
At its core, olive oil is fresh fruit juice. Unlike seed oils that often involve refining, olive oil is produced by crushing olives into a paste and mechanically separating the oil from the water and solids. That is why high-quality extra virgin olive oil can taste grassy, peppery, fruity, nutty, or even a little wild. It still carries the personality of the fruit.
Extra virgin olive oil is the highest grade because it is minimally processed and must meet chemical and sensory standards. Regular “olive oil” on a label usually refers to a more refined product with a milder flavor. So if your goal is making something vivid, fresh, and worth drizzling on bread like you are starring in a cooking show, you are aiming for extra virgin quality.
Can You Make Olive Oil at Home?
Yes, but there is an asterisk the size of California.
You can absolutely make small-batch olive oil from fresh olives. However, producing truly excellent olive oil at home is difficult because quality depends on fresh fruit, fast processing, careful handling, and efficient oil separation. Commercial mills use a crusher, a malaxer, and centrifuges because those machines do a much better job than improvised kitchen setups.
So there are really two ways to “make olive oil”:
1. The best-quality route
Harvest fresh olives and take them to a local mill or community press day. This is the smartest option if you have access to one.
2. The DIY route
Make a tiny batch at home for learning and bragging rights. It can be fun and delicious, but yields are small and consistency is harder to control.
If your main goal is quality, use a mill. If your main goal is the experience, the home route can still be a memorable adventure with a few sticky counters and one slightly concerned spouse.
What You Need to Make Olive Oil
Fresh olives
This is non-negotiable. You need fresh olives, not cured olives from the grocery store. Good oil varieties include Arbequina, Koroneiki, Mission, Frantoio, and Leccino. Healthy fruit matters more than almost anything else.
Harvest containers
Use shallow, ventilated crates or bins. Avoid packing olives tightly into deep buckets where they can heat up, bruise, and ferment.
Cleaning setup
You need a way to remove leaves, twigs, dirt, and rocks. Even tiny debris can affect flavor, and stones are terrible for equipment. Rocks and premium olive oil are not a recommended pairing.
Crushing equipment
Commercial mills use stone mills, hammermills, or metal-tooth grinders. At home, people improvise with food processors, grinders, or small fruit crushers.
Mixing equipment
After crushing, the paste needs to be slowly mixed so small oil droplets can combine into larger ones. This step is called malaxation.
Separation method
Commercial operations use centrifuges. At home, people often rely on pressing, settling, spooning off oil, or small tabletop systems. Just know that modern olive oil is typically not made with old-school pressing alone; centrifugation does most of the heavy lifting in professional production.
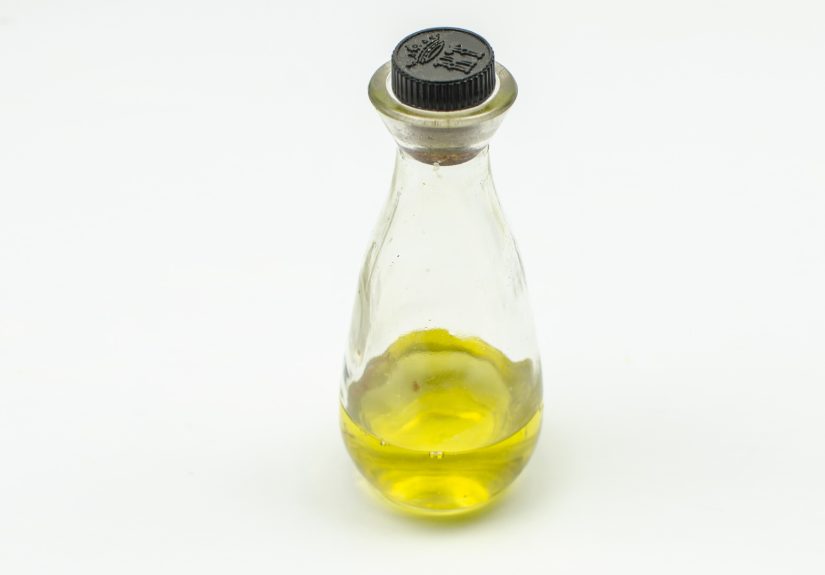
Storage bottles
Use dark glass, metal tins, or other opaque containers. Olive oil hates light, heat, and air with the passion of a cat hates bath time.
Step-by-Step: How to Make Olive Oil
Step 1: Harvest olives at the right time
Ripeness affects flavor, yield, bitterness, pungency, and shelf life. Early-harvest olives tend to produce greener, more peppery, more robust oils. Later harvests may increase perceived yield, but flavor often softens and shelf life can shorten. Many growers watch fruit maturity closely and harvest when the oil content and flavor profile line up with their goals.
Do not use olives that have fallen to the ground. Fallen fruit is more likely to be damaged, contaminated, or already fermenting, which can create sensory defects in the finished oil.
Step 2: Process the fruit fast
Once olives are picked, the clock starts ticking. Fresh olives should be milled as soon as possible, ideally within hours. The longer they sit, the greater the chance of oxidation, fermentation, and off-flavors. This is one of the biggest differences between “pretty good” and “wow, that is incredible.”
If you cannot mill immediately, keep the olives cool, dry, and ventilated. Never leave them in sealed plastic bags or piled up in a hot trunk unless your goal is to invent a new flavor called “tragic.”
Step 3: Sort, clean, and wash
Remove leaves, twigs, stems, dirt, and damaged fruit. Wash the olives to remove dust and field residue. Clean fruit gives you a cleaner paste and protects your equipment.
This step seems boring, but it is one of the quiet heroes of olive oil quality. A little patience here saves a lot of regret later.
Step 4: Crush the olives into a paste
The olives are crushed whole, including pits, into a thick paste. Crushing breaks the flesh cells and releases the oil droplets trapped inside. At a commercial mill, this happens quickly and consistently. At home, the texture may be rougher, but you still want a well-broken paste.
If your paste is too chunky, oil release will be limited. If you pulverize it too aggressively, you can create excess bitterness or a texture that is harder to separate cleanly. This is one of those irritatingly important middle grounds where food science politely asks you not to improvise too wildly.
Step 5: Malax the paste
Malaxation is the slow mixing of the crushed olive paste, usually for about 20 to 45 minutes. This allows tiny oil droplets to merge into larger ones, making extraction easier. Longer mixing can improve yield, but too much exposure can also increase oxidation and reduce freshness.
In professional production, careful temperature control matters. People often use the phrase “cold pressed,” but modern extra virgin olive oil is more accurately described as mechanically extracted at controlled temperatures rather than literally pressed with ancient-looking equipment.
Step 6: Separate the oil from the water and solids
This is where the magic becomes machinery. In a modern mill, centrifuges separate olive oil from vegetation water and pomace. Some systems separate oil, water, and solids in different phases; others separate the oil from a wetter paste. Either way, the goal is the same: isolate the oil quickly and cleanly.
At home, this is the hardest part. Some people press the paste through cloth, let the liquid settle, and skim or siphon off the oil. Others use compact extraction tools. Expect lower yields and more sediment than you would get from a commercial mill.
Step 7: Let the oil settle or filter it
Fresh oil may contain tiny particles and water droplets. You can let it settle and rack off the cleaner oil, or filter it. Unfiltered oil can be gorgeous and vibrant, but sediment and moisture may shorten shelf life. Filtered oil is often more stable in storage.
If you are making only a tiny batch to use quickly, unfiltered may be perfectly fine. If you want the oil to last longer, filtering or careful settling is the wiser move.
Step 8: Bottle and store properly
Transfer the oil into dark glass bottles, tins, or another opaque, food-safe container. Fill bottles as fully as practical to reduce headspace and oxygen exposure. Store them in a cool, dark place away from the stove, windows, or any warm spot that seems “convenient.” Convenience is lovely, but oxidation is faster.
Freshness matters. Olive oil does not improve with age like wine. It is at its best when young, lively, and protected from light, air, and heat.
How to Get Better Flavor and Yield
If you want better homemade olive oil, focus on the variables that matter most:
- Use healthy, undamaged fruit.
- Harvest at the ripeness that matches your taste goals.
- Do not pick up fruit from the ground.
- Mill as quickly as possible after harvest.
- Keep leaves, twigs, rocks, and dirt out of the batch.
- Do not overdo malaxation time or temperature.
- Store the finished oil in dark, airtight containers.
- Make only what you can use while still fresh.
In other words, the secret to better olive oil is not a secret at all. It is good fruit, careful handling, and speed.
Common Mistakes When Making Olive Oil
Using old or bruised olives
Bad fruit makes bad oil. Olive oil is brutally honest that way.
Waiting too long to mill
Even beautiful olives can develop fusty, stale, or muddy notes if they sit too long before processing.
Assuming cloudy means better
Cloudiness can look charmingly rustic, but it may also mean there is moisture or sediment that reduces shelf life.
Storing oil in clear glass by a sunny window
That may look pretty on social media, but it is not kind to the oil.
Expecting huge yields from small batches
Olives are generous with flavor, not always with volume. A surprisingly large amount of fruit may produce a surprisingly modest amount of oil.
Is Homemade Olive Oil Really Extra Virgin?
Maybe, but you cannot know for sure without testing.
To be formally classified as extra virgin, olive oil must meet chemical standards and pass sensory evaluation. That means your backyard batch may be excellent, fresh, and delicious, but unless it is tested by a qualified lab and tasting panel, calling it “extra virgin” is more a hopeful compliment than a technical certification.
Still, homemade olive oil can absolutely be wonderful. It may not arrive with a seal, but it can still taste like the freshest, most personal bottle in the room.
How Long Homemade Olive Oil Lasts
That depends on fruit quality, filtration, storage, and handling. In general, olive oil is best enjoyed while fresh. Once opened, it is smartest to use it within a few months for peak flavor. If it smells like crayons, putty, stale nuts, or sadness, it has likely gone rancid.
The best storage setup is a cool, dark place in a tightly sealed opaque container. Smaller bottles are often smarter than giant containers because each opening introduces more oxygen.
What Making Olive Oil Feels Like in Real Life: of Experience
People who make olive oil for the first time often expect a tidy kitchen project and discover that it feels more like a cross between harvest season, science lab, and family event. The experience begins in the grove, not in the bottle. Fresh olives do not wait politely. Once the fruit is ready, everyone suddenly becomes very interested in weather, timing, crates, and whether the truck is actually leaving on time.
One of the most common experiences among small growers is surprise at how quickly fruit quality changes. Olives that look perfectly fine on the tree can start softening, heating, or bruising after harvest if they are packed too deeply or left too long before milling. That lesson tends to stick. Many growers say the biggest shift in their thinking comes when they stop seeing olives as a shelf-stable crop and start treating them like delicate fresh produce.
Then there is the first milling day, which people often remember with unusual detail. The smell of freshly crushed olives is intense and green, somewhere between cut grass, herbs, and raw artichoke. The paste looks less glamorous than most beginners expect. It is not elegant; it is thick, messy, and stubborn. But when oil finally separates, even in a tiny stream, the reaction is almost always the same: total delight. Suddenly all the cleaning, lifting, sorting, and waiting seems worth it.
Home experimenters usually describe the process as educational, humbling, and slightly chaotic. They learn fast that separating oil cleanly is much harder than crushing olives. Many first batches are tiny. Some are cloudy. Some taste amazing for a week and then decline quickly because too much moisture or sediment remained in the bottle. This is why experienced makers become almost boringly devoted to clean fruit, fast processing, and good storage. The exciting part is the oil. The unexciting part is what protects the oil.
Community milling events often create a different kind of experience. Backyard growers bring fruit they have watched all year and leave with bottles that feel deeply personal. The oil may taste pepperier or grassier than supermarket olive oil, which surprises people in the best way. It is one of the clearest moments where someone realizes that fresh extra virgin olive oil is not supposed to taste flat. It is supposed to have energy.
Another recurring experience is learning that yield and quality are not always best friends. New makers often hope for the biggest possible amount of oil, but seasoned producers talk more about balance: the right harvest timing, the right flavor profile, the right freshness, the right storage. In the end, making olive oil teaches patience, restraint, and respect for the fruit. It is satisfying work, but not lazy work. The payoff is not just a bottle on the counter. It is the moment you taste your own oil on bread, vegetables, or soup and realize that you did not just make a condiment. You captured a season.
Final Thoughts
If you want to make olive oil, start with the truth: great oil is made from great fruit, handled quickly and gently, then protected from heat, light, and oxygen. The basic process is simple on paper: harvest, clean, crush, malax, separate, settle or filter, then bottle. The challenge is doing each step well.
For most people, the best path to excellent oil is harvesting fresh olives and using a professional mill. For curious food lovers, a small home batch can still be a fantastic project and a memorable way to understand what real olive oil is. Either way, once you taste truly fresh oil, ordinary bottles start to feel a little emotionally distant.
And that, frankly, is the delicious risk of learning how to make olive oil.


