Table of Contents >> Show >> Hide
- What Is an Iron-On Decal?
- Materials & Tools You’ll Need
- Choosing Between HTV and Printable Transfers
- Design Prep: Artwork That Transfers Cleanly
- Step-by-Step: Making an HTV Iron-On Decal
- Step-by-Step: Making a Printable Transfer Decal
- Heat, Time & Pressure: Dialing It In
- Placement & Sizing Cheat Sheet
- Fabric Compatibility
- Care & Wash Instructions (Longevity Boosters)
- Troubleshooting: Fixing Common Issues
- Safety & Workspace Tips
- Cost & Scaling: From One Tee to a Small Batch
- Advanced Options to Explore Later
- Quick Reference Table
- Example Workflow: A Two-Color HTV Team Logo
- SEO-Friendly FAQ
- Conclusion
- Extra: of Hands-On Experience With Iron-On Decals
If you’ve ever looked at a blank T-shirt and thought, “You could be so much more,” this guide is your new best friend. We’ll walk through materials, design prep, cutting, pressing, and aftercareplus troubleshooting and pro tipsto help you make crisp, durable iron-on decals at home like a seasoned maker.
What Is an Iron-On Decal?
An iron-on decal is artworkletters, logos, graphicstransferred to fabric using heat and pressure. You can make them in two common ways:
- Heat Transfer Vinyl (HTV): Colored vinyl (matte, glossy, glitter, flock, holographic) that you cut with a machine and heat-press onto fabric. Great for solid colors and layered designs.
- Printable Transfer Paper: Paper you print on (inkjet or laser, match paper to printer type), then heat-press to the garment. Perfect for full-color photos, gradients, and intricate artwork.
Materials & Tools You’ll Need
- Design software: Cricut Design Space, Silhouette Studio, Affinity Designer, Illustrator, or any tool that exports SVG/PNG.
- Cutting machine (for HTV): Cricut, Silhouette, Brother, etc. A craft knife works in a pinch for simple shapes.
- Printer (for transfer paper): Inkjet or lasermust match the transfer paper type. Use inkjet paper for inkjet printers and laser paper for laser printers.
- Heat source: Heat press is most consistent, but a home iron or handheld press works if you follow time/pressure carefully.
- HTV or transfer paper: Choose finish and color; for dark garments, use “dark fabric” transfer paper.
- Teflon sheet or parchment: Protective barrier to avoid scorching or sticking.
- Weeding tools: Hook/pin tweezers for removing excess vinyl pieces.
- Lint roller, pressing pillow (optional), ruler or t-square for alignment.
- Garments/fabric: Cotton and cotton-poly blends are easiest. Avoid high-stretch until you’re comfortable (or choose stretch-rated HTV).
Choosing Between HTV and Printable Transfers
Use this quick decision guide:
- Want vibrant photos or tiny color details? Printable transfer paper (no cutting layers, just contour cuts).
- Prefer crisp, layered, solid colors that last? HTV is durable, flexible, and stacks nicely when planned right.
- Printing on dark tees? Use “dark fabric” transfer paper (usually not mirrored) or high-opacity HTV colors.
Design Prep: Artwork That Transfers Cleanly
File formats & resolution
- HTV: Use vector formats (SVG) for razor-sharp edges and easy scaling.
- Printable transfers: Use high-resolution PNG (300 DPI at final print size) with a transparent background when possible to avoid large, shiny rectangles.
Mirroring rules (very important)
- HTV: Most HTV is cut shiny side down and the design must be mirrored before cutting.
- Inkjet/laser transfer paper: Light-fabric paper is commonly mirrored. Dark-fabric paper is usually not mirrored. Always check your paper’s instructions.
Color and layering tips
- For HTV layering, keep stacks minimal. Many crafters use a base layer for alignment, tack 2–4 seconds for each layer, then a final full press at the end.
- For printable transfers, avoid heavy borders. Feather edges slightly or use a shape closely hugging the artwork for a more professional look.
Step-by-Step: Making an HTV Iron-On Decal
- Prep the garment. Pre-wash without fabric softener. Pre-press 3–5 seconds to remove moisture and wrinkles.
- Load the HTV. Place it on the mat shiny (carrier) side down.
- Mirror the design. In your software, mirror before cutting.
- Cut with the right settings. Choose material (standard, glitter, flock need different blade pressures). Do a small test cut.
- Weed the excess. Remove all parts you don’t want pressed onto the shirt, leaving the design on the clear carrier sheet.
- Position the design. Center it (commonly 2–3 inches below the collar on adult tees). Use a ruler or alignment guide for consistency.
- Press. Typical HTV ranges: 290–320°F (145–160°C), 10–20 seconds, medium-firm pressure. Follow your HTV’s instructions.
- Peel carrier. Some HTV is warm peel, others cool peel. If edges lift, re-cover and press 3–5 seconds more.
- Finish press (optional). Cover with a Teflon sheet and press 3–5 seconds for a smooth, embedded finish.
Step-by-Step: Making a Printable Transfer Decal
- Choose the right paper. Match inkjet vs. laser and light vs. dark fabric.
- Prep the file. For light-fabric paper, mirror the image; for many dark-fabric papers, do not mirror.
- Print at high quality. Use the paper’s recommended printer settings; let the print dry fully.
- Cut. Use scissors for simple shapes or a cutting machine’s Print-Then-Cut to trim accurately around the design.
- Position & press. Typical ranges are 320–375°F (160–190°C), 15–30 seconds, firm pressure, but always follow your paper’s spec.
- Peel. Some are hot peel, some cold peel. Stick to the paper’s instruction sheet to the letter.
Heat, Time & Pressure: Dialing It In
Think of transfers as a chemistry handshake: too little heat/pressure, and they won’t bond; too much, and you’ll scorch or over-melt. Use these general guardrails:
- HTV: 290–320°F, 10–20 seconds, medium to firm pressure.
- Printable transfers: 320–375°F, 15–30 seconds, firm pressure.
Pro tip: If you’re using an iron, turn off steam, use the “cotton” setting, and press section by section with firm, even downward pressuredon’t slide.
Placement & Sizing Cheat Sheet
- Adult tees (short front graphic): 2–3 in below collar; common widths 8–11 in depending on shirt size.
- Back graphics: Centered 3–5 in below collar; 10–12 in wide for adult sizes.
- Left chest logos: About 3.5–4 in wide; 7–9 in down from the shoulder seam, 3–4 in from the centerline.
- On bags/hats: Use pressing pillows or hat presses for even contact on seams and curves.
Fabric Compatibility
- Best: 100% cotton, cotton/poly blends, triblends (check heat tolerance).
- Polyester/performance: Use lower-temperature HTV to reduce dye migration or scorching.
- Nylon & coated fabrics: Look for specialty HTV rated for nylon; test first.
Care & Wash Instructions (Longevity Boosters)
- Wait 24 hours before washing so the adhesive fully sets.
- Wash inside out, cold water, gentle cycle.
- No bleach, avoid fabric softeners, and low heat tumble or hang dry.
- Iron inside out if needed; avoid direct heat on the decal surface.
Troubleshooting: Fixing Common Issues
- Edges lifting after peel: Press again for 3–5 seconds with a Teflon sheet; ensure proper pressure. For HTV, verify warm/cool peel instructions.
- Cracking after a few washes: Increase press time slightly or pressure; confirm you used recommended temperature; review wash routine.
- Dye migration (pinkish tint on whites): Lower temp, switch to a low-temp HTV rated for polyester, or use a blocker HTV layer.
- Scorch marks: Lower temperature, shorten time, or add a pressing pillow; switch to parchment/Teflon barrier.
- Color shift on printed transfers: Calibrate printer color profile, choose correct paper preset, and let ink dry completely before pressing.
Safety & Workspace Tips
- Keep heat tools on stable, heat-resistant surfaces; never leave a hot press or iron unattended.
- Ventilate your workspace, especially with high heat and synthetic fabrics.
- Store HTV and transfer paper flat, away from humidity and direct sunlight.
Cost & Scaling: From One Tee to a Small Batch
For hobby projects, a basic setup (iron, a few sheets of HTV/transfer paper) is inexpensive. If you’re doing small batches or selling, a clamshell or swing-away heat press and a cutting machine quickly pay off in speed and consistency. Track costs per item (blank + media + ink + time) to price responsibly.
Advanced Options to Explore Later
- Sublimation: For polyester or polymer-coated blanksyields permanent, vibrant color that dyes the fibers (requires sublimation printer/ink and high heat).
- DTF (Direct-to-Film): Prints to a film with adhesive powder and transfers to many fabrics; flexible and durable, but needs specialized equipment.
- Specialty HTV: Stretch HTV for athletic wear, flock for velvety texture, glitter/holo for sparkle, and reflective for safety or style.
Quick Reference Table
| Method | Best For | Typical Temp | Time | Peel |
|---|---|---|---|---|
| HTV | Solid colors, layered logos | 290–320°F | 10–20 s | Warm or cool (brand-specific) |
| Light-Fabric Transfer Paper | Photos, gradients on light tees | 320–350°F | 15–25 s | Varies (often hot peel) |
| Dark-Fabric Transfer Paper | Photos on dark tees | 340–375°F | 20–30 s | Varies (often cold peel) |
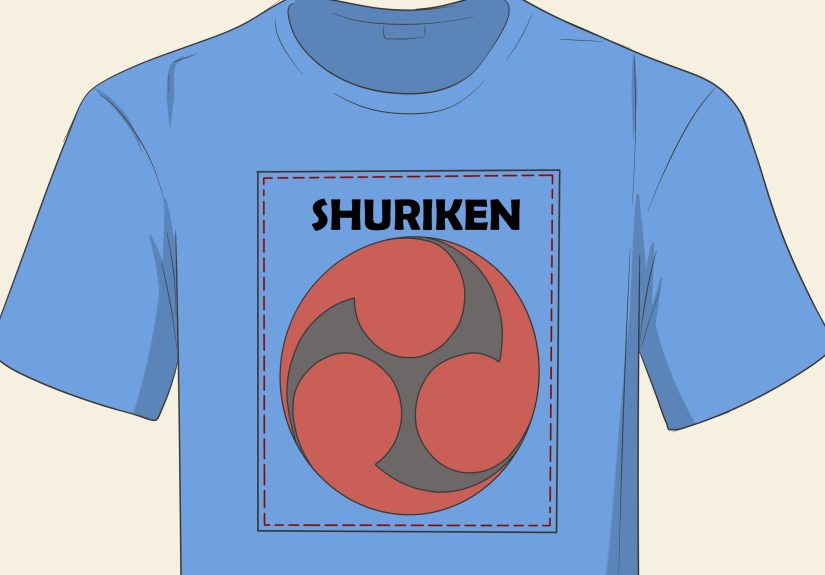
Example Workflow: A Two-Color HTV Team Logo
- Create your vector logo with separate layers (e.g., white base, blue outline).
- Mirror the whole design. Cut colors separately from corresponding HTV sheets.
- Weed both colors. Pre-press shirt 3–5 seconds.
- Place the base (white) and tack for 3–5 seconds. Peel as instructed.
- Align the top (blue) layer, cover, and press for the full time (e.g., 10–15 s).
- Final 3–5 s press with Teflon to seal edges. Admire your handiwork.
SEO-Friendly FAQ
Do I need to wash the shirt first?
It’s smart to pre-wash to remove sizing and preshrink. Skip fabric softener.
Why is my design peeling?
Usually not enough heat/pressure/timeor peeling at the wrong temperature. Repress with proper pressure and follow peel instructions.
Can I layer glitter HTV?
Glitter often works best as a top layer only. Check your brand’s specs.
How long do iron-on decals last?
With proper pressing and care, dozens of washes. Printable transfers varydark-fabric papers often feel thicker and may age faster than quality HTV.
Conclusion
From a single custom tee to a small side hustle, iron-on decals are a fast, affordable way to personalize fabric. Once you dial in the trio of heat, time, and pressure, you’ll get repeatable, professional results. Start with a test press, follow your material’s specs, and let your creativity do the rest.
SEO Summary
sapo: Ready to turn plain tees into show-stoppers? This in-depth guide covers everything you need to make iron-on decals at homefrom picking HTV vs. printable transfer paper to dialing in heat, time, and pressure. Follow the step-by-step tutorials, learn pro placement tricks, avoid common mistakes, and keep your designs bright and durable wash after wash.
Extra: of Hands-On Experience With Iron-On Decals
When I started making iron-on decals, I did what most beginners do: I cranked the heat up, smashed the press like a panini, and hoped for the best. Shockingly, that approach works… about never. What actually made a difference was learning to test press. I cut a tiny square from the margin of my HTV sheet, pressed it on scrap fabric, and checked adhesion and feel. If it lifted at the corners, I nudged pressure or time. That tiny test saved entire sheets of vinyl.
I also learned that placement matters more than your brain thinks. Two inches below the collar sounds generic until you see the difference between a centered, level graphic and one that’s suspiciously tipping toward your armpit. A cheap t-square and a bit of chalk make you look like you have industrial laser alignmentno one needs to know it’s $3 craft chalk doing the magic.
Next, layering strategy. For multi-color HTV, I treat the base layer like a “hinge.” I press it for only 3–5 secondsjust enough to tackso I don’t overcook the vinyl when I add the second (or third) layer. The final layer gets the full recommended time. If I’m using a specialty top layer (glitter, holographic), I try to keep it on top; many specialty films don’t love being layered under other vinyls.
If you’re using a home iron, the secret ingredient is pressure. Stand up, lean in, and press each section without moving for the full time (usually 15–20 seconds per section). Then overlap sections slightly so every inch of the design gets equal heat. Slide your iron around and you risk cold spots and partial bonds.
With printable transfer paper, edge management is everything. If you cut right on the ink line, it looks slickbut it’s risky if your cut is off by a hair. Leaving a 1–2 mm margin often looks cleaner in real life because it avoids nibbling your ink. For dark-fabric paper, remember you’re usually not mirroring; it’s basically a sticker you place ink-side up. I like to warm the shirt for a couple seconds, then press firmly with a Teflon sheet. Cold peel vs. hot peel really matters herefollow the instructions, even if your instincts say “just rip it.”
Finally, care and expectations. HTV has terrific durability if you avoid hot dryers and strong detergents. Printable transfers can feel thickerespecially on dark-fabric paperbut they shine when you need photo-level details. For gifts and teams, I keep a simple spreadsheet of sizes, placements, and press settings that worked. The next time someone says, “We loved those shirts, can we get 12 more by Friday?” you’ll press repeat like a pro.
The bottom line: success with iron-on decals is 80% preparationmirroring correctly, picking the right media for the fabric, test pressing, and aligning carefullyand 20% confidence. Once you’ve nailed your first perfect press, the only real problem is resisting the urge to iron graphics on everything you own.