Table of Contents >> Show >> Hide
- Why Egg Carton Seed Starters Work So Well
- What You Need
- How to Make Egg Carton Seed Starters in a Few Easy Steps
- Step 1: Choose the Right Egg Carton
- Step 2: Add Drainage Holes
- Step 3: Set the Carton on a Tray
- Step 4: Fill Each Cup with Seed-Starting Mix
- Step 5: Moisten the Mix
- Step 6: Plant the Seeds
- Step 7: Cover Lightly and Label Everything
- Step 8: Create a Warm, Bright Environment
- Step 9: Water Gently
- Step 10: Thin, Grow, and Transplant
- Best Seeds for Egg Carton Starters
- Common Mistakes to Avoid
- How to Care for Seedlings After Germination
- Why Gardeners Love This Method
- Experience: What It Is Really Like to Use Egg Carton Seed Starters
- Conclusion
Starting seeds indoors sounds like one of those wholesome weekend projects that turns your kitchen into a tiny greenhouse and your windowsill into a hopeful little farm. The good news? It really can be that simple. If you have an empty cardboard egg carton, a packet of seeds, and a bit of patience, you already have the makings of an easy, budget-friendly seed-starting setup.
Egg carton seed starters are popular for a reason. They reuse something that would otherwise head to the recycling bin, they keep seedlings organized, and they make small-space gardening feel refreshingly doable. You do not need a greenhouse, fancy trays, or a gardening apron with suspiciously perfect pockets. You just need a few basics, a little sunlight, and the willingness to get some soil under your fingernails.
In this guide, you will learn exactly how to make egg carton seed starters in a few easy steps, which seeds work best, how to avoid rookie mistakes, and what to do once those first green sprouts pop up and start acting like they own the place.
Why Egg Carton Seed Starters Work So Well
Egg cartons are one of the easiest DIY seed-starting containers because they are already divided into small cells. That means each seed gets its own little home, which helps keep roots from becoming one tangled underground family reunion. Cardboard cartons are especially useful because they are breathable, easy to cut apart, and gentle on a small budget.
They are also ideal for gardeners who want to start a modest number of plants without buying a full tray system. If you are growing herbs, flowers, lettuce, or a handful of tomato seedlings, an egg carton makes the process feel less like a commercial operation and more like a cheerful experiment that might eventually become salsa.
That said, egg cartons are best for the early stage of growth. The cells are small, so seedlings cannot live there forever. Think of them as a starter apartment, not a forever home. Once roots develop and true leaves appear, most seedlings will need to move into larger containers or straight into the garden, depending on the crop and the weather.
What You Need
- 1 cardboard egg carton
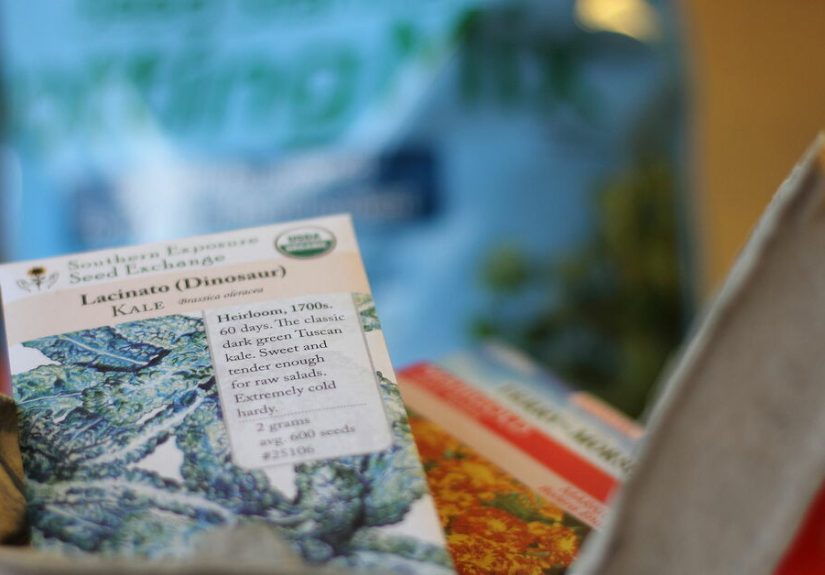
- Seed-starting mix
- Seeds
- A shallow tray, lid, or waterproof plate to catch drips
- Water
- A marker for labeling
- Scissors or a pencil for drainage holes
- Plastic wrap or a clear cover, optional
The star of the show is the cardboard egg carton, not the foam kind. Cardboard is easier to work with, allows better airflow, and fits the whole eco-friendly vibe that makes this project so satisfying in the first place.
How to Make Egg Carton Seed Starters in a Few Easy Steps
Step 1: Choose the Right Egg Carton
Pick a clean, empty cardboard egg carton. If it is greasy, moldy, or carrying mysterious breakfast residue, retire it with honor and grab another one. Clean, simple, and dry is the goal. If the lid is attached, you can cut it off or fold it underneath for a little extra stability.
Step 2: Add Drainage Holes
This step matters more than it looks. Poke a small hole in the bottom of each cup with scissors, a skewer, or the tip of a pencil. Seeds need moisture, but they do not want to swim. Drainage holes help prevent soggy soil, root problems, and that discouraging moment when a seedling flops over like it just heard terrible news.
Step 3: Set the Carton on a Tray
Place the carton on a shallow tray, baking sheet, plant saucer, or even a sturdy plastic lid. This catches excess water and keeps your windowsill, table, or countertop from becoming a surprise swamp. It also makes moving your seedlings much easier.
Step 4: Fill Each Cup with Seed-Starting Mix
Use a lightweight seed-starting mix rather than garden soil. Seed-starting mix is finer, fluffier, and better suited for tiny roots and tender seedlings. Fill each cell nearly to the top, then gently pat the mix down just enough to remove big air pockets. Do not compact it like you are packing a suitcase before a budget flight.
Step 5: Moisten the Mix
Before sowing, lightly moisten the seed-starting mix so it feels damp but not soaked. You want the texture of a wrung-out sponge, not a mud pie. Pre-moistened mix helps seeds settle in more evenly and makes it easier to avoid blasting them away with a heavy stream of water later.
Step 6: Plant the Seeds
Check the seed packet for planting depth. As a general rule, seeds should be planted about two to three times as deep as their width, though some seeds need light and should only be pressed gently onto the surface. Add one or two seeds per cup. If both sprout, you can thin later by snipping the weaker one at soil level.
Step 7: Cover Lightly and Label Everything
Cover the seeds with a light layer of mix if the packet calls for it. Then label the carton or individual rows with the plant name and sowing date. You may think you will remember what went where, but three weeks later everything will look like “small green optimism,” and that is not a useful label.
Step 8: Create a Warm, Bright Environment
Place the tray in a warm spot with bright light. A sunny window can work, but many gardeners get better results with a grow light. If your home is chilly, a warm room helps encourage germination. You can loosely cover the carton with plastic wrap or a clear lid until seeds sprout to help hold in moisture, but remove the cover once seedlings emerge so airflow improves.
Step 9: Water Gently
Keep the mix evenly moist, especially during germination. Water gently so you do not uncover the seeds or flatten tiny seedlings. Bottom watering by adding a little water to the tray can be especially helpful because it lets the mix absorb moisture from below. Just do not leave the carton sitting in standing water for too long.
Step 10: Thin, Grow, and Transplant
Once seedlings sprout and begin growing true leaves, it is time to decide who stays. Thin extra seedlings if needed, and when roots begin to outgrow the tiny cells, transplant them into larger pots or into the garden after hardening them off. If you are using a cardboard carton, you can cut the cups apart at planting time, though it still helps to make sure roots can move through the material easily.
Best Seeds for Egg Carton Starters
Egg carton seed starters are especially handy for plants that benefit from an indoor head start but do not need a huge root zone right away. Herbs, lettuce, many flowers, tomatoes, peppers, and brassicas can all begin this way. The key is timing. Because the cells are small, you do not want to start seeds too early and leave them cramped for weeks.
Fast-growing plants with large roots may outgrow egg cartons quickly, so this method works best when you are prepared to transplant at the right moment. In other words, egg cartons are excellent launchpads, but not luxury condos.
Common Mistakes to Avoid
Using Garden Soil
Garden soil may seem convenient, but it is usually too dense for seed starting. It can compact, drain poorly, and make it harder for delicate seedlings to get established.
Skipping Drainage
No holes means trapped water, and trapped water means trouble. Always give each cell a way to drain.
Overwatering
Seedlings like moisture, not swamp conditions. Constantly soggy mix can invite disease and weak growth. Check moisture regularly and water with intention, not panic.
Starting Too Many Seeds
It is easy to get carried away and plant every packet in sight. But unless you are planning a tomato empire, start with what you can realistically care for and transplant.
Ignoring Light
Seedlings that stretch, lean, and look dramatically exhausted are usually asking for more light. Rotate the tray if you are using a window, or keep grow lights close enough to prevent legginess.
How to Care for Seedlings After Germination
Once your seeds sprout, the job changes from “encourage life” to “do not accidentally ruin life.” Remove any plastic cover, keep light consistent, and watch for crowding. Seedlings need a balance of moisture, airflow, and brightness. Too little light makes them weak. Too much water makes them mushy. Too much fussing makes you the problem.
As the seedlings grow, check them daily. Turn the tray if one side gets more sun. Water when the surface begins to dry. If roots start poking through the bottom or the leaves look oversized for the little cells, move the plants into larger containers. This step is especially important for tomatoes, peppers, and other seedlings that develop quickly indoors.
Before transplanting outdoors, harden off your seedlings by gradually exposing them to outside conditions over several days. Start with a short stay in shade, then slowly increase the amount of sun and wind they receive. It is basically a gentle orientation program for life outside.
Why Gardeners Love This Method
There is something deeply satisfying about turning an ordinary egg carton into a seed-starting tray. It is simple, inexpensive, and wonderfully practical. It also makes gardening feel approachable. You do not need a shed full of equipment or a greenhouse worthy of a lifestyle magazine. You need a carton, a plan, and maybe one windowsill that is ready to work overtime.
This method is also great for families, classrooms, and beginner gardeners because each step is easy to see and understand. Children can help fill the cells, drop in seeds, and label rows. Adults can enjoy the quieter thrill of watching tiny green shoots appear and pretending they are not checking on them every six hours.
Experience: What It Is Really Like to Use Egg Carton Seed Starters
The first time many people try egg carton seed starters, the experience is a mix of confidence, curiosity, and at least one unnecessary moment of overwatering. On day one, it feels almost too easy. You save a carton from breakfast, fill it with mix, tuck in a few seeds, and suddenly your kitchen looks like the opening scene of a very wholesome gardening movie. It is charming. It is organized. It gives you the bold and unrealistic feeling that you now have your life together.
Then comes the waiting. And this is where the real experience begins. Seed starting teaches patience in a way that modern life rarely does. You cannot refresh a windowsill the way you refresh a phone screen. Some days nothing seems to happen, and then one morning there is a tiny green loop pushing through the soil like a miniature miracle with excellent timing. That moment never gets old. Even experienced gardeners still get excited when the first seedlings appear.
Another common experience is learning just how different seedlings can be from one another. Some pop up fast and act like they pay rent. Others take their sweet time and make you wonder whether you accidentally planted hopes instead of seeds. Egg cartons make this process easy to observe because each little cell becomes its own tiny test plot. You start noticing which seeds germinate quickly, which need more warmth, and which ones clearly enjoy being dramatic.
There is also a practical side to the experience. Egg cartons fit nicely on windowsills and shelves, so they work well in apartments, small homes, and anyone’s “temporary garden lab” tucked near a bright window. They are lightweight and easy to move, which is helpful when you realize one corner of the house gets better light than the spot you originally chose. This happens often. Seedlings have a way of revealing the truth about your home’s lighting situation.
Most gardeners also learn that small containers mean you have to pay attention. Egg carton cells dry out faster than large pots, so daily check-ins become part of the routine. Not long, dramatic check-ins. More like quick inspections with coffee in hand. Is the mix dry? Are the stems stretching? Is one seedling leaning like it spent the night at a party? These little observations make beginners better gardeners surprisingly fast.
Perhaps the best part of the experience is the sense of momentum it creates. Starting seeds in an egg carton feels like the first real step toward the growing season. It turns vague gardening plans into action. Instead of saying, “I should plant herbs this year,” you suddenly have basil seedlings on the windowsill making that goal look very official. And once you transplant those seedlings into bigger pots or into the garden, the whole process feels even more rewarding because you remember exactly where they started: in a humble egg carton that almost got tossed in the recycling bin.
That is the charm of this project. It is not fancy, but it is memorable. It invites experimentation, teaches useful habits, and gives you a small but meaningful front-row seat to how plants begin. For such a simple setup, it delivers a surprisingly rich gardening experience. Also, it makes breakfast leftovers look impressively productive.
Conclusion
If you want a low-cost, beginner-friendly way to start seeds indoors, egg carton seed starters are hard to beat. They are easy to make, simple to manage, and perfect for gardeners who enjoy practical projects with a little personality. With the right seed-starting mix, proper drainage, steady moisture, and enough light, those humble little cups can launch a healthy batch of seedlings in just a few easy steps.
Start small, label everything, and do not be surprised if one carton turns into three. That is how gardening begins: one good idea, one hopeful seed, and one windowsill that suddenly has a job.