Table of Contents >> Show >> Hide
- Why Drip Irrigation Is Worth the (Small) Fuss
- Plan First, Buy Second (Your Wallet Will Thank You)
- Drip Irrigation Parts Checklist (The “Don’t Make Three Trips” List)
- Step-by-Step: How to Install Drip Irrigation
- Step 1: Connect to Your Water Source (Spigot or Irrigation Valve)
- Step 2: Lay Out the Mainline Tubing (1/2" Poly)
- Step 3: Build Branch Lines and “Laterals”
- Step 4: Add Emitters (Where the Magic Actually Happens)
- Step 5: Flush, Cap, and Pressure-Test (Yes, Really)
- Step 6: Set a Watering Schedule That Makes Sense
- Step 7: Mulch, Label, and Protect the System
- Common Mistakes (And How to Avoid a Backyard Soap Opera)
- Maintenance: The Five-Minute Habit That Saves Your Weekend
- Example: Simple Raised Bed Drip Layout (Tomatoes + Herbs)
- Conclusion: A Better Watering System (And a Better Life)
- Experience Section: Real-World Lessons From Installing Drip Irrigation (The Stuff Manuals Don’t Roast You For)
If you’ve ever stood in the yard holding a hose like it’s a full-time job (with zero benefits and questionable
retirement), drip irrigation is your escape plan. Done right, a drip system waters plants slowly at the root zone,
wastes less water, keeps leaves drier (hello, fewer fungal drama queens), and frees you up to do important thingslike
pretending you’re “just checking the garden” when you’re actually avoiding emails.
This guide walks you through planning, parts, and a step-by-step install for a typical home garden or landscape bed.
It’s written for real humans: you don’t need a plumbing license, just a little patience and the ability to not lose
small fittings in the mulch.
Why Drip Irrigation Is Worth the (Small) Fuss
Drip irrigation (also called “trickle” or “micro-irrigation”) delivers water through tubing and emitters directly to
the soil where roots can use it. Compared with overhead sprinklers, it can be dramatically more efficient because
you’re not watering sidewalks, wind, or the neighbor’s cat.
- Water savings: Targeted watering can reduce water use compared with sprinklers, especially in hot or windy conditions.
- Healthier plants: Drier foliage can mean fewer disease problems.
- Fewer weeds: You’re watering the plant’s root zone, not the whole bed like a weed buffet.
- Convenience: Add an irrigation timer and your garden gets watered even when you forget (or “forget”).
Plan First, Buy Second (Your Wallet Will Thank You)
The biggest drip irrigation mistake is buying a kit first and then trying to convince your yard to match it. Flip
that: plan your layout, then buy what supports it.
1) Sketch Your “Water Map”
Grab paper (or a phone note you’ll never find againpaper is better). Mark beds, containers, trees, and shrubs. Note
sunny vs. shady areas, slopes, and spots that dry out faster. These become natural “zones.”
2) Group Plants Into Zones
A drip irrigation zone is a group of plants watered together. Put thirsty veggies together, drought-tolerant
ornamentals together, containers together, and so on. If you try to water basil and cactus on the same schedule,
somebody’s going to file a complaint.
3) Check Your Pressure and Flow (So You Don’t Build a Sad System)
Most homes deliver higher pressure at the spigot than drip components want. That’s why drip setups typically include
a filter and a pressure regulator (pressure reducer). To size your system sensibly:
- Pressure (psi): Use a simple pressure gauge at the spigot.
- Flow (gpm): Time how long it takes to fill a 5-gallon bucket. Example: 30 seconds = 10 gpm.
- Usable capacity: Don’t plan to use every last drop. Leave a buffer so pressure stays stable.
4) Choose Your “Delivery Style”: Emitters vs. Dripline vs. Soaker
There’s no one perfect setupjust the one that matches your plants and patience level.
- Dripline (inline drip tubing): Emitters are built into the tubing at set spacing and flow rate.
Great for rows, beds, and groundcovers. - Point-source emitters: Individual drippers you punch into 1/2″ tubing (often with 1/4″ micro tubing
to reach plants). Great for containers, shrubs, and spaced-out plants. - Soaker hoses: Simple and quick, but less precise. Fine for some beds if you’re keeping it basic.
Drip Irrigation Parts Checklist (The “Don’t Make Three Trips” List)
Here’s what most home drip irrigation installations use. You may not need every item, but you’ll want to know what
exists before you’re kneeling in mulch wondering why water stops at the first corner.
Core components at the water source
- Timer (optional but awesome): Hose-end timer or controller if connecting to a spigot.
- Backflow preventer / vacuum breaker: Helps protect the potable water supply.
- Filter: A mustemitters clog when grit gets invited to the party.
- Pressure regulator: Drops pressure to what drip components can handle.
- Y-splitter (optional): Keep your spigot usable for a hose while drip stays connected.
Distribution components
- 1/2″ poly tubing (mainline): The “artery” that carries water around beds.
- 1/4″ distribution tubing: The “capillaries” that reach individual plants/containers.
- Tees, elbows, couplers: For branching and turning.
- Barbed fittings & goof plugs: Barbs connect; goof plugs fix mistakes. Both save sanity.
- End caps or figure-8 ends: Close lines (and open later for flushing).
- Optional inline valves: Turn off sections or balance flow between beds.
Emitters and application devices
- Inline dripline: For beds/rows.
- Button emitters (0.5–2.0 gph common): For individual plants.
- Adjustable drippers/micro-sprays (optional): Useful for containers or tight plantings.
- Stake/hold-downs: Keep tubing in place so it doesn’t wander like a garden snake.
Tools
- Tubing cutter or sharp pruners: Clean cuts = fewer leaks.
- Punch tool: Makes proper holes for barbed fittings and emitters.
- Measuring tape + marker/flags: Layout now, regret less later.
- Teflon tape: For threaded fittings (if you’re tying into valves/manifolds).
Step-by-Step: How to Install Drip Irrigation
Step 1: Connect to Your Water Source (Spigot or Irrigation Valve)
Most beginners start at an outdoor faucet. That’s totally fineand honestly the least dramatic route.
- Turn off water at the spigot.
- Assemble in the right order. A common setup is:
timer → backflow preventer → filter → pressure regulator → tubing adapter.
If your backflow device requires a specific placement (and many do), follow its instructions and local code. - Don’t overtighten. “Hand tight plus a little” beats “Hulk tight,” which turns plastic threads into a
sad confetti.
If you’re tying into an existing sprinkler system, you may connect downstream of a valve (or convert a sprinkler
riser). In that case, you still generally need filtration and pressure regulation to protect
emitters, and you may need approved backflow protection depending on local requirements.
Step 2: Lay Out the Mainline Tubing (1/2″ Poly)
Unroll your 1/2″ poly tubing along the perimeter of beds or down rows. A few tips that feel “extra” until they save
you:
- Warm it first: Leave tubing in the sun for 10–20 minutes so it relaxes and stops fighting you.
- Avoid tight bends: Gentle curves keep flow steady and reduce kinks.
- Stake every few feet: Tubing that moves will eventually place emitters in new zip codes.
- Keep it mower-safe: If this line crosses lawn, consider burying shallowly or routing along edges.
Step 3: Build Branch Lines and “Laterals”
Need to split into multiple beds? Cut the mainline and insert tees. Add elbows for corners. If you have separate beds
with different needs, add a small manual valve at each lateral so you can throttle or shut off sections.
Keep connections neat, and don’t force tubing onto barbs when it’s cold. If you feel like you’re wrestling an
alligator, warm the tubing again.
Step 4: Add Emitters (Where the Magic Actually Happens)
Emitters should be placed so water reaches the root zonenot the plant’s stem like you’re trying to give it a tiny
foot bath.
Option A: Inline dripline for beds and rows
Lay dripline down each row or weave it through a bed. Emitter spacing (like 12″, 18″, or 24″) depends on plant spacing
and soil. Closer spacing helps in sandy soils; wider may work in heavier soils that spread water laterally.
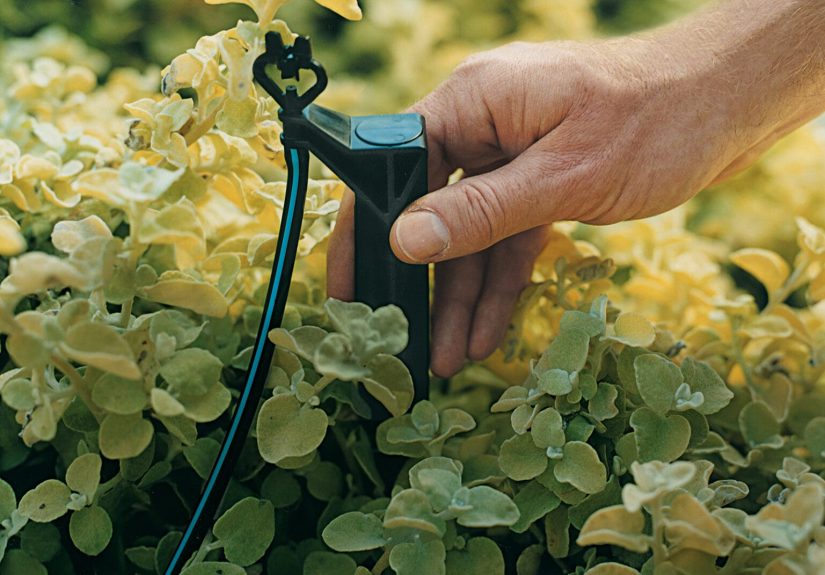
Option B: Point-source emitters for individual plants, shrubs, and containers
- Use a punch tool to make holes in the 1/2″ mainline.
- Insert a barbed 1/4″ connector (or an emitter directly, if designed for that).
- Run 1/4″ tubing to the plant, then add an emitter at the end (or use a stake emitter).
- Place emitters near the dripline of the plant (outer root area) as it matures, not always right at the base.
Practical placement examples (adjust for plant size, soil, and weather):
- Vegetables in rows: Inline dripline or emitters spaced about a foot apart for dense plantings.
- Tomatoes/peppers: One or more emitters per plant depending on size and heat.
- Shrubs: Multiple emitters around the plant, not all on one side.
- Trees: Several emitters spread within the canopy dripline area; increase outward as the tree grows.
- Containers: Small emitters (or adjustable drippers) can work welljust make sure drainage is good.
One underrated rule: keep plants reasonably close to the distribution line you’re feeding from. If you’re running
spaghetti tubing across the yard like it’s a pasta-themed escape room, you may want another lateral instead.
Step 5: Flush, Cap, and Pressure-Test (Yes, Really)
This step separates “installed” from “installed and actually works.”
- Leave ends open (no end caps yet).
- Turn on water and let it run briefly to flush out plastic shavings and dirt.
- Cap the ends using end caps or figure-8 closures.
- Check for leaks at every connection and fix them now.
- Fix mistakes with goof plugs if you punched a hole in the wrong spot. It happens to the best of us and also to everyone else.
Step 6: Set a Watering Schedule That Makes Sense
Drip irrigation isn’t “set it and forget it” foreverit’s “set it, observe, and tweak like a responsible plant
parent.”
- Water early morning to reduce evaporation and keep plants happy.
- Adjust for soil: Sandy soils often need shorter, more frequent runs; clay may need longer but less frequent.
- Verify wetting depth: Dig a small hole after a run to see how deep moisture traveled. Aim for the active root zone.
- Start conservative: It’s easier to add minutes than to revive a drowned rosemary.
Step 7: Mulch, Label, and Protect the System
A thin layer of mulch over tubing helps reduce UV damage, keeps soil moisture steadier, and makes the whole system
less visible (goodbye, “plastic snake” aesthetic). Label valves/zones if you have more than onefuture you will feel
deeply understood.
If you live where freezing happens, drain the system at season’s end and store removable timers/filters where they
won’t crack.
Common Mistakes (And How to Avoid a Backyard Soap Opera)
Mistake: Skipping the filter
Emitters clog. It’s not a moral failing; it’s physics. Use a filter and clean it occasionally.
Mistake: No pressure regulator
Too much pressure can pop fittings, cause uneven flow, and shorten component life. Regulate pressure so the system runs as designed.
Mistake: Mixing plant needs in one zone
If one bed needs water daily and another needs it weekly, split them into separate zones or add valves to balance flow.
Mistake: Not flushing the lines
Flushing removes debris that can clog emitters. Build in easy-to-remove end caps and make flushing a routine.
Mistake: Emitter placement too close to stems
Watering right at the stem can encourage shallow rooting. Place emitters so moisture reaches the broader root zone,
and move them outward as plants mature.
Maintenance: The Five-Minute Habit That Saves Your Weekend
- Weekly (quick scan): Look for dry spots, soggy spots, and obvious leaks.
- Monthly: Check and rinse the filter; inspect emitters for clogs.
- Every season: Flush lines, replace cracked tubing, and adjust schedules for temperature and rainfall.
- Every 4–6 months (or as needed): Do a deeper flush by removing end caps and running water until clear.
Example: Simple Raised Bed Drip Layout (Tomatoes + Herbs)
Imagine two 4×8 raised beds. One has tomatoes and peppers (thirstier), the other has herbs (less thirsty).
- Make two zones (or one zone with a valve to reduce flow to the herb bed).
- Run 1/2″ mainline to each bed along the edge.
- Bed 1 (tomatoes/peppers): Use 1/4″ tubing to each plant with 1–2 gph emitters, adding a second emitter later in summer if needed.
- Bed 2 (herbs): Use lower-flow emitters, or an inline dripline loop with closer spacing for denser herbs.
- Mulch and test, then adjust run time by checking moisture depth.
Conclusion: A Better Watering System (And a Better Life)
Installing drip irrigation is one of those home projects that pays you back immediately: less water waste, fewer weeds,
healthier plants, and more time not dragging hoses like you’re reenacting a tiny Western.
Start with a plan, use the right “front-end” parts (backflow protection, filter, pressure regulation), lay tubing
cleanly, place emitters thoughtfully, and flush before you cap. Then do the grown-up thing: run it, observe it, tweak
it. Your plants will thank you, and your water bill might even send a little thank-you note (okay, it won’tbut it
will chill out).
Experience Section: Real-World Lessons From Installing Drip Irrigation (The Stuff Manuals Don’t Roast You For)
Let’s talk about what it’s actually like to install drip irrigationbecause the diagrams look calm, and then
you’re outside holding a coil of tubing that behaves like it was trained by a circus.
Lesson #1: Buy extra fittings like you buy extra tacos. In theory, you’ll make perfect cuts, never
change your mind, and won’t accidentally punch a hole where you shouldn’t. In reality, your layout evolves the moment
you see how the bed “really looks” from the patio chair. Extra tees, couplers, elbows, goof plugs, and end caps turn
an “I guess I’ll redo everything” moment into a two-minute fix.
Lesson #2: Warm tubing is friendly tubing. Cold poly tubing is stubborn and will fight you, your
hands, and your overall optimism. If the tubing is stiff, let it sit in sunlight or warm water so it slides onto
barbed fittings without making you question your life choices. This is the difference between “DIY project” and “new
CrossFit routine.”
Lesson #3: Your first schedule will be wrong, and that’s normal. New drip installers often set a
timer and assume the job is done. But plants, soil, and weather are chaotic little variables. Sandy soil drinks and
drains quickly; clay holds water longer. A bed in full sun is a different universe than a bed tucked under a tree.
Expect two to three rounds of tweaks the first couple weeks: adjust minutes, adjust days, then verify by checking soil
moisture depth. It’s not failureit’s calibration.
Lesson #4: Pressure problems masquerade as “random” problems. One plant looks thirsty, another looks
overwatered, and you start blaming the plants like they’re being dramatic on purpose. Often it’s pressure and flow:
too much pressure can cause fittings to pop or emitters to run inconsistently; too little pressure can starve the end
of a long line. If you notice uneven performance, shorten runs, split a zone, add a valve to balance laterals, or
switch to dripline designed for longer runs. And yesfilters matter. A dirty filter can mimic low pressure and make
you chase ghosts.
Lesson #5: Labeling is a love letter to Future You. If you have multiple beds or valves, label what
each line serves. Nothing says “why did I do this” like turning off the wrong valve and accidentally cutting water to
the tomatoes during a heat wave. A simple tag or a quick map photo saved to your phone is the kind of small effort
that pays back big.
Lesson #6: Flush days are not optional. The first flush removes debris from installation. But ongoing
flushing is what keeps the system from slowly turning into a “some plants get water, some don’t” mystery novel. If you
build your system so end caps are easy to remove, flushing becomes a 3-minute task instead of a weekend repair.
Lesson #7: Drip irrigation quietly upgrades your whole garden routine. This is the part you don’t
fully appreciate until after: you stop watering “when you remember,” and you start watering consistently. Plants love
consistency. You’ll notice fewer stress swings, more predictable growth, and fewer times you’re sprinting outside
because the leaves suddenly look like they’re negotiating for better working conditions.
The best part? Once you’ve installed one zone, the next one feels easy. Drip irrigation has a learning curve, but it’s
shortand it pays you back in time, water efficiency, and the smug satisfaction of knowing your garden is watered
while you’re doing literally anything else.