Table of Contents >> Show >> Hide
- What “Great Subwoofer Performance” Actually Means
- Step 1: Placement Is 60% of the Battle (Yes, Really)
- Step 2: Set Your Receiver for Proper Bass Management
- Step 3: Get the Level Right (A Little Discipline = A Lot More Detail)
- Step 4: Phase and TimingThe Secret Sauce for “Tight” Bass
- Step 5: Fix the Room Problems You Can’t EQ Away
- Step 6: Consider Two Subwoofers (It’s Not Just for Bass Addicts)
- Step 7: Use Room Correction… but Don’t Let It Drive the Car Into a Ditch
- Step 8: Don’t Ignore the Physical Stuff (It’s Not All Menus and Math)
- Step 9: Troubleshooting Cheatsheet (Because Life Is Short)
- Putting It All Together: A Simple “Best Results” Setup Flow
- Conclusion: Your Subwoofer Is Only as Good as Your Setup
- Extra: of Real-World “What Actually Happens” Experiences
- Experience #1: The “Corner Boom” Revelation
- Experience #2: The “My Bass Disappeared” Panic (It’s Usually a Null)
- Experience #3: The “I Tweaked One Knob and Everything Locked In” Moment
- Experience #4: The “Two Subs Changed Everything” Surprise
- Experience #5: The “It Was the Picture Frame the Whole Time” Humble Pie
A subwoofer can make your system feel bigger than your living roomlike your couch just got a VIP seat at a movie premiere.
But it can also do the opposite: one-note “boom,” missing bass on certain songs, or that weird moment when an explosion happens onscreen
and your room responds with… polite disappointment.
The good news: most subwoofer problems aren’t “bad subwoofer” problems. They’re setup problemsplacement, crossover, phase, level,
room modes, and (sometimes) a single setting buried in your receiver menu that’s basically a booby trap.
Let’s fix the stuff that actually moves the needle so you can get tight, powerful, even bass that blends seamlessly with your speakers.
What “Great Subwoofer Performance” Actually Means
Before you start turning knobs like you’re cracking a safe, it helps to define the goal. Great bass is:
- Even across your listening area (not amazing in one seat and missing in the next).
- Blended (you feel bass everywhere, but you can’t point at the sub and say “the bass is over there”).
- Clean and controlled (impact without mud, rumble without bloat).
- Appropriately loud (fun, not exhausting).
Translation: you want the subwoofer to behave like part of the speaker system, not like a separate appliance that occasionally startles houseplants.
Step 1: Placement Is 60% of the Battle (Yes, Really)
Low frequencies interact with your room in dramatic ways. Walls and corners can boost output, but they can also create peaks and nulls
(spots where bass is louder or almost disappears). This is why “it sounds great when I stand in the doorway” is a real thing.
Start with smart “first-try” positions
- Front of the room near the main speakers: often easiest to blend and keeps bass anchored to the screen.
- Avoid dead-center placements on a wall when possiblesymmetry can excite certain room modes more strongly.
- Corner placement can add output (helpful for small subs or large rooms), but may exaggerate boominess.
Do the Subwoofer Crawl (yes, it’s as glamorous as it sounds)
The “subwoofer crawl” is a proven, low-tech way to find where the bass is smoothest in your room. Here’s the simple version:
- Put the subwoofer at your main listening position (right where your head normally is).
- Play a looped bass-heavy track or a repeating movie scene.
- Crawl around the perimeter of the room (and a few realistic sub locations), keeping your ears about couch-seat height.
- Find the spot where bass sounds the most even and natural (not the loudest). Put the sub there.
You’re not chasing maximum boomyou’re chasing smooth response. Loud is easy. Smooth is the flex.
Quick example: why placement matters
Say your sub is in the front-left corner and you get huge bass on kick drums but the bass guitar disappears on certain notes.
That’s often a room-mode null at your seat. Moving the sub even 1–2 feet can shift the interaction and restore those missing notes.
Tiny changes can produce big results at low frequenciesbecause physics is petty like that.
Step 2: Set Your Receiver for Proper Bass Management
Most home systems sound better when the receiver handles bass management (crossover and routing) rather than letting the subwoofer’s knob do it.
Your receiver can apply proper filtering to both the speakers and the sub, keeping everything aligned.
Set speakers to “Small” (even if they’re big)
In AVR language, “Small” doesn’t mean “tiny.” It means bass-managed. Your speakers can still play full, rich sound
the receiver just redirects deep bass to the subwoofer where it’s usually cleaner and more efficient.
Pick a crossover frequency that matches your speakers
A classic starting point is 80 Hz (widely used as a baseline), but the best setting depends on how low your speakers play cleanly.
Common starting points:
- Small satellites/on-wall: 120–150 Hz
- Bookshelf speakers: 80–120 Hz
- Large towers: 60–80 Hz
If you know your speaker’s low-end capability, a practical rule is to set the crossover a bit above where the speaker response starts to roll off.
This helps the transition stay smooth and reduces strain on the mains.
Set the subwoofer’s own crossover correctly
If you’re using an AVR crossover (recommended), set the subwoofer’s low-pass/crossover knob to max (or “LFE/Bypass” mode).
That prevents “double filtering,” which can create weird gaps or lumps around the crossover region.
Step 3: Get the Level Right (A Little Discipline = A Lot More Detail)
The subwoofer level should feel powerful, but it shouldn’t constantly call attention to itself. Over-loud subs mask midbass detail,
make voices sound chesty, and turn every soundtrack into the same “thump, thump” demo.
Where to set gain and trim (the practical approach)
- Start sub gain around the middle (often ~12 o’clock) before calibration.
- Run your receiver’s auto setup (Audyssey, YPAO, Dirac, MCACC, ARC, etc.).
- If the receiver sets sub trim extremely low (like bottoming out), reduce gain on the sub and rerun calibration.
- After calibration, adjust sub level slightly to tastebut keep it reasonable.
The key is to avoid forcing the receiver into extreme trims. You want headroom, clean output, and predictable behavior.
Step 4: Phase and TimingThe Secret Sauce for “Tight” Bass
“Phase” is basically timing alignment between your mains and your sub. When they’re aligned, bass around the crossover adds together smoothly.
When they’re misaligned, you can get a hole (weak bass) or a hump (boomy bass) right where you want a clean handoff.
The simple phase test (no lab coat required)
- Play music with steady bass (or a test tone near your crossover, like 60–100 Hz).
- Sit in your main seat.
- Flip the phase switch (0/180) or adjust the phase knob slowly.
- Choose the setting that sounds fuller and more even at the listening position.
Use distance/delay settings in the AVR
Many receivers let you adjust “distance” for the subwoofer. This is really delay/time alignment.
If the bass feels detached, slow, or hollow near the crossover, small distance tweaks can lock the system in.
Don’t be surprised if the “distance” value doesn’t match a tape measureprocessing delay can change effective timing.
Step 5: Fix the Room Problems You Can’t EQ Away
Room modes (standing waves) create peaks and nulls. EQ can tame peaks pretty well, but nulls are stubbornboosting them often just wastes power.
That’s why placement comes first.
Three practical room-mode moves that work
- Move the sub (even a foot or two) to shift peaks/nulls.
- Move the listening position slightly forward/back if you’re stuck in a null.
- Add a second subwoofer to smooth response across seats.
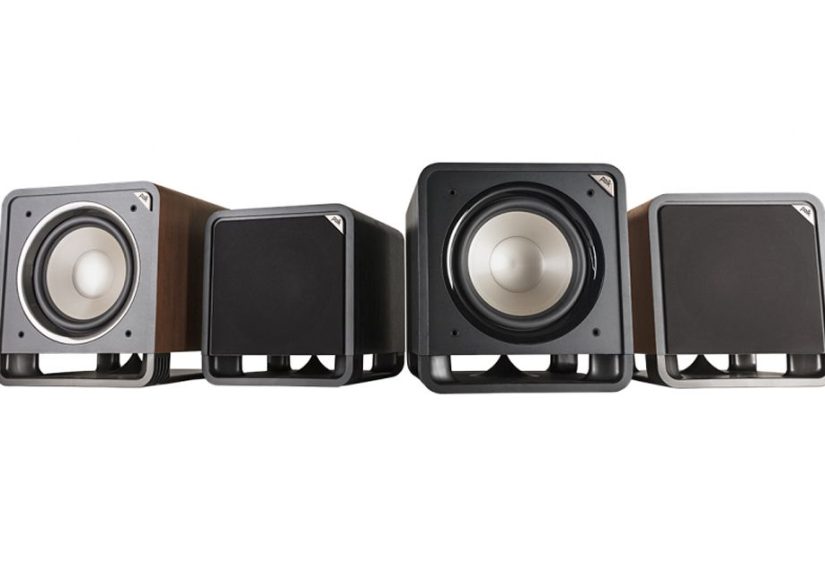
Step 6: Consider Two Subwoofers (It’s Not Just for Bass Addicts)
Two subs aren’t only about louder bass. The big win is smoother bass across more of the room.
With two subs in different locations, their peaks and nulls don’t line up perfectlyso the combined response is often more even.
That means fewer “dead zones,” better consistency across a couch, and less “one-note” boom.
Good starting layouts for dual subs
- Opposite corners (front-left + rear-right) for broad smoothing in many rooms.
- Midpoints of opposing walls (mid-front + mid-back) in some rectangular rooms for consistency.
- Front stage pair (both near the front) for aesthetics and simpler wiringstill helpful, but sometimes less smoothing than spread placement.
If your receiver has two sub outputs and room correction that supports multiple subs, you’re in great shape.
If not, you can still run two subs by splitting the signal, but calibration options will vary.
Step 7: Use Room Correction… but Don’t Let It Drive the Car Into a Ditch
Auto room correction systems can be fantastic because they measure the room and apply filters to improve response.
But they work best when you give them a good starting point: solid placement, sensible crossover, and sane levels.
Room correction best practices
- Take measurements from multiple positions around your main seat (follow your system’s guidance).
- Keep the room quiet (HVAC off if possible, no barking, no blender auditions).
- After calibration, verify: does bass sound even on multiple tracks and at different volumes?
- If bass is too polite, adjust sub level slightlyavoid massive boosts that can cause distortion.
If you want next-level control: measurement tools
If you’re the type who reads manuals for fun (no judgment), tools like an SPL meter or measurement software
can help you dial in crossover behavior, phase alignment, and EQ. Software like Room EQ Wizard (REW) paired with a measurement mic
is commonly used to visualize frequency response and identify peaks/nulls.
You don’t have to go full audio scientist, but measurements can turn “I think it’s better?” into “Oh, that 45 Hz peak is the villain.”
Step 8: Don’t Ignore the Physical Stuff (It’s Not All Menus and Math)
Isolation: reduce rattles, tighten the feel
If your sub is on a resonant floor, you might be hearing the floor more than the bass.
Isolation feet or platforms can reduce vibration transfer, especially in upstairs rooms or apartments.
It won’t fix poor placement, but it can clean up the “everything is buzzing” effect.
Secure the room (the real enemy is a loose picture frame)
If your bass sounds like a bag of coins, you probably have room buzzvents, frames, cabinet doors, even light fixtures.
A quick walk-around during a bass-heavy scene can reveal the culprits. Felt pads and a little tightening can make your system sound “more expensive” fast.
Step 9: Troubleshooting Cheatsheet (Because Life Is Short)
Problem: Bass is loud but muddy
- Lower sub level a couple dB.
- Try a different placement (sub crawl).
- Check crossovertoo high can make bass localizable and thick.
Problem: Bass disappears on certain notes
- That’s often a room nullmove the sub or seat.
- Try phase/delay tweaks near crossover.
- Consider a second sub for smoothing.
Problem: Bass feels “behind” the sound
- Adjust sub distance/delay in the AVR.
- Check phase settings.
- Make sure the sub’s crossover isn’t fighting the AVR crossover (use bypass/max on the sub).
Problem: Subwoofer sounds great for movies, too much for music (or vice versa)
- Use different listening modes/presets if your system allows.
- Set a neutral calibration, then do a tiny per-input adjustment.
- Try lowering crossover for music if bass feels chunky in the upper bass region.
Putting It All Together: A Simple “Best Results” Setup Flow
- Place the sub using smart starting spots, then confirm with the sub crawl.
- Set AVR bass management: speakers “Small,” crossover starting at 80 Hz (adjust based on speakers).
- Set sub controls: crossover to bypass/max, phase to 0 to start, gain around mid.
- Run room correction (multi-position measurements).
- Fine-tune: small level changes, phase/distance tweaks if crossover region feels off.
- Validate using 5–10 familiar tracks and a couple movie scenes at realistic volumes.
Conclusion: Your Subwoofer Is Only as Good as Your Setup
The best subwoofer performance comes from a few high-impact moves: great placement, sensible crossover and bass management,
proper level matching, and phase/time alignment. Room correction and measurement tools can take you furtherbut they work best
when the fundamentals are already solid.
Once you hear bass that’s deep and controlledbass you feel in your chest but also hear as texture and detailyou’ll never go back.
Also, you may start rewatching movies “for the soundtrack,” which is a completely normal and respectable lifestyle choice.
Extra: of Real-World “What Actually Happens” Experiences
Here’s what people commonly run into when they try to get the best performance out of a subwooferand what usually fixes it.
Think of these as “field notes” from typical living rooms, not perfect studio spaces.
Experience #1: The “Corner Boom” Revelation
A lot of setups start with the sub in a front corner because it’s convenient and it gets loud easily. The first reaction is usually,
“Wow, I have bass now!” The second reactionafter a few daysis, “Why does every bass note sound like the same note?”
Corner placement can energize the room strongly, which is great for output, but it can also exaggerate certain frequencies.
The fix is often surprisingly simple: slide the sub out of the corner by a foot or two, or try along the front wall closer to the mains.
Many people are shocked that the bass becomes less loud but more impactfulbecause the punch you feel is now spread across
more frequencies instead of piling onto one boomy peak.
Experience #2: The “My Bass Disappeared” Panic (It’s Usually a Null)
Another classic: the sub sounds great while you’re standing, but when you sit down, the bass drops like it forgot its lines.
This is often a room null right at the listening position. The most common “aha” moment is realizing you don’t need a new sub
you need a new location. People who try the sub crawl often find a spot where bass is suddenly smooth and present again,
even at lower volume. If the room layout limits placement, moving the couch forward or back a small amount can also help.
It feels silly to rearrange furniture for a 40 Hz problem… until you hear the 40 Hz problem disappear.
Experience #3: The “I Tweaked One Knob and Everything Locked In” Moment
Once placement is close, phase and timing become the difference between “pretty good” and “wow.”
The most common experience is this: the system has bass, but kick drums don’t have that snap, and bass lines feel a bit smeared.
Then someone flips phase from 0 to 180 (or nudges the phase knob), and suddenly the bass tightens up like it found the beat.
What happened? You aligned the sub’s output with the speakers around the crossover region so they reinforce each other instead of partially canceling.
It’s a small change that can make music sound faster and movies sound more effortless.
Experience #4: The “Two Subs Changed Everything” Surprise
People often assume two subwoofers are only for bass fanatics. But the most common reaction after adding a second sub is not “It’s louder.”
It’s “The bass is everywhere now.” The sweet spot gets bigger. The couch becomes the listening positionnot one single seat.
Even if total volume stays similar, bass sounds more consistent and natural because the room’s peaks and nulls are averaged out.
If you watch movies with friends or family, this is one of the most practical upgrades you can make.
Experience #5: The “It Was the Picture Frame the Whole Time” Humble Pie
Finally, there’s the rattle hunt. Many people think their sub is distorting when the real issue is a buzzing vent, a loose shelf,
or a cabinet door vibrating in sympathy. After a few minutes of tracking down the noise and adding felt pads or tightening hardware,
the system suddenly sounds cleaner. It’s not as fun as buying new gear, but it’s wildly cost-effectiveand it makes your bass feel tighter
because you’re no longer hearing “bonus percussion” from your room.


