Table of Contents >> Show >> Hide
- Why You’d Drill at an Angle in the First Place
- Tools and Materials for Angled Drilling
- Three Main Ways to Drill at an Angle
- Step-by-Step: How to Drill at an Angle Without Special Tools
- Simple Homemade Guides for Better Angles
- Tips for Cleaner, Safer Angled Holes
- Common Mistakes When Drilling at an Angle
- FAQ: Angled Drilling Basics
- Real-World Lessons: Experiences with Drilling at an Angle
- Conclusion
Need to drill a hole that’s not perfectly straight? Welcome to the world of angled drillingwhere you’re half woodworker, half geometry student, and entirely likely to say, “Okay, this time I’ll get it right.”
Whether you’re installing shelf brackets, making pocket-screw joints, or running a cable through a piece of trim, knowing how to drill at an angle into wood is a seriously useful skill. The good news: you don’t need fancy tools to do it. A regular drill, the right bits, and a little technique can give you clean, accurate angled holes that don’t split the wood or send the bit wandering off like it has its own plan.
Why You’d Drill at an Angle in the First Place
Drilling straight down is great for basic pilot holes, hardware mounting, and boring holes for dowels. But certain projects practically demand angled holes:
- Pocket-screw joinery: Joining two boards at 90 degrees (like face frames or cabinet boxes) using pocket holes.
- Running wires or hoses: Angled holes let you enter and exit wood surfaces in “hidden” spots.
- Stronger fastener purchase: Driving a screw at an angle can grab more material and reduce the chance of the wood splitting.
- Decorative details: Think angled dowels, peg hooks, or support braces where the angle is part of the design.
The trick is controlling that angle so your hole ends up where you intendednot emerging through the wrong face of the board.
Tools and Materials for Angled Drilling
Basic Tools
- Corded or cordless drill
- Wood drill bits (brad-point bits are great for accuracy)
- Pencil or fine-tip marker
- Speed square, bevel gauge, or protractor for marking angles
- Clamps to hold the workpiece and guides
- Scrap wood for backing blocks or simple jigs
Optional but Very Helpful
- Drill press with a tilting table for precision angles
- Pocket-hole jig (like common pocket-hole systems) for repeatable angled screw holes
- Angle drill guide or drill stand to keep the bit locked at a set angle
- Countersink bit if you want screw heads to sit flush or slightly below the surface
Safety Gear
- Safety glasses (wood chips are tiny, fast, and rude)
- Hearing protection if you’re drilling a lot
- Dust mask when working with dusty or treated materials
Three Main Ways to Drill at an Angle
1. Using a Drill Press with a Tilted Table or Jig
If you have access to a drill press, you’ve basically unlocked “easy mode” for angled holes. Most drill presses let you tilt the table to a specific anglesay 15°, 30°, or 45°. Set the angle, clamp your workpiece, and drill. The press keeps the bit perfectly aligned while you focus on positioning and depth.
No tilting table? You can make an angled jig by cutting a block of wood to the desired angle and clamping it on the drill press table, then clamping your workpiece to the block. The drill stays vertical; the jig does the angle work for you.
2. Using a Pocket-Hole Jig
Pocket-hole jigs are basically purpose-built angled drill guides. You clamp the jig to your workpiece, insert the special stepped bit into the guide, and drill through at a pre-set angle that’s perfect for pocket screws. The result is a clean, angled “pocket” for a screw that pulls two boards together tightly.
The advantages:
- Fast, repeatable angles
- Built-in depth control via stop collars on the bit
- Great for building frames, cabinets, and furniture
The downside? You’re limited to the angle and location the jig is designed for. For general “random angle in a random spot” drilling, you still need other methods.
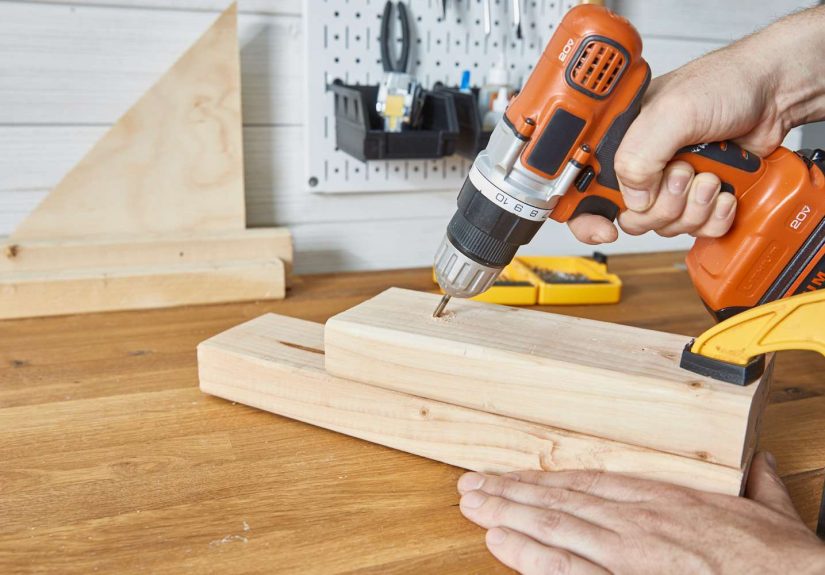
3. Freehand Drilling at an Angle (No Jig Required)
This is the real-world scenario for many DIYers: you have a handheld drill, some bits, and a piece of wood on a workbench. That’s it. You can still drill angled holes accuratelyit just takes a bit of setup and patience.
A popular technique is to start the hole straight (at 90° to the surface) and then gradually tilt the drill to the desired angle as the bit bites into the wood. This initial straight “dimple” keeps the bit from skating around while you change the angle.
Step-by-Step: How to Drill at an Angle Without Special Tools
Step 1: Plan the Angle and Exit Point
Before you touch the drill:
- Mark where the hole will start on the surface.
- Roughly sketch the intended path of the bit through the wood.
- If the hole will exit on another face, mark the target exit spot too.
This is where a speed square or bevel gauge comes in handy. You don’t have to calculate sine, cosine, and tangentunless you really want tobut try to visualize the path so you don’t unexpectedly punch through a visible face.
Step 2: Start with a Shallow Pilot Hole at 90°
Install a smaller “starter” bitabout half the diameter of your final hole. Hold the drill perpendicular (90°) to the surface and:
- Drill just deep enough to create a small pocket or divotabout 1/16 to 1/8 inch.
- Stop before the bit gets too deep; you want a guide, not a full straight hole.
This shallow pilot hole acts like a pivot point for the bit in the next step.
Step 3: Tilt the Drill to the Desired Angle
With the bit still in the shallow pilot hole:
- Lean the drill slowly to your desired angle, keeping the tip of the bit anchored in the divot.
- Apply light pressure and start the drill at a modest speed.
- Let the bit “carve” its way into the wood at the new angle.
Don’t force the drill. If you tilt too aggressively or push too hard, the bit can bend, break, or jump out of the hole.
Step 4: Switch to the Final-Size Bit
Once you’ve created a clean angled pilot hole:
- Back the bit out fully and swap to your final-size bit.
- Reinsert the new bit, following the angle established by the pilot hole.
- Drill in short bursts, clearing chips regularly.
For deeper holes, wrap masking tape around the bit at the desired depth to act as a quick visual stop indicator.
Step 5: Use a Backing Block to Prevent Tear-Out
If your angled hole will exit through the far side of the wood, clamp a sacrificial scrap piece behind the exit point. This helps:
- Prevent splintering and ragged edges
- Support the fibers as the bit breaks through
- Reduce the risk of the wood splitting along its grain
Step 6: Countersink if You’re Installing a Screw
When the angled hole is meant for a screw, consider using a combination pilot-and-countersink bit. This creates:
- A pilot hole for the screw to follow
- A conical recess so the screw head sits flush or slightly recessed
This not only looks cleaner but also reduces the chance of cracking around the screw head, especially near edges.
Simple Homemade Guides for Better Angles
Angle Block Jig
One of the easiest upgrades for your angled drilling game is a simple wood block cut at the angle you want to drill.
- Cut a 2×4 with a miter saw at your desired anglesay 30° or 45°.
- Clamp the angled face of the block to your workpiece.
- Hold the side of your drill against the angled face of the block as you drill.
The block becomes a physical reference, so you don’t have to “eyeball” the angle every time.
Drill-Guide Block
You can also make a reusable drill guide:
- Take a short chunk of hardwood.
- Use a drill press (or a very careful setup) to drill a hole through it at your desired angle.
- Now clamp that block to your workpiece and run your handheld drill through the guide hole.
This gives you clean, repeatable angled holes without needing to adjust anything on your drill itself.
Tips for Cleaner, Safer Angled Holes
- Use sharp bits. Dull bits wander, burn the wood, and make your life harder.
- Drill pilot holes, especially near edges. They help prevent splitting and give screws a clear path.
- Drill in stages for deep holes. Pull the bit out regularly to clear chips and keep it cool.
- Clamp everything. Clamp the workpiece, clamp the jig, clamp your supporting blocks. Movement is your enemy.
- Let the speed do the work. Too much pressure can bend the bit or deflect it from your intended path.
Common Mistakes When Drilling at an Angle
1. Bit Wandering Across the Surface
If you try to start drilling at full angle right on the surface, the bit can skate across the wood. Starting with a perpendicular shallow pilot hole almost always solves this.
2. Blowing Out the Back Side
Angled holes tend to exit close to an edge, where the wood is more fragile. Without a backing board, the bit can blow out a chunk of material. A simple clamped scrap block behind the exit point works wonders.
3. Splitting the Wood
This is common when drilling too close to the end grain or not using a pilot hole for screws. Use smaller pilot bits, keep at least a couple of screw diameters’ distance from the end, and avoid overtightening screws.
4. Overheating the Bit
Long holes in dense wood at a steep angle can generate a lot of friction. If you smell burning or see smoke, stop, back the bit out, and let it cool. Work in short bursts with chip clearing.
5. Missing Your Target Exit Point
If the hole needs to appear in an exact spot on another face, mark both the entry and exit points and use layout lines to guide your angle. You can even drill a small shallow “target divot” on the exit side and aim for it.
FAQ: Angled Drilling Basics
How steep an angle can I drill by hand?
Most DIYers can reliably manage between about 15° and 45° using the pilot-hole-then-tilt method. Very shallow angles (less than about 15°) are tough because the bit wants to ride along the surface instead of cutting in, and extremely steep angles can cause the bit to bind more easily.
Does the type of wood matter?
Yes. Softwoods like pine or fir are more forgiving and easier to drill at an angle. Hardwoods such as oak or maple resist the bit more and require sharper bits, more careful technique, and slower progress to avoid burning or wandering.
What bits should I use?
For precise entry points, brad-point bits are excellent because their center spur helps keep the bit on your mark. For deep or large angled holes, use a starter bit, then step up gradually to avoid stressing the bit or the wood.
Can I just use a multi-function angle drilling jig?
Sure. Adjustable drill guides and angle jigs exist specifically for this job. They’re especially handy if you often drill at common angles like 15° or 30° and want more consistency without a drill press.
Real-World Lessons: Experiences with Drilling at an Angle
The Shelf Support Incident
Picture this: You’re installing decorative shelf brackets that call for screws driven into the underside of a wall-mounted cleat at a slight angle. You figure, “How hard can it be?” Five seconds later, the bit skates across the wood, scratches the visible face, and the hole you eventually do drill exits right through the front of the board. Not ideal.
What would have prevented it?
- Lightly center-punching the starting point instead of just eyeballing it
- Starting with a small pilot hole at 90° and then tilting to the angle
- Clamping the board so both hands could control the drill
That one mishap teaches you more about angled drilling than five perfect YouTube videos ever could.
Building a Bed Frame with Pocket Screws
When you build something like a bed frame or a large table, pocket-screw joinery can feel like magic. You drill angled holes in one board, drive in special screws, and everything cinches together tightly and squarely. But the first time you try it, it’s common to run into issues:
- The screws poke through the mating board because the depth or screw length wasn’t set correctly.
- The joint shifts because the boards weren’t clamped securely when the screws were driven.
- A few holes end up at slightly different angles, causing alignment problems.
After a few attempts, you realize that clamping is non-negotiable, and following the jig’s settings for material thickness makes a huge difference. You also learn that pre-drilling angled holes by handif you ever need to without the jigbenefits from the same discipline: good layout, consistent depth, and solid support.
Making a Simple Angle Block You’ll Use Forever
Many woodworkers eventually make themselves a small collection of angle blocks: a 45° block, a 30° block, maybe a 22.5° for trim work. At first, they’re just offcuts from miter saw cuts. But once you realize how often you need to hold the drill somewhere between “straight” and “eyeballed,” these little blocks become your favorite helpers.
A classic example: drilling angled holes along the edge of a board for decorative dowels or pegs. With an angle block clamped in place, you simply rest the drill body against the block and let it guide the tilt. The result is a row of evenly angled holes that look intentionally designed, not “close enough.”
The “I Wish I’d Used a Backing Board” Moment
If you work with visible surfacestable legs, chair parts, or decorative trimyou’ll eventually experience the heartbreak of blowout. You drill a nice clean angled hole through one side, only to discover that the exit side has exploded into a mess of splinters.
The lesson is simple but powerful: any time a hole is exiting on a surface you’ll see, clamp a scrap board tightly to that face. The bit will pass from your workpiece into the scrap, and the fibers will stay supported. Suddenly, your projects look cleaner and more “pro,” even if you’re still working out of a single-car garage.
Learning Your Own Comfort Angle
Over time, you’ll notice there are angles you’re naturally better at. Maybe 30° feels easy and controllable, while very shallow angles give you trouble. That’s totally normal. The more you practice, the more your muscle memory kicks in.
A smart habit is to experiment on scrap wood first whenever you’re trying a new angle or a deeper hole than usual. Mark the entry and exit points, try different approaches, and see how the bit responds. It’s much less stressful to make your mistakes on scrap than on the final piece of a big project.
Conclusion
Drilling at an angle into wood doesn’t require exotic tools or advanced mathjust a clear plan, the right drill bits, and a few smart techniques. Start with a shallow pilot hole, tilt the drill gradually, use backing blocks and guides whenever you can, and don’t rush the cut. Whether you’re making pocket-screw joints, hiding wires, or adding decorative details, solid angled drilling skills make your projects stronger, cleaner, and a lot more professional-looking.
And the next time someone asks, “How do you get your angled holes so neat?” you can smile, shrug, and say, “Oh, you know…just a little geometry and a lot of practice.”