Table of Contents >> Show >> Hide
- Why Kitchen Cabinets Become the Kitchen’s “Mood Ring”
- Cabinet Makeover Options (And the Real Question You Should Ask)
- The Frustration Phase: What Was Actually Going Wrong
- The Accident That Changed the Plan (And the Look)
- The Plan: Turn a Mistake Into a “Custom Cabinet” Finish
- Step-by-Step: How to Get a Durable New Kitchen Cabinet Look
- Step 1: Decide if Your Cabinets Are Paint-Friendly
- Step 2: Remove Doors, Drawers, and Hardware (Yes, All of It)
- Step 3: Degrease Like You Mean It
- Step 4: Scuff Sand (You’re Not Removing the FinishYou’re Creating Grip)
- Step 5: Fill Holes and Fix Dings
- Step 6: Prime With a Bonding Primer
- Step 7: Paint With a Cabinet-Grade Finish
- Step 8: Add the “Accident-Style” Upgrade (Optional, But Beautiful)
- Step 9: Let the Finish Cure (This Is Where Good Makeovers Become Great)
- Step 10: Upgrade Hardware for Instant “New Cabinet” Energy
- What This Makeover Actually Costs (And Where People Overspend)
- Common Mistakes (So You Don’t Recreate My Frustration for Fun)
- The Reveal: Why “Perfect” Isn’t Always the Best-Looking Finish
- Conclusion
- 500 More Words: Real-World Experiences That Prove Cabinet Makeovers Are Emotional
The story starts the way most kitchen makeovers do: with big dreams, small patience, and one cabinet door that
refused to close like it wasn’t being paid enough.
I’d been side-eyeing my cabinets for months. Not because they were “ugly” exactlymore like they had that
mysterious, sticky sheen that screams “I’ve survived 10,000 dinners and I will survive you, too.”
Every time I wiped them down, they looked clean for approximately 14 minutes. Then the light hit just right,
and suddenly: fingerprints, smudges, and a glow that could only be described as “grease chic.”
Frustration builds quietly in a kitchen. It starts with a sigh. Then it becomes a rant. Then one day you find
yourself Googling “cabinet replacement cost” while eating cereal for dinner because you’re too annoyed to cook.
And thenbecause the universe has a sense of humoran accident happens. Something chips. Something spills.
Something goes wrong in a way that’s annoying in the moment… and weirdly perfect in the long run.
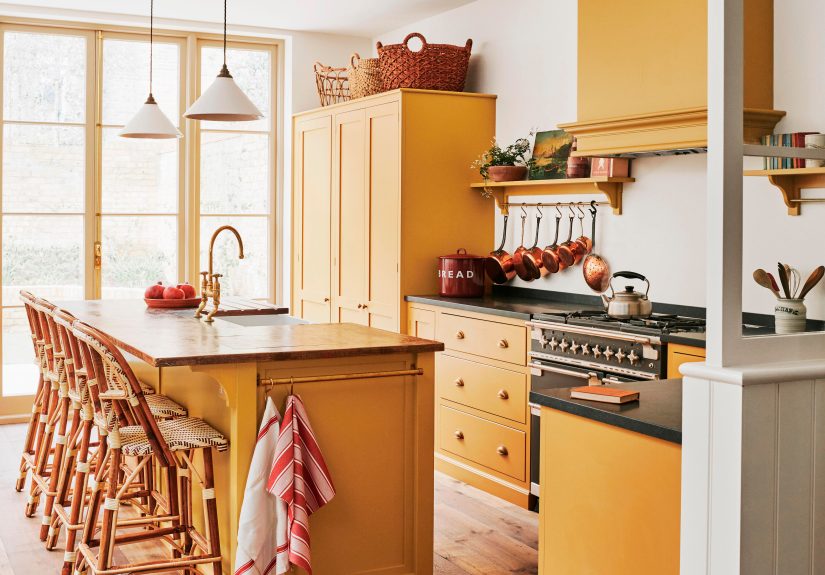
Why Kitchen Cabinets Become the Kitchen’s “Mood Ring”
Cabinets take more daily abuse than most of the kitchen. Heat, steam, cooking oils, hand oils, cleaners, and
the occasional spaghetti sauce explosion all settle into the finish over time. Even “nice” cabinets can end up
looking tired because the finish gets dull, sticky, or uneven.
The good news: most cabinet problems are cosmetic. The better news: cosmetic problems are usually cheaper to
fix than structural onesespecially if your cabinet boxes are still sturdy.
Cabinet Makeover Options (And the Real Question You Should Ask)
Before you do anything dramaticlike pricing custom cabinets or calling your credit card company to apologize
ask this:
Are my cabinet boxes structurally sound?
If the boxes are solid, you have three makeover paths that can deliver a “new kitchen cabinet look” without a
full tear-out.
1) Paint (Best for Maximum Visual Change on a Budget)
Painting is the classic cabinet glow-up. It’s also the one with the biggest “prep-to-payoff” ratio. Do the prep
right and your cabinets can look professionally finished. Skip it and you’ll be starring in a peeling paint
sequel nobody asked for.
2) Refinish or Re-stain (Best for Wood Lovers)
If you have real wood doors and you love the grain, refinishing can be stunning. It’s also more sensitive to
technique because stains highlight uneven sanding and blotches. Gorgeous when done well; humbling when done
“fast.”
3) Reface (Best for “New Door” Impact Without Moving Walls)
Refacing keeps the cabinet boxes but replaces doors and drawer fronts (and often adds a veneer to visible box
surfaces). It’s more expensive than paint but can look like a full replacement if your layout already works.
4) Replace (Best When the Cabinets Are Actually the Problem)
If boxes are warped, falling apart, water-damaged, or badly laid out, replacement may be the smart long-term
choice. But if your frustration is mainly “they look old,” you can usually get the look you want without
replacing everything.
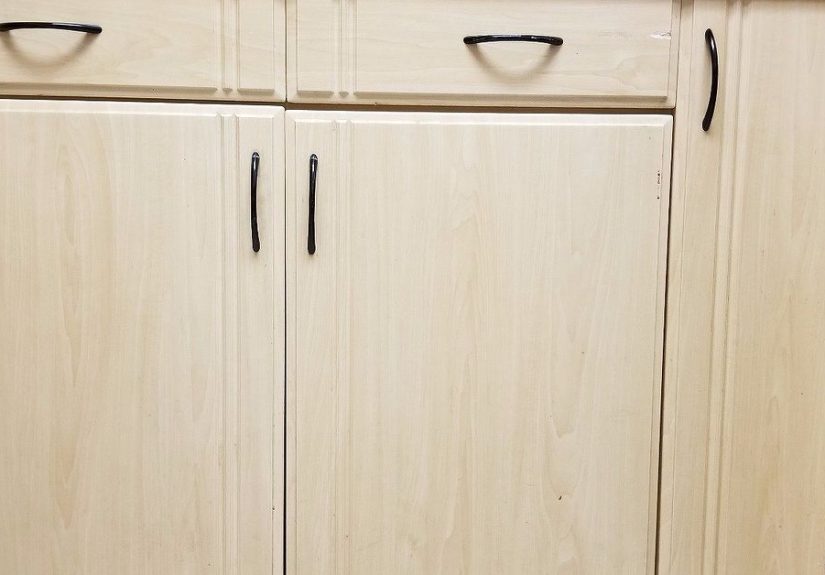
The Frustration Phase: What Was Actually Going Wrong
My cabinets had three issues that are incredibly common:
- Grease film that laughed at casual cleaning.
- A glossy old finish that made paint adhesion a real concern.
- Hardware scarsextra holes and worn spots from old pulls.
This is where most DIYers get stuck. They want the after photo, but they’re standing in the before photo,
holding a sponge, realizing that cabinets are basically vertical frying pans.
The fix isn’t complicated. It’s just unglamorous: degrease, scuff, prime, paint, cure. And
that last wordcureis the one people skip because it sounds like something you do to a ham.
The Accident That Changed the Plan (And the Look)
Here’s what happened: I was removing doors (because painting around hinges is a shortcut to sadness), and one
door slipped. It didn’t shatter. It didn’t break in half. It just landed corner-first and took a chunk out of
the finish right on the edge.
At first I was furious. Then I noticed something: the chipped area revealed a lighter layer underneathalmost a
soft, warm tone that looked… good. Like intentionally worn. Like “French kitchen charm,” not “I dropped a door
because my arms got tired.”
That’s when the makeover stopped being a basic paint job and became a design decision:
I wasn’t going to fight every imperfection. I was going to use them.
Instead of aiming for a sterile, factory-perfect finish, I leaned into a more forgiving, high-style look:
a custom, layered cabinet finishthe kind that looks expensive because it’s not afraid of a
little texture and depth.
The Plan: Turn a Mistake Into a “Custom Cabinet” Finish
You can pull this off in a few different ways, depending on your taste:
- Two-tone cabinets (light uppers, darker lowers) to add instant designer contrast.
- Softly distressed edges where wear would happen naturally.
- A glaze or wash to create dimension and highlight profiles.
- New hardware that makes old doors look brand new.
The key is that your finish choice should match your reality. If you have kids, pets, roommates, or a tendency
to open cabinets with your elbow while holding three grocery bags, a slightly forgiving finish is not “settling.”
It’s genius.
Step-by-Step: How to Get a Durable New Kitchen Cabinet Look
Step 1: Decide if Your Cabinets Are Paint-Friendly
Solid wood, wood veneer, and MDF doors typically paint well with proper prep. Laminate can be painted, but it
needs specific prep and a bonding primer. Some slick surfaces (like certain thermofoil doors) are notoriously
hard to keep painted long-termso if you’re not sure, test first or consider new doors.
Step 2: Remove Doors, Drawers, and Hardware (Yes, All of It)
Label everything. Put hinges and screws in baggies. Mark each door location. This sounds extra until you’re
holding a door at midnight thinking, “Was this the left of the sink or the right of the stove?” Spoiler: they
all start to look the same when you’re tired.
Step 3: Degrease Like You Mean It
Cabinets near the stove and trash pull-out are usually the worst. Use a degreasing cleaner appropriate for
painted surfaces and follow label directions. Wipe, rinse, and let dry. Paint doesn’t stick to cooking oil.
Paint sticks to clean, slightly rough surfaces. Give it what it wants.
Step 4: Scuff Sand (You’re Not Removing the FinishYou’re Creating Grip)
You’re aiming for a “dull, evenly scuffed” surface, not bare wood everywhere. A sanding sponge or sandpaper in
the 150–220 grit range is common for scuff sanding, while damaged areas may need more attention. Vacuum dust and
wipe with a tack cloth or microfiber cloth afterward.
Step 5: Fill Holes and Fix Dings
If you’re switching hardware sizes, fill old holes with wood filler. For dents and edge damage, build up filler,
let it fully dry, then sand smooth. This is also the moment to decide: do you want a perfectly smooth modern
look, or do you want a finish with a little character? Both are valid. Only one of them is faster.
Step 6: Prime With a Bonding Primer
Primer is not optional on most cabinets because kitchens are high-touch and high-humidity. A quality bonding
primer helps paint adhere and blocks stains. Apply a thin, even coat. Let it dry fully, then lightly sand with a
fine grit (often around 220) to knock down dust nibs and brush marks. Clean dust again.
Step 7: Paint With a Cabinet-Grade Finish
For cabinets, durability matters. Many DIYers choose cabinet enamels or trim enamels designed for hard-wearing
surfaces. You can roll and brush, or spray if you have the setup (and the patience to mask everything like you
work for NASA).
For brush-and-roll, a high-quality angled brush for edges plus a small foam roller for flat panels can give a
smooth finish with fewer marks. Work in thin coats. Thick coats look faster on day one and worse on day seven.
Step 8: Add the “Accident-Style” Upgrade (Optional, But Beautiful)
If you want that layered, custom lookthe one that saved my projecttry one of these:
- Soft edge distressing: After the paint cures enough to handle gently, lightly rub edges with
very fine sandpaper to mimic natural wear. Keep it subtle. - Glaze in the grooves: A cabinet glaze can deepen profiles and add age and dimension (great for
shaker doors and raised panels). - Two-tone layout: Paint uppers a lighter shade to keep the room airy and lowers a deeper shade
to anchor the space.
The goal isn’t “messy.” The goal is “intentional.” There’s a differenceand it’s mostly about restraint.
Step 9: Let the Finish Cure (This Is Where Good Makeovers Become Great)
Paint can feel dry quickly but still be curing (hardening) underneath. Give the finish time before reinstalling
doors, stacking dishes, or scrubbing. Treat your cabinets gently for the first few weeks. Think of it like a
fresh manicure, but on a much larger scale and with fewer compliments from strangers.
Step 10: Upgrade Hardware for Instant “New Cabinet” Energy
New pulls can make old doors look surprisingly modern. If your old holes don’t match, you can:
- fill and drill new holes (best-looking),
- use hardware backplates (fast and stylish),
- or choose pulls with a matching center-to-center measurement (least dramatic).
What This Makeover Actually Costs (And Where People Overspend)
A DIY kitchen cabinet makeover can be relatively affordable compared with replacement, but costs vary based on
paint choice, primer, filler, sandpaper, and tools. The biggest “hidden cost” is time: prepping, drying, sanding
between coats, and curing can stretch across several days.
People overspend most often in two places:
- Buying the wrong paint first and redoing it later.
- Skipping prep and paying for peeling, chips, and touch-ups forever.
Spend your money on prep supplies and a durable paint system. That’s the difference between “Instagram finish”
and “I can’t believe this is already chipping.”
Common Mistakes (So You Don’t Recreate My Frustration for Fun)
- Not cleaning enough: If the rag turns yellow, keep going.
- Skipping primer: Cabinets are not the place to test your luck.
- Rushing dry times: Stacking doors too soon creates dings and sticking.
- Painting the wrong surface: Some materials need special productsor replacement doors.
- Forgetting safety: Ventilation matters, and older homes may require lead-safe practices.
If your home was built before 1978, be extra cautious about sanding or scraping old painted surfaces. Use
lead-safe practices and consider professional guidanceespecially if kids or pregnant people are in the home.
When in doubt, involve a qualified adult or certified pro. A pretty kitchen is great. A safe kitchen is better.
The Reveal: Why “Perfect” Isn’t Always the Best-Looking Finish
Here’s the funny part: the accident that irritated me at the start ended up making the final cabinets look more
custom. By embracing a finish with a little depthrather than chasing sterile perfectionI got a cabinet look
that felt warm, intentional, and expensive.
Frustration forced me to slow down and prep properly. The accident pushed me toward a more forgiving, stylish
finish. And the end result didn’t just look “new.” It looked like it belonged in the kitchenlike it had a plan.
Conclusion
If you’re frustrated with your cabinets, you’re not dramaticyou’re observant. Cabinets set the tone of the
kitchen, and tired finishes make the whole space feel older than it is.
The best cabinet makeovers aren’t magic. They’re mostly prep, patience, and a willingness to pivot when reality
shows up. Sometimes that pivot is triggered by an accident. And sometimesif you play it rightthat accident is
the moment your kitchen finally gets its glow-up.
500 More Words: Real-World Experiences That Prove Cabinet Makeovers Are Emotional
Experience #1: The “Why Is My Paint Beading Up?” Panic
The first time I tried to paint cabinets years ago, the paint beaded up like rain on a freshly waxed car. I
stared at it, offended, as if the cabinet doors had personally rejected me. The lesson was simple and painfully
universal: I hadn’t degreased enough. Kitchens create invisible buildup, especially around handles and near the
stove. Once I cleaned againslowly, thoroughly, and with a rinse stepthe primer finally laid down smoothly.
That one frustrating hour saved me weeks of chipping later. If your cabinets act weird, assume they’re dirty
before assuming you’re cursed.
Experience #2: The “Oops, That’s Not the Color” Miracle
A friend once ordered a warm white and got something closer to “mushroom gray.” She was ready to return it, but
we tested it on the back of one door anyway. Under kitchen lighting, it looked rich and modernlike a designer
neutral instead of a mistake. She leaned into it, paired it with warmer hardware, and suddenly the whole kitchen
felt calmer and more expensive. The takeaway: always test paint in your actual space, at multiple times of day.
The “wrong” color on a swatch can be the “right” color in your kitchen, especially when you have warm bulbs,
natural light, and countertops that shift everything.
Experience #3: The Door That Stuck (And the Cure-Time Wake-Up Call)
Another time, someone reinstalled doors too quickly because they were “dry to the touch,” and a freshly painted
door stuck to the frame like it was trying to become one piece of furniture. When it finally popped free, it
took a little paint with itan instant regret souvenir. That’s when cure time became non-negotiable. Dry is not
the same as cured. Cabinets are high-contact surfaces, so they need time to harden. If you’re impatient (hi, it’s
me too), plan the project when you can leave doors off overnight or for a couple of days. It’s inconvenient, but
it beats doing touch-ups every week like it’s a hobby.
Experience #4: The Hardware Swap That Did 60% of the Work
The most surprising experience: sometimes the cabinet “makeover” feeling comes from hardware more than paint.
One kitchen had decent doors but dated knobs that screamed early-2000s rental. After paint, the cabinets looked
nice, but still not “new.” The moment modern pulls went on, the whole kitchen snapped into focus. It was like
the cabinets finally got a haircut and stopped wearing cargo shorts. If you’re budgeting, don’t skip hardware.
And if your old holes don’t match, backplates can be a lifesavercovering scars while adding a little polish.
Small changes can produce big “new cabinet look” energy.