Table of Contents >> Show >> Hide
- Why Paint a Kitchen Countertop Instead of Replacing It?
- Is Your Countertop a Good Candidate for Paint?
- What You Need for a Glossy Painted Countertop
- Step-by-Step Glossy Painted Kitchen Counter Top Tutorial
- Step 1: Empty the counters and create a clean work zone
- Step 2: Degrease thoroughly
- Step 3: Remove old caulk and repair flaws
- Step 4: Scuff sand or follow the kit’s prep system exactly
- Step 5: Prime or apply the required base coat
- Step 6: Add color, pattern, or faux-stone detail
- Step 7: Apply the glossy topcoat carefully
- Step 8: Respect the cure time
- How to Get a Truly Glossy Finish Without Brush Marks
- Common Mistakes That Ruin Painted Countertops
- How Durable Is a Glossy Painted Kitchen Countertop?
- How to Care for Your Painted Countertop
- Is a Glossy Painted Countertop Worth It?
- Experiences and Real-Life Lessons From a Glossy Countertop Project
- Conclusion
If your kitchen countertop is screaming “builder-grade beige” while your budget is whispering “absolutely not,” painting it can be a smart, affordable makeover. A glossy painted countertop will not magically become a slab of Carrara marble blessed by Italian angels, but it can look clean, polished, and dramatically more modern when you do the prep right. And that is the secret nobody wants to hear because prep is about as glamorous as scrubbing a greasy toaster oven.
This glossy painted kitchen counter top tutorial walks you through the full process, from deciding whether your countertop should be painted at all to getting that shiny finish without roller marks, weird bumps, or the dreaded “it looked amazing for 18 hours and then chipped when I set down a coffee mug” outcome. The goal here is simple: help you create a countertop that looks expensive, feels intentional, and survives normal life in a real American kitchen.
Why Paint a Kitchen Countertop Instead of Replacing It?
Replacing countertops can cost hundreds or thousands of dollars once you factor in materials, fabrication, sink removal, plumbing reconnects, and the emotional damage caused by renovation dust. Painting, by contrast, is a budget-friendly weekend project for homeowners who want a refresh without turning the kitchen into a construction zone.
A painted glossy finish works especially well when the existing countertop is structurally sound but visually tired. Think outdated laminate, a dull solid-surface counter, or a worn builder-grade finish that still functions fine. If the bones are good, paint can deliver a surprisingly dramatic upgrade. That is why painted countertop tutorials remain so popular: they sit in the sweet spot between “cheap temporary fix” and “why did I not do this sooner?”
That said, a painted countertop is not the same as a factory-finished stone slab. It is a cosmetic resurfacing project. Done well, it can look fantastic and hold up nicely with proper care. Done badly, it becomes a glossy cautionary tale.
Is Your Countertop a Good Candidate for Paint?
Good candidates
Your countertop is a solid candidate if it is mostly flat, sound, and free from major swelling or structural damage. Laminate is the most common success story. Some countertop coating systems also work on tile, butcher block, cultured marble, melamine, and even certain previously coated surfaces. If you are using a specialty kit, always match the product to the surface instead of assuming “paint is paint.” In countertop land, that assumption ages badly.
Bad candidates
If the countertop has peeling laminate, soft spots from water damage, crumbling seams, major burns, or deep movement around the sink, painting will not solve the real problem. Gloss makes surface flaws more visible, not less. A shiny finish is a little like brutal overhead lighting in a dressing room: honest to the point of rudeness. If your countertop is failing, repair or replacement is the smarter move.
The quick reality check
If you can wipe your hand across the surface and say, “This is ugly but basically fine,” paint may be perfect. If you can say, “This feels like damp cereal box cardboard,” step away from the roller.
What You Need for a Glossy Painted Countertop
For the best results, use a countertop-specific coating system or a paint-and-topcoat combination designed for hard-working surfaces. Standard wall paint is not your hero here. It is simply not built for grease splatters, water, cleaning products, and the occasional flying spoon.
You will usually need a degreasing cleaner, painter’s tape, repair filler if the surface has chips or gouges, fine or medium sandpaper for scuffing where required, lint-free cloths, a high-density foam roller or the roller type recommended by your coating system, a brush for edges, and a glossy protective topcoat if it is not already built into the kit. A drop cloth and some patience are also helpful. One is sold in stores. The other is mostly back-ordered.
Step-by-Step Glossy Painted Kitchen Counter Top Tutorial
Step 1: Empty the counters and create a clean work zone
Remove everything from the countertop, including small appliances, cutting boards, jars, and that mysterious stack of mail that apparently lives next to the toaster. Mask off the sink rim, backsplash, walls, cabinet faces, appliance edges, and anywhere you do not want coating to wander. A glossy finish reflects light, so even small drips and missed edges will be more noticeable than they would be with a matte surface.
Step 2: Degrease thoroughly
This step matters more than color selection, and yes, I know that sounds rude. Kitchens collect invisible grime from cooking oils, hand residue, food splatter, and cleaning product buildup. If you paint over that mess, the coating may not bond properly. Clean the surface thoroughly with a strong degreasing cleaner, rinse as directed, and let the countertop dry completely. Do not rush. Paint loves clean surfaces and hates shortcuts.
Pay extra attention to areas around the stove, sink, and front edge of the counter where hands constantly rest. If the surface still feels slick, clean it again.
Step 3: Remove old caulk and repair flaws
Any failing caulk near the backsplash, sink edge, or seams should come out before you coat the surface. If you leave bad caulk in place, the new finish can crack or lift around it. Fill chips, gouges, or deep scratches with an appropriate filler, let it dry fully, and sand the repair smooth. Glossy countertops do not forgive lumpy patch jobs. They put them on stage and hand them a microphone.
Step 4: Scuff sand or follow the kit’s prep system exactly
Many successful countertop makeovers involve lightly sanding glossy surfaces so primer or base coat can grip better. The goal is not to dig through the countertop. You are creating tooth, not a crater field. Some newer countertop systems advertise little or no sanding, but even then, manufacturers often require an adhesion test or light sanding if the test fails. Follow the product instructions precisely, because the prep method is part of the chemistry, not just a polite suggestion.
If your home is older and you may disturb old painted surfaces nearby, use safe work practices and avoid generating dust carelessly. This is especially important in homes built before 1978.
Step 5: Prime or apply the required base coat
If your chosen system needs a bonding primer, apply thin, even coats and let them dry according to the label. If your countertop kit uses a base coat instead of a separate primer, apply that base coat exactly as directed. Most successful projects use thin coats, steady rolling, and a maintained wet edge. That last phrase sounds fancy, but it just means you do not want one section to dry before the next section blends into it.
Work in manageable sections rather than trying to race from one end of the kitchen to the other like you are painting during a game show lightning round. Thin, even coverage beats thick, gloopy enthusiasm every time.
Step 6: Add color, pattern, or faux-stone detail
This is where your countertop starts to look intentional instead of merely less sad. You have a few common style directions:
Solid glossy color: Ideal for modern kitchens. Soft white, charcoal, black, warm gray, and greige are popular because they look clean and pair well with most cabinets.
Stone-look finish: Great for laminate counters that need visual texture. Layered sponging or mineral-style kits can mimic granite or quartz-like movement.
Marble-inspired look: Usually created with a light base and subtle gray or taupe veining before the topcoat.
Whatever style you choose, do not overwork the surface. Homeowners often ruin a promising faux finish by fussing with it too long. Put down the texture, step back, and let it be art. Or at least let it be countertop art, which has lower emotional stakes.
Step 7: Apply the glossy topcoat carefully
The shine comes from the protective topcoat, not from wishful thinking. For a glossy painted kitchen countertop, the topcoat is where durability and appearance finally meet. Use the applicator recommended for your product, often a foam roller or a short-nap roller, and apply in smooth, even passes.
The key tricks are simple: do not let the product puddle, do not press too hard, do not keep rolling back over half-set coating, and do not assume a thick coat will look glossier. Usually it just looks more chaotic. A controlled, even film produces the smoothest shine.
If your finish allows a second topcoat for added durability or uniformity, stay inside the recommended recoat window. That window matters. Miss it, and you may have adhesion trouble between coats.
Step 8: Respect the cure time
This is the part that separates a countertop makeover from a countertop tragedy. Dry to the touch is not the same as cured. Some systems allow light use after about 24 hours, while full cure may take several days or even one to two weeks depending on the coating chemistry. During that time, avoid dragging appliances, scrubbing hard, setting down hot pans, or treating the counter like a granite workhorse.
Think of curing like letting concrete, cookies, or a bad haircut settle. Interfering early never improves the outcome.
How to Get a Truly Glossy Finish Without Brush Marks
The most polished-looking countertops usually come from boringly disciplined technique. Use the right roller, roll in thin coats, and maintain a wet edge. Keep dust down before topcoating, because a glossy surface will spotlight every crumb, pet hair, and mystery fleck in the room. If possible, turn off ceiling fans while coating, but keep the room ventilated. You want air movement, not a lint tornado.
Temperature and humidity matter too. Countertop coatings usually perform best within a moderate temperature range, with lower humidity for proper drying. If the room is too cold, too damp, or too chaotic, the finish can drag, cloud, or cure slowly. In other words, your kitchen renovation does not need a dramatic weather subplot.
Common Mistakes That Ruin Painted Countertops
Using the wrong paint
Countertops need specialty products or a surface-appropriate system. Ordinary interior wall paint is a poor choice for a kitchen work surface.
Skipping prep
If the coating fails, the root cause is often grease, dust, leftover residue, or poor adhesion from inadequate prep.
Applying coats too heavily
Thick coats can puddle, bubble, or leave texture that looks clumsy under gloss.
Ignoring cure time
This is the heartbreak classic. The countertop looks amazing, then gets scratched because someone slid the air fryer back into place twelve hours too soon.
Treating the finish like stone
A painted countertop is durable when cared for properly, but it still needs common-sense protection. Use trivets, use cutting boards, and do not let water sit around seams forever.
How Durable Is a Glossy Painted Kitchen Countertop?
The honest answer is: durable enough for many kitchens, but not indestructible. In lower- to moderate-traffic households, a well-painted countertop can hold up beautifully for years with proper care. In ultra-busy kitchens where hot pans land randomly and knives appear to be used directly on every available surface, the finish will age faster.
Durability depends on surface prep, product choice, topcoat quality, and how the countertop is used afterward. Glossy finishes can look luxurious, but they may show scratches more readily than textured stone-look coatings. That does not make them a bad option. It just means you should go in with realistic expectations instead of fantasy-novel expectations.
How to Care for Your Painted Countertop
Once the surface has fully cured, clean it with mild soap and water or a non-abrasive cleaner approved by the product manufacturer. Avoid harsh abrasives, steel wool, aggressive scrub pads, and cleaners that could dull or scratch the finish. Wipe spills promptly, especially oils, tomato sauce, wine, and coffee. Use a cutting board for food prep and a trivet under hot cookware.
Also, unless your specific product states otherwise, do not prepare food directly on the painted surface. A countertop coating is a finish system, not a cutting board and not a serving tray for bare pizza slices. Your countertop may be glossy, but it is not auditioning for restaurant duty.
Is a Glossy Painted Countertop Worth It?
Yes, if you want a big visual upgrade for a modest budget and you are willing to do the prep carefully. A glossy painted kitchen counter top can brighten the room, modernize dated materials, and buy you time before a full remodel. It is especially worth it in starter homes, rentals you own, laundry rooms, basement kitchenettes, and kitchens where replacement is not in the cards right now.
No, if you expect the finish to behave exactly like quartz, or if your existing countertop is already structurally failing. Paint is a makeover tool, not a miracle worker. A very good makeover tool, yes. A miracle worker, no.
Experiences and Real-Life Lessons From a Glossy Countertop Project
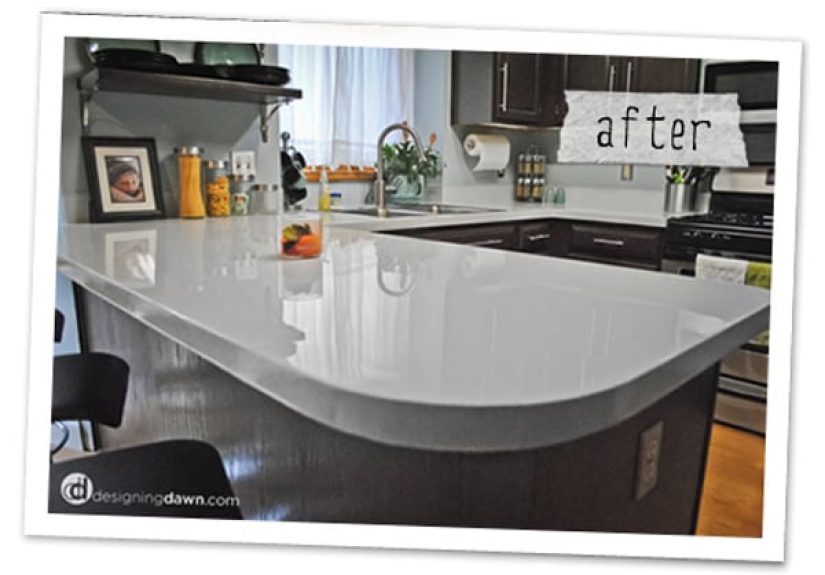
One of the most common experiences people have with a glossy countertop paint project is that the before-and-after difference feels bigger in person than it does in photos. A tired laminate counter tends to drag the whole kitchen down, even when the cabinets, hardware, and lighting are decent. Once the surface is refinished in a glossy white, soft gray, charcoal, or faux marble look, the room suddenly feels brighter, cleaner, and more expensive. It is one of those upgrades where visitors say, “Wait, you painted that?” which is the home-improvement equivalent of a standing ovation.
Another real-world lesson is that the project usually starts with confidence and ends with humility. At the beginning, people think color is the big decision. Halfway through, they realize surface prep is the entire plot. Cleaning twice, removing old caulk, sanding repairs smooth, and taping carefully do not make for exciting social media content, but they make or break the final result. Homeowners who love their finished countertops almost always say the same thing in one form or another: the prep took longer than expected, but it was worth it.
There is also the emotional roller coaster of topcoat day. The first few passes can look streaky or underwhelming, and it is easy to panic. Then the coating levels out, the shine appears, and suddenly the countertop begins to look finished instead of experimental. This is usually the moment when a person either becomes deeply loyal to countertop paint forever or swears never to DIY anything glossy again. Much depends on whether they left the surface alone long enough to settle.
People also learn very quickly that cure time is not decorative language. It is common to feel tempted to move the microwave back, set down the coffee maker, or wipe off a tiny spot with enthusiasm before the surface is fully hardened. That temptation should be resisted with the seriousness of a person guarding fresh concrete. The households that get the best longevity are the ones that baby the finish at first and then use sensible habits long term, like trivets, cutting boards, and quick cleanup around the sink.
Finally, there is the style lesson. A glossy painted countertop works best when the look suits the kitchen around it. A crisp solid color can make an older kitchen feel cleaner and more modern. A faux-stone finish can soften a plain builder-grade space. A dramatic black gloss can look fantastic, but it may show every crumb like it is building a legal case against your snack habits. In other words, the best finish is not just the prettiest one on a sample card. It is the one that matches your lighting, cabinets, maintenance style, and tolerance for seeing fingerprints at noon.
That combination of beauty, practicality, and realistic expectations is what turns this from a temporary patch job into a genuinely satisfying project. When done carefully, a glossy painted countertop is not just a cheap fix. It is a smart design reset that gives your kitchen new energy without demanding a full renovation budget.
Conclusion
A glossy painted kitchen counter top tutorial is really a lesson in restraint: clean better than you think you need to, sand only as much as required, roll thin coats, and wait longer than your impatient little heart would prefer. Do that, and you can transform a worn countertop into a polished focal point that looks fresh, intentional, and surprisingly upscale. Skip the prep, rush the cure, or treat it like solid stone on day two, and the countertop will return the favor with chips, scratches, and regret.
If you want a high-impact kitchen upgrade without the cost of replacement, this is one of the best DIY options around. Just remember that the glossy finish is not created by magic. It is created by preparation, patience, and a deep personal commitment to not putting the toaster back too soon.


