Table of Contents >> Show >> Hide
- Why a Porch Snowman Is the Ultimate Low-Stress Winter Decor
- Pick Your Porch Snowman Style
- Project 1: Reversible Wood Slice Porch Snowman (Two Seasons, One Build)
- Project 2: Porch-Leaner Snowman Sign (Tall, Classic, and Camera-Ready)
- Project 3: Lighted Tomato Cage Snowman (The Nighttime Show-Off)
- Project 4: Pumpkin-Pail Porch Snowman (Budget-Friendly Upcycle)
- Details That Make Your Snowman Look Expensive (Even If It Wasn’t)
- Make It Porch-Proof: Anchoring, Sealing, and Surviving Wind
- Porch Styling Ideas: Make the Snowman Look Like He Belongs There
- FAQ: DIY Porch Snowman
- Experiences & “I Wish Someone Told Me This” Notes (Extra )
- Conclusion
If you’ve ever tried to build a “real” snowman and ended up with a sad snow pancake (or… no snow at all),
you already understand the appeal of a DIY porch snowman. This is the snowman that shows up on time,
holds its shape, and doesn’t faceplant the second the temperature does something dramatic.
In this guide, you’ll get several porch-friendly snowman buildsranging from quick-and-cute to
“wow, you made that?!”plus practical tips for weatherproofing, anchoring, and styling.
The goal is simple: create an outdoor snowman decoration that looks charming, survives wind,
and doesn’t require a master’s degree in hot glue.
Why a Porch Snowman Is the Ultimate Low-Stress Winter Decor
A porch snowman is basically the overachiever of winter decorating. It doesn’t melt, it doesn’t need daily repairs,
and it won’t mysteriously lose its carrot nose to a squirrel with ambitions.
Best of all, you can tailor it to your porch sizesmall stoop, big wraparound, apartment entry, you name it.
What makes a porch snowman “work” outdoors?
- Stable base: It shouldn’t wobble when the door closes or a breeze rolls through.
- Weather-tough finish: Paint and sealants that can handle cold, damp, and sun.
- Simple silhouette: Bold shapes read well from the sidewalk (and in low winter light).
- One “personality” detail: A scarf, hat, twig arms, or buttons that make it feel alive.
Pick Your Porch Snowman Style
Before you cut wood or unwrap lights, decide what kind of snowman you want. Here are four proven approaches,
each with a different vibe and skill level.
Option A: Reversible Wood Slice Snowman
The MVP if you love decor that lasts past December. One side can be winter (snowman) and the other can be fall
(pumpkins), so your storage bin gets a break.
Option B: Porch-Leaner Snowman Sign
Tall, classic, and very “Pinterest in real life.” A vertical board sign can fill empty wall space beside your door
and looks great with lanterns and greenery.
Option C: Lighted Tomato Cage Snowman
Glowy and magical at night. This is your “seen from the street” optionespecially great on covered porches.
Option D: Pumpkin-Pail Snowman
A budget-friendly upcycle that turns leftover fall pieces into winter charm. It’s surprisingly cute, and it comes together fast.
Project 1: Reversible Wood Slice Porch Snowman (Two Seasons, One Build)
This is a sturdy, porch-sitting snowman made from thick wood slices stacked into a classic snowman shape.
The fun part: paint pumpkins on one side (fall) and a snowman on the other (winter). Flip it when the season changes.
Materials
- Three thick wood slices (small/medium/large; aim for roughly 7″, 9″, and 11″ diameters)
- An oval or round wood base (thicker is better for stability)
- Craft paint: white, black, orange (plus a darker orange for pumpkin shading)
- Wood glue (or strong hot glue), plus a couple of screws for the base
- Wooden dowel (for connecting slices) + drill
- Ribbon or fabric for a scarf
- Small twig (for pumpkin stem / hidden anchor for hat)
- Felt hat (or craft a hat from wood/felt)
- Optional: sandpaper, exterior clear sealer
Tools
- Drill + bit sized to your dowel
- Paintbrushes
- Pencil, ruler (or anything that helps you line things up straight)
- Clamp (optional, but helpful)
Step-by-step
-
Plan the stack. Lay the slices on the floor (large bottom, medium middle, small top).
Adjust until it looks balanced and “snowman-ish.” Mark a light centerline so you can reassemble the same way. -
Paint the two faces. On one side of each slice, paint an orange circle area (pumpkin side).
On the reverse, paint a white circle area (snowman side). Let dry fully. -
Mark connection points. Stack the slices again and mark where each slice touches the next.
These marks guide where your dowel holes should line up. -
Drill dowel holes. Drill holes into the touching edges so a dowel can “pin” the slices together.
Dry-fit firstyour goal is snug, not “hammer it like you’re forging a sword.” -
Glue and assemble. Add wood glue into the holes and on contact points, insert dowels,
and stack the slices. Hold until set. -
Anchor to the base. Position the large slice on the base and secure with screws from underneath.
This is the difference between “porch decoration” and “wind-powered tumbleweed.” -
Add the stem/hat trick. Glue a small twig to the top edge of the smallest slice.
On the pumpkin side it reads as a stem; on the snowman side it helps hide/anchor the hat. -
Paint details. Pumpkin side: add darker orange shading lines for dimension.
Snowman side: paint eyes, a smile, and buttons in black; add an orange carrot nose. - Style it up. Tie on a scarf (buffalo plaid is a classic), then glue or pin the hat in place.
Pro tips for a cleaner, more “store-bought” finish
- Shadowing: Dry-brush a little gray stain or diluted gray paint around where the slices meet to create depth.
- Distress lightly: Sand just the edges so the wood texture peeks through (subtle is the secret).
- Seal it: If it’s going outdoors, use a clear exterior sealerespecially on exposed cut wood.
Project 2: Porch-Leaner Snowman Sign (Tall, Classic, and Camera-Ready)
A porch-leaner sign is a winter decorating cheat code: it fills vertical space, photographs beautifully,
and you can customize it with wording like “Welcome,” “Let It Snow,” or “Baby It’s Cold Outside” (your porch, your rules).
Quick build overview
-
Choose your board: A fence board works well for a rustic look; wider boards give you more painting room.
Sand splinters and rough edges. - Base coat: Paint a neutral background (gray, white, or soft blue). Let it dry.
-
Sketch or stencil: Use a printable pattern, light pencil sketching, or stencils for crisp shapes.
Paint your snowman face/body, scarf, buttons, and optional trees or snowflakes. - Add dimension: Use darker tones for shadows and highlights for “snowy” pop.
- Seal it: A clear outdoor topcoat helps prevent moisture damage and fading.
Design ideas that look intentional (not accidental)
- One focal snowman + small supporting accents (trees, snowflakes, simple lettering).
- Big scarf with a bold pattern for contrast.
- Limited palette: White + black + one accent color (red or teal) reads clean from the street.
Project 3: Lighted Tomato Cage Snowman (The Nighttime Show-Off)
This build gives you that cozy glow that makes winter porches feel like a holiday movie set.
It’s especially effective on a covered porch where it’s protected from direct rain and heavy wind.
Materials
- Tomato cage (or two, depending on desired height)
- Outdoor-rated string lights (LED runs cooler and is energy-friendly)
- White mesh, batting, or fabric to create a “snowy” body look
- Zip ties or strong twist ties
- Foam ball, lantern globe, or lightweight sphere for the head
- Hat + scarf (fabric, felt, or even a small outdoor-safe top hat)
- Planter + rocks/sand (for anchoring), optional stake for extra stability
Build steps
- Invert and secure the cage. Flip the tomato cage so the legs meet at the top and fasten them together.
- Wrap lights evenly. Start at the base and spiral upward so the light distribution looks balanced.
-
Create the “snow” layer. Wrap white mesh/batting around the cage, securing with ties as you go.
Step back occasionally to keep it smooth and not lumpy (unless you’re going for “snowman after a blizzard,” which is a vibe). - Add the head. Attach a lightweight sphere at the top. Keep it snugwind loves stealing heads.
- Accessorize. Add scarf, hat, and optional buttons (lightweight ornaments work nicely).
-
Anchor it. Place the base in a heavy planter filled with rocks or sand.
Your snowman should glow, not migrate.
Electrical safety mini-check
- Use outdoor-rated lights and extension cords.
- Plug into a GFCI outlet if available.
- Keep connections off the ground and sheltered from standing water.
Project 4: Pumpkin-Pail Porch Snowman (Budget-Friendly Upcycle)
If you have leftover plastic pumpkin pails (or foam pumpkins), you can turn them into a porch snowman quickly.
This is a great “Sunday afternoon craft” that looks surprisingly polished once painted and accessorized.
Materials
- 2 (or 3) plastic pumpkin pails or foam pumpkins
- White matte spray paint (matte helps it look snowy, not shiny)
- Strong glue (craft adhesive suited for plastic), plus hot glue for small parts
- Buttons (black + optional red accents), ribbon scarf, hat
Steps
- Remove handles from pails.
- Spray paint light coats of matte white; let dry between coats to avoid drips.
- Stack and glue (two is often sturdier than three, especially if your porch gets windy).
- Add the face (buttons or paint), then scarf and hat.
- Place on a non-slip mat or in a tray to keep it from sliding around.
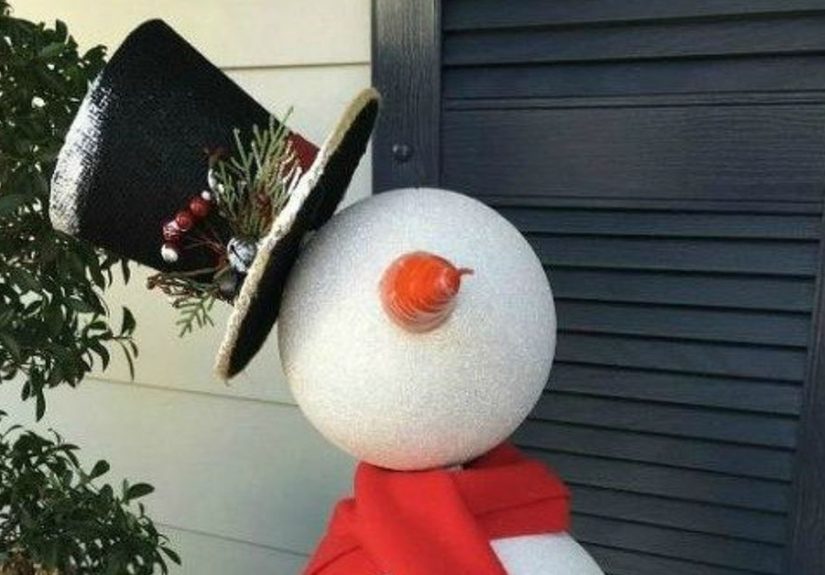
Details That Make Your Snowman Look Expensive (Even If It Wasn’t)
The difference between “cute DIY” and “wait… where did you buy that?” is usually in the finishing touches.
Here are upgrades that don’t take long but dramatically improve the look.
Easy upgrades
- Depth shading: Dry-brush gray around edges, under hats, and between stacked pieces.
- Better buttons: Use mismatched vintage-style buttons or small hardware pieces for rustic charm.
- Textured scarf: A thicker fabric reads warmer and looks more “winter-real.”
- Distressed paint: Light sanding reveals wood grain and makes the finish feel intentional.
- Natural twig arms: Real sticks add character fast (and look less “perfect,” which is good).
Make It Porch-Proof: Anchoring, Sealing, and Surviving Wind
Outdoor winter decor has two enemies: moisture and gravity. (Wind is basically gravity’s mischievous cousin.)
Here’s how to keep your front porch snowman decoration looking cute instead of tragic.
Weatherproofing checklist
- Seal raw wood: Especially cut edges and end grain.
- Use exterior-safe paints or protect craft paint with an outdoor clear coat.
- Elevate from wet floors: A small stand, feet, or base prevents water from wicking up.
- Anchor tall builds: Use planters with weight, door-side corner placement, or discreet brackets.
Porch Styling Ideas: Make the Snowman Look Like He Belongs There
A snowman looks best when it’s part of a scene, not standing alone like it got lost on the way to a holiday party.
Pair it with simple supporting decor and you’ll get instant curb appeal.
Simple porch “scene” formulas
- Snowman + lanterns + greenery: Two lanterns at different heights + a small evergreen pot = classic.
- Snowman + hanging snowflakes: Lightweight paper snowflakes add movement and feel magical.
- Snowman + doormat message: Keep it short and cheerful (“Let It Snow” or “Hello Winter”).
- Snowman + one bold color pop: Red ribbon, teal scarf, or berry picks in greenery.
FAQ: DIY Porch Snowman
How tall should a porch snowman be?
For most entryways, 2–4 feet is the sweet spot: tall enough to be seen from the curb, short enough to stay stable.
If you’re doing a porch-leaner sign, match it to your door handle height for a balanced look.
What’s the most weather-resistant option?
A sealed wood build (wood slices or a solid board sign) tends to last well outdoors, especially on covered porches.
Lighted builds can last toojust use outdoor-rated components and anchor them securely.
How do I keep my snowman from tipping over?
Use a wider base, add weight (planter with rocks/sand), and place it near a wall or corner that blocks wind.
If it’s tall, consider a discreet bracket or tie point behind it.
Experiences & “I Wish Someone Told Me This” Notes (Extra )
People don’t usually talk about the experience of building a DIY porch snowmanjust the final photo.
But the process has a few universal moments that show up again and again, and knowing them ahead of time makes the whole project smoother.
First: the personality phase is real. At the beginning, it’s just materials on the floorwood slices, ribbon,
paint bottles, maybe a tomato cage looking suspiciously like it belongs in a summer garden.
Then you add the eyes and suddenly you’re negotiating with an inanimate object.
“Is that smile too creepy?” “Are these buttons giving ‘fashionable’ or ‘grandpa’s coat’?”
The good news: snowmen are forgiving. Slightly uneven eyes often look cuter because they feel handmade.
If you want instant charm, tilt the hat a little and let the scarf fall naturally rather than perfectly symmetrical.
Snowmen shouldn’t look like they’re headed to a job interview (unless that’s your theme).
Second: drying time always takes longer than your optimism. Paint will feel dry until you touch it,
then it will politely inform you that it was lying. Plan for downtime.
This is the moment where most crafters end up doing something very important, like making hot chocolate or scrolling
winter porch decor ideas “for five minutes” (which is winter-time math for forty-five).
A simple fix is to do paint in thin coats and set pieces somewhere warm and ventilated.
If you’re spray painting pumpkins, light coats are your best friendheavy coats love dripping at the worst possible moment.
Third: wind is a critic. It will judge your work. Loudly. Especially the first time you set your snowman outside.
That wobble you barely noticed indoors? Wind noticed. The scarf tails you thought were “whimsical”?
Wind calls them “a free kite.” Anchoring becomes the difference between “adorable winter welcome” and
“neighborhood mystery object rolling down the driveway.”
The easiest stabilizers are heavy planters, wide bases, and positioning in a porch corner.
If your porch is exposed, a discreet tie behind the snowman (to a railing post or hook) can keep things calm
without changing the look from the front.
Fourth: kids and guests will interact with it. They will. Even adults.
Someone will pose next to it. Someone will touch the nose. Someone will try to straighten the scarf.
So it’s worth reinforcing the parts that get grabbed: the hat, the scarf knot, the nose, and any button pieces.
If you’re building with kids, the experience becomes half the pointmessy paint hands, goofy design debates,
and that proud moment when your snowman goes on the porch like it owns the place.
If you’re not building with kids, you still get the quiet satisfaction of walking past it at night and thinking,
“Yep. I made winter charming.”
Lastly: you’ll learn what your porch actually needs. Some porches look best with one big statement piece
(a tall snowman sign), while others shine with a small vignette (snowman + lanterns + greenery).
After you build one, it becomes easier to decorate every winter because you’ve created an anchor piece.
And that’s the secret: a DIY porch snowman isn’t just a craftit’s the start of a winter porch “tradition”
you can pull out year after year (with fewer glue sticks each time, hopefully).
Conclusion
A DIY porch snowman is one of the easiest ways to make your home feel warm and welcoming in winter
even when the weather is doing its dramatic thing. Whether you build a reversible wood slice snowman,
paint a porch-leaner sign, create a glowing tomato cage snowman, or upcycle pumpkin pails,
the best version is the one that fits your porch and your patience level.
Pick a style, keep it stable, add one great scarf, and let your snowman do what snowmen do best:
make people smile without melting under pressure.


