Table of Contents >> Show >> Hide
- Why a DIY Organizer Works Better Than “Just Shove It in a Drawer”
- Before You Build: The 15-Minute Setup That Makes Everything Easier
- Materials & Tools That Cover 90% of DIY Organizers
- 8 DIY Organizer Projects You Can Mix-and-Match
- 1) Cardboard Drawer Dividers (Fast, Cheap, Shockingly Effective)
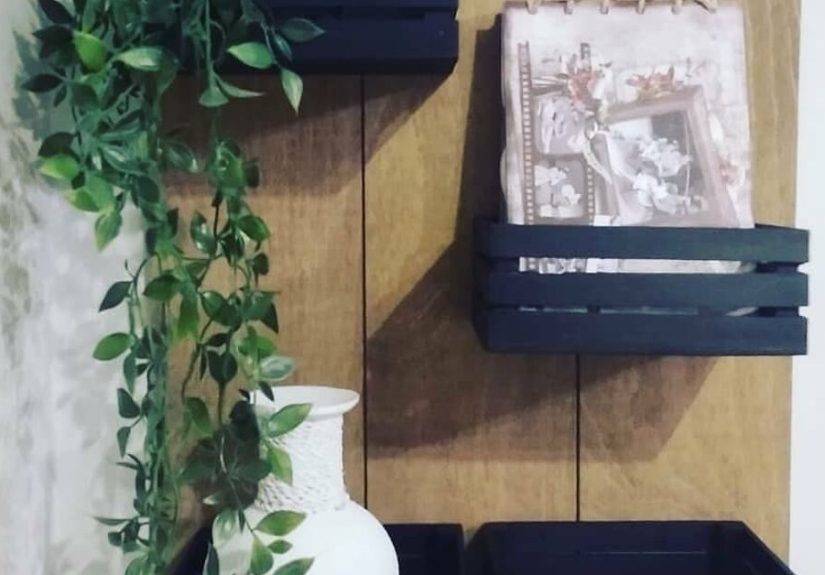
- 2) Pegboard Wall Organizer (Vertical Storage, Maximum Flex)
- 3) Mason Jar Organizer Board (For Small Stuff That Loves to Disappear)
- 4) Entryway Drop Zone Organizer (So Your Home Stops Eating Keys)
- 5) Kitchen Pantry Bin System (The End of the Snack Avalanche)
- 6) Closet Organizer Basics (The “I Have Nothing to Wear” Fix)
- 7) Garage Tote Shelf (Big Storage Without Big Drama)
- 8) Desk & Cable Mini-Organizer (Because Cables Are Sentient)
- Room-by-Room DIY Organizer Cheat Sheet
- How to Make Your Organizer Actually Stay Organized
- Conclusion
- Experience Notes: What DIYers Learn (So You Don’t Have To)
- Experience #1: Don’t Buy Containers First
- Experience #2: Leave 10–20% Empty Space on Purpose
- Experience #3: The Best Organizer Is the One You’ll Maintain When You’re Tired
- Experience #4: Labels Are Not Optional (Even If You Think They Are)
- Experience #5: Visibility Beats Perfection
- Experience #6: Measure the Awkward Stuff, Not Just the Space
- Experience #7: “Command Centers” Work Because They Reduce Friction
Clutter has one job: to multiply the second you turn your back. (It’s basically a gremlin with receipts.)
A DIY organizer, on the other hand, does three heroic things at once: it saves space, saves money,
and saves your sanity from the dreaded “Where did I put that thing I literally had five seconds ago?” spiral.
This guide is packed with DIY organization ideas you can actually finishwithout a workshop,
a master’s degree in carpentry, or a mystical ability to fold fitted sheets. We’ll cover smart planning, materials,
and a lineup of practical builds for drawers, closets, pantries, entryways, desks, bathrooms, and garagesplus a
big end section of “real-life lessons” so you don’t learn them the hard way.
Why a DIY Organizer Works Better Than “Just Shove It in a Drawer”
Buying storage is easy. Buying the right storage is where dreams go to get dusty. DIY lets you tailor an
organizer to your exact space and habitsbecause your life is not “standard size,” and neither is that mystery
cabinet where batteries go to retire.
- Custom fit: Build for your dimensions, not the average dimension of a marketing photo.
- Budget-friendly: Cardboard, scrap wood, jars, and simple hardware can go a long way.
- Easy upgrades: Add labels, dividers, hooks, and bins as your needs change.
- Less visual noise: Organizers reduce “stuff scatter,” which makes a room feel calmer fast.
Before You Build: The 15-Minute Setup That Makes Everything Easier
1) Declutter with a Purpose (Not a Personality Crisis)
You don’t need to become a minimalist who owns one spoon and a single, emotionally supportive houseplant.
You just need to decide what’s staying. Pick a category (cables, spices, socks, tools) and sort into four piles:
Keep, Donate, Recycle, Trash.
Your organizer should serve what you truly use, not what you feel guilty about.
2) Measure Like a Grown-Up
A tape measure is the difference between “custom organizer” and “modern art piece that doesn’t fit anywhere.”
Measure width, depth, height, and any weird obstacles (hinges, pipes, outlets). Write it down. Yes, write it down.
No, you will not remember it later.
3) Assign “Homes” to Items
The secret sauce of home organization is not the containerit’s the address.
Decide where things live based on frequency:
- Daily: eye-level, front-of-drawer, easiest reach
- Weekly: nearby, but not prime real estate
- Rarely: higher shelves, back corners, labeled bins
Materials & Tools That Cover 90% of DIY Organizers
You can build a lot with a few basics. Start small and level up as you go.
Budget Materials
- Corrugated cardboard, foam board, or MDF offcuts
- Clear jars or containers (great for small items)
- Wood boards (1×4, 1×6) and plywood scraps
- Bins, baskets, and drawer trays
- Hook hardware, command hooks, labels, painter’s tape
Helpful Tools
- Tape measure, pencil, scissors/utility knife
- Drill/driver + bits, level, stud finder (for wall systems)
- Sandpaper, wood glue, screws, wall anchors
- Label maker or printable labels (life-changing, mildly addictive)
8 DIY Organizer Projects You Can Mix-and-Match
1) Cardboard Drawer Dividers (Fast, Cheap, Shockingly Effective)
If your drawer is a “junk drawer,” it’s usually because it’s one big open plan officeno walls, no rules, no hope.
Fix it with a grid divider.
- Measure the inside width and depth of your drawer.
- Cut cardboard strips the full depth of the drawer (height: 2–4 inches is usually plenty).
- Cut matching strips for the width.
- Cut halfway-down notches where strips intersect, then slide together to form a grid.
- Wrap edges with tape for durability (and to avoid cardboard “splinters”).
- Assign each grid space a category: batteries, tape, pens, earbuds, etc.
Pro tip: Start with larger compartments. Tiny compartments feel organized until you realize you
own five kinds of tape and they’re all bulky.
2) Pegboard Wall Organizer (Vertical Storage, Maximum Flex)
A pegboard organizer is the MVP of garages, craft rooms, and home offices. It’s basically a wall
that says, “Sure, I’ll hold that for you.”
- Choose a wall area and find studs (especially if you’ll hang heavier items).
- Mount furring strips or spacers so hooks have room behind the board.
- Attach pegboard securely and check level.
- Add hooks, bins, small shelves, and tool holders.
- Sketch a “layout” first so you don’t play hook musical chairs for two hours.
Make it prettier: Paint the pegboard and use matching containers. Suddenly it’s “design” and not
“hardware store chic.”
3) Mason Jar Organizer Board (For Small Stuff That Loves to Disappear)
Cotton swabs, screws, hair ties, paper clipstiny items are basically professional escape artists. A jar organizer
keeps them visible and contained.
- Pick identical jars for a clean look (or embrace the charming mismatch).
- Attach metal clamps to a wood board using screws (space evenly).
- Slide jars into clamps and tighten.
- Label each jar lid or the board underneath.
This works great in bathrooms, craft areas, laundry rooms, and workshopsanywhere “small stuff” becomes “lost stuff.”
4) Entryway Drop Zone Organizer (So Your Home Stops Eating Keys)
The entryway is where chaos starts. A good entryway organizer creates a landing spot for the daily
carry: keys, wallet, mail, sunglasses, dog leash, and that one glove that’s always alone.
- Top surface: a tray or shallow box for keys and pocket items
- Hooks: for bags, jackets, and leashes
- Basket/bin: for shoes or grab-and-go items
- One rule: mail goes into a holder immediately (or it becomes “wallpaper”)
Keep it simple: the goal is fewer decisions when you’re rushing out the door, not a museum exhibit.
5) Kitchen Pantry Bin System (The End of the Snack Avalanche)
Pantry organization is mostly about categories and visibility. Clear bins help you see what you have, and labels
prevent the “six open bags of the same pasta” situation.
- Group items by use: breakfast, baking, snacks, dinner staples, spices, backstock.
- Use bins for loose packets and small items (pudding mix, seasoning, snack bars).
- Add a “use first” bin for items nearing expiration.
- Label everything in plain language (“Snacks,” not “Crunchy Joy Units”).
Optional upgrade: A small turntable for sauces and oils. It’s like a lazy Susan, but for your
culinary indecision.
6) Closet Organizer Basics (The “I Have Nothing to Wear” Fix)
A DIY closet organizer doesn’t have to be a full renovation. Even one tower plus shelves can
dramatically increase usable space. The big idea: use vertical height and create zones.
- Short-hang zone: shirts, blouses, folded pants
- Long-hang zone: dresses, coats (keep it narrower)
- Shelves: bins for accessories, sweaters, bags
- Bottom zone: shoe rack or cubbies
Build smart: Anchor into studs where possible; use appropriate wall anchors otherwise. Measure
twice, cut once, and avoid “freehand shelf bracket vibes.”
7) Garage Tote Shelf (Big Storage Without Big Drama)
If your garage floor looks like a Tetris game you’re losing, tote shelves are a clean reset. Store seasonal items,
sports gear, and holiday decorations in stackable totes.
- Pick standard-size totes and measure their height.
- Build shelves with spacing that allows easy slide-in/slide-out (and a little breathing room).
- Label totes by category and season.
- Keep heavier totes lower to avoid “gravity’s little surprise.”
Tip: If you can’t lift it safely, it doesn’t belong on a high shelf. Your future self will thank you.
8) Desk & Cable Mini-Organizer (Because Cables Are Sentient)
A tidy desk is less about perfection and more about removing friction. When supplies are easy to grab and cords
aren’t tangled like headphone spaghetti, you actually want to sit down and work.
- Use binder clips on the desk edge as cable holders.
- Label cords (yes, every one) to avoid unplugging the wrong thing.
- Use a small box as a charging station with holes for cords.
- Keep frequently used items within arm’s reach; store the rest in a drawer divider.
Room-by-Room DIY Organizer Cheat Sheet
Bathroom
- Jar organizer for cotton items and small toiletries
- Under-sink bins labeled by category (hair, skin, first aid)
- One “backup” bin for refills to prevent duplicates scattered everywhere
Kids’ Spaces
- Open bins with picture labels (kids can’t maintain what they can’t decode)
- Toy rotation: keep half stored, swap weekly to reduce clutter and boredom
- Low hooks for backpacks and jackets (kid-height is a magical thing)
Living Room
- Basket for throws and remotes
- Magazine file for mail and papers (a “paper command center” light)
- Hidden storage ottoman for games and cords
How to Make Your Organizer Actually Stay Organized
Here’s the truth: an organizer is not a spell. It’s a system. If the system takes too long, it won’t happen.
Make it easy enough for “tired you” to succeed.
- The 10-minute reset: Set a timer nightly or weekly and put things back in their homes.
- One-in, one-out: If a new item arrives, something leaves (especially in closets and drawers).
- Label like you mean it: Labels reduce decision-making and stop “close enough” dumping.
- Audit quarterly: Seasonal swaps keep storage relevant (and prevent mystery piles).
Conclusion
A DIY organizer isn’t about having a picture-perfect pantry or a garage that looks like a catalog.
It’s about making your home work for your real lifebusy mornings, missing scissors, spontaneous snack cravings,
and all. Start with one problem zone, build one simple solution, and let the momentum do the rest.
Experience Notes: What DIYers Learn (So You Don’t Have To)
If you’ve ever built an organizer and thought, “Wow, I nailed it,” only to discover two weeks later that your
system has devolved into chaos with extra stepswelcome. That’s not failure; that’s field research. Here are
the most common, most useful lessons people pick up after a few rounds of real-world organizing.
Experience #1: Don’t Buy Containers First
This is the classic trap: you see cute bins, you buy cute bins, and then you get home and realize they don’t fit
your shelf, your drawer, or your actual stuff. A bin without a plan becomes a “miscellaneous container,” which is
just a fancy name for a clutter landlord. Instead, sort first, measure second, then buy/build third. When the bin
matches the category and the space, it feels like the organizer is doing the work for you.
Experience #2: Leave 10–20% Empty Space on Purpose
Overfilling is how organized spaces die. When every compartment is packed to the brim, there’s no room for “life
drift”the extra batteries, the random birthday candles, the new water bottle your friend insisted you needed.
Empty space is not wasted space; it’s shock absorption for reality. Aim for a little breathing room in drawers,
bins, and shelves, and you’ll find it’s easier to put things away quickly.
Experience #3: The Best Organizer Is the One You’ll Maintain When You’re Tired
Systems that require perfect behavior don’t survive Monday. If putting something away takes more than a few
secondsopening a lid, moving three bins, lifting a heavy stackpeople default to “I’ll do it later,” and later
becomes never. That’s why open-top bins, hooks at hand level, and simple drawer grids work so well. They reduce
the number of steps between you and “done.”
Experience #4: Labels Are Not Optional (Even If You Think They Are)
Labels feel extra… until you’ve spent five minutes opening identical bins trying to find tape. A label isn’t just
decoration; it’s a decision shortcut. It turns cleanup into a simple matching game. And if you live with other
humans, labels are basically diplomacy. Nobody can claim they didn’t know where the scissors go when the bin says
“SCISSORS” in friendly, non-negotiable letters.
Experience #5: Visibility Beats Perfection
People keep what they can see and forget what they can’t. That’s why clear containers, open shelving for daily
items, and front-of-drawer storage are powerful. The “perfectly hidden” system often becomes the “I forgot I owned
this” system, which leads to duplicates and more clutter. Use a hybrid approach: visible storage for everyday
essentials, labeled opaque bins for backstock and seasonal items.
Experience #6: Measure the Awkward Stuff, Not Just the Space
Measuring the shelf is good. Measuring the shelf and the vacuum, the broom, the sports gear, and the
suspiciously tall reusable gift bags is better. Odd shapes create odd problems. Hooks, vertical slots, and
pegboard-style solutions usually outperform bins for these. When items have a “park here” spot designed for their
shape, the space stays tidy longer with less effort.
Experience #7: “Command Centers” Work Because They Reduce Friction
Families and busy households thrive with a drop zone: a place for keys, mail, forms, and “leave-the-house” items.
The experience here is simple: if there’s no assigned landing spot, flat surfaces become the landing spot.
A wall file + key hooks + a small tray can prevent daily micro-chaos. It’s not glamorous, but it’s the kind of
boring that saves your morning.
The big takeaway: your organizer doesn’t need to be perfect. It needs to be practical,
easy, and built around how you actually live. Start small, adjust as you go, and remember
the goal is less time managing stuff and more time doing literally anything else.