Table of Contents >> Show >> Hide
- Why Drop Cloth Curtains Are the Budget MVP
- Before You Buy: Choosing the Right Drop Cloth
- Supplies Checklist
- Step-by-Step: How to Make No Sew Drop Cloth Curtains
- Step 1: Measure like you want your curtains to look expensive
- Step 2: Pre-wash the drop cloth (yes, really)
- Step 3: Choose your “no sew” hanging style
- Step 4: Cut panels to length (and make them match)
- Step 5: Hem the sides and bottom with fusible hem tape
- Step 6: Finish the top edge (based on your hanging method)
- Step 7: Hang, adjust, and make it look finished
- Style Upgrades That Still Count as “No Sew”
- Care and Cleaning
- Troubleshooting: Fixes for Common No-Sew Curtain Problems
- Real-Life Experience: What You’ll Actually Experience Making No-Sew Drop Cloth Curtains (About )
- Conclusion
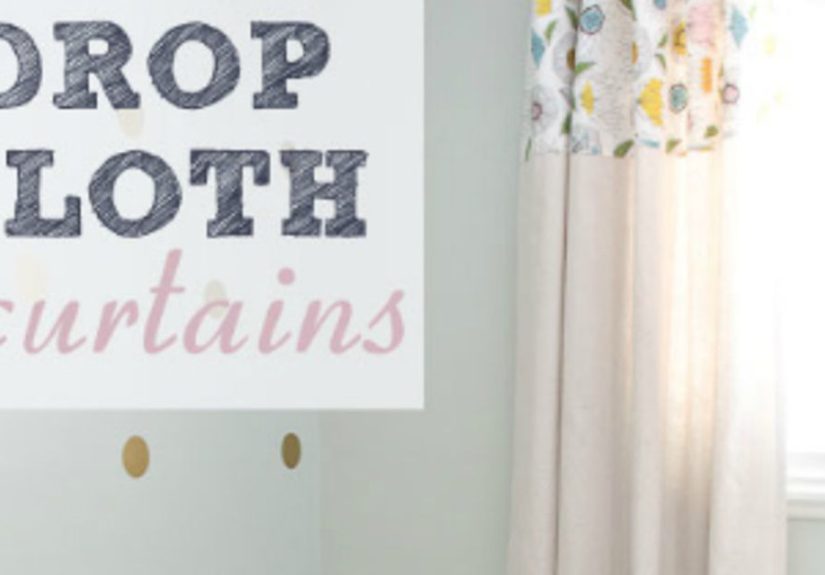
Want curtains that look custom, feel cozy, and don’t require you to become best friends with a sewing machine? Enter:
DIY no sew drop cloth curtainsthe budget-friendly window treatment that’s basically a glow-up for painter’s canvas.
They can read farmhouse, modern organic, coastal, or “I totally paid full retail for these” (your secret is safe).
This guide walks you through choosing the right canvas drop cloth, measuring for a professional fit, hemming without stitches,
and hanging your panels so they drape like you know what you’re doing. (Even if you’re making it up as you go. That’s the DIY spirit.)
Why Drop Cloth Curtains Are the Budget MVP
A canvas drop cloth is durable, neutral, and has that relaxed texture that makes a room feel instantly warmer. It also happens to be
widely available, usually cheaper than decorator fabric, and forgiving if your measuring tape and confidence are both “approximate.”
- Affordable: Big panels for less than most ready-made drapes.
- Textured + timeless: Perfect for farmhouse curtains, minimalist spaces, or vintage-inspired rooms.
- Easy to customize: Hem to any length, add trim, or layer with linersno sewing required.
- Washable: Great for real life (dust, pets, kids, your iced coffee “incident”).
Before You Buy: Choosing the Right Drop Cloth
Go for canvas (not plastic)
For curtains, you want a canvas drop cloththe painter’s kind that feels like sturdy cotton. Plastic drop cloths are great
for protecting floors, but they’re not exactly “softly billowing in the breeze.” Canvas gives you that linen-like drape once it’s washed.
Check the weave, seams, and hems
Many drop cloths come with a stitched perimeter hem and may have center seams depending on size. Seams aren’t a deal-breakersome people
like the subtle “panel” look. Just decide whether you want seams visible, hidden at the outer edges, or avoided by buying a different size.
Pick a size that makes sense for your window
Drop cloths come in common painter-friendly dimensions. Choose one that gives you enough width for fullness and enough length for hems.
If you’re unsure, size up. Extra fabric is much easier to deal with than curtains that hover awkwardly above the floor like they’re scared of commitment.
Supplies Checklist
Here’s what you’ll typically need for no sew drop cloth curtain panels:
- Canvas drop cloth(s)
- Measuring tape
- Fabric scissors (or very sharp household scissors)
- Iron + ironing board (or a heat-safe flat surface and patience)
- Fusible hemming tape (iron-on hem tape)
- Straight pins or fabric clips (optional but helpful)
- Curtain rod + brackets
- One hanging method: curtain clip rings, clip-on drapery hooks, or a no-sew rod pocket
- Optional: trim, fabric glue, grommet kit, blackout liner, curtain weights
Step-by-Step: How to Make No Sew Drop Cloth Curtains
Step 1: Measure like you want your curtains to look expensive
Start with rod placement. A classic rule: mount the rod about 4–6 inches above the window frame (or higher if you want the room to feel taller),
and extend the rod several inches beyond each side so the glass is mostly clear when curtains are open.
Length options (pick your vibe):
- Float: hem ends about 1/2 inch above the floor (clean, modern, easier to vacuum).
- Kiss: barely touches the floor (tailored and polished).
- Puddle: extra length gathers at the bottom (romantic, dramatic, slightly high-maintenance).
Width + fullness:
For a nice drape, aim for total curtain width at 1.5 to 2 times the rod width. Example: a 60-inch rod looks best with 90–120 inches of fabric total.
Split that across two panels for a balanced look.
Step 2: Pre-wash the drop cloth (yes, really)
Canvas drop cloths often feel stiff out of the package, and they can shrink in the wash. Pre-washing helps soften the fabric, removes sizing,
and lets you hem to the “final” size instead of the “surprise shrink” size.
- Wash in warm or hot water with regular detergent.
- Dry fully (medium to high heat helps soften canvas).
- Repeat if you want extra softness.
- Iron or steam if wrinkles bother you. (Wrinkles also count as “relaxed texture,” so you’re not wrong either way.)
Safety note: if you choose to brighten or lighten the fabric, follow the instructions on the product you use and avoid mixing cleaning chemicals.
When in doubt, keep it simple: detergent + hot wash + tumble dry does a lot.
Step 3: Choose your “no sew” hanging style
There are three popular ways to hang DIY no sew drop cloth curtains. Your choice affects both the look and the effort.
Option A: Curtain clip rings (easiest, fastest)
Clip rings attach to the top edge of the fabricno rod pocket, no grommets, no drama. They also make it easy to fine-tune height:
you can shift the clips slightly up or down to even things out.
Option B: No-sew rod pocket (clean, classic)
You can fold over the top edge and use fusible hemming tape to create a pocket for the rod. This looks tailored and hides the rings.
It takes longer than clip rings but still avoids sewing.
Option C: Grommet kit (modern look, still no sewing)
A grommet kit lets you punch holes and secure metal rings for a crisp, contemporary style. It’s not sewing, but it is more “tools on the table.”
Step 4: Cut panels to length (and make them match)
After washing and drying, hang the drop cloth temporarily (even with a couple of clips) to confirm length. Mark your desired finished length,
then add extra for hems:
- Bottom hem allowance: 2–4 inches (more if you want a heavier hem).
- Side hem allowance: 1–2 inches per side.
- Top allowance: depends on hanging method (clip rings need very little; rod pockets need several inches).
Pro tip: Cut both panels using the first one as a template so they match. Curtains that are different lengths are like eyebrows:
sisters, not twins… but you still want them in the same family.
Step 5: Hem the sides and bottom with fusible hem tape
Fusible hemming tape (iron-on hem tape) bonds fabric with heat, giving you a clean edge without stitching. Follow the package directions,
but the general method looks like this:
- Iron the edge flat.
- Fold the edge to your hem width (for sides, often 1 inch; for bottom, 2 inches or more).
- Insert hem tape between the folded layers.
- Press firmly with a hot iron in sections, holding a few seconds per section.
- Let it cool, then test the bond by gently tugging.
Helpful tricks:
use a thin cotton cloth between the iron and fabric if you’re worried about adhesive residue, and work on a flat surface so the hem stays straight.
If the tape doesn’t stick, apply more heat/pressure and make sure the fabric is dry.
Step 6: Finish the top edge (based on your hanging method)
If using clip rings
Fold the top edge down about 1 inch and fuse it with hem tape to reinforce the fabric where clips will grab. Then clip rings across the top,
spacing them roughly 6–8 inches apart. More rings = smoother drape.
If making a no-sew rod pocket
Measure your rod diameter and add a little wiggle room. A common pocket depth is 3–4 inches, plus an extra inch for a header above the pocket.
Fold the top edge down to create the pocket, place hem tape along the edge, and iron to seal. Slide the rod through.
If using grommets
Reinforce the top with a folded, fused hem first. Then mark evenly spaced holes, cut carefully, and install grommets per your kit instructions.
Keep spacing consistent so the pleats look intentionalnot like the curtains are doing interpretive dance.
Step 7: Hang, adjust, and make it look finished
Hang the curtains and step back. Check:
- Are panels the same length?
- Do they “float” evenly above the floor?
- Is the rod level?
- Does the fullness look balanced when open and closed?
If you used clip rings, small height differences are easy to fixjust reposition a clip. If you created a rod pocket, you may need a tiny re-press
on a hem or a slight trim to even things out.
Style Upgrades That Still Count as “No Sew”
Want your drop cloth curtain panels to feel custom? These upgrades add personality without adding stitches.
Add trim for a high-end border
Apply decorative trim along the leading edge or bottom using hem tape (for heat-safe trims) or a strong fabric glue (for delicate trims).
A simple contrast border can make the curtains look designer-level without designer-level pricing.
Create faux pinch pleats with clip placement
With clip rings, you can pinch small folds at each clip for a pleated look. It’s basically “pretend tailoring,” and it works surprisingly well.
Layer in a liner (privacy + light control)
If you need more privacy or want to block light, add a liner using iron-on tape at the top and a few discreet attachment points down the sides.
Blackout liners can make drop cloth curtains more bedroom-friendly.
Dye or stencil for custom color
Drop cloth canvas takes dye and paint well. If you dye, pre-wash first, follow dye instructions carefully, and expect a slightly mottled “organic” finish.
Stenciling a simple pattern near the bottom adds interest without overwhelming the room.
Care and Cleaning
Most canvas drop cloth curtains can be washed at home. If you used fusible hem tape, washing is usually fine, but avoid harsh cycles at first.
When in doubt: gentle cycle, cold or warm water, and air-dry or low heat. Iron if needed.
Troubleshooting: Fixes for Common No-Sew Curtain Problems
“My hem tape isn’t sticking.”
- Make sure the fabric is dry and wrinkle-free.
- Use the correct heat setting (often cotton/high).
- Press firmly and hold long enough in each section.
- Let the hem cool before moving itcooling helps it set.
“My curtains look stiff.”
- Wash and dry again to soften the canvas.
- Steam or iron for a smoother drape.
- Add more rings or adjust spacing for deeper, more natural folds.
“They’re uneven!”
- Re-check rod level first (walls are sneaky).
- With clip rings, shift clip placement slightly to balance the bottom edge.
- If needed, re-press a hem or trim a tiny amount, then re-fuse.
Real-Life Experience: What You’ll Actually Experience Making No-Sew Drop Cloth Curtains (About )
Here’s the honest part: making DIY no sew drop cloth curtains is easybut it’s the kind of easy that comes with a few “Wait, why is it doing that?”
moments. The first surprise is usually the fabric itself. Fresh drop cloth canvas can feel stiff and a little crunchy, like it’s auditioning to be a tote bag.
Once you wash and dry it, though, it relaxes fast. A second wash often takes it from “hardware store” to “I bought these at a boutique.”
You’ll also notice shrinking is real, which is why pre-washing saves your sanity. Hemming first and washing later is the DIY equivalent of putting together a puzzle
and realizing you’re missing a corner piece.
The next experience: measuring and second-guessing. You’ll measure, then measure again, then hold the fabric up to the window and think,
“Is this too long? Too short? Is my floor… tilted?” (Sometimes, yes.) Hanging the panels temporarily before committing to a final hem is the move.
Clip rings make this step dramatically easier because you can test the height in real time and adjust with tiny clip shifts. If you’re doing a rod pocket,
plan on a little more back-and-forth. Not hardjust slower.
Hem tape is where you’ll feel like a wizard and a student at the same time. When it works, it’s magical: crisp, straight hems with zero stitches.
When it doesn’t, it’s usually because the iron wasn’t hot enough, you moved the fabric before it cooled, or the fold wasn’t pressed flat.
The good news is that most mistakes are fixable. You can re-press, add a short strip of tape where it popped open, or trim a frayed edge and start that section again.
It’s forgiving DIY, which is exactly what you want for a first curtain project.
Styling is the fun payoff. Once the curtains are up, you’ll probably notice the texture instantly makes the room feel warmer and more finished.
And you’ll also notice that hardware matters: a simple rod looks fine, but a thicker rod or matte finish can make the whole setup feel more intentional.
If you want that “designer drape,” you’ll likely end up adding more clip rings than you thought you neededextra support makes the folds look smoother.
Finally, you’ll experience the most satisfying DIY moment of all: someone walks in and says, “Where did you get those?” and you get to casually reply,
“Oh, I made them.” (Try not to look too smug. Or do. You earned it.)
Conclusion
Drop cloth curtains are the sweet spot between “budget DIY” and “custom look.” With the right measurements, a good pre-wash, and a clean no-sew hem,
you can create curtain panels that soften your space, boost privacy, and look far more expensive than they are. Whether you keep them simple with clip rings
or elevate them with trim and liners, you’ll end up with window treatments that feel personaland practical.


