Table of Contents >> Show >> Hide
- What Is a DIY Kraft Paper Message Board?
- Why Kraft Paper Works So Well
- Design Options Before You Build
- Materials and Tools
- Planning Tips That Save You Time (and Mild Regret)
- How to Make a DIY Kraft Paper Message Board (Hybrid Version)
- DIY Kraft Paper Roll Add-On (Optional)
- Styling Ideas for Different Spaces
- Common Mistakes to Avoid
- Maintenance and Refresh Tips
- Real-World Experiences With a DIY Kraft Paper Message Board (Extended Notes)
- Conclusion
If your desk is covered in sticky notes, grocery lists, “don’t forget” reminders, and one mysterious scrap of paper that simply says “Tuesday???”this project is for you. A DIY kraft paper message board is one of those rare home projects that is equal parts useful, affordable, and actually cute. It gives you a dedicated place to write notes, pin receipts, clip schedules, and doodle brilliant ideas (or very bad grocery math) without turning your fridge into a paper avalanche.
Even better, this project is highly customizable. You can make it renter-friendly, kid-friendly, office-friendly, and budget-friendly. You can build a clean minimalist board for a home office, a rustic command center for the kitchen, or a giant workshop planner with a kraft paper roll and tear-off sheets. If you can measure a rectangle and use a level without starting an argument with it, you can make this.
What Is a DIY Kraft Paper Message Board?
A kraft paper message board is a wall-mounted board system that uses kraft paper as the main note-taking or display surface. Depending on your design, it may include:
- A flat backing board (foam board, hardboard, plywood, or cork-backed panel)
- A kraft paper writing layer (sheet or roll)
- Clips, tacks, or elastic for holding notes
- A frame or trim for a finished look
- Optional hanging hardware, shelves, or paper-roll dispensers
Think of it as a mash-up between a bulletin board, a to-do list station, and a stylish wall organizer. It’s part décor, part productivity tool, and part “I swear I am getting my life together” energy.
Why Kraft Paper Works So Well
1) It’s inexpensive and easy to replace
Unlike specialty dry-erase panels or glass boards, kraft paper is affordable and easy to refresh. Messed up your calendar? Tear off a sheet and start over. Spilled coffee while making a “weekly plan”? Congratulations, now it’s a “distressed design.”
2) It fits different styles
Kraft paper has a natural, warm tone that works with farmhouse, Scandinavian, industrial, and modern spaces. It pairs nicely with black hardware, stained wood, painted trim, or clean white walls.
3) It supports multiple uses
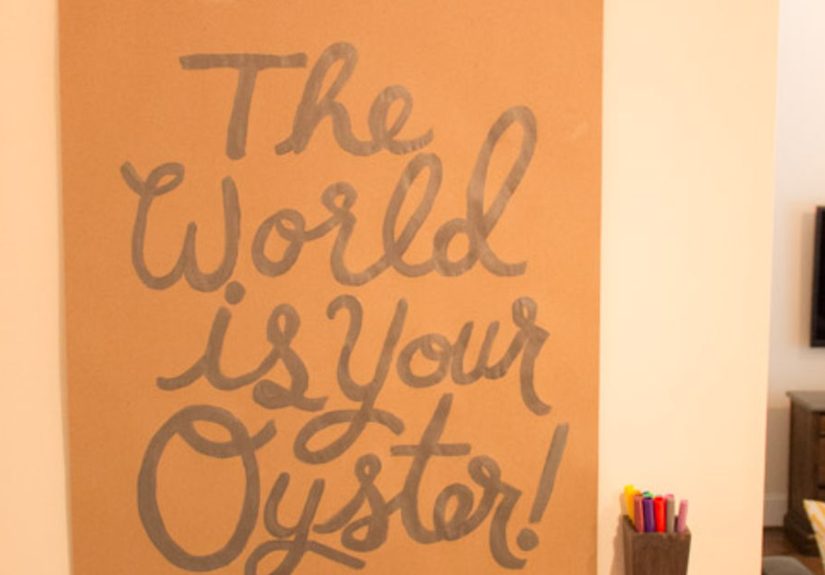
You can use it for meal planning, chores, project sketches, school schedules, shopping lists, habit tracking, or rotating inspirational quotes. It’s also a smart option for kids’ drawing stations and workshop planning areas.
Design Options Before You Build
Before you cut anything, choose the version that fits your space and habits:
Option A: Flat Board + Kraft Paper Sheet (Best for home offices)
A rigid backing board wrapped or topped with kraft paper, plus clips or pushpins. Clean, simple, and easy to style.
Option B: Kraft Paper Roll Dispenser + Tear Bar (Best for kitchens/workshops)
A wall-mounted roll on a dowel with a lower bar to guide and tear sheets. Great for daily lists and quick notes.
Option C: Hybrid Board (Best overall)
A framed board with one pinned section, one kraft paper writing section, and a small clip rail. This is the “command center” version and the one we’ll build below.
Materials and Tools
Core Materials
- Backing board (foam board, hardboard, plywood panel, or cork panel)
- Kraft paper roll or large kraft sheets
- Spray adhesive or craft adhesive (for paper/fabric layers)
- Painter’s tape
- Wood trim (optional) for framing
- Clips, thumbtacks, or pushpins
- Hanging hardware (Command strips for lighter builds, or screws/anchors for heavier builds)
Optional Upgrades
- Dowel rod + brackets (for a paper roll dispenser setup)
- Elastic cord or ribbon for tucking notes
- Small shelf ledge for markers/scissors
- Paint or stain for trim
- French cleat hardware for large/heavy boards
Tools
- Tape measure
- Level
- Pencil
- Utility knife (or saw, depending on board type)
- Scissors
- Drill/driver (for anchors/screws)
- Stapler or staple gun (optional, for wrapped edges)
- Safety glasses and gloves (recommended)
Planning Tips That Save You Time (and Mild Regret)
Choose the right wall location
Put the board where you naturally pause: near the kitchen entry, above a desk, by a mudroom drop zone, or in a craft room. A beautiful board hidden behind a door is just wall décor with commitment issues.
Size it to your routine, not just your wall
If you only need weekly reminders, a medium board works. If you’re tracking family schedules, school papers, and meal planning, go larger. Oversized boards can be budget-friendly if you use panel materials and a simple trim frame.
Think about weight before hanging
A lightweight foam-board build can often be renter-friendly. A framed wood build with a dowel roll and hardware may need screws into studs or drywall anchors. If your board includes shelves or heavier accessories, plan mounting firstnot last.
How to Make a DIY Kraft Paper Message Board (Hybrid Version)
Step 1: Measure and cut your backing board
Start with a size that suits your space (for example, 24×36 inches for a home office or 30×40 inches for a family command center). Cut the backing board to size. Foam board is easiest for beginners; hardboard or plywood creates a more durable option.
If you want a pin-friendly section, use a cork panel or attach a cork roll to one side of the backing. Many DIY bulletin board projects use cork, foam board, or hardboard combinations because they are easy to customize and inexpensive.
Step 2: Mark out your sections
Divide the board into functional zones with pencil lines on the back (or lightly on the front edges):
- Top section: “This Week” notes
- Center section: Kraft paper writing area
- Bottom section: Clips/pockets/receipts
This planning step keeps the finished board from becoming a chaos museum.
Step 3: Add the kraft paper surface
Cut kraft paper to fit the writing section, leaving a little extra if you want wrapped edges. If you’re using spray adhesive, apply it lightly and evenly in a well-ventilated area. Smooth the paper from the center outward to reduce bubbles and wrinkles.
If you prefer a replaceable surface, don’t glue the entire sheet. Instead, secure the top edge under a thin trim strip or clips so you can swap paper whenever you want.
Step 4: Build or attach a simple frame (optional but worth it)
A wood trim frame instantly makes the board look intentional instead of “I taped this up during a coffee emergency.” Cut trim to size, miter the corners if you want a polished finish, and paint or stain before attaching.
For a beginner-friendly build, even straight-cut trim painted one color looks great. If your board is large, a frame also helps protect edges and improve stiffness.
Step 5: Add function layers
This is where the board becomes a message center instead of just a paper rectangle.
- Clips: Screw or glue small clips onto a thin strip of wood for receipts, invitations, or to-do lists.
- Elastic/ribbon: Crisscross elastic can hold photos or notes without holes.
- Pockets: Fabric or paper pockets can hold pens, stamps, or coupons.
- Pin area: Leave one cork section uncovered for pushpins.
Step 6: Finish and protect
Use painter’s tape when painting trim or section lines for cleaner edges. Make sure surfaces are clean, dry, and dust-free before taping so the tape sticks properly and gives you sharper lines. Let painted trim dry completely before final assembly.
If you’re spray painting hardware (like brackets or a tear bar), follow label instructions, work in a ventilated area, and apply light coats instead of one heavy coat. Light coats reduce runs and give a cleaner finish.
Step 7: Hang the board safely
Use a level. Then use it again. Future-you will thank you.
For light boards: Command picture hanging strips can work well when used exactly as directed on approved surfaces. Follow surface prep instructions (including rubbing alcohol), wait times, and weight limits for the strip size you choose.
For medium/heavy boards: Use screws with appropriate drywall anchors, or mount into studs. Anchors help distribute load in drywall, and the right anchor type depends on what you’re hanging and how heavy it is.
For oversized boards: Consider French cleats for better support and easier leveling, especially if your board has a thick frame or added accessories.
DIY Kraft Paper Roll Add-On (Optional)
If you want the “tear-off list” feature, add a kraft paper roll under or beside the main board:
- Mount two brackets at equal height.
- Slide a dowel rod through the kraft paper roll.
- Set the dowel on the brackets.
- Add a lower guide bar (wood, metal flat bar, or trim strip) to keep the paper flat.
- Test the roll tension before final tightening.
A common DIY lesson here: friction matters. If the roll drags on the wall or bracket, it won’t feed smoothly. A small offset, spacer, or bolt stop can improve how the roll spins and keep your paper from tearing awkwardly.
Styling Ideas for Different Spaces
Kitchen Command Center
- Label sections: “Meals,” “This Week,” “Groceries,” “School”
- Add hooks for keys and reusable bags
- Use dark trim for contrast with kraft paper
Home Office Productivity Board
- Use a neutral frame and minimal clips
- Add one pinned inspiration corner
- Keep a replaceable kraft paper sheet for brainstorming
Kids’ Art + Homework Station
- Use rounded corners and secure mounting
- Add a roll dispenser for drawing paper
- Clip rotating artwork for easy display
Common Mistakes to Avoid
Using the wrong adhesive amount
Too much adhesive can soak through thin kraft paper, wrinkle the surface, or create lumps. Use light, even coverage and smooth as you go.
Ignoring wall type
Drywall, plaster, tile, and paneling behave differently. Heavy boards need hardware that matches the wall, not just what’s in the “random screws” jar.
Skipping a test layout
Lay out clips, pockets, and labels before attaching them. This saves you from discovering that your “weekly schedule” header is covering the only writable area.
Overbuilding the first version
Start simple. A clean board that gets used every day beats a super-complicated organizer that stays half-finished in the garage for six months.
Maintenance and Refresh Tips
- Replace kraft paper when it becomes crowded, torn, or permanently coffee-tinted.
- Dust the frame and clips regularly.
- Check mounting points every few months, especially for high-use areas.
- Rotate sections seasonally (school year, holidays, summer plans, project phases).
One of the best things about this project is that it evolves with your life. Today it’s a grocery and homework board. Next month it’s a renovation planner. In December, it somehow becomes a gift-tracking system and cookie production schedule.
Real-World Experiences With a DIY Kraft Paper Message Board (Extended Notes)
After helping friends and family build versions of this project (and watching a few “quick upgrades” turn into full Saturday adventures), one pattern shows up every time: people underestimate how much they’ll actually use a message board once it’s placed in the right spot. The board itself isn’t magicbut the visibility is. A note on a phone app disappears into the digital void. A note on a kraft paper board at eye level becomes real.
In one small apartment kitchen, a renter-friendly version made from foam board, trim tape, and clips completely changed the morning routine. The household used the top section for weekly appointments, the middle kraft paper area for grocery items, and the bottom clips for mail that needed action. The biggest surprise was not organizationit was fewer repeated conversations. If something was on the board, everyone saw it. No more “I thought you said Thursday.” The board became the neutral referee.
In a home office setup, the owner started with a basic cork-and-kraft hybrid and expected to use it mostly for reminders. Instead, it became a project planning wall. They used kraft paper sheets for rough outlines, pinned research printouts on the cork side, and clipped “next actions” on a rail. The practical benefit was mental clarity: unfinished ideas had a home, so the desk stayed cleaner. The emotional benefit was even better. Crossing out completed tasks in thick marker on kraft paper is wildly satisfying. It feels more dramatic than tapping a checkbox on a screenand honestly, that drama can be motivating.
A workshop version taught a different lesson: durability matters. The first build looked great but used lightweight clips and thin paper in a high-traffic area. After a few weeks of sawdust, bumps, and constant use, the clips loosened and the paper tore too easily. Version two used stronger hardware, a better tear edge, and a roll setup with smoother feed spacing. That one lasted. The takeaway? Match the build quality to the room. A craft-room board and a garage board may look similar, but they live very different lives.
Families with kids often discover a bonus use: communication without nagging. A section for “After School,” “Lunch Ideas,” or “Tonight’s Plan” helps kids know what’s happening without asking the same question six times before dinner. It also gives children a place to participatedrawing, checking off chores, or leaving notes. The board becomes a shared surface, not just a parent command post.
And here’s the most relatable experience of all: your first layout probably won’t be your final layout. That’s normal. Most people adjust section sizes, move clips, or switch from glued sheets to replaceable kraft paper after living with the board for a couple of weeks. The good news is that this project is forgiving. You can revise it without rebuilding everything. In fact, the best DIY kraft paper message boards usually look more thoughtful after those small real-life tweaks. They stop being “a cute project” and start being something you rely on every day.
Conclusion
A DIY kraft paper message board is one of the smartest low-cost upgrades you can make for a home office, kitchen, craft room, or family drop zone. It blends organization and style, scales from tiny to oversized, and works whether you prefer a renter-friendly setup or a built-in look. Start simple, build for your actual routine, and let the board evolve as your needs change. Your future selfstanding there with a marker, a grocery list, and a suddenly organized brainwill be impressed.