Table of Contents >> Show >> Hide
- What are decorative filler snowflakes, exactly?
- Why snowflakes always win the winter décor Olympics
- Pick your snowflake filler like you pick your winter coat
- Where decorative filler snowflakes look best
- Three winter décor recipes you can copy today
- DIY upgrades that pair perfectly with snowflake filler
- Pro styling tips so your snowflakes look intentional (not accidental)
- Storage, cleanup, and reusing your snowflake stash
- Conclusion
Winter decorating has two modes: (1) calm, cozy, “I only lit one candle and I’m feeling emotionally stable,” and
(2) full-blizzard sparkle where your living room looks like a snow globe shook itself out of spite. Decorative filler
snowflakes are the secret weapon for both. They’re tiny, low-commitment, and wildly effective at turning “regular table”
into “winter wonderland” without requiring a ladder, a glue gun incident, or a conversation with your smoke detector.
In this guide, we’re talking about the snowflake “fillers” you scatter, layer, and tuck into bowls, vases, trays,
centerpieces, and party tablesplus how to choose the right materials, style them like a pro, and avoid the classic
mistakes (like using glitter confetti in a house that contains humans who blink).
What are decorative filler snowflakes, exactly?
Decorative filler snowflakes are small snowflake-shaped pieces used as accents or “filler” in décor. You’ll see them
sold as table scatter, confetti, vase filler, bowl filler, ornament filler, and craft embellishments. They’re usually
lightweight, repeatable (a.k.a. you can reuse them), and designed to add texture and sparkle in places where greenery,
ribbon, or ornaments feel too bulky.
They work because snowflakes read as “winter” without screaming “holiday only.” That means you can keep the look up
after the big celebrations without feeling like your home is still waiting for a December calendar to catch up.
Why snowflakes always win the winter décor Olympics
Snowflakes have built-in design credibility: they’re naturally geometric, visually light, and instantly seasonal.
Science backs up the vibesnow crystals form with a six-sided structure, which is why classic snowflake designs lean
toward six points. That hexagonal structure comes from how water molecules arrange themselves as they freeze.
Bonus: paper-craft experts love making snowflakes because a few folds can create that six-point symmetry, and the results
look fancy even when you made them at midnight in your pajamas.
Pick your snowflake filler like you pick your winter coat
Different materials give different “winter personalities.” Here’s the cheat sheet so you don’t end up with a vibe
mismatch (like rustic cabin décor wearing nightclub confetti).
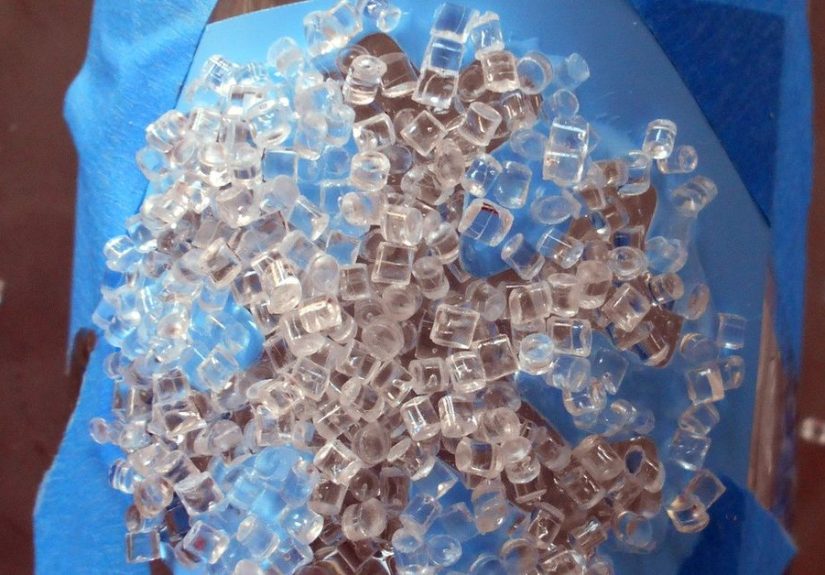
Clear acrylic or “crystal” snowflakes
- Look: Icy, modern, light-catchinggreat with glass, mirrors, and white lights.
- Best for: Clear vases, hurricane candle holders (with caution), mirrored trays, minimalist tables.
- Styling tip: Layer them over clear stones or beads for depth, like “ice on ice.”
Metallic foil confetti (silver, champagne, or iridescent)
- Look: Sparkly party energyperfect for New Year’s, winter birthdays, and “fancy cocoa bar” moments.
- Best for: Dessert tables, gift tables, place settings, photo backdrops.
- Reality check: Lightweight confetti + HVAC = snowstorm. Use strategically (more on that later).
Felt, fabric, or embroidered snowflakes
- Look: Cozy, soft, Scandinavian-ishworks with knit textures, wood, and neutral palettes.
- Best for: Tiered trays, bowls, mantel styling, kids’ spaces, pet-friendly zones.
- Bonus: Quiet décor. No crunch, no crinkle, no glitter migration.
Wood or paper snowflakes
- Look: Natural and handmadeperfect for rustic winter themes or cottage-style décor.
- Best for: DIY garlands, place cards, centerpiece accents, hanging installations.
- Fun fact: Paper snowflakes are a classic winter craft and widely taught because folding into thirds
helps you get that six-point shape.
Common sizes and why they matter
Snowflake fillers often come in a mix of small-to-medium sizes (think roughly half an inch up to around 1.5 inches),
which helps your décor look layered instead of flat. Mixed sizes also read more “natural,” like a real flurry.
Where decorative filler snowflakes look best
The easiest way to use snowflake filler is to think in “zones.” You’re not decorating everythingyou’re spotlighting
a few areas where winter charm belongs.
1) The bowl moment (coffee table, entry table, kitchen island)
Grab a shallow bowl or footed compote and build a simple winter layer:
- Base: pinecones, neutral ornaments, or white/clear filler stones
- Accent: decorative filler snowflakes sprinkled across the top
- Finish: one “hero” object (a candle, mini tree, or small lantern)
This is the low-maintenance option: easy to refresh, easy to move, and it won’t hijack the whole room.
2) Clear vase filler that looks like “frozen lake chic”
Clear vases are basically winter décor’s blank canvas. Fill with clear beads/stones, tuck in snowflake fillers, then
add twinkle lights (battery-operated) for an icy glow. If you’re doing flowers or greenery, the filler can help visually
anchor stems and make the arrangement look intentional rather than “I stuck branches in water and hoped for the best.”
3) Table scatter for winter parties and cozy dinners
Table scatter works best when it’s not everywhere. Aim for “sprinkled” rather than “we hosted a confetti parade indoors.”
A light scatter around centerpieces and place settings looks polished. Heavier scatter works best on a dessert table or
gift table where you’re not constantly clearing plates.
4) Centerpieces with hanging snowflakes (the “wow” factor)
Want the table to feel extra special? Take inspiration from winter tablescapes that use hanging elementspaper snowflakes,
garlands, and lights above the table can add drama without crowding plates.
5) Winter weddings and “elegant snow” events
Snowflake filler is popular for winter weddings because it photographs beautifully, especially paired with whites,
silvers, icy blues, and candlelight. Wedding inspiration roundups often lean on natural winter texturesevergreen,
seasonal florals, and metallic touchesto build a seasonal look that’s still classic.
Three winter décor recipes you can copy today
Recipe A: “Crystal Cabin” (modern, clean, icy)
- Clear acrylic snowflakes + clear beads/stones
- White twinkle lights in a glass cylinder
- Evergreen sprigs tucked at the base
Looks best with white, gray, black, and natural wood. Very “ski lodge but make it minimalist.”
Recipe B: “Frosted Glam” (party-ready, reflective, dramatic)
- Silver/iridescent snowflake confetti or metallic scatter
- Mirrored tray centerpiece
- Ornaments + a few disco-ball-style accents (optional, but fun)
Keep the confetti contained (tray, runner, or centerpiece zone) so it looks intentional and stays put.
Recipe C: “Cozy Nordic” (soft, reusable, calm)
- Felt snowflake fillers in white + one accent color (icy blue or deep green)
- Wood beads, mini trees, or knit textures
- Simple candles (LED if kids/pets are nearby)
This is the “I want winter, not a sparkle explosion” approach. Peaceful. Photo-friendly. Low cleanup.
DIY upgrades that pair perfectly with snowflake filler
Make your own paper snowflakes for layering
Paper snowflakes are a classic because the folding method creates symmetrical designs, and you can make them in different
sizes for instant layering on windows, walls, and even as placemat toppers. Step-by-step tutorials from craft and lifestyle
outlets emphasize starting with a square sheet and folding to achieve that six-point structure.
Kid-friendly snowflake “art” as décor
If you’ve got kids (or you’re the kind of adult who enjoys craft time with snacks), simple snowflake art projects can become
décor: frame the best ones, clip them to a garland, or turn them into gift tags. Craft retailers even pitch snowflake projects
as a way to explore symmetry and patternsbasically math, but cute.
Faux frost for a snowy finish (use caution)
Some DIY winter décor trends use crystal-like “faux frost” techniques to make greenery look snow-dusted. If you try any
chemical-based method, follow reputable instructions carefully and keep finished décor away from food, kids, and pets.
Pro styling tips so your snowflakes look intentional (not accidental)
Use containment to control chaos
If you’re using confetti-style snowflakes, contain them in a tray, shallow bowl, hurricane vase base, or along the center
of a runner. Containment makes it look curated and keeps it from traveling to the hallway like it pays rent there.
Mix textures, not just sparkle
Pair shiny snowflakes with matte elements: wood, felt, kraft paper, greenery, linen napkins. Contrast reads expensive,
even if everything came from a craft store aisle you “just happened” to walk down for 45 minutes.
Pick a palette and commit
Winter palettes that consistently look good: white-on-white, silver + icy blue, navy + metallic, and deep green + cream.
Wedding color guides often highlight how winter décor shines when you keep the base neutral and add one strong accent.
Keep flames and tiny fillers separated
If you use real candles, keep lightweight fillers and confetti well away from open flames. A winter wonderland is adorable;
a winter “why is the table smoking?” situation is not.
Storage, cleanup, and reusing your snowflake stash
Decorative filler snowflakes are at their best when you can reuse them year after year. Store them in labeled containers
by color and material. If you mix everything together, you’ll spend next winter sorting sparkles like a holiday-themed
archaeologist.
- Confetti: store flat in a zip bag; shake gently before using to separate pieces.
- Acrylic/wood: store in small bins; they’re sturdy and easy to reuse.
- Felt/fabric: store dry and clean to avoid lint transfer.
Cleanup tip: a small handheld vacuum is your best friend for table scatterjust avoid vacuuming anything you plan to reuse
unless you enjoy “surprise snowflakes” later.
Conclusion
Decorative filler snowflakes are the rare décor item that’s affordable, versatile, and genuinely transformative. Whether
you’re styling a cozy bowl on a coffee table, building a sparkling winter centerpiece, or hosting a full winter wonderland
party, these little flakes add texture and seasonal charm without demanding a total home takeover.
Start small: choose one material that matches your style (clear acrylic for icy modern, felt for cozy, metallic for glam),
keep your palette consistent, and use trays and bowls to keep everything looking polished. Then, when winter ends, pack the
snowflakes away neatly so next season feels like a decorating upgradenot a scavenger hunt.
Experience Notes: 10 real-life things you’ll notice (and how to handle them)
1) Static cling is real. Lightweight confetti-style snowflakes love sweaters, fleece throws, and anything
that makes winter cozy. If you’ve ever stood up from the couch and taken half the décor with you, you understand. The fix:
use heavier fillers (wood/acrylic), or keep confetti inside trays and shallow bowls where it stays put.
2) Less looks better in photos. In real life, you can sprinkle a lot and it feels festive. In photos,
too much scatter can read as “messy table” instead of “magical snowfall.” A good rule: keep the densest snowflake action
in one focal area (like the centerpiece tray) and let the rest of the table breathe.
3) The best winter décor has layers. When people say a setup looks “designer,” it’s usually because there
are at least three layers: a base (runner or tray), a body (greens, candles, ornaments), and a topper (snowflake filler or
sparkle accents). If your décor feels flat, add one more texturematte linen, wood beads, or clear stonesbefore adding more
snowflakes.
4) Pets and toddlers treat snowflakes like snacks. Tiny fillers are tempting to curious hands and paws.
If your home includes explorers, choose felt or larger wooden pieces, and keep small scatter up high or inside closed
containers (like lidded jars or cloches). It’s still cutejust safer.
5) Glitter travels. Even “not that glittery” décor can migrate. If you’re decorating a dining table, you
may suddenly discover sparkles on plates, sleeves, and your forehead (somehow). If that’s not your winter dream, use clear
acrylic flakes or matte felt. You’ll still get the winter theme without the “craft store explosion” aftermath.
6) Lighting changes everything. Clear snowflakes look subtle in daytime and absolutely brilliant at night
with warm twinkle lights nearby. If your décor feels underwhelming, add a small light sourcebattery fairy lights in a vase,
or a little lamp near your centerpiece. Suddenly: ice palace.
7) People touch the décor. At parties, guests pick up little snowflakes, point at them, and sometimes
accidentally sweep them into their napkin like a souvenir. If you don’t want your décor slowly disappearing, use scatter in
“no-touch zones” (dessert table, entry table, mantle tray) and keep dining tables more contained.
8) The easiest win is the entry table. If you’re short on time, skip the whole-house makeover and style
one tray in the entryway: a candle (LED works), a small green sprig, and a sprinkle of snowflake filler. It sets the mood
the second someone walks in. Maximum impact, minimal effort.
9) DIY snowflakes feel more personal. Even if you buy filler snowflakes, adding a few handmade paper
snowflakes (different sizes, slightly imperfect) makes the whole setup feel warmer and less “catalog.” Plus, it’s a fun
winter activity that can turn into décor you actually want to keep.
10) Next-year-you will be grateful for labeled storage. The best winter decorating “experience” isn’t the
stylingit’s opening a bin next season and finding everything sorted and ready. Label bags by material (acrylic, felt,
confetti) and color (silver, white, blue). Your future self will feel like you left them a gift. (Which, in a way, you did.)


