Table of Contents >> Show >> Hide
- What “Matte Dew” Actually Means
- Why the Matte-Dew Combo Works (It’s Not Just a Trend)
- The Matte Dew Toolkit
- Step-by-Step: A Matte Dew Routine in 7 Minutes
- Placement Maps for Real People
- Troubleshooting: When Matte Dew Goes Sideways
- Ingredients 101: The Stuff That Makes Matte Dew Possible
- All-Day Matte Dew Maintenance (Without Rebuilding Your Whole Face)
- Real-World Experiences: Getting Matte Dew Right (The Stuff Tutorials Don’t Tell You)
- Conclusion
“Matte” and “dewy” used to be sworn enemies. Matte was the no-nonsense friend who shows up with blotting papers and a
strict calendar. Dewy was the glowing extrovert who insists your skin should look like it drinks eight glasses of water,
gets eight hours of sleep, and has never heard the words “stress” or “late-night pizza.”
And then real life happenedcombo skin, office lighting, humid commutes, winter cheeks, oily T-zones, and selfies that
somehow capture texture you didn’t know you owned. Enter Matte Dew: a custom finish effect that lets you
blur and control shine where you need it, while keeping the “healthy skin” glow where you actually want it.
What “Matte Dew” Actually Means
A Matte Dew finish is not “half matte, half shiny.” It’s soft-matte structure + controlled radiance. The goal is to
make your skin look smooth and even (matte/blur) without sucking the life out of it (dew). Think: pores look minimized,
foundation looks like skin, and the high points of your face catch light in a deliberate, flattering waynot a “my
forehead is auditioning as a mirror” way.
The product that named the vibe
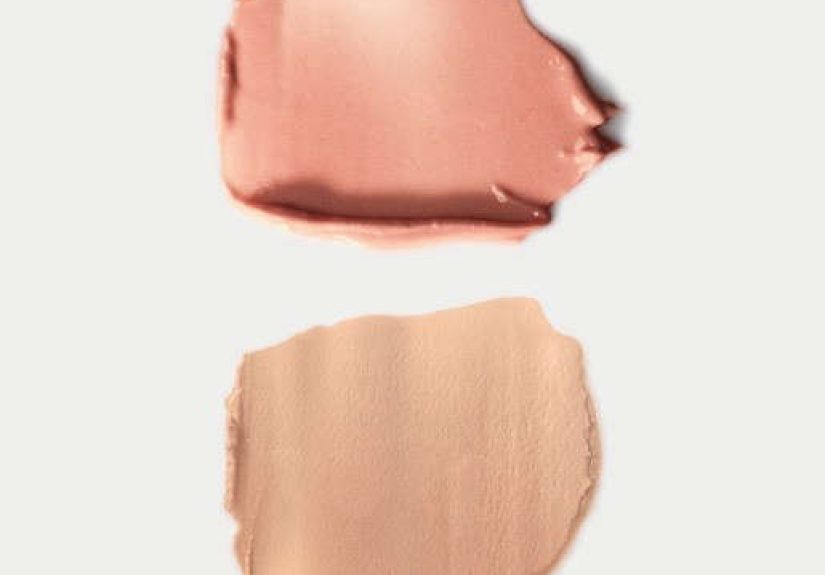
The phrase “Custom Finish Effects – Matte Dew” is also the name of a dual-texture complexion finisher concept: one side
focused on mattifying/shine control and optical smoothing, the other side focused on moisture and radiancemeant to be
applied exactly where you want each effect, even over makeup, without turning cakey.
Why this approach is so practical
- Your face is not one skin type. Most people have zones: oilier around the nose/forehead and drier on cheeks.
- Finish changes with light. A look that’s perfect in the bathroom can go rogue under office fluorescents.
- Makeup wears unevenly. Oils break down pigment; dryness makes product cling. Matte Dew targets both problems.
Why the Matte-Dew Combo Works (It’s Not Just a Trend)
A polished complexion is mostly about how light hits the surface. Shine comes from oil and smooth reflective areas.
“Matte” reduces reflectivity by diffusing light and absorbing excess oil. “Dew” adds a hydrated lookoften by using
emollients/humectants and strategically placed glow that mimics naturally moisturized skin.
The secret sauce is placement. Matte everything can look flat or dry. Dew everything can look greasy by lunchtime.
Matte Dew says: “Let’s stop arguing and put each finish on a schedule.”
The Matte Dew Toolkit
1) Skin prep: clean + hydrate (yes, even if you’re oily)
A Matte Dew finish starts before makeup. Hydration helps your base apply smoothly and reduces the odds of separation,
patchiness, or “foundation clinging to dry spots like it’s paying rent.” If you’re acne-prone, moisturizer can still be a
daily playerespecially after cleansingso your skin doesn’t overcompensate with more oil.
If you’re oily, you’re not banned from hydrationyou just need lightweight formulas and smart timing. And if shine pops
up midday, blotting papers can remove oil without smearing your whole base.
2) Primer: strategic, not a full-face mandate
Primer is like double-sided tape for your baseuse it where it earns its keep. Many people get better results when they
spot-prime the T-zone or textured areas instead of coating the entire face. That’s Matte Dew energy: targeted results,
less product, more control.
3) Base makeup: pick “skin-like” over “mask-like”
Matte Dew plays best with base products that already look like skin: light-to-medium coverage foundations, skin tints,
tinted moisturizers, and concealers used sparingly. You can still go full coverage, but you’ll want to thin it out and
build only where needed.
4) Mattify where you need it
The matte side of Matte Dew can come from a mattifying gel, a pressed powder, a loose powder, a powder foundation, or a
blur balm. The biggest difference-maker is how you apply it:
- Press, don’t sweep: pressing sets product without moving the base underneath.
- Small tools, small areas: precision powdering keeps glow intact while controlling shine in problem spots.
- Thin layers: you want a “soft focus” effect, not a “chalk outline” situation.
5) Add dew where you want it
Dew can come from a moisturizing finisher, a hydrating balm, a liquid illuminator mixed into foundation, a cream
highlighter, or a setting spray that melts powders down. The rule: aim for radiance that looks like skincare, not
glitter.
Best “dew zones” usually include: tops of cheekbones, temples, brow bone (lightly), the center of the eyelid (if you
like a glossy lid), and a whisper on the bridge of the nosedepending on your pore texture and oil pattern.
6) Lock it in (without killing the vibe)
Setting powder increases wear and reduces shine. Setting spray helps fuse layers and can add a more skin-like finish.
Matte Dew often uses both, but in different places: powder in the T-zone, spray overall (or only on the perimeter
for a glow boost).
Step-by-Step: A Matte Dew Routine in 7 Minutes
- Moisturize: Apply a lightweight moisturizer while skin is slightly damp. Let it settle for 60–90 seconds.
- Spot-prime: Use primer on pores/texture zones (often nose, inner cheeks, forehead center, chin).
- Base: Apply skin tint/foundation thinly. Add coverage only where needed.
- Conceal: Tap concealer under eyes and around redness. Blend edges; don’t overbuild.
- Matte map: Press powder (or mattifying gel) into the T-zone, sides of nose, and anywhere makeup breaks up first.
- Dew map: Tap a moisturizing finisher or cream highlight onto cheekbones and temples. Keep it off textured pores.
- Finish: Mist setting spray lightly to “melt” layers together. If you get oily, spray more on outer face than center.
Placement Maps for Real People
Combination skin: the classic T-zone treaty
Matte: forehead center, nose, chin, and the crease beside the nostrils.
Dew: cheekbones, temples, and a touch above the brow tail.
Result: shine is controlled where it’s loudest, glow stays where it looks intentional.
Oily skin: soft-matte base + “earned” glow
Start with a long-wear or soft-matte base, then do precision powdering (small brush, small areas). For dew, skip thick
balms and use a thin liquid illuminator mixed into a tiny amount of foundation for cheekbones onlyor use a
setting spray that gives a satin finish. Midday: blot, then re-press a minimal amount of powder.
Dry or mature skin: “matte” becomes “blur,” not “desert”
Use matte sparinglymainly for under-eye creasing or around the nose. Choose a finely milled powder and press lightly.
Put dew where skin naturally looks lifted: cheekbones and temples. Hydration is non-negotiable here; a humectant-rich
routine (like products featuring hyaluronic acid) can help the complexion look plumper before you add glow.
Acne-prone skin: set smart, not thick
Over-powdering can emphasize texture, but not setting at all can shorten wear. The sweet spot is thin layers: conceal,
then press a small amount of powder exactly where concealer needs to stay. Keep dew away from active breakouts if shine
makes them look more prominent.
Troubleshooting: When Matte Dew Goes Sideways
If it looks cakey
- You likely used too much powder or layered too many matte products. Blot gently, then mist setting spray to re-melt.
- Switch from sweeping motions to pressing motions.
- Try powdering only the T-zone and leaving cheeks alone.
If it turns greasy fast
- Make sure moisturizer has fully settled before foundation.
- Use primer only where oil breaks through most.
- Blot (don’t rub), then re-press powder in tiny amounts.
If makeup separates or slides
- Check product compatibility (very oily skincare under silicone-heavy base can sometimes slip).
- Apply in thinner layers and allow short “set” times between steps.
- Use setting spray for longevity, not just glow.
Ingredients 101: The Stuff That Makes Matte Dew Possible
Oil control + blur
Many mattifying products use powders and minerals that absorb oil and soften the look of pores. Silica is a common
exampleoften used for oil control and a smoother skin feel. Talc is also used in many powders; it’s widely discussed
from a safety and contamination-testing standpoint, and many people prefer pressed powders to reduce airborne dust.
Hydration + “dew”
Humectants like hyaluronic acid help attract and hold water, supporting that hydrated look under makeup. The dew side
isn’t just shineit’s the visual effect of skin that looks comfortable, flexible, and not tight.
Setting sprays and “film formers”
Setting sprays typically rely on film-forming ingredients that create a light layer over makeup so it wears longer. Some
sprays lean matte; others lean radiant. Matte Dew routines often pick sprays that keep hold but don’t turn the face into
a powdered donut.
Quick safety note about loose powders
Any loose powder can become airborne. If you use loose powder, apply gently (press, don’t flick), avoid inhaling dust,
and consider using pressed formulas if you’re sensitive. If you have concerns about ingredients, check product labeling
and patch testespecially if you’re acne-prone or reactive.
All-Day Matte Dew Maintenance (Without Rebuilding Your Whole Face)
- First line of defense: blotting papers to remove oil while leaving pigment behind.
- Second line: re-press a tiny amount of powder only where needed (usually nose/inner cheeks/chin).
- Bring dew back: tap a pinhead amount of hydrating balm onto cheekbones, or mist setting spray lightly.
- Skip the panic layering: the fastest route to cake city is “just one more” powder pass every hour.
Real-World Experiences: Getting Matte Dew Right (The Stuff Tutorials Don’t Tell You)
People who fall in love with Matte Dew usually have the same “aha” moment: it’s not about buying one magical productit’s
about treating your face like different neighborhoods with different weather. Here are common real-world experiences
and lessons that show up again and again when people actually wear Matte Dew out in the wild.
The “commuter forehead” problem
A lot of folks report that their makeup looks flawless at home, then turns shiny during a humid walk, subway ride, or
“why is the car heater set to tropical rainforest?” drive. The Matte Dew fix that tends to work best is surprisingly
boring: spot-prime and spot-set. Instead of powdering the whole face (which can look heavy later), they press powder
only into the center forehead, around the nose, and the chinthen keep cheeks more hydrated and flexible. In other
words: don’t fight the climate everywhere. Just negotiate with the zones that are most likely to revolt.
The “my cheeks feel tight but my nose is shiny” paradox
Combination skin experiences are basically this paradox in a trench coat. The biggest win people report is switching from
“one finish for the whole face” to “two finishes in harmony.” They’ll use a lightweight moisturizer everywhere, then add
a touch more hydration on the outer face. Matte steps are limited to the T-zone. Dew steps are limited to the cheekbones
and temples. The result is a face that looks balancedlike the skin is naturally healthy, not artificially shiny or
artificially flat.
The “camera flash betrayed me” lesson
Matte Dew wearers often learn that certain powders can show texture or flashback if applied heavily. The practical
takeaway people share: thin layers + pressing tools. Using a small brush or puff and pressing a whisper-thin layer
into the skin tends to look more invisible than dusting with a giant fluffy brush. And when they want dew for photos,
they keep it to areas that naturally catch light (upper cheekbone) and avoid putting glow directly on enlarged pores.
That’s the difference between “lit-from-within” and “lit-from-my-T-zone.”
The “mature skin glow” breakthrough
Many people with mature or drier skin report that full matte finishes can emphasize fine lines, while full dewy finishes
can look slick. Matte Dew becomes a sweet spot: they use “matte” as a blurring tool only where makeup creases (often
under eyes or around the nose), then rely on hydration and a satin setting spray to keep everything looking like skin.
A common experience: when they reduce powder overall and switch to targeted powdering, the face looks smootherand the
glow looks more believable because it’s not fighting a layer of dryness.
The “I over-touched-up and now I’m cakey” rite of passage
Almost everyone who experiments with Matte Dew has a day where touch-ups go too far. The best real-life rescue trick
people share is: blot first, then re-press. If you powder on top of oil, you can create a paste. Blotting papers
remove the oil first, then a tiny press of powder sets the area again. If it still looks heavy, a light mist of setting
spray can help meld everything back into a skin-like finish. Matte Dew is basically a polite reminder that your makeup
wants gentle adjustments, not a full renovation every two hours.
In short, real-world Matte Dew success usually comes down to three habits: (1) apply less than you think you need, (2)
place products like you’re contouringstrategicallyand (3) touch up with blotting and pressing, not rubbing and
layering. Once you get those down, Matte Dew stops feeling like a trend and starts feeling like a cheat code for
“my skin but better.”
Conclusion
Matte Dew is what happens when you stop forcing your whole face to pick one side. You control shine where it’s loud,
add hydration where it’s flattering, and keep everything looking like skinnot a mask, not a disco ball, not a chalk
board. With targeted prep, smarter powder placement, and intentional glow, “Custom Finish Effects – Matte Dew” becomes a
finish you can wear in real lifeunder real lightson a real schedule.


