Table of Contents >> Show >> Hide
- What makes pie crust flaky (the delicious science, minus the boring parts)
- The Best Flaky Pie Crust Recipe (makes 2 crusts)
- Rolling, shaping, and crimping without tears
- Blind baking (pre-baking) for crisp bottoms
- Flavor & texture variations
- Troubleshooting: when your crust has opinions
- Make-ahead, storage, and freezer strategy
- Quick FAQ
- Conclusion
- Real-life pie crust experiences: 10 lessons I learned the hard way (so you don’t have to)
If pie crust has ever made you whisper “I’m fine” while staring into a bowl of flour like it personally betrayed you,
welcome. The good news: a truly flaky pie crust isn’t a mystical gift reserved for grandmas and pastry
chefs with forearms like rolling pins. It’s a repeatable techniquebuilt on cold butter, smart hydration, and just
enough handling to bring the dough together without turning it into a chewy frisbee.
This guide gives you a best flaky pie crust recipe (with clear weights), plus the “why it works” science,
step-by-step instructions, troubleshooting, and a few optional upgrades (yes, including the famous vodka trick).
By the end, you’ll be making pie dough like you do taxes: still not “fun,” but far less terrifying and way more rewarding.
What makes pie crust flaky (the delicious science, minus the boring parts)
Flakiness comes from layers. Those layers happen when bits (and sheets) of fat stay distinct inside the dough.
In the oven, that fat melts and releases moisture as steam, which pushes flour layers apartlike a tiny pastry elevator.
Your job is to keep the fat cold and separate until baking.
The three rules of flaky pie crust
- Keep everything cold: Cold fat = defined layers. Warm fat = greasy dough and sad texture.
- Limit gluten: Mix just until the dough holds together. Overmixing makes it tough.
- Hydrate strategically: Enough liquid to form a dough, not so much that you invite gluten to move in permanently.
The Best Flaky Pie Crust Recipe (makes 2 crusts)
This is a reliable, all-butter homemade pie crust that bakes up crisp and shatter-flaky. It’s ideal for fruit pies,
quiche, pot piebasically anything you want to wrap in buttery confidence.
Ingredients
- 315 g (2 1/2 cups) all-purpose flour, plus more for rolling
- 12 g (2 tsp) sugar (optional; helps browning and tendernessskip for super-savory pies if you want)
- 6 g (1 tsp) fine salt
- 226 g (2 sticks) unsalted butter, very cold (cut into 1/2-inch cubes)
- 120 g (1/2 cup) ice-cold water (have a little extra ready, just in case)
Optional upgrades (pick your adventure)
- Vodka swap for extra tenderness: Replace half the water with cold vodka (or gin). You’ll get easy-to-roll dough with less gluten development.
- “Easier handling” blend: Replace 2–4 tablespoons of butter with cold vegetable shortening for a dough that’s slightly more forgiving in warm kitchens.
- Extra flake boost: Grate half the butter on a box grater (then freeze it 10 minutes). Those shreds create dramatic layers.
Equipment
- Large bowl
- Pastry cutter or two forks (or your fingertipsfast hands, cold attitude)
- Bench scraper (helpful, not mandatory)
- Kitchen scale (highly recommended for consistency)
- Plastic wrap or reusable wrap
- Rolling pin
Step-by-step: how to make flaky pie crust
- Chill like you mean it.
Put the butter cubes in the freezer for 10–15 minutes. Fill a cup with water and ice; measure the cold water you’ll use.
If your kitchen runs warm, chill the mixing bowl too. - Mix dry ingredients.
In a large bowl, whisk flour, sugar (if using), and salt until evenly combined. - Cut in the butterthen flatten some of it.
Add the cold butter cubes. Use a pastry cutter to cut the butter into the flour until you have a mix of:- some pea-sized pieces (texture)
- some larger, thin “flakes” or flattened bits (layers)
Pro move: grab a few butter chunks and squish them between your fingers into flat shards, then toss them back into the flour.
You’re basically building pastry “shingles.” - Add cold water gradually.
Drizzle in about 3/4 of the water and toss with a fork. Add the remaining water a tablespoon at a time until the dough
looks shaggy and holds together when you squeeze a handful. It should not look wet, glossy, or sticky. - Bring it together (without overworking).
Dump the shaggy dough onto the counter. Press it into a rough rectangle with your hands. If it’s dry and falling apart,
mist in a teaspoon of water and press again. - Do 2–3 quick folds for big flakes.
Using a bench scraper, fold the dough like a letter: fold the bottom third up, then the top third down.
Rotate 90 degrees and repeat once or twice. This creates layers without kneading. - Divide, wrap, and chill.
Split into two equal discs (about 330–340 g each). Wrap tightly and refrigerate at least 2 hours (overnight is great).
This rest relaxes gluten and firms the buttertwo wins, one nap.
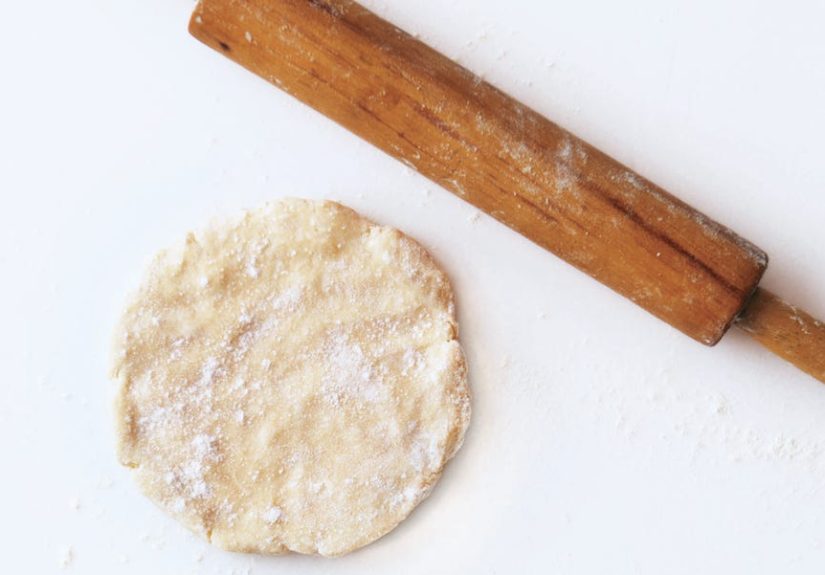
Rolling, shaping, and crimping without tears
Roll it out
- Let the dough sit at room temp for 5–10 minutes if it’s rock-hard.
- Flour the counter lightly (too much flour can dry the dough).
- Roll from the center outward, rotating the dough a quarter-turn every few rolls.
- Aim for a 12-inch circle for a 9-inch pie plate (about 1/8-inch thick).
Transfer to the pie dish
- Roll the dough around the pin, then unroll into the dish.
- Lift and settle it into cornersdon’t stretch it, or it may shrink in the oven.
- Trim with 1 inch overhang, fold under, and crimp.
If the dough warms up or feels soft, pause and chill it 10–15 minutes. Pie crust rewards patience the way toddlers reward silence:
briefly, and with crumbs.
Blind baking (pre-baking) for crisp bottoms
Making pumpkin pie, chocolate cream, banana cream, or any custard/silky filling? You want a fully baked or partially baked crust
so the bottom doesn’t turn into edible sponge.
How to blind bake a single crust
- Chill the shaped crust in the pie dish for at least 30 minutes (freezer is fine too).
- Line and weight it: Place parchment (or foil) over the dough and fill with pie weights,
dried beans, or rice all the way up the sides. - Bake at 375°F until the edges are set and lightly golden (about 25–30 minutes).
- Remove weights and bake 8–15 minutes more until the bottom looks dry and lightly golden.
- Cool before adding no-bake fillings; for custards, follow your pie recipe’s instructions.
Docking: should you poke holes?
Docking (pricking the dough) can help prevent bubbles, but it’s not mandatory if you use enough weights and chill well.
If you do dock, do it after removing the weights, and consider brushing with egg wash to help seal holes before adding wet fillings.
Flavor & texture variations
All-butter (this recipe)
Maximum flavor, gorgeous flakes, classic pie aroma. Best for fruit pies, galettes, and any time butter is the vibe.
Butter + shortening (more forgiving)
Shortening melts at a higher temperature than butter, which can make the dough easier to handle and help it hold shape.
You’ll trade a little flavor for easeuseful for decorative crimping, lattices, or summer kitchens.
Vodka (or other alcohol) method
Alcohol hydrates flour but doesn’t develop gluten the way water does. Result: dough that’s easier to roll, less prone to shrinking,
and still bakes up flaky because the alcohol evaporates quickly.
Troubleshooting: when your crust has opinions
“My dough is crumbly and won’t come together.”
- Add water slowly (1 teaspoon at a time) and pressdon’t knead.
- Check your flour measurement. Too much flour dries everything out.
“It shrank or slumped in the oven.”
- Don’t stretch the dough when fitting it into the pan.
- Chill the shaped crust before bakingcold dough holds its structure longer.
- Use weights for blind baking, and fill them to the top edges.
“It’s tough instead of tender.”
- Too much mixing or too much water can overdevelop gluten.
- Let the dough rest (at least 2 hours) so gluten relaxes before rolling.
“The bottom is soggy.”
- Blind bake for custard pies and juicy fillings.
- Try a thin egg wash on the bottom crust before filling (it creates a moisture barrier).
- For fruit pies, bake on a lower rack so the bottom gets more heat.
Make-ahead, storage, and freezer strategy
- Refrigerate: Wrapped dough discs keep 2–3 days.
- Freeze dough discs: Wrap tightly and freeze up to 3 months. Thaw overnight in the fridge.
- Freeze shaped crust: Freeze in the pie dish, then wrap well. Bake from frozen (add a few minutes).
If you bake pies for holidays, do future-you a favor: make dough weeks ahead. The freezer is basically a time machine made of ice.
Quick FAQ
Is a food processor okay?
Absolutely. Pulse the dry ingredients, add cold butter, and pulse just until you have a mix of small pieces and larger bits.
Then add cold water in short pulses. Stop before it becomes a smooth paste. Overprocessing = fewer flakes.
Can I use salted butter?
Yesreduce the added salt slightly (start by cutting it back about 1/4 teaspoon). Unsalted butter gives you more control,
but salted butter won’t ruin your pie dreams.
What flour is best?
Standard all-purpose flour is the everyday winner for flavor, structure, and ease. Lower-protein flours can be tender, but
can also be finicky for beginners.
Conclusion
The best flaky pie crust isn’t about perfectionit’s about process. Keep the butter cold, hydrate carefully,
fold a couple of times for layers, and chill long enough for the dough to relax. Once you nail that rhythm, pie becomes less
“special occasion stress” and more “casual weeknight glory.”
Real-life pie crust experiences: 10 lessons I learned the hard way (so you don’t have to)
I used to think flaky pie crust was 70% talent and 30% secret family heirloom vibes. Then I made enough crusts to realize it’s
actually 70% temperature management and 30% not panicking. The first time I tried to rush dough, I ended up with a crust that
tasted fine but chewed like it had unfinished business. Here’s what consistently changed my results from “meh” to “where did you buy this?”
and yes, people will assume you bought it, because that’s how compliments work.
Lesson 1: When a recipe says “cold,” it means “cold,” not “I looked at the fridge once.” I now chill butter, water, and sometimes
the bowl. If the dough ever feels soft or shiny, I stop and chill it. Ten minutes of chilling saves you from thirty minutes of fighting a sticky mess.
Lesson 2: I stopped treating water like a dare. Adding liquid gradually is boring, but it prevents that tragic moment where the dough
turns gummy and you start adding flour like you’re salting a sidewalk in winter.
Lesson 3: Rolling is not an arm workout. If you have to press hard, the dough is too coldwait a few minutes. If it sticks and smears,
it’s too warmchill it. Lesson 4: I quit stretching dough into the pan. It feels efficient, but stretched dough shrinks back in the oven
like it’s retracting from a social interaction. Now I lift and settle it gently and it behaves.
Lesson 5: Those quick folds are magic. I used to skip them because I thought folding sounded “fussy.” Turns out it’s the easiest way to
build layers without complicated technique. Lesson 6: Blind baking is not optional for custard pies. Before I learned that, my pumpkin pie
bottoms were soggy enough to qualify as soup-adjacent. Weight the crust, bake until set, then finish the bottom until it looks dry. It’s the difference
between crisp and regret.
Lesson 7: My oven has moods. Using an oven thermometer helped more than I wanted to admit. Lesson 8: If your dough cracks
while rolling, it’s not “ruined”it’s just cold or a little under-hydrated. Let it warm slightly, patch with scraps, and keep going. Pie crust is forgiving
if you don’t announce defeat too early. Lesson 9: The freezer is your best friend. I now freeze dough discs and even shaped crusts, which
makes last-minute pies feel suspiciously calm.
Lesson 10: Your first crust doesn’t need to be perfectit needs to be edible and better than store-bought. The confidence comes fast.
After a few rounds, you’ll recognize the dough’s “ready” look (shaggy but cohesive), you’ll roll with less flour, and you’ll start making decorative edges
like you’re casually auditioning for a baking show. And if it’s not flawless? Put whipped cream on it. Whipped cream covers many sins, including my own.


