Table of Contents >> Show >> Hide
- Why Wire Gauge Matters (and Why Your Breaker Cares)
- Quick Refresher: What “Gauge” Means in the U.S.
- Method 1: Read the Markings (The “If It’s Printed, Use It” Method)
- Method 2: Use a Wire Gauge Tool (The “No Math, Just Fit” Method)
- Method 3: Measure Diameter with Calipers and Convert to AWG (The “Precision Mode” Method)
- Common Mistakes That Make Wire Gauging Unreliable
- After You Gauge Wire: A Practical “Does This Make Sense?” Check
- FAQ: Quick Answers for Real-Life Scenarios
- Conclusion: Three Ways to Gauge Wire Without the Guesswork
- Experiences From the Field: The 500-Word “Yep, I’ve Been There” Add-On
Wire gauge is one of those things that feels boring right up until it isn’tlike the “check engine” light,
or realizing you’ve been using “reply all” for three years. The right wire gauge keeps circuits cool, tools happy,
and breakers from throwing tantrums. The wrong gauge can mean voltage drop, hot insulation, and that unmistakable
“something’s not right” smell that turns a Saturday DIY into a Monday electrician visit.
In this guide, you’ll learn three practical, real-world ways to gauge wire (in American Wire Gauge, or AWG),
plus tips to avoid common mistakes. Whether you’re sorting mystery spools in your garage, replacing a light fixture,
or building a low-voltage project, you’ll walk away able to identify wire size with confidenceand without
needing to “eyeball it and hope.”
Why Wire Gauge Matters (and Why Your Breaker Cares)
“Gauge” tells you how thick a conductor is. Thickness matters because thicker wire can safely carry more current
(ampacity) with less heat buildup and less voltage drop over distance. If the wire is too small for the load,
it can overheat, degrade insulation, and create a fire risk. If it’s bigger than necessary, it’s usually safe
(just stiffer, pricier, and more annoying to wrestle into a box that was clearly designed by someone who hates hands).
In the U.S., most everyday building wire sizing is discussed in AWG. For common household branch circuits,
gauge is tightly linked to breaker size and code rules. For low-voltage, automotive, and electronics,
gauge still mattersbut the limiting factors may include voltage drop, flexible strand count, and connector ratings.
Quick Refresher: What “Gauge” Means in the U.S.
AWG basics in plain English
AWG works “backwards”: the smaller the number, the thicker the wire. So 10 AWG is thicker than 12 AWG,
which is thicker than 14 AWG. It’s like golf scoring, but with copper.
Solid vs. stranded changes how you measure
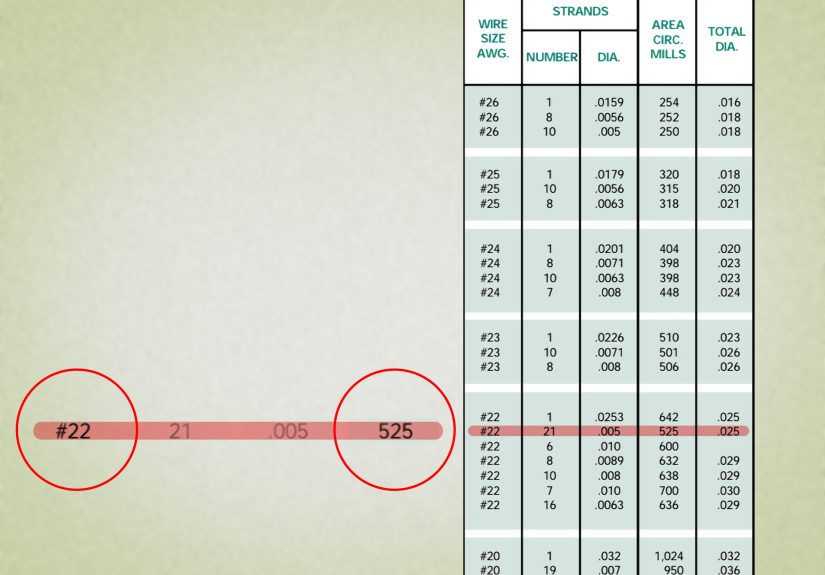
With solid wire, the diameter is straightforward: one round conductor. With stranded wire,
the overall thickness depends on how many strands and how tightly they’re bundled. Two different stranded wires can look
similar on the outside but have different copper cross-sectional area insideespecially if one has thick insulation.
Bottom line: to gauge wire accurately, you want to identify the wire size based on the conductor,
not the insulation jacket, not the vibes.
Method 1: Read the Markings (The “If It’s Printed, Use It” Method)
The easiest way to gauge wire is to let the manufacturer do the work for you. Many cables and individual conductors
have the gauge printed right on the insulation or outer jacket.
Where to look
- On the outer jacket of cable (like NM-B “Romex”-style cable): look for something like “12/2” or “14/3.”
- On individual conductors (like THHN/THWN building wire): look for “12 AWG,” “10 AWG,” etc.
- On packaging (spools, boxes, labels): often the clearest place for gauge, conductor count, and insulation type.
How to read common cable labels
You’ll often see a format like “12/2” or “14/3.” The first number is the wire gauge. The second number is the
number of insulated conductors inside (ground is typically separate and may not be counted the same way on every label).
Example: 12/2 NM-B usually means 12-gauge cable with two insulated conductors (plus ground).
Example: 14/3 NM-B usually means 14-gauge cable with three insulated conductors (plus ground),
which is common when you need a traveler wire for certain switching setups.
Bonus: markings also tell you “what kind” of wire it is
Cable markings may include wire type (NM-B, THHN, MC), voltage rating, temperature ratings, and certification marks.
That matters because the same gauge can have different allowable ampacity depending on insulation type,
temperature ratings, bundling, and installation conditions.
When markings are missing (or suspicious)
If the wire is older, cut short, painted over, or you’re holding a random “mystery wire” from a drawer labeled
“Important Stuff,” the printing may be gone. Or you may be dealing with a wire that has been re-jacketed,
re-labeled, or otherwise “modified” by someone whose tool collection includes both wire nuts and optimism.
In that case, move on to Method 2 or 3.
Method 2: Use a Wire Gauge Tool (The “No Math, Just Fit” Method)
A wire gauge tool is the simplest hands-on way to gauge wire. It’s usually a small metal or plastic plate
(sometimes a disc) with notches labeled by AWG sizes. If the conductor fits snugly into the “12” notch,
congratulations: you have 12 AWG (or you’re very close).
What counts as a “wire gauge tool”
- Dedicated wire gauge plate/disc: quick, compact, and surprisingly satisfying to use.
- Wire strippers with gauge markings: many strippers have holes labeled by AWG for stripping insulation.
- Crimp tools and terminals: some are labeled for wire size ranges (helpful, but not always precise).
Step-by-step: gauging wire with a gauge plate
- Turn off power if the wire is part of a circuit. Confirm with a tester when appropriate.
- Expose the conductor by stripping back a small amount of insulation. You only need a short section.
- Choose a notch you suspect (say, 12 AWG) and try the conductor.
- Look for a snug fit: the conductor should slide in without forcing and without wobbling like a hula hoop.
- Confirm with the next size: if it fits loosely in 12 but won’t fit 13 (some tools include odd sizes), you’re likely at 12.
Pro tips for accurate results
- Measure the conductor, not the insulation. A gauge notch is for bare metal.
- Don’t flatten the wire. If you crushed it with pliers or a dull stripper, it may “fit” wrong.
- Stranded wire needs care. Twist strands gently into a tight bundle so they behave like a round conductor.
If you’re doing a lot of wiring or sorting unknown spools, a wire gauge tool is one of those cheap purchases
that pays for itself the first time you avoid buying the wrong terminalsor the wrong breaker.
Method 3: Measure Diameter with Calipers and Convert to AWG (The “Precision Mode” Method)
When the markings are gone and you don’t have a gauge plate handy (or you want a second opinion), measure the conductor diameter
with a caliper. This method is especially useful for solid wire and for confirming a gauge when you’re working with short scraps.
What you need
- Digital calipers (best) or a precise micrometer.
- A wire gauge chart (printed, bookmarked, or saved on your phone).
- A clean conductor: strip insulation carefully and wipe off debris/oxidation if needed.
Step-by-step for solid wire
- Strip the wire so you have a clean, undamaged conductor.
- Zero your calipers before measuring (calipers lie when they’re not resetlike a bathroom scale after the holidays).
- Measure the diameter across the conductor. Take two readings at different angles to confirm it’s round.
- Match the diameter to an AWG chart to identify the gauge.
What about stranded wire?
Stranded wire is trickier because the copper area matters more than the overall “bundle” diameter (which can be influenced
by air gaps and strand arrangement). You have two practical options:
- Option A (practical): Twist the strands tightly into a neat, round bundle and use a gauge plate or compare to known wire.
This is quick and usually good enough for terminals and connectors rated by AWG range. - Option B (more exact): Measure the diameter of a single strand, estimate copper area, and multiply by strand count
(requires patience, good lighting, and the kind of calm usually found in yoga studios).
A quick AWG math note (for the curious and the stubborn)
AWG isn’t linear. Each step changes diameter by a consistent ratio, which is why charts are so handy.
If you love formulas, AWG diameter can be calculated from the gauge number, but for most DIY and shop uses,
measuring and matching to a chart is faster and less likely to end in you arguing with a calculator at 11:47 p.m.
Common Mistakes That Make Wire Gauging Unreliable
- Measuring insulation: The outer diameter of insulated wire tells you mostly about insulation thickness, not conductor size.
This mistake is responsible for at least 40% of “I swear it looked like 12 gauge” stories. - Flattened conductors: If you nicked or crushed the copper while stripping, your caliper reading can be off.
- Stranded vs solid confusion: A stranded wire can look “bigger” than a solid wire of the same AWG because of construction.
Always compare like with like when possible. - Mixed standards: Some wire is sized in metric (mm²) rather than AWG. Don’t assume; check markings or documentation.
- Coatings and plating: Tinned copper and other finishes can slightly affect measurement. Usually it’s minor, but it’s worth noting
if you’re right on the border between sizes.
After You Gauge Wire: A Practical “Does This Make Sense?” Check
Once you’ve identified a wire gauge, sanity-check it against how it’s being used. In U.S. residential wiring,
common rules of thumb align with code requirements for typical branch circuits, but always follow local code,
the project’s design, and manufacturer instructions. If anything feels “off,” treat it as a cluenot an inconvenience.
General branch-circuit expectations
- 14 AWG copper commonly pairs with 15-amp circuits.
- 12 AWG copper commonly pairs with 20-amp circuits.
- 10 AWG copper commonly pairs with 30-amp circuits.
These are general expectations for many everyday situations, not a one-size-fits-all promise. Real-world ampacity depends on insulation type,
temperature rating, installation method, correction factors, and the equipment terminations involved.
When in doubt, consult an electricianespecially for panel work or anything that makes your eyebrows do the “concerned owl” shape.
Voltage drop: the silent troublemaker
Even if a wire is “legal,” long runs can cause voltage dropespecially in low-voltage lighting, automotive setups,
and workshop tools at the far end of an extension. If something runs weak, dim, or hot at the endpoint, consider upsizing the gauge
or shortening the run. Bigger wire reduces resistance and helps your equipment perform closer to its rated specs.
FAQ: Quick Answers for Real-Life Scenarios
Can I gauge wire with a ruler?
Technically, yesbut only if the ruler is precise, the wire is solid, and your eyes are having a good day.
A caliper is far more accurate. A wire gauge tool is faster. A ruler is what you use when you’re stranded
in the “mystery-wire” wilderness with nothing but hope and office supplies.
Do cable jacket colors tell me the gauge?
Sometimesespecially in certain residential cable familiesbut you should treat color as a hint, not proof.
Manufacturers and product lines vary, and the only reliable answer is the printed marking or a measurement.
What if the wire is already installed and I can’t see much of it?
First, prioritize safety: de-energize the circuit and verify. Then look for any printed markings on exposed jacket sections,
in accessible boxes, or on leftover cable tails. If you still can’t confirm, don’t guess for a load-bearing decision.
Pull a known sample or consult a pro.
Conclusion: Three Ways to Gauge Wire Without the Guesswork
If you want the easiest path, read the markings. If you want the quickest hands-on check,
use a wire gauge tool. If you want the most precise measurement from a mystery scrap,
measure the conductor with calipers and match it to an AWG chart.
Once you can gauge wire confidently, everything gets smoother: choosing terminals, matching connectors, sizing fuses and breakers,
and avoiding those “why is this getting warm?” moments. And that’s the real winquietly competent wiring that doesn’t demand attention.
Experiences From the Field: The 500-Word “Yep, I’ve Been There” Add-On
The first time I really learned to gauge wire wasn’t in a neat tutorialit was in a cardboard box labeled “CABLES (DO NOT TRASH)”
that looked like it had survived three moves, one breakup, and a minor flood. Inside were assorted coils of red, black, and “mystery beige”
wire with exactly zero readable markings. I did what any reasonable person would do: I guessed. Then I tried to crimp a terminal on it,
and the wire slid out like it was escaping a low-budget prison movie. That was my sign to stop freelancing and start measuring.
I bought a cheap wire gauge disc and immediately felt like I’d unlocked a life skill that should come standard in adulthood.
The notches were labeled, the wire either fit or didn’t, and suddenly I wasn’t debating whether a conductor was “kinda like 12-ish.”
The funniest part? Half the problem wasn’t the copperit was insulation. Some wires had thick jackets that made them look beefy,
and others had thin insulation that made them look smaller. Once I stripped them, the truth came out. (Wire: the ultimate “don’t judge a book by its cover” lesson.)
The caliper method became my go-to for solid wire scraps. I’d strip a short section, zero the calipers, and measure the conductor.
When the measurement landed close to a common size, I’d still double-check with a gauge plate because real life is messy:
copper can be nicked, oxidized, or slightly out-of-round if you’ve manhandled it. For stranded wire, I learned a new kind of patience:
gently twist the strands into a tight bundle and don’t mash them flat. The moment you squeeze stranded wire with pliers,
you’ve basically turned your “measurement” into abstract art.
The biggest “experience-based” takeaway is this: always do a reality check after you gauge wire. If you think you found 14 AWG on a circuit
that’s protected by a 20-amp breaker, stop and investigate. Maybe you misread it. Maybe it’s a different conductor. Maybe someone did
something unsafe. Either way, that mismatch is a clue worth respecting. The second takeaway is purely practical:
label your leftovers. I now keep a marker in my wire bin and write the gauge on tape the second I cut a piece.
It takes five seconds and saves me from future-me, whodespite having the same namehas the memory of a distracted goldfish.
Finally, a small habit that helps: keep one short, clearly labeled sample each of common gauges (like 10, 12, 14, 16, 18 AWG) in your toolbox.
When you find mystery wire, compare it side-by-side. It’s not as exact as calipers, but it’s fast, surprisingly effective,
and makes you look like the kind of person who has their life together. (Even if your wire box says otherwise.)


