Table of Contents >> Show >> Hide
- Tip 1: Start With the Right Leaves (and Skip the Sketchy Stuff)
- Tip 2: Shred Leaves Strategically (Not Into Dust, Not Into Mattresses)
- Tip 3: Balance Leaves (Browns) With Greens (Nitrogen) So the Pile Actually Moves
- Tip 4: Build a Big Enough Pile to Heat Up (Yes, Size Matters Here)
- Tip 5: Moisture Is the “Hidden Setting” That Controls Everything
- Tip 6: Layer Like You Mean It (and Avoid the Great Leaf Pancake)
- Tip 7: Turn the Pile for Oxygen (and Faster Results)
- Tip 8: Watch Temperature (You Don’t Need to Obsess, Just Pay Attention)
- Tip 9: Keep Pests and Weed Seeds From Hijacking Your Hard Work
- Tip 10: Use a Fall “Leaf Bank” and Consider Leaf Mold for the Easiest Win
- How to Tell When Leaf Compost Is Finished
- How to Use Leaf Compost in Your Garden (Without Wasting It)
- Extra: Fall Leaf Composting “Experience Notes” (About )
- Conclusion
Fall leaves are basically nature’s free soil upgradeyet every year we treat them like a problem to be bagged, dragged, and mysteriously multiplied overnight. (You raked once. How is there a second forest on your lawn?) The truth: leaves are one of the best “brown” ingredients you can add to a compost pile. They’re carbon-rich, abundant, and they break down into dark, crumbly compost that makes garden soil easier to work, better at holding moisture, and friendlier to plant roots.
The catch? Leaves can also be composting’s most talented diva. Whole leaves love to mat into a soggy lasagna layer that blocks air. Dry leaves can sit there like crunchy confetti for months. And if you go “all leaves, no greens,” your pile may quietly turn into a leaf museum exhibit labeled: “Decomposition: Coming Soon.”
This guide walks you through practical, backyard-tested strategies for composting leaves in autumnhot composting for faster results, plus slower “leaf mold” options if you prefer a low-maintenance approach. Expect clear steps, small science explained in plain English, and a few reality checks that will save you from building a pile that smells like regret.
Tip 1: Start With the Right Leaves (and Skip the Sketchy Stuff)
What to collect
Most fallen leaves are excellent compost material: maple, birch, poplar, fruit tree leaves, and many others break down happily when mixed with nitrogen-rich “greens.” If you have a variety, even bettermixing leaf types helps the pile stay fluffier and compost more evenly.
What to avoid or handle carefully
- Leaves treated with persistent herbicides: If your leaves come from lawns, hay, or roadside areas that may have been treated, be cautious. Some broadleaf herbicides can persist in clippings, manure, or compost and can damage sensitive garden plants later (tomatoes and beans are famous “canaries” here).
- Heavily diseased leaves: If you don’t routinely hit hot-compost temperatures, it’s safer to keep disease-heavy material out of the pile.
- Black walnut leaves: These contain compounds associated with plant growth suppression. Many gardeners compost them successfully when the pile gets hot and the compost finishes thoroughlybut if you’re unsure, compost walnut leaves separately or keep their finished compost away from sensitive plants.
Quick rule: if you wouldn’t put it in a veggie bed today, don’t put it in your compost and “hope the microbes sort it out.” Microbes are amazing, but they’re not magicians with tiny liability insurance policies.
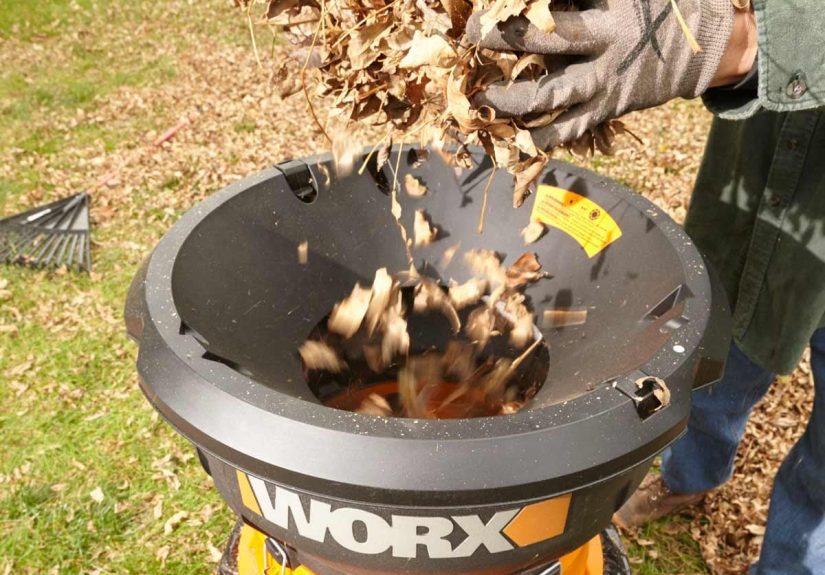
Tip 2: Shred Leaves Strategically (Not Into Dust, Not Into Mattresses)
Smaller pieces break down faster because microbes get more surface area to work onso shredding leaves can noticeably speed up composting. The easiest method is running leaves through a mulching mower and collecting the chopped leaves. A leaf shredder works too.
But there’s a twist: if leaves are shredded extremely fine and piled alone, they can compress and reduce airflow. Compost needs oxygen. Without it, the pile slows down, turns slimy, or develops the kind of odor that makes neighbors suddenly “remember” they left their windows open.
The sweet spot
Aim for “confetti,” not “flour.” If you have a lot of finely shredded leaves, mix them with some coarser material (small twigs, chunky stems, or a handful of woodier browns) and turn the pile regularly to prevent matting.
Tip 3: Balance Leaves (Browns) With Greens (Nitrogen) So the Pile Actually Moves
Leaves are carbon-heavy. Carbon is energy for decomposers, but they also need nitrogen to build proteins and reproduce. Without enough nitrogen, your pile becomes the compost equivalent of eating only crackers: technically food, but nobody’s thriving.
Easy ratio guidance for real life
- By volume: Many home compost guides recommend roughly equal volumes of browns and greens, or about 2–3 parts leaves to 1 part greens depending on what “greens” you’re using.
- Greens that pair well with leaves: fresh grass clippings (thin layers only), kitchen scraps (buried), coffee grounds, garden trimmings, and manure from herbivores (when appropriate and from trusted sources).
If your fall is “all leaves, no greens,” you can still compost: stockpile leaves and add greens over winter, or sprinkle small amounts of a nitrogen source (for example, certain fertilizers) to help kick-start activity. Go lightmore isn’t faster if it turns your pile into a smelly mess.
Tip 4: Build a Big Enough Pile to Heat Up (Yes, Size Matters Here)
Compost piles heat up because microbes generate heat while they work. But small piles lose heat quickly to the surrounding air. If you want faster, hot compostingespecially in cool fall weatherbuild a pile with enough mass to hold heat.
Practical target
A pile roughly 3–5 feet wide, long, and tall is a common sweet spot: big enough to heat, small enough to manage. If you only have a tiny pile, you can still compost, but it will be slower and more dependent on temperature swings.
Think of it like soup: a mug cools fast, a stockpot stays warm. Microbes prefer stockpot vibes.
Tip 5: Moisture Is the “Hidden Setting” That Controls Everything
Decomposers need water to live and move through the pile. Too dry, and the pile stalls. Too wet, and you squeeze out oxygen, inviting anaerobic microbes (the ones that make compost smell like a swampy apology).
The wrung-out sponge test
Grab a handful from the middle of the pile and squeeze: it should feel like a wrung-out spongedamp, but not dripping. If it crumbles and feels dusty, add water. If it drips or oozes, add dry browns and turn to fluff it back up.
Fall tip: leaves can shed water, especially waxy types. Water each layer as you build the pile rather than trying to soak the whole thing later. It’s easier to hydrate a lasagna while you’re assembling it than to pour a gallon on top and hope it finds its way in.
Tip 6: Layer Like You Mean It (and Avoid the Great Leaf Pancake)
The fastest leaf compost piles are mixed piles. If you dump a mountain of leaves in one go, you’re basically crafting a compost-proof blanket. Leaves mat. Matted leaves block oxygen. Oxygen is compost’s love language.
A simple layering pattern
- Start with a “twiggy” base layer for airflow (small sticks or coarse stems).
- Add 3–6 inches of leaves.
- Add 1–3 inches of greens (kitchen scraps buried, grass clippings thinly spread).
- Sprinkle a little finished compost or garden soil (optional “microbe starter”).
- Water lightly, then repeat.
This creates a pile that’s mixed enough to heat evenly, with less risk of dense mats. If you already have a leaf mountain, don’t panicbreak it up with a garden fork and mix in greens plus moisture over a few turning sessions.
Tip 7: Turn the Pile for Oxygen (and Faster Results)
Turning introduces oxygen, redistributes moisture, and moves outer material into the hot center where decomposition is fastest. If you’re aiming for hot composting, turning is a power move.
How often should you turn?
- Fast-track mode: every 1–2 weeks (or whenever the pile cools noticeably after heating).
- Low-effort mode: once a month, or whenever you add a big batch of new leaves.
No, you don’t need a gym membershipjust a sturdy fork and the willingness to do a little “compost Pilates.” Turning is also your best fix for common issues: odors, soggy pockets, or that stubborn layer of leaves refusing to break down.
Tip 8: Watch Temperature (You Don’t Need to Obsess, Just Pay Attention)
A compost thermometer is helpful but not required. Your senses can tell you plenty: a warm center, visible steam on cool mornings, and faster settling are good signs. If you do use a thermometer, “hot compost” commonly lives in the range where decomposition accelerates and many weed seeds and pathogens are reduced when conditions are maintained properly.
When heat is goodand when it’s not
- Good: warm-to-hot core, steady breakdown, pile shrinking over time.
- Too cool: likely too dry, too many leaves, not enough nitrogen, or pile too small.
- Too hot: very high temps can slow things by stressing decomposers; turning helps regulate.
If your pile isn’t heating, don’t assume you “failed composting.” Composting isn’t a test. It’s a recipe. Adjust moisture, add greens, increase pile size, and turn for airflowthen give it time.
Tip 9: Keep Pests and Weed Seeds From Hijacking Your Hard Work
Leaves themselves rarely attract pests. The trouble starts when kitchen scraps are tossed on top like a buffet advertisement. If you compost food waste, especially in fall when critters are in “bulk up for winter” mode, manage it smartly.
Simple defenses that work
- Bury food scraps in the center of the pile and cover with leaves.
- Avoid meat, dairy, fats, and oily foods in backyard piles.
- Weeds: If weeds have seeds, only compost them if your pile reliably gets hot. Otherwise, you may “plant” next year’s weeds with your finished compost.
Also: don’t add pet waste to a typical backyard compost pile. It’s not worth the pathogen risk for home garden use.
Tip 10: Use a Fall “Leaf Bank” and Consider Leaf Mold for the Easiest Win
One of the smartest fall composting habits is building a leaf banka stash of leaves you can use all year as browns. Because the moment you start composting kitchen scraps in winter, you’ll realize you need more browns than you thought. (Leaves are your compost pile’s emergency fund.)
Easy leaf bank ideas
- Store dry leaves in paper yard bags in a shed or garage.
- Use a wire bin or a simple ring of fencing to hold extra leaves.
- Keep a lidded trash can of shredded leaves near your kitchen compost bucket for quick “brown cover”.
Leaf mold: the low-maintenance alternative
If you want a nearly hands-off method, make leaf mold (composted leaves with little or no added greens). It takes longer than hot compost, but it’s fantastic as mulch and soil conditionerespecially for moisture retention. Popular methods include piling leaves in a wire cage or placing damp leaves in perforated bags and letting time do the work.
Hot compost is the fast espresso shot. Leaf mold is the slow-cold brew. Both will improve your garden.
How to Tell When Leaf Compost Is Finished
Finished compost looks dark and crumbly, smells earthy (like a forest after rain), and you can’t clearly identify most of the original materials. A few stubborn leaf veins? Normal. A pile full of recognizable leaves? Not finished.
Quick curing tip
Even when compost looks “done,” letting it sit (cure) for a few weeks can stabilize it and reduce the chance it ties up nitrogen when you apply it. If you’re using compost around seedlings or in potting mixes, curing is especially helpful.
How to Use Leaf Compost in Your Garden (Without Wasting It)
- Top-dress beds: spread 1–2 inches on garden beds and let soil life incorporate it over time.
- Improve planting holes: mix compost with native soil rather than filling holes with pure compost.
- Mulch boost: apply a thin layer around perennials, then top with leaf mulch or wood mulch as needed.
- Compost tea? (Optional): if you do it, keep it simple and use promptly; don’t treat it like a magic potion.
Leaf compost isn’t just “dirt upgrade.” It improves soil structure, encourages beneficial biology, and helps your garden handle both heavy rain and dry spells better. That’s a lot of benefit from something you were about to pay someone to haul away.
Extra: Fall Leaf Composting “Experience Notes” (About )
If leaf composting came with a warning label, it would read: “May cause sudden confidence followed by a mysterious pile of nothing.” That’s not failureit’s the normal learning curve. Here are the most common real-world experiences backyard composters report each fall, plus what typically fixes them.
Experience #1: The Leaf Mattress Problem. Someone dumps three weeks of raked leaves into a bin, congratulates themselves, and returns a month later to find… a compressed, soggy slab. It’s like the leaves formed a union and decided oxygen was not invited. The fix is almost always the same: break it up with a fork, mix in greens (or a small nitrogen boost), and add structurecoarser material, small sticks, or even mixing the pile more thoroughly. Once airflow returns, the pile usually “wakes up.”
Experience #2: “My pile won’t heat, so composting must be fake.” This happens when the pile is too small, too dry, or too leaf-heavy. A lot of people get great results simply by scaling up: combine multiple bags into one larger pile, water as you build, and add greens in layers. The first time a pile steams on a cold morning, it feels like you discovered a backyard superpowerbecause you kind of did.
Experience #3: The Great Grass Clipping Mistake. Grass is a powerful “green,” but thick layers can turn slimy fast. Many gardeners learn (the aromatic way) that grass clippings should be added in thin layers and mixed with plenty of leaves. If the pile smells sour or ammonia-like, it’s often too wet and too nitrogen-rich in pockets. Add dry leaves, turn thoroughly, and the smell usually fades as oxygen returns.
Experience #4: “I added kitchen scraps and now I have… roommates.” Fall is prime time for squirrels, raccoons, and other opportunists. The composters who stay happiest tend to bury scraps deep and cover them with a thick “leaf blanket,” or they compost mostly yard waste outdoors and keep food scraps to a more secure system. The lesson is simple: don’t advertise snacks at the surface.
Experience #5: Leaf hoarding becomes a lifestyle. After one successful season, many gardeners start saving leaves like they’re collecting rare coins. A “leaf bank” becomes a real thing: extra bags tucked behind a shed, a wire ring filled to the brim, or a trash can of shredded leaves ready to balance winter kitchen scraps. The funny part is that it’s not irrational leaves are one of the best browns you can stockpile for year-round composting.
Experience #6: Leaf mold surprise appreciation. Some composters start out chasing fast compost, but end up loving leaf mold because it’s so easy. You toss leaves in a cage or bag, keep them slightly damp, and let time handle the rest. A year later, you’ve got a fluffy, dark soil conditioner that makes garden beds easier to work and helps them hold moisture. It feels like finding money in an old coat pocketexcept the money is made of leaves.
The biggest “experience” takeaway: leaf composting rewards small adjustments. If your pile is slow, it usually needs one (or two) things: more moisture, more nitrogen, more air, or more volume. Fix the limiting factor and the pile almost always starts behaving like compost again.
Conclusion
Leaf composting in fall is one of the simplest ways to turn yard cleanup into garden gold. Start with good leaves, shred (sensibly), balance browns with greens, build a pile big enough to heat, keep moisture at that wrung-out sponge level, and turn for oxygen. Whether you’re chasing hot compost for faster payoff or letting leaves slowly become leaf mold, you’re keeping valuable organic matter on-siteright where your soil can use it.


