Table of Contents >> Show >> Hide
- What Is a Network Server Rack or Enclosure?
- Key Factors to Consider Before You Buy
- The Best Types of Network Server Racks and Enclosures for Different Setups
- Practical Buying Tips and Common Mistakes
- Installation and Maintenance Essentials
- Real-World Experiences With Network Server Racks and Enclosures
- Conclusion: Choosing the Best Network Server Rack for You
If you’ve ever tried to stack a switch on top of a firewall on top of a NAS on top of a router, you already know the truth: at some point, gravity and cable spaghetti will win. That’s where network server racks and enclosures come in. A good rack turns chaos into a tidy, cool, secure, and scalable setupwhether you’re running a home lab in the guest room or a full-blown data center.
In this guide, we’ll walk through what makes a great server rack or enclosure, how to choose the right size and style, which features actually matter, and how to avoid the classic mistakes (like realizing your rack is too shallow after the 90-pound UPS arrives). We’ll also share real-world experiences and lessons learned so you don’t have to find out the hard way.
What Is a Network Server Rack or Enclosure?
A network server rack is a standardized frame designed to hold IT gear such as servers, switches, patch panels, UPS units, and routers. Most modern racks follow the 19-inch EIA standard, meaning the horizontal mounting rails are 19 inches wide and accept standard rackmount equipment. The vertical height is measured in rack units (U), where 1U equals 1.75 inches.
An enclosure (or cabinet) is essentially a rack with walls: typically front and rear doors, side panels, and a top panel. Enclosures improve security, airflow control, and cable management, making them a favorite in server rooms, data centers, and network closets where equipment needs to be protected and presentable.
While 19-inch racks are still the norm for most businesses and home labs, data centers are starting to see wider “open rack” designs for high-density AI and cloud workloads. For most buyers today, though, a standard 19-inch rack or enclosure is still the best fit.
Key Factors to Consider Before You Buy
1. Rack Type: Open Frame vs. Enclosure vs. Wall-Mount
Choosing the best network rack starts with the form factor:
- Open frame racks (2-post or 4-post): Great for network closets and labs where physical security isn’t a big concern. They offer excellent access and airflow. Two-post racks are popular for patch panels and light gear, while four-post racks provide more stability and weight capacity for servers and UPS units.
- Rack enclosures (floor-standing cabinets): These add lockable doors and side panels. They’re ideal when you need security, better airflow control, or a cleaner look. Many enclosures include fan cutouts, cable entry panels, and built-in mounting for PDUs and cable managers.
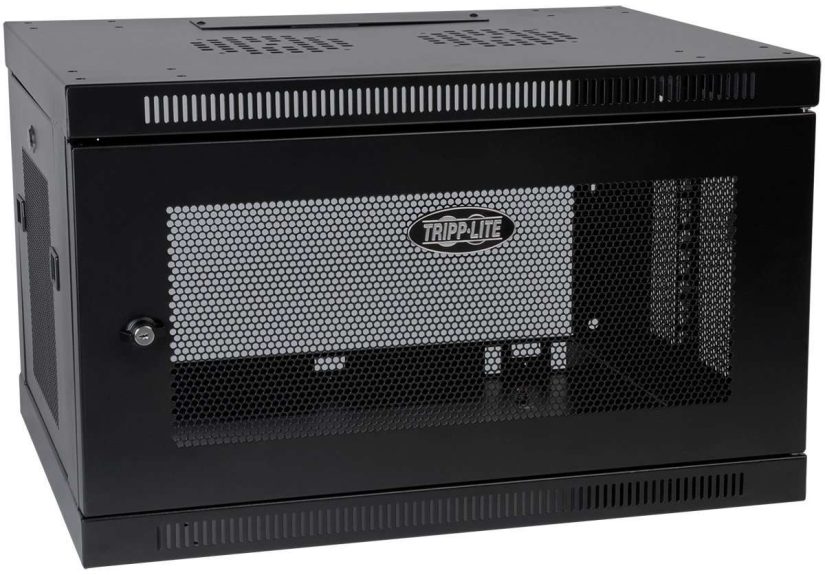
- Wall-mount racks and cabinets: Designed for small network setups, branch offices, and tight spaces. They typically support shallower equipment such as switches, patch panels, and short-depth servers. They’re perfect when you don’t have the floor space for a full-size cabinet.
2. Size: Height (U), Depth, and Width
Server racks come in different heights, commonly 9U, 12U, 18U, 22U, 27U, 42U, or 48U. A 42U rack is the classic full-height data center cabinet, tall enough for multiple servers, switches, and power equipment. Smaller 9U–18U racks are good for home labs, AV closets, and edge deployments.
Depth is just as important as height. Modern servers and UPS units can be long, so you want enough depth for the chassis plus rear cabling and airflow. Many general-purpose rack enclosures are around 36–48 inches deep, while open-frame racks and compact cabinets can be shallower. A good rule of thumb: your rack’s usable depth should be a few inches deeper than your deepest device to allow for cables and rear airflow.
The standard width is still 19 inches for IT gear, although the overall external width of the cabinet may be wider to accommodate side cable channels and airflow paths.
3. Weight Capacity and Build Quality
Not all racks are created equal. The best network server racks publish clear static and rolling weight ratings, often in the 600–2000 lb range for full-size enclosures. If you’re planning multiple servers, a large UPS, and network switches, don’t skimpchoose a rack with solid steel construction, reinforced frames, and quality hardware.
Look for features like:
- Heavy-duty mounting rails with marked U positions
- Adjustable rail depth to match your equipment
- Pre-installed casters and leveling feet for easier placement
- Grounding points for safety and standards compliance
4. Cooling and Airflow Management
Heat is the mortal enemy of electronics. The best server rack enclosures are designed to keep air flowing smoothly:
- Vented front and rear doors or perforated panels to support front-to-back airflow
- Fan cutouts or built-in fans on the top or rear for active exhaust
- Space for blanking panels to block unused rack units and prevent hot air recirculation
- Clear cable routes that don’t block airflow to server intakes
If you’re in a small room, remember that the rack doesn’t make heat disappearit just helps move it away from sensitive components. You may still need air conditioning or dedicated ventilation for higher-density builds.
5. Cable Management and Power Distribution
A rack without cable management is just a very expensive metal coat rack. Good racks and enclosures make it easy to route and organize cables:
- Vertical and horizontal cable managers
- Removable top and bottom panels with knockouts or brush grommets
- Dedicated mounting spaces for PDUs and cable ladders
For power, plan on rackmount PDUs (Power Distribution Units) that mount vertically along the rear or sides of the cabinet. Make sure the rack has enough depth and side clearance to accommodate them, especially if you’re using larger switched PDUs for remote management.
6. Security and Access
If your rack will live in a shared office, lab, or colocation facility, you’ll want locking front and rear doors and lockable side panels to protect your gear. Many of the best network server enclosures use keyed locks by default, and some support more advanced access control systems.
Look for designs that balance security with usability. Being secure is great; being locked out from patching a cable 10 minutes before a maintenance window is not.
7. Future-Proofing and Growth
It’s tempting to buy “just enough” rack today, but most IT environments grow. A few tips:
- Leave 20–30% of your rack units empty for future gear.
- Choose adjustable rails and flexible cable management so you can reconfigure as hardware changes.
- Consider slightly deeper and wider cabinets to accommodate future servers or higher-density equipment.
Large cloud and AI data centers are beginning to adopt wider rack formats to improve power and cooling for dense compute, but for small and mid-size deployments, a high-quality 19-inch rack will stay relevant for years.
The Best Types of Network Server Racks and Enclosures for Different Setups
Instead of naming a single “best rack,” it’s more helpful to match rack types to real-world scenarios. Here’s how to pick an ideal rack or enclosure for your environment.
1. Home Lab and Small Office
For a home lab, small business, or branch office network:
- Height: 9U–18U is usually plenty unless you’re running multiple full-depth servers.
- Depth: Enough to handle your deepest device plus cablesoften 24–32 inches for compact gear.
- Type: A small floor-standing enclosure or a sturdy wall-mount cabinet for switches, patch panels, and a short-depth server or NAS.
Priorities here are low noise, tidy appearance, and easy access. A wall-mount network cabinet with a locking front door and side access panels is ideal if your main gear is switches, patch panels, and routers. Choose a quieter room if possibleno one loves listening to server fans during conference calls.
2. Network Closet in a Growing Business
Once you’re dealing with more users, more switches, and maybe one or two rackmount servers, it’s time to step up:
- Height: 24U–27U or larger to leave room for growth.
- Type: A 4-post open frame rack if the room itself is secure, or a fully enclosed cabinet if not.
- Features: Lockable doors, good airflow (vented doors), vertical cable managers, and mounting points for PDUs.
In this environment, cable management becomes critical. Plan the vertical cable runs, label everything, and keep patch cables manageable lengths. You’ll thank yourself the first time you have to trace a link during a ticket storm.
3. Server Room and Small Data Center
For dedicated server rooms or small data centers, you’ll typically want:
- Height: 42U or 48U full-height enclosures.
- Depth: 36–48 inches to support modern servers and rear cabling.
- Features: Strong frames with high weight capacity, adjustable rails, perforated doors, side cable channels, and robust options for PDUs and environmental monitoring.
The best network server enclosures in this category focus on cooling efficiency, dense cable routing, and ease of deploymentshipping fully assembled, with marked rack units, baying hardware for joining cabinets together, and accessories like blanking panels and cable managers.
4. Edge, Retail, and Remote Locations
For retail stores, remote offices, and other edge deployments where space is limited and security is important:
- Height: 9U–24U.
- Type: Short-depth enclosed cabinets that can fit under counters, in back rooms, or in small closets.
- Features: Lockable doors, solid construction, and enough depth for short servers, firewalls, and switching gear.
Look for enclosures that can be discreetly integrated into office spaces without looking like a mini data center in the corner. Noise and vibration matter more here than in a dedicated server room.
Practical Buying Tips and Common Mistakes
- Measure your space twice, buy once. Check room dimensions, door width and height, elevator size, and clearance for turning a cabinet around corners. Many enclosures are tall and deep enough that getting them into the room is the hardest part.
- Check actual equipment depth. Don’t assume all 1U servers are the same length. Verify the manufacturer’s depth spec and ensure your rack has extra space for rear cabling and airflow.
- Plan power and cooling up front. It’s far easier to install enough PDUs and proper cooling before the rack is full of hot gear.
- Think about where cables will go. Plan vertical and horizontal cable management, fiber trays, and top-of-rack or end-of-row patching strategies.
- Don’t cheap out on weight capacity. Bargain racks can flex or wobble under heavy loads. If you’re mounting multiple servers or UPS units, prioritize sturdy construction and high weight ratings.
- Label everything. While not technically a rack feature, good labeling turns your cabinet from a puzzle into a well-organized system.
Installation and Maintenance Essentials
Once your new network rack or enclosure arrives, there are a few best practices to follow:
- Build or place the rack in its final location. Enclosures can be heavy and awkward to move once fully loaded, so get placement right early.
- Start heavy and low. Install heavy equipment like UPS units and large battery banks at the bottom of the rack for stability.
- Mount rails and slide kits carefully. Make sure rails are level, square, and set to the correct depth before sliding servers into place.
- Use proper cable support. Avoid letting heavy cable bundles hang from ports. Use strain relief bars and cable managers to support them.
- Keep airflow paths clear. Don’t stuff power bricks, cables, or odds and ends in front of server intake vents. Use blanking panels to control airflow where needed.
- Schedule periodic inspections. Check for loose screws, sagging rails, blocked vents, and overloaded PDUs. A quick quarterly walk-through can prevent unpleasant surprises.
Real-World Experiences With Network Server Racks and Enclosures
Theory is nice, but server racks really shine (or fail) in everyday use. Here are some practical experiences and lessons that often separate “good enough” racks from the best network server enclosures.
First, depth and cable space matter more than you think. Many admins have learned the hard way that a “standard” cabinet wasn’t quite deep enough once the rear rails, power cables, and network patch cords were installed. Even if the server technically fits between the rails, you don’t want cables sharply bent or crammed against the back door. Choosing a rack with a bit of extra depthand adjustable railsmakes installations smoother and reduces stress on ports and connectors.
Second, airflow is not optional. In a home lab, it’s tempting to prioritize aesthetics and go with glass-front doors or closed side panels without much ventilation. After a few weeks of warm summer nights and rising fan speeds, many people end up retrofitting vented doors, adding top-mounted fans, or even replacing the cabinet. The best enclosures balance security with generous perforation so servers can do their job without throttling or overheating.
Third, cable management can make or break your relationship with your rack. A well-chosen enclosure will have vertical channels and routing cutouts that naturally guide you toward neat, bundled cable paths. When you can route power down one side and network up the other, with plenty of tie-down points and bend-radius-friendly cable managers, everything from troubleshooting to adding new hardware becomes significantly less painful. The difference between “I can swap that switch in 10 minutes” and “I need a free afternoon and a stress ball” is often just how well the rack supports organized cabling.
In branch offices and remote sites, compact racks and wall-mount cabinets earn their keep. Here, security and discretion are key. A lockable wall cabinet that keeps switches, routers, and small servers out of sight and out of reach of curious hands is usually worth far more than its price tag. Choosing a cabinet with reversible doors, easy side access, and flexible mounting options lets you install it in awkward corners or above eye level without sacrificing usability.
Another recurring lesson is to choose a rack that matches not just today’s hardware, but tomorrow’s projects. Many teams start with one or two servers and a single top-of-rack switch, only to add storage arrays, backup appliances, and extra networking gear over time. The best network server racks support that growth with ample U space, solid weight capacity, and modular accessoriesthings like additional cable managers, blanking panels, and PDUs that can be added without replacing the entire cabinet.
Finally, don’t underestimate the human factor. Features like clearly numbered U markings, removable side panels, and doors that open wide and lift off when needed make day-to-day work easier. When the rack is thoughtfully designed, you spend less time wrestling with metal and more time actually managing your infrastructure. Over the life of the rackwhich might easily be 8–10 years or morethose small convenience features pay for themselves many times over in reduced maintenance headaches.
Put simply, the “best” rack is the one that fits your space, supports your hardware, keeps things cool and secure, and makes your job easier rather than harder. Spending a bit of extra time up front to choose the right network server rack or enclosure will reward you every time you open the door, trace a cable, or slide in a new piece of gear.
Conclusion: Choosing the Best Network Server Rack for You
Picking a network server rack or enclosure isn’t just a hardware purchase; it’s an investment in reliability, organization, and future growth. By focusing on the right rack type, height, depth, weight capacity, airflow, cable management, and security, you can create a clean, efficient environment for your equipmentone that will scale with you instead of holding you back.
Whether you’re wiring up a home lab, taming a wild network closet, or planning a small data center, the best network server racks and enclosures all have one thing in common: they’re built to make your life easier, not harder. Choose thoughtfully now, and your future self (and your cables) will be very grateful.


