Table of Contents >> Show >> Hide
- Why Aged Terracotta Looks So Good
- Before You Start: Pick a Style That Fits Your Space
- Three Proven Ways to Replicate Aged Terracotta Wall Art
- Color Recipe: Getting the Terracotta Tone Right
- Make It Look Old on Purpose: Patina Tricks That Work
- Seal It or Leave It Matte? Choosing the Right Finish
- Mounting and Display: Make It Look Like a Real Find
- Troubleshooting: Common Problems and Easy Fixes
- Hands-On Experiences: What It’s Like to Make Faux Aged Terracotta Wall Art (The Fun, the Fussy, the “Oops”)
- Conclusion
Terracotta has a talent for making a room feel instantly warmerlike it just came back from a long weekend in Tuscany with a good tan and better stories.
The problem? Real aged terracotta wall pieces can be pricey, heavy, fragile, or all three. The good news is you can replicate that sun-baked, timeworn look
with common DIY supplies, a little layering, and a willingness to get a tiny bit dusty (emotionally and literally).
This guide walks you through multiple methods to create faux aged terracotta wall art that looks convincingly old, charmingly imperfect, and
intentionally curatednot “I made this in my garage at 11 p.m.” (Even if you did. No judgment.)
Why Aged Terracotta Looks So Good
Terracotta is basically “baked earth”a porous, fired clay that naturally lands in that warm spectrum from ochre to red. Because it’s often left
unglazed, terracotta wears its life on its surface. That’s exactly what makes it so beautiful: it collects subtle evidence of time.
The color isn’t flatit’s layered
A convincing terracotta finish usually has more than one “clay” color going on: a warm base (burnt orange or rusty red), softened by dusty tan,
smoky brown, and occasional chalky highlights. Real terracotta shifts with light and age, so your goal is depth, not perfection.
Patina happens where life happens
Old pieces look old because edges get worn, raised details catch dust, recesses hold shadow, and porous materials can show pale, powdery deposits
from minerals and salts that migrate with moisture. (In buildings, that white powder is a real phenomenon called efflorescence. For art, we’ll fake
the lookwithout inviting any moisture drama into your walls.)
Before You Start: Pick a Style That Fits Your Space
“Aged terracotta wall art” can mean a lot of things. Decide your vibe first, because it makes the design and finish choices way easier:
- Mediterranean relief: raised arches, leaves, florals, sun motifs, or simple geometric panels
- Artifact-inspired plaques: faux chips, worn edges, imperfect symmetry, “excavated” texture
- Modern terracotta: smoother finish, minimal shapes, subtle patina, clean framing
- Tile illusion: multiple small panels arranged like an antique terracotta installation
If you can’t decide, go with a pair of matching panels. Two pieces instantly look “collected,” like you have a calm, art-buying life that includes
casual trips to flea markets with a linen tote.
Three Proven Ways to Replicate Aged Terracotta Wall Art
Choose the method that matches your patience level, your tools, and how much texture you want. You can also combine methods (the best DIY projects
are basically harmless science experiments with better lighting).
Method 1: Textured Relief Panel (Joint Compound “Clay” Look)
This is the most sculptural approach. You build raised texture first, then paint and patina it until it looks like fired clay that’s lived a full,
interesting life.
Materials
- Canvas, wood panel, MDF, or thick foam board (choose something rigid if you’re adding heavy texture)
- Premixed joint compound (drywall mud) or lightweight spackle
- Putty knife, old credit card, palette knife, or a plastic scraper
- Optional: stencils, air-dry clay shapes, or cardboard cutouts for raised design
- Primer (optional but helpful), acrylic craft paint
- Soft brush, stencil brush, or old chip brush
- Glaze medium (optional), or water for thinning paint into a “wash”
- Clear matte sealer or wax/topcoat (more on sealing later)
Step-by-step
- Prep the surface. If your base has any sheen, scuff-sand it lightly so the compound grabs on. Wipe off dust.
- Create the relief. Spread joint compound in thin layers. If you want a carved look, add a slightly thicker layer and “draw”
lines into it with a palette knife. For an artifact vibe, keep edges irregular and let tool marks show. - Add intentional imperfections. Tap the surface with a stiff brush for pitting. Press a crumpled paper towel lightly for
mottled texture. Drag a scraper to mimic worn areas. Keep it subtleyour art doesn’t need to look like it survived a meteor. - Dry fully. This is where patience pays. Let it dry completely (often overnight). If it cracks, don’t panictiny cracks can
look authentic. Big cracks mean your layer was too thick; patch and re-dry. - Prime (optional) and base coat. Paint the whole piece a warm clay color: think burnt sienna + a little raw umber + a touch
of tan. Two thin coats are better than one gloopy coat. - Build depth with washes. Thin a darker brown and brush it into recesses, wiping back the high points with a rag.
Repeat with a slightly different tone so it doesn’t look “one-note.” - Highlight the high points. Dry brush a lighter terracotta or dusty beige across raised texture. Keep the brush mostly dry.
This is the moment it stops looking like paint and starts looking like clay. - Add chalky “age.” Lightly stipple or dry brush an off-white/taupe onto corners, ridges, and random spots. Focus on places
where dust would collect and edges would wear. - Seal (optional but recommended). Use a matte sealer if you want a stable finish that won’t smudge. If you prefer a softer,
more tactile look, consider waxjust know wax changes how you can topcoat later.
Best for: statement pieces, faux antique plaques, and anything you want to look like it has real depth and weight.
Method 2: Paint + Baking Soda (Fast Faux Terracotta Texture)
If you want a terracotta-like surface quickly, adding baking soda (or baking powder) to paint creates a slightly gritty, mineral texture that reads
surprisingly “ceramic” once it’s dry and layered.
Materials
- Acrylic craft paint (warm terracotta base color)
- Baking soda (start small; you can always add more)
- Mixing cup, brush, optional sponge
- Panel/canvas base
How to do it (without making a crumbly mess)
- Mix a test batch. Combine paint with a small amount of baking soda until it looks like thick, textured paint. If it turns into
paste immediately, you added too much. Add more paint to rebalance. - Apply in thin, textured coats. Brush in different directions to create irregular texture. Don’t overwork it.
- Layer tones. Once dry, add a second coat in a slightly different terracotta shade, then a thin brown wash in recesses.
- Dry brush highlights. Dusty tan on the raised areas makes the texture read as “clay,” not “craft paint.”
- Seal if needed. Some baking-soda mixes can feel chalky. A matte topcoat stabilizes the surface and reduces rub-off.
Best for: quick projects, small panels, and tile-style sets where you want consistent texture without sculpting.
Method 3: Classic Distress + Glaze (Aged Finish, Minimal Texture)
Prefer a smoother, “handled over time” look? Use layered paint, sanding, and glaze to create believable age. This is the method that works well
for more modern homes that still want warmth.
Materials
- Base coat paint (terracotta tone)
- Second coat paint (slightly lighter or slightly different terracotta)
- Fine sandpaper (220 grit)
- Glaze medium (optional) or thin paint wash
- Optional: dark wax or antiquing wax
Step-by-step
- Base coat. Apply your deeper terracotta tone and let it dry fully.
- Second coat. Brush a slightly different tone over the base. Don’t aim for perfect coveragevariation is your friend.
- Distress selectively. Sand edges and high points to reveal hints of the base coat. Stop often; you want “worn,” not “wrecked.”
- Glaze for depth. Brush glaze over small sections, then wipe back, leaving pigment in crevices and corners. This adds instant age.
- Finish with soft highlights. Dry brush dusty beige or off-white very lightly to simulate accumulated “time.”
Best for: framed panels, modern-relaxed interiors, and anyone who wants “antique-ish” without chunky texture.
Color Recipe: Getting the Terracotta Tone Right
If your terracotta looks too orange, it can read like pumpkin decor. If it’s too red, it can look like brick. Aim for warm earth with a little
soot and dust mixed in.
Easy color mixes that look believable
- Classic clay: burnt sienna + a touch of raw umber + a little tan/cream
- Sun-faded terracotta: terracotta + dusty beige + tiny bit of gray
- Antique “artifact” vibe: terracotta base + brown wash + chalky off-white dry brush
- Smoky aged look: terracotta + umber wash + soft black-brown glaze in corners
The secret is layering: two to four thin layers in slightly different tones almost always look more realistic than one “perfect” color.
Make It Look Old on Purpose: Patina Tricks That Work
1) Dry brushing: the fastest “age” illusion
Dry brushing is basically the art of not really painting. Load a brush, wipe most of it off on a paper towel, then skim the surface so pigment
catches only on raised areas. This instantly exaggerates texture and makes your piece look handled and worn.
2) Washes and glazes: depth without drama
A thin brown wash (watered-down paint) settles into crevices and makes details pop. A glaze does a similar thing but gives you longer working time,
so you can wipe and manipulate it before it dries. Use it sparinglylike salt in soup. You can always add more, but too much turns into “mud season.”
3) Chalky highlights: the “dust of centuries” effect
Off-white, stone, and light taupe are your patina power colors. Stipple them lightly near corners and raised motifs. Then blend with a clean, dry
brush so it looks like natural wear, not polka dots.
4) Faux efflorescence (the safe version)
In real masonry, efflorescence is a powdery salt deposit left behind when moisture evaporates from porous materials. For wall art, you want the look
without the moisture. Fake it by dry brushing very thin off-white in a few streaks and spots, concentrating near the “base” of the design and in
crevices. Keep it irregular and subtlelike a whisper, not a snowstorm.
Seal It or Leave It Matte? Choosing the Right Finish
Aged terracotta should look low-sheen. The question is whether you want it to be touchable and “chalky,” or more durable and wipeable.
Wax finishes
Wax can deepen color, add a soft hand-rubbed feel, and help maintain a vintage, matte look. Clear wax protects; dark wax adds instant “grime in the
details” (in a good way). The big caution: once you wax, many topcoats won’t bond well over it. Wax is often the final stop.
Matte topcoats (water-based)
If you want durability and less rub-offespecially on baking-soda texturesa matte protective topcoat is practical. A water-based clear coat can
protect without adding much shine. Always test first, because some sealers deepen color more than you expect.
My practical rule
If the piece will hang where nobody touches it, you can keep it mostly raw-looking (or use minimal sealing). If it’ll be bumped, dusted, or moved,
a matte topcoat reduces maintenance and keeps the patina from turning into “mysterious beige on your fingertips.”
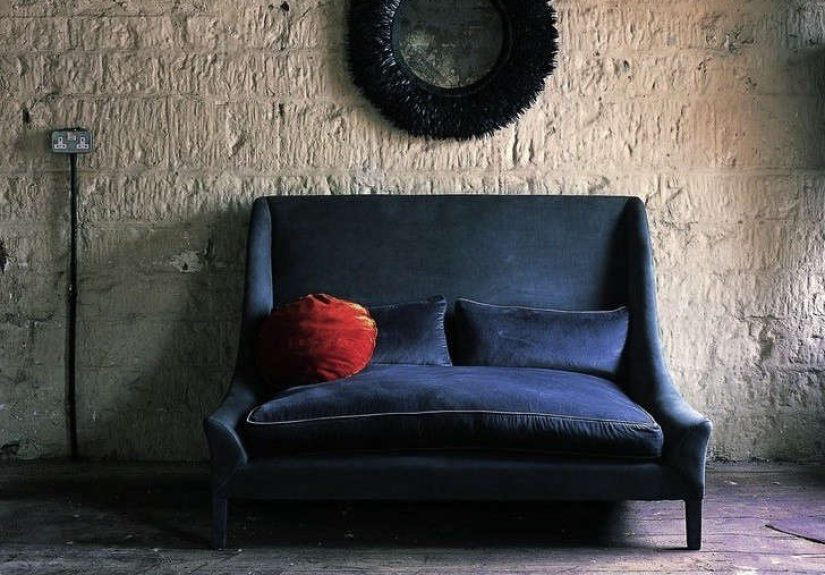
Mounting and Display: Make It Look Like a Real Find
- Float-frame it: a simple wood frame makes a DIY panel look gallery-worthy.
- Pair pieces: two panels side-by-side reads curated and intentional.
- Use warm lighting: texture comes alive with angled lighttry a picture light or nearby sconce.
- Mix materials: terracotta art looks great near linen, wood, black metal, and natural stone.
Bonus styling trick: hang your piece slightly lower than you think. Artifact-style art looks more convincing when it feels integrated into the room,
not perched up near the ceiling like it’s avoiding conversation.
Troubleshooting: Common Problems and Easy Fixes
Problem: The texture cracked a lot
Thick compound layers are the usual culprit. Patch cracks with a thin skim of compound, let dry fully, then repaint and re-patina. Tiny cracks can
be charming; giant fissures are a cry for thinner layers.
Problem: Paint is peeling or not sticking
Smooth or glossy surfaces need scuff-sanding so new layers can bond. If you skipped prep, lightly sand, wipe clean, prime, and repaint.
Problem: It looks “flat” and fake
Add depth: a darker wash in recesses, then a lighter dry brush on high points. Terracotta looks real when it has shadows and highlights in the right places.
Problem: The finish feels dusty or rubs off
Seal with a matte topcoat, or use wax appropriately. Test your finish on a corner first so you don’t accidentally add unwanted shine.
Hands-On Experiences: What It’s Like to Make Faux Aged Terracotta Wall Art (The Fun, the Fussy, the “Oops”)
The first thing you learnusually within five minutesis that “terracotta” is not one color. In your head it’s a single warm clay shade. On an
actual finished piece, it’s more like a tiny committee of browns, oranges, tans, and dusty neutrals negotiating a peace treaty. When I tried doing
one perfect coat of “terracotta paint,” it looked like a brand-new flowerpot that had never experienced weather, time, or even a mildly interesting
Tuesday. The fix wasn’t buying a different paint color. It was layering.
My favorite “aha” moment happened with dry brushing. I used to treat dry brushing like a final optional steplike parsley on pasta. Then I did one
pass of dusty beige across raised texture and watched the whole surface suddenly read as ceramic instead of craft paint. It’s almost unfair how much
realism you get from barely applying any paint at all. The key is restraint: if your brush is leaving obvious strokes, it’s not dry brushing; it’s
just brushing with commitment issues.
The second surprise: joint compound is incredibly forgiving, right up until it isn’t. Thin layers are friendly, cooperative, and dry predictably.
Thick layers are dramatic. They crack, they shrink, they punish impatience. The best workflow I found was doing texture in stagesone layer to
establish a general relief, then smaller additions for details the next day. That approach also makes the piece look more authentic because real
terracotta reliefs rarely have perfectly uniform depth. Little variations feel handmade.
If you try the paint-and-baking-soda method, mix a small batch first. The texture can go from “subtle ceramic grit” to “crumbly cookie dough” fast,
depending on paint thickness, brand, and how enthusiastic you are with the baking soda. I had one test patch that looked amazinguntil I brushed it
after drying and it shed tiny grains like it was trying to become beach sand. A matte topcoat solved that, but the real lesson was to add the baking
soda gradually and keep the coats thinner than you think.
Patina is where your personality shows up. I leaned into the “found object” look by darkening recesses with a brown wash, then wiping back until it
looked like shadow, not mud. After that, I added chalky highlights sparingly, mainly on corners and raised edges. The temptation is to do the
satisfying part everywheremore highlights, more “age,” more drama. But the pieces that looked most realistic were the ones where I left some areas
calmer. Real aging is uneven. It has quiet spots.
The most entertaining mistake I made was trying to “improve” a piece that was already good. I added one extra dark glaze pass thinking it would
make it richer, and suddenly my warm terracotta looked like it had been stored in a fireplace. I rescued it with a gentle dry brush of the base
color and a soft tan over the top, but I also learned the best DIY motto: stop when it looks good, not when you feel like you’ve done enough steps.
(Your wall art does not get extra credit for suffering.)
Finally, display matters more than I expected. Hanging the piece near warm light made the texture pop and the color feel deeper. Putting it in a
simple frame made it look intentional instead of “mysteriously textured board.” And pairing two panels together instantly elevated the whole thing:
suddenly it wasn’t a craft projectit was a collection. The point isn’t to trick someone into thinking it’s a 200-year-old artifact. The point is
to create something that delivers that same cozy, earthy, timeless feeling every time you walk past it.
Conclusion
Replicating aged terracotta wall art is less about one magic product and more about smart layering: a warm base, realistic shadows, soft dusty
highlights, and just enough imperfection to feel honest. Start with the method that fits your styletextured relief for drama, baking-soda paint for
speed, or distressed glazing for subtletythen let patina do the heavy lifting. Your goal isn’t “perfect.” It’s “believably lived-in.”
And if anyone asks where you found it, you’re allowed to smile mysteriously. That’s just good interior design manners.