Table of Contents >> Show >> Hide
- Why a Propagation Station Is the Most Satisfying “Set It and Watch It” Project
- Pallet Boards: The “Free Wood” That Needs a Background Check
- Tools and Materials
- Pick Your Build Style: Three Designs That All Start With Pallet Boards
- Step-by-Step: Build a Plant Propagation Station From Pallet Boards
- How to Use Your Propagation Station (So You Actually Get Roots)
- Make It Look Finished (Even If Your Workshop Is a Mess)
- Quick FAQ
- Conclusion: Your Cuttings Deserve Better Than Random Cups
- Experiences and Lessons From DIY Propagation Stations (500+ Words)
If you’ve ever stared at a pothos vine and thought, “I could definitely turn this into a small jungle,” you’re already halfway to owning a propagation station.
The other half is realizing you don’t need a fancy boutique rack to grow roots in wateryou need a few cuttings, some glass tubes (or jars), and a
piece of pallet wood that’s ready to become the MVP of your windowsill.
This guide walks you through building a plant propagation station from pallet boards that looks intentional (not “I found this behind a store”),
works beautifully, and keeps your cuttings organized instead of scattered across random mugs. We’ll cover pallet safety, a few design options,
step-by-step building, and how to use your station so your cuttings root instead of… auditioning for a science-fair mold exhibit.
Why a Propagation Station Is the Most Satisfying “Set It and Watch It” Project
Plant propagation is basically gardening’s version of copy-and-paste. You take a cutting, give it the right conditions, and it grows roots and becomes a new plant.
A dedicated station makes this easier because it:
- Organizes your cuttings so you can track what’s rooting and when.
- Improves success rates by keeping jars stable and nodes properly submerged.
- Turns plant chores into decor (yes, you can have “functional” and “cute”).
- Makes gifting effortless: hand someone a rooted cutting and watch them become a plant person in real time.
Plant Science in Plain English: The Node Is the Whole Point
For most common houseplants, new roots form from a nodethe spot on a stem where leaves attach and growth buds live.
No node usually means no new plant (just a sad leaf slowly giving up). If you’re unsure, look for a little bump, joint, or leaf scar on the stem and
cut just below it. Keep at least one node under water when you’re rooting in water.
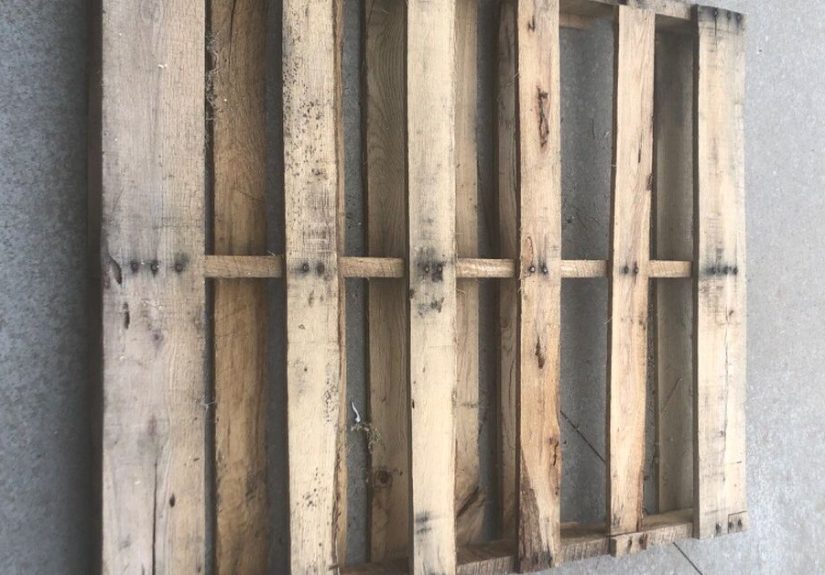
Pallet Boards: The “Free Wood” That Needs a Background Check
Pallet boards are awesome because they’re sturdy, rustic, and often free. They’re also mysterious. Your job is to make sure the pallet you use is
the kind that carried something boring like paper towelsnot something that would make your cuttings write dramatic goodbye letters.
How to Read Pallet Stamps (The Tiny Ink That Matters)
Many pallets used in international shipping have an ISPM 15 mark that includes a treatment code. For DIY indoor projects:
- Choose “HT” pallets (heat treated). This is generally considered the safer option for hobby projects.
- Avoid “MB” pallets (methyl bromide fumigated). Skip these entirelyespecially for indoor use.
- No stamp? Treat it as unknown. That doesn’t automatically mean unsafe, but it does mean you can’t verify treatment.
Quick Pallet Selection Checklist
- Pick pallets that are dry, clean-looking, and odor-free.
- Avoid pallets that are painted, heavily stained, or oily (unknown history).
- Skip anything with visible mold, weird residue, or a smell that screams “industrial mystery.”
- If you’re building a station for rooting edible herbs, consider using new wood (or a verified clean source) for extra peace of mind.
Tools and Materials
Materials
- Pallet boards (enough for one backing board and optional shelf pieces)
- Glass test tubes (or small jars/vases) + optional tube holders
- Wood glue (optional, depending on design)
- Wood screws (1¼” to 2″ range, depending on thickness)
- Wall-mount hardware (D-rings, keyhole hangers, or a French cleat)
- Finish: water-based polyurethane, wipe-on poly, or furniture wax (choose low-odor indoor-friendly finishes)
- Felt pads or a drip tray (optional, but your furniture will send thank-you notes)
Tools
- Work gloves and eye protection
- Pry bar (or pallet buster) and hammer
- Drill/driver
- Forstner bit (commonly 1″ for many test tubes, but measure yours)
- Measuring tape, pencil, and square
- Sandpaper or an orbital sander (80/120/180 grits)
- Hand saw, miter saw, or circular saw
- Stud finder (if wall mounting)
Pick Your Build Style: Three Designs That All Start With Pallet Boards
Option A: Countertop “Bar Rail” Station (Easiest)
A single thick board with drilled holes that hold test tubes upright. Great for shelves, windowsills, and plant stands.
Minimal parts, maximum satisfaction.
Option B: Wall-Mounted Station (Most Instagrammable)
A backboard mounted to the wall with a front rail (or drilled shelf) to hold tubes. This keeps your cuttings out of pet reach
and makes your plants look like a living art installation.
Option C: Mini “Shelf + Tube Row” Station (Most Practical)
Add a shallow shelf under the tube row for rooting hormone, labels, snips, or tiny plant clippers. It’s a propagation station and
a command center.
Step-by-Step: Build a Plant Propagation Station From Pallet Boards
Step 1: Break Down the Pallet Safely
Wear gloves and eye protection. Pallet wood loves hiding splinters like it’s a competitive sport. Use a pry bar (or pallet buster) to lift boards.
Go slow to reduce splitting. If boards fight back, switch tactics: tap nails slightly to loosen their grip, pull them with end nippers or a nail puller,
and keep your hands out of the “pinch zone.”
Step 2: Clean and Prep the Boards
Brush off dirt and debris, then wipe with a damp cloth. Let the wood dry fully before sanding or finishing.
Sand the faces and edgesespecially where hands will touchstarting around 80 grit and working up to 180 grit for a smoother feel.
You can keep a little rustic texture, but aim for “farmhouse charming,” not “splinter roulette.”
Step 3: Plan Your Dimensions (Here’s a Reliable Example)
You can scale this up or down, but here’s a practical layout that works well for a typical home setup:
- Backboard (optional for wall mount): 24″ wide x 8″ to 10″ tall
- Tube rail (drilled piece): 24″ wide x 3½” to 4½” tall
- Tube spacing: 2½” to 3″ center-to-center (prevents leaf crowding)
- Number of tubes: 6 to 10 across, depending on tube diameter
If you’re using test tubes, measure the outer rim diameter. Your hole should be just big enough for the tube to slide in and rest securely.
If you’re using small jars, you may skip drilling and use a shelf with a lip or a wood strip “fence” to keep them from tipping.
Step 4: Drill the Tube Holes
Clamp the wood securely. Mark a straight line where the tube centers will go. Use a Forstner bit sized to your tubes.
Many DIYers use a 1″ Forstner bit for common test tubes, but your hardware should lead this decisionnot vibes.
- Depth: Drill about ½” to ¾” deep for most test tubes (deep enough to stabilize, shallow enough to keep tubes easy to remove).
- Clean edges: Drill slowly to prevent tear-out. A scrap board underneath helps reduce splintering on the exit side.
- Test fit: Try one tube before drilling the whole row. This one step saves big “why is nothing fitting?” energy.
Step 5: Assemble the Station
For a countertop station, you can stop at a single drilled board. For a wall or shelf build:
- Attach the drilled rail to the backboard with screws from the back (cleaner look) or from the front (easier).
- If adding a shelf, screw a second pallet board below the tube rail and support it with small side braces or a back cleat.
- Check stability by placing empty tubes in the holes and gently wiggling the assembly (technical term: the “please don’t fall” test).
Step 6: Finish for Indoor Use
Because this station will live around water, a protective finish helps prevent swelling, stains, and water rings. A water-based polyurethane is a common
choice for indoor projects because it dries relatively fast and tends to have lower odor than some alternatives.
- Apply thin coats, let dry, lightly sand between coats if needed, and finish with 2–3 coats.
- If you prefer a matte rustic look, furniture wax can work, but remember it’s less water-resistant than a film finish.
- Let the finish cure fully before putting water-filled tubes in place.
Step 7: Mount It (If Wall-Mounted)
Water is heavier than it looks, especially when it’s multiplied by eight little test tubes and the confidence of a new DIYer.
Use wall anchors rated for the load or mount into studs. D-rings, keyhole hangers, or a French cleat all work well.
Keep the station level so tubes sit evenly and don’t lean like they’re auditioning for a domino trick.
How to Use Your Propagation Station (So You Actually Get Roots)
Choose Plants That Love Water Propagation
Many common houseplants root readily in water. Reliable starters include pothos, philodendron, tradescantia (wandering dude),
coleus, spider plant plantlets, and some vining aroids. Herbs like basil can also root in water when cut correctly and kept in bright, indirect light.
Make the Cut Correctly
- Use clean, sharp snips or pruners.
- Cut just below a node.
- Remove leaves that would sit under water (submerged leaves rot and foul the water fast).
- Place the cutting so at least one node is under water.
Light, Water, and Timing: The “Not Too Much, Not Too Little” Rule
Most cuttings do best in bright, indirect light. Direct sun can heat the water and encourage algae. Dim light can slow rooting.
Keep the water freshmany horticulture guides suggest changing or refreshing water regularly (often every few days to about a week),
especially if it gets cloudy or smelly.
When to Transfer to Soil
There isn’t one universal “perfect” root length, but a practical approach is to transplant when roots are clearly established and not just tiny nubs.
Some guidance suggests moving water-rooted cuttings to soil when roots are still relatively short (around the half-inch range) to help them adapt,
while other common houseplant advice encourages waiting until roots are a couple inches long for sturdiness. The sweet spot often depends on the plant.
- Good sign: roots are branching or multiple roots have formed, not just one long strand.
- Transition tip: keep the soil evenly moist for the first 1–2 weeks after potting to reduce transplant shock.
Troubleshooting Common Water Propagation Problems
- Cloudy water: change it, rinse the tube, and remove any submerged leaves.
- Stem rot: trim back to healthy tissue, let the cut end dry briefly, and restart with clean water.
- Algae: move to less direct light, refresh water, and consider using opaque tubes or wrapping the bottom portion.
- No roots after weeks: double-check that a node is submerged, increase indirect light, and try a fresh cutting.
Make It Look Finished (Even If Your Workshop Is a Mess)
Small Upgrades That Add Big “Designer” Energy
- Label everything: painter’s tape flags or tiny plant tags keep you from guessing later.
- Add a drip solution: a slim tray or coaster under the station protects surfaces.
- Use a matching tube set: identical tubes make even the wildest cuttings look curated.
- Consider a small grow light: if you don’t have bright windows, a compact LED grow light can help indoors.
Quick FAQ
Do I need rooting hormone?
Not alwaysmany plants root fine in water without it. Rooting hormone is more commonly used for soil or other media and can help speed rooting for certain cuttings.
If you use it, follow the label directions and keep containers clean to avoid contamination.
How often should I change the water?
Refresh it regularly and use your senses: if it’s cloudy, smelly, or growing algae, change it. Many guides recommend changes every few days to about weekly,
depending on conditions and plant type.
Is pallet wood safe indoors?
Use common-sense screening: choose clean, dry pallets; avoid “MB” treated pallets; and avoid pallets with paint, spills, or strong odors.
Sand and seal the wood for a smoother, more water-resistant finish.
Conclusion: Your Cuttings Deserve Better Than Random Cups
A plant propagation station from pallet boards is one of those rare DIY projects that’s budget-friendly, genuinely useful,
and weirdly addictive. You’ll start with “I just want to root this pothos,” and suddenly you’re labeling tubes like a tiny plant laboratory
and giving away cuttings like party favors.
Build it simple or dress it up. Either way, you’ll end up with a piece that turns propagation into a tidy, beautiful routineand gives your plants
a proper place to multiply their leafy little dynasty.
Experiences and Lessons From DIY Propagation Stations (500+ Words)
People often assume the hardest part of this project is the drilling. In reality, the most “character-building” moments usually happen before the drill bit
even comes outright when you meet your pallet. A common experience is discovering that not all pallet boards are created equal. Some come apart cleanly,
almost politely. Others splinter, crack, and cling to nails like they’re emotionally attached. The workaround most DIYers learn quickly is to slow down,
pry from multiple points, and accept that you might sacrifice one board to save three. It’s not failure; it’s woodworking tuition.
Another classic lesson is hole sizing. Many first-time builders drill holes based on what the internet used (often 1″) and then realize their test tubes
are slightly wideror worse, slightly narrower. Too tight and the tube won’t seat properly; too loose and it wobbles like it’s trying to escape.
The “aha” moment is realizing you can design around the glass you actually own: measure the rim, test on scrap, and only then commit to the final rail.
If the holes end up a hair too big, some makers add a thin cork strip, a rubber grommet, or even a neat wrap of jute twine around the tube neck
to snug things up without redoing the entire piece.
On the plant side, there’s a predictable emotional arc: excitement, obsession, mild panic, then victory. Early on, people tend to crowd the station because
empty tubes feel like wasted potential. The result is a leafy traffic jam where leaves overlap, block light, and drop into the water. That’s when the water
clouds faster and stems get mushy. The fix is simple but not always intuitive: fewer cuttings per row, more spacing, and a strict “no leaves underwater” rule.
Once builders enforce that rule, the station starts behaving like a real propagation tool instead of a tiny swamp simulator.
Placement is another learning curve. The most beautiful spot for a propagation stationright in a sunny windowcan also be the spot that triggers algae growth
because sunlight hits the water directly. Many DIYers eventually move their station a few feet back from the glass, or to a window with bright, indirect light,
and suddenly the tubes stay clearer longer. Some even rotate tubes weekly, giving each cutting a turn in the “best seat” without cooking the water.
One of the most satisfying experiences people describe is watching the first healthy roots appear and realizing the station has changed their habits.
Instead of taking random cuttings and forgetting them, they start making cleaner cuts, labeling varieties, and timing transfers more thoughtfully.
That usually leads to better survival rates when moving cuttings to soil. A helpful routine many adopt: refresh water on a set day, rinse tubes quickly,
and inspect roots for branching before potting up. It’s a five-minute ritual that keeps the station looking good and functioning well.
Finally, there’s the unexpected social side: once you have a tidy propagation station, people notice. Friends ask for cuttings. Neighbors ask what you built.
And suddenly you’re handing someone a rooted pothos like it’s a tiny green handshake. That’s the hidden payoffthis project isn’t just decor.
It’s a repeatable system that turns one plant into many, and makes the whole process feel organized, approachable, and honestly kind of fun.


