Table of Contents >> Show >> Hide
- What Is a High Gloss Dutch Door, Exactly?
- Inside the Dutch Door Paint Kit (and Other Great Options)
- Planning Your Palette: Color Ideas for Glossy Dutch Doors
- Step-by-Step: How to Paint a High Gloss Dutch Door
- Styling Around Your Glossy Dutch Door
- Real-Life Lessons from High Gloss Dutch Door Projects
- Glossy Dutch Doors: Small Project, Big Impact
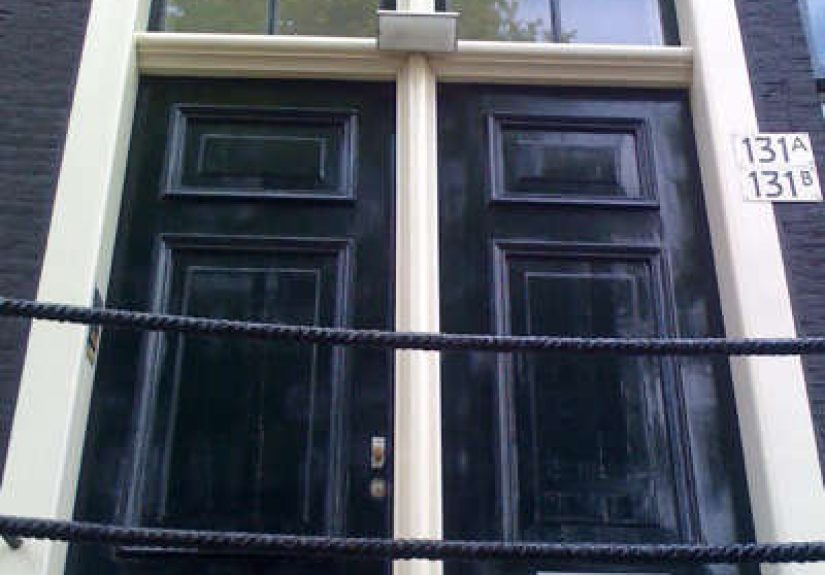
If you’ve ever walked down a historic European street and caught yourself staring at the doors instead of the architecture, you’re not alone. High gloss Dutch doors have that effect: part sculpture, part welcome sign, and part “please admire my excellent taste from the sidewalk.” Inspired by the shiny black entries you see in Amsterdam and beyond, a high gloss Dutch door is an easy way to give your home serious curb appeal without a full renovation.
This guide walks you through everything you need to know about high gloss Dutch doors, from choosing paint and palette to prep, application, and real-world lessons learned. Think of it as your Remodelista-style playbook for turning an ordinary door into a glossy showpiece.
What Is a High Gloss Dutch Door, Exactly?
A Dutch door is a door that’s split horizontally so the top and bottom halves can operate independently. You can swing the top open for fresh air and conversation while keeping the bottom closed to corral kids, pets, or the occasional runaway Amazon package. Originally popular in farmhouses for ventilation and security, Dutch doors are now a favorite in cottage, coastal, Craftsman, and modern homes alike.
When you pair that split design with a high gloss finish, you get something special: a door that behaves like furniture and reflects light like lacquer. The glossy sheen highlights every panel and profile, turning a simple entry into a focal point.
Why the Dutch Love Gloss (and Why You Might, Too)
In the Netherlands, high-gloss painted doors are practically a national sport. The shine isn’t just for dramait’s also practical. High gloss enamel is exceptionally durable, resists weather, and is easy to wipe clean, making it ideal for front doors that battle sunlight, rain, and the occasional muddy paw swipe.
That combination of beauty and longevity is exactly what’s behind the Remodelista obsession with glossy Dutch doors: they look luxurious and they wear well.
Inside the Dutch Door Paint Kit (and Other Great Options)
The original Remodelista story highlights Fine Paints of Europe, the North American importer of high-end Dutch paints known for intense pigments and glassy finishes. Their Dutch Door Kit is designed as a one-box solution for creating that Old World gloss at home.
What You Typically Get in a Dutch Door Kit
- Primer matched to your door material (wood, fiberglass, or metal).
- High gloss enamel paint, often an oil-based or hybrid enamel such as Hollandlac Brilliant, known for extreme shine and a hard, durable shell.
- Mineral spirits or thinner for clean-up and fine-tuning viscosity.
- Quality brush suitable for high-gloss leveling.
- Sandpaper in multiple grits (typically medium for initial prep and very fine for between coats).
- Step-by-step instructions tailored to glossy doors, including dry times and sanding tips.
This kind of kit removes a lot of guesswork: you’re not standing in the paint aisle wondering which primer works with which enamel, or whether your bargain brush will leave bristles as a permanent “texture.”
Other High Gloss Door Paints to Consider
If you’re not using a pre-curated kit, you still have great options. Homeowners and pros frequently turn to:
- Fine Paints of Europe Hollandlac Brilliant for an ultra-glossy, almost mirror-like oil finish that demands excellent prep but delivers stunning results.
- Sherwin-Williams Emerald Urethane Trim Enamel, a water-based enamel designed for doors and trim that cures hard, resists yellowing, and can be used indoors or out.
- Benjamin Moore Advance Interior Enamel, a popular choice for doors and trim because it levels well, dries hard, and behaves more like an oil in terms of durability but cleans up with soap and water.
- Full Gloss finishes from European-style brands like Farrow & Ball, which offer ultra-high-gloss water-based enamels that work indoors and out and are often used on statement-making front doors.
The right choice for you depends on your comfort level (oil vs. water-based), local climate, and how patient you are with longer dry times.
Planning Your Palette: Color Ideas for Glossy Dutch Doors
Picking the color might be the most funand the most paralyzingpart of the project. High gloss amplifies color, so whatever you choose will feel richer and more dramatic than the same shade in a matte finish.
1. Classic Neutrals
If you want timeless curb appeal, you can’t go wrong with glossy black, charcoal, or deep navy. These colors frame glass panes beautifully and work with both traditional and modern architecture. They also pair smoothly with most siding colors, from white clapboard to painted brick. Many design features on Dutch door roundups highlight how a dark, glossy door anchors a light façade.
2. Moody, Inky Hues
Charcoal blue, bottle green, or a near-black plum look incredible in high gloss. They read neutral from afar but reveal depth and personality up closeespecially when the sun hits that shiny surface. Think “classic with a twist,” not “shouting from the street.”
3. Playful Pastels and Coastal Blues
For cottage, beach, or farmhouse styles, consider powder blue, robin’s egg, or soft teal. A high-gloss pastel Dutch door feels friendly and less formal, perfect for open-door living between kitchen and porch. Many real-world examples show pale blue Dutch doors framed by white trim and flanked by simple plantersa look that feels bright without being loud.
4. Bold Historic Colors
High gloss is fearless enough to handle a saturated red, pumpkin, or golden yellow. Rich, heritage-inspired colorslike a deep tulip red or punchy Dutch orangebring that European townhouse energy right to your doorstep and look fantastic in shiny enamel.
Whichever direction you choose, always test your color in real daylight and on both halves of the door. A chip in the paint aisle doesn’t account for porch shadows, surrounding greenery, or the cool cast of northern light.
Step-by-Step: How to Paint a High Gloss Dutch Door
High gloss paint is glamorous but unforgiving. The shine will happily highlight every ding, drip, or patchy brush stroke. The secret: think prep, not shortcuts.
1. Choose the Right Product and Conditions
- Pick a high-quality enamel designed for doors and trim (oil or hybrid for maximum flow and hardness, or a premium water-based enamel for easier cleanup).
- Check the label for recommended temperature and humidity. Ideally, you’re painting around 70–77°F with moderate humidity; high moisture can extend drying times, ruin adhesion, and lead to future peeling or mildew.
- If you live in a very humid climate, use a dehumidifier or pick a cooler, drier day.
2. Remove Hardware and Prep the Surface
- Take the door off the hinges if possible, especially if you’re aiming for a mirror-like finish. Lay it flat on sawhorses so gravity works in your favor.
- Remove hardware or carefully tape around it with painter’s tape.
- Clean the door with a degreaser to remove oils, fingerprints, and atmospheric grime.
- Sand the surface with medium-grit sandpaper to scuff any existing finish, then vacuum and tack-cloth everything until dust-free.
With high gloss enamel, “good enough” prep is never actually good enough. Products like Hollandlac Brilliant will proudly showcase any dust nib or patchy sanding job, so spend more time here than feels reasonable.
3. Prime Like a Pro
- Apply the primer recommended by your paint manufacturerusually a bonding or undercoat primer designed to pair with your enamel.
- Prime all exposed edges, including the top and bottom of the door, to help prevent moisture intrusion and extend the life of the finish.
- Allow primer to dry fully, then lightly sand with fine-grit paper (220–320) for a silky base.
4. Apply High Gloss Paint in Thin, Confident Coats
- Use a high-quality brush or a fine-finish roller rated for enamels. Some pros prefer brushing for better control around panels; others mix rolling large areas with tipping off by brush.
- Work in sections: panels first, then rails and stiles, always brushing into wet edges to avoid lap marks.
- Keep coats thin. High-gloss enamels are often self-leveling; too much paint at once encourages sags and drips rather than a smoother finish.
- Let each coat dry the full recommended time (sometimes overnight), then sand lightly with very fine paper before the next coat.
Two to three coats are typical for a deep, even shine, especially with dark or saturated colors.
5. Let It Cure Before Heavy Use
Even when the paint feels dry to the touch, enamels can take days or weeks to fully cure. During this time:
- Avoid slamming the door or leaning heavy objects against it.
- Skip adhesive hooks, wreath magnets, or tape until the finish is fully hardened.
- Operate the Dutch halves gently so you don’t stick fresh paint together.
Your patience will be rewarded with a finish that feels like a factory-coated door rather than a rushed weekend project.
Styling Around Your Glossy Dutch Door
Once the door is gleaming, a few details will finish the look:
- Hardware: Choose knobs, latches, and hinges that suit both halves of the doorusually a standard handle below and a latch or deadbolt above. Modern black hardware looks crisp against pale doors; brass feels warm and traditional against darker hues.
- Lighting: A simple sconce or lantern keeps the door the star while adding symmetry and warmth.
- Planters: Tall planters or a pair of low pots flanking the door echo classic Dutch and cottage entries.
- Entry mat: A tailored mat in a simple pattern grounds the space and protects your newly painted threshold.
Inside, treat the top of the Dutch door like a mini shelf when it’s closed: a vase of flowers or a small framed artwork nearby makes the whole interior view feel curated.
Real-Life Lessons from High Gloss Dutch Door Projects
The glossy photos are inspiring, but the real wisdom comes from what happens behind the scenes. Here are some lived-in lessons drawn from homeowners, painters, and the realities of high-gloss enamels.
The Impatient DIYer’s Surprise
One common story: the weekend warrior who rushes the prep, slaps on thick coats of enamel, and then panics when the door looks streaky. The good news is that high-quality enamels are engineered to self-levelif you give them thin coats, the right working time, and a dust-free surface. When people slow down, sand between coats, and respect dry times, the transformation from “oh no” to “oh wow” is dramatic.
The Coastal Cottage Reality Check
In seaside or humid climates, glossy doors are a smart choice because they’re easy to wipe down and hold up well to salt spray and grime. But humidity is still the boss. Paint applied on a muggy afternoon can take much longer to cure and is more prone to tackiness or future peeling. Savvy homeowners watch the weather, run dehumidifiers, and sometimes break the project into two days to paint in the driest windows.
Kids, Dogs, and the Bottom Half of the Door
If you’re installing a Dutch door as a stylish “baby gate,” expect the bottom half to take the brunt of fingerprints, paw prints, and backpack bumps. This is where your choice of enamel really pays off. Hard-curing products like Hollandlac Brilliant or premium urethane enamels are easier to scrub without dulling the shine. Families often report that a quick wipe with a damp cloth restores the door to showroom statussomething flat paint could never claim.
Common Mistakes to Avoid
- Skimping on prep: Every shortcut shows. Invest more time in sanding, cleaning, and priming than you think you need.
- Using the wrong roller or brush: Cheap tools can leave texture, bubbles, or shed bristles into the finish.
- Ignoring the edges: Unprimed or unpainted tops and bottoms of doors are more vulnerable to moisture, which can swell wood and crack your beautiful gloss.
- Re-coating too soon: If the previous layer hasn’t set up, the next coat can drag, sag, or wrinkle. Follow the label, even if it means an extra day with your door on sawhorses.
- Skipping color tests: A color that looks perfect in a glossy online photo can go neon or muddy on your house. Always test.
Why It’s Worth It
Despite the fussiness of prep and cure times, homeowners who commit to a high gloss Dutch door consistently report that it’s one of the highest-impact, lowest-square-foot projects they’ve done. That little slice of shining color becomes a daily mood boosterwhether you’re grabbing the mail, waving to neighbors, or swinging open the top half for a breeze.
Glossy Dutch Doors: Small Project, Big Impact
In the spirit of Remodelista, a high gloss Dutch door is all about disciplined choices and thoughtful details: a beautifully prepped surface, a carefully chosen enamel, and a color that makes your house feel a little more like the European streetscapes we daydream about.
Prep thoroughly, respect the paint, and lean into the gloss. The result is a door that doesn’t just close off your homeit welcomes you in with a shine that says, “Yes, I do look this good every day.”
SEO metadata in JSON format


