Table of Contents >> Show >> Hide
- What We Know (and What We’re Still Guessing)
- Phase 1: Drawing the Circle (Earthworks and the Earliest Monument)
- Phase 2: Getting the Stones (Quarrying and Shaping)
- Phase 3: Moving the Megaliths (Transport Theories That Actually Make Sense)
- Phase 4: Raising the Stones (The Part Everyone Imagines… and Still Underestimates)
- Phase 5: The Alignment (Yes, the Sun Is Part of the Design)
- So…How Was Stonehenge Built? A Practical Summary
- 500-Word Experience Add-On: Feeling the Engineering Up Close
- Conclusion: The Real Mystery Isn’t the StonesIt’s the Organization
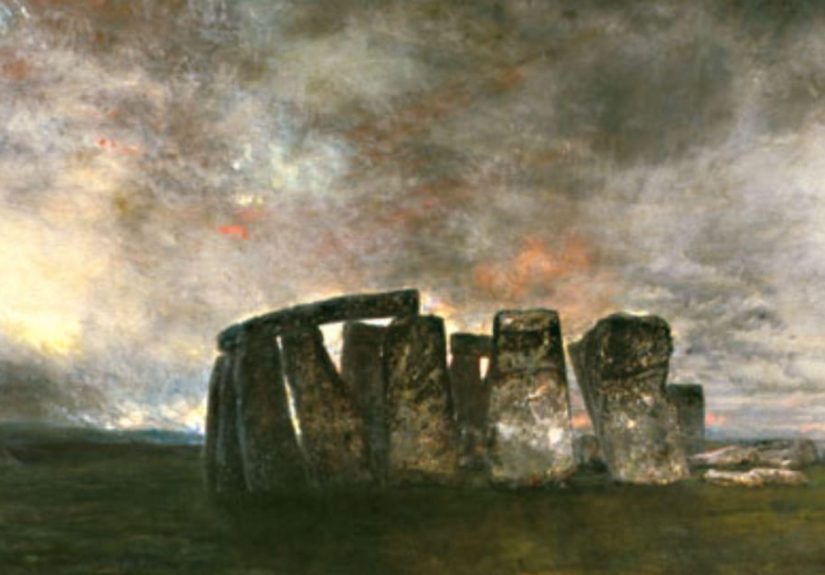
Stonehenge is the world’s most famous “how did they even do that?” projectan open-air puzzle made of multi-ton rocks, big ambition, and zero surviving instruction manual. No blueprints. No receipts. No cranky foreman leaving notes like, “Tell Dave to stop losing the antler picks.”
What we do have: archaeology, geology, experiments, and a lot of smart people arguing politely (and sometimes not-so-politely) about ropes, sledges, and whether a 4-ton rock prefers the scenic route. This article draws on mainstream U.S. science/history coverage and educational resources (including Smithsonian Magazine, National Geographic, PBS NOVA, History.com, Encyclopaedia Britannica, Scientific American, Science.org/AAAS, Archaeology Magazine, TIME, Popular Mechanics, and NASA Science) to explain the most credible picture of how Stonehenge was built.
What We Know (and What We’re Still Guessing)
It wasn’t built in one go
Stonehenge was constructed in phases over many centuries, with different layouts, materials, and rearrangements over time. Think of it less like “one building” and more like a long-running remodel where every generation adds a new feature and swears it will be the final version.
Two main stone familiesplus one big wildcard
The monument is best known for two types of stone:
- Sarsens: the largest stones (many weighing tens of tons), forming the iconic outer circle and the tall “trilithons” inside.
- Bluestones: smaller (still hefty) stones in the inner settings, sourced far away compared with the local landscape.
There’s also the Altar Stonea large slab near the center that recent research suggests may have traveled an especially dramatic distance compared with other stones, which adds another layer of “how on Earth?” to the story.
Phase 1: Drawing the Circle (Earthworks and the Earliest Monument)
Digging the hengewithout metal tools
The earliest work at Stonehenge involved earthworks: a circular ditch and bank enclosing a large area. Archaeologists think Neolithic builders excavated the ditch with tools like antler picks and shovels made from bone or wood. That might sound primitiveuntil you try digging chalky soil for hours with anything that isn’t steel. Suddenly, antlers start to look like premium equipment.
A place of ceremonyand the dead
Early features inside the enclosure (including the famous “Aubrey Holes”) have been associated with human activity that included burials and cremation remains. Stonehenge wasn’t just a pretty ring on a hill; it appears to have been meaningful ground for generationsmore like a sacred district than a one-time construction stunt.
Phase 2: Getting the Stones (Quarrying and Shaping)
Sarsens: huge stones from “nearby”… in Neolithic terms
Geochemical research has helped identify likely source areas for many of Stonehenge’s sarsen stones. “Nearby” here still means a serious journeymiles of uneven ground, forests, and slopeswhile hauling something that outweighs your entire neighborhood.
Once extracted, sarsens were shaped by “pecking” (repeated hammering with hard stone tools), then smoothing and dressing surfaces. The goal wasn’t just to stand rocks upright; it was to make them fit together in a precise and stable structure.
Bluestones: smaller stones with a much longer commute
Bluestones are geologically “foreign” to the Salisbury Plain. Evidence strongly links many of them to sources in Wales, which implies transport over an enormous distance for the time. That decisionbringing special stone from far away instead of using only local materialssuggests the stones carried meaning beyond “this was the closest rock shop.”
Stoneworking without metal: slow, loud, and surprisingly sophisticated
Neolithic builders didn’t have iron chisels or steel saws. They had stone hammers, patience, and technique. Shaping sarsens likely involved:
- Percussion (hammering) to knock off high spots
- Pecking to gradually refine surfaces
- Abrasion with sand and stone to smooth and fine-tune
The results weren’t crude. Some stones were subtly tapered and finished to look consistent from ground levelbasically an ancient version of “make it look straight from the camera angle.”
Phase 3: Moving the Megaliths (Transport Theories That Actually Make Sense)
If Stonehenge had a slogan, it would be: “It’s not the lifting, it’s the dragging.” Moving big stone is mostly about friction, traction, and not panicking when your rope makes that ominous “I’m about to snap” noise.
Overland transport: sledges, rails, and teamwork
A widely supported idea is that stones were hauled on wooden sledges pulled with ropes. Experiments and reconstructions suggest sledges can outperform log rollers, especially on softer ground where rollers sink or wander off like shopping carts with a bad wheel.
One practical approach is a sledge sliding over a prepared surfacewooden rails, brush, or compacted trackpossibly lubricated with water, mud, or animal fat. The point isn’t to make the stone “light,” but to make it less stubborn.
Water routes: when “take the river” is your best engineering choice
For very long-distance moves (especially from Wales), some researchers propose at least partial transport by watercoastal routes and riversbecause floating heavy cargo can be more efficient than dragging it for hundreds of miles. Boats and rafts introduce their own risks (waves, currents, weather), but they also let you move weight without grinding it across every hill in Britain.
Did glaciers do some of the work?
You’ll sometimes hear the idea that glaciers might have carried bluestones closer to Salisbury Plain during the Ice Age, leaving people to “only” move them the last stretch. It’s an ongoing debate. Many accounts aimed at general readers emphasize human transport as the leading explanation for how bluestones ended up at Stonehenge, but the glacier concept keeps popping up because nature does occasionally relocate boulders with zero regard for our sense of fairness.
How many people did it take?
There’s no single number. It depends on stone weight, terrain, season, and method. But the broader evidence suggests Neolithic communities could organize large gatheringspotentially seasonalcapable of coordinated labor, provisioning, and ceremonies. The nearby landscape (including big settlement and feasting evidence at Durrington Walls) supports the idea that building wasn’t just “work”it was also social and ritual life on a massive scale.
Phase 4: Raising the Stones (The Part Everyone Imagines… and Still Underestimates)
Dig the pit, tip the stone, backfill like your life depends on it
A plausible method for erecting a standing stone goes like this:
- Dig a pit with one side sloped (a ramp) using antler and stone tools.
- Drag the stone to the pit and maneuver its base toward the hole.
- Tip and lever it uprightusing timber A-frames, ropes, and lots of careful coordination.
- Pack the base with rubble and compacted soil, then backfill to lock it in place.
The genius here is that you don’t “lift” the whole stone vertically. You pivot it. Physics does some of the heavy liftingif you respect it.
Stone carpentry: mortise-and-tenon and tongue-and-groove joints
The outer sarsen circle originally had lintels (horizontal stones) set on top of uprights, forming a continuous ring. To keep those lintels stable, builders used joinery techniques more commonly associated with woodworking:
- Mortise-and-tenon joints: a protruding “tenon” on the upright fits into a carved socket (“mortise”) on the lintel underside.
- Tongue-and-groove joints: adjacent lintels interlock side-to-side, helping the ring behave like one connected system rather than a bunch of independent slabs.
That’s not just cleverit’s structural strategy. Interlocking joints help resist shifting, wobbling, and small movements over time. Stonehenge wasn’t meant to be “standing today by luck.” It was engineered to stay put.
How did they get lintels up there?
The most practical explanations involve building up earthen ramps or wooden scaffolds so lintels could be hauled upward gradually, then slid into place. Once the lintel seated onto the tenons, workers could remove supports and (eventually) erode or dismantle ramps.
If you’re thinking, “That still sounds insanely hard,” you’re right. But “hard” isn’t the same as “impossible,” especially when you can marshal a community, plan for seasons, and treat the whole project as something sacred and socially binding.
Phase 5: The Alignment (Yes, the Sun Is Part of the Design)
Solstice sightlines: not accidental
Stonehenge is famously aligned with solar events, including the solstices. From certain viewpoints, the sun appears in line with key stones around the longest and shortest days of the year. That kind of alignment fits a broader human tradition: building monuments that connect community life to seasonal cyclesfood, farming, ceremony, and time.
It’s not just an “ancient calendar” meme
Calling Stonehenge a “calendar” can be misleading, because it suggests a precise, everyday scheduling device. A better framing is that it’s a monumental marker: a place where the year’s turning points could be witnessed together, reinforcing shared beliefs, shared time, and shared identity.
So…How Was Stonehenge Built? A Practical Summary
Put all the best-supported pieces together, and a realistic construction picture looks like this:
- Plan a sacred landscape with earthworks firstdefining space and meaning before adding giant stones.
- Source stones deliberately: big local sarsens for the main structure, and culturally significant bluestones from far away.
- Move stones with low-tech physics: sledges, ropes, prepared tracks/rails, possible lubrication, and (for long routes) potential water transport.
- Raise uprights by pivoting: pits, ramps, levers, timber frames, and careful backfilling.
- Lock the structure together using interlocking joints that behave like carpentryexcept your “wood” is 25 tons and refuses to apologize.
- Rearrange and refine over time, keeping the monument alive across generations rather than treating it as a one-and-done build.
500-Word Experience Add-On: Feeling the Engineering Up Close
You don’t have to be an archaeologist (or own an antler pick) to get a real sense of how Stonehenge was built. In fact, the most eye-opening “aha” moments come from simple experiences that make the physicsand the peoplefeel real.
1) The “distance hits you” moment
When you read that bluestones likely came from Wales and sarsens came from miles away, it can sound like trivia. Then you picture the route: hills, mud, forests, rivers, and no paved roadsjust human muscles, rope, and wood. Suddenly the question becomes less “How?” and more “Why was this worth it?” That shift is important. Stonehenge starts to feel like a statement: “We can do hard things together, on purpose.”
2) Try a tiny hauling experiment (no injuries, no lawsuits)
Grab something awkward but safelike a heavy cooler, a loaded storage bin, or a big cardboard box filled with books. Now do three short tests on a flat surface:
- Drag it directly (you’ll feel maximum friction).
- Put it on a towel and pull (suddenly it glides betterhello, “sledge”).
- Put it on a stiff board (even smoother and more controlled).
In two minutes, you’ve learned a core Stonehenge lesson: you’re not “lifting” the worldyou’re negotiating with friction. The Neolithic trick wasn’t superhero strength. It was smart surfaces, good rope, and teamwork.
3) Build a desk-top Stonehenge to understand stability
Use books as uprights and a ruler as a lintel. Balance it once, then try again with “interlocks” (sticky notes or folded paper tabs that keep the ruler from sliding). That’s the intuitive idea behind mortise-and-tenon and tongue-and-groove joints: controlling sideways slip and keeping weight centered so the whole system acts as one.
4) Picture the build as a festival, not a work shift
Evidence near Stonehenge points to large gatherings and feasting in the broader landscape. Imagine what that means in human terms: people arriving with food, animals, stories, and skills; someone who knows ropework; someone who can shape stone; someone organizing teams; someone calling out rhythm so fifty people pull together instead of accidentally inventing “competitive tug-of-war” at the worst possible time. In that frame, Stonehenge becomes less like a lonely mystery and more like a community engineritual, identity, and engineering fused into one giant, unforgettable group project.
5) Visiting perspective: it feels designed to be witnessed
Even without stepping into the center, most visitors describe the same feeling: the monument “reads” differently as you move. From some angles the uprights look like independent pillars; from others the lintel line feels like a deliberate horizon. The layout invites you to stand, look, align, and notice. It’s easy to understand why solstice events matternot because Stonehenge is a magical clock, but because it turns time into a shared experience. You’re not just observing the sky. You’re participating in a tradition of watching it together.
Conclusion: The Real Mystery Isn’t the StonesIt’s the Organization
Stonehenge wasn’t “built by accident,” and it wasn’t built by people who didn’t know what they were doing. The strongest explanations involve practical methodssledges, ropes, ramps, pits, and ingenious joinerypowered by something even more impressive: coordinated human effort over generations.
In other words, the monument isn’t a riddle that needs aliens to solve it. It’s a reminder that humans, when motivated by shared meaning, can move mountains. Or at least… they can move the parts of mountains that fit on a wooden sledge.