Table of Contents >> Show >> Hide
- 12 Steps to Sign Over a Check
- Step 1: Read the front of the check carefully
- Step 2: Decide who you are signing it over to
- Step 3: Check if your check has “and” or “or” between payees
- Step 4: Confirm the recipient’s bank will accept a signed‑over (third‑party) check
- Step 5: Turn the check over and locate the endorsement area
- Step 6: Sign your name exactly as it appears on the front
- Step 7: Below your signature write “Pay to the order of [Recipient Name]”
- Step 8: Double‑check spelling, date, ink, and no extraneous marks
- Step 9: Hand the check to the new recipient
- Step 10: Recipient deposits or cashes the check
- Step 11: Keep your own records and consider marking the check “VOID” after deposit
- Step 12: Be aware of alternatives if this method doesn’t work
- Picture Guide Snapshot
- Common Mistakes & How to Avoid Them
- When Is It Smart to Sign Over a Check?
- Security & Fraud Considerations
- Conclusion
- 500‑Word Personal Experience & Insights
Related (LSI) keywords: how to sign a check over to someone, pay to the order of back of check, transfer check to another person, bank acceptance of signed‑over check
12 Steps to Sign Over a Check
Grab your check and a blue or black pen. Ready? Let’s go.
Step 1: Read the front of the check carefully
Check the “Pay to the Order of” line, the date, the numeric amount and the written amount. According to U.S. Bank’s rules, if any of these are wrong (e.g., the written amount doesn’t match the number) the bank may refuse to accept the check. If the check is made out to “You or Someone Else,” the rules differ (see Step 3).
Step 2: Decide who you are signing it over to
You, as the original payee, must designate a new recipient the person or business who will deposit or cash it. Confirm their full legal name (as their bank will want it exact). The Huntington guide says you should plan ahead and make sure the other party is willing.
Step 3: Check if your check has “and” or “or” between payees
If the check says “Jane Smith and John Smith,” both must sign the back. If it says “Jane Smith or John Smith,” only one needs to endorse. The PNC guide explains this for multiple‑payee checks.
Step 4: Confirm the recipient’s bank will accept a signed‑over (third‑party) check
Here’s where the plot thickens: Not all banks will accept a check that’s been transferred from you to someone else. The Chase guide points this out plainly: some banks simply refuse third‑party endorsements. So call ahead or ask the recipient to check with their branch.
Step 5: Turn the check over and locate the endorsement area
On the back of the check you’ll see an area marked “Endorse Check Here” (or similar). Use a blue or black pen lighter ink might not scan well. According to the WaFd Bank article, use dark ink because check scanners struggle with pastel ink.
Step 6: Sign your name exactly as it appears on the front
Write your signature in the endorsement box, exactly how your name is written on the “Pay to the Order of” line. This helps avoid “signature mismatch” headaches. From the Citizens Bank guide: if the name is misspelled, you may need to sign the incorrect version then the correct one.
Step 7: Below your signature write “Pay to the order of [Recipient Name]”
This is the critical move. Right below your signature in the endorsement area, write something like: “Pay to the order of John Doe”. This tells the bank you are transferring your right to the funds to someone else. The Chase guide shows exactly this wording.
Step 8: Double‑check spelling, date, ink, and no extraneous marks
Small mistakes trip up banks. Use clear ink, no pencil, avoid side scribbles. The WaFd article spells this out.
Step 9: Hand the check to the new recipient
Once you’ve endorsed and written “Pay to the order of…”, it’s time to give the check to the person you designated. It’s wise if possible to accompany them to the bank branch so everything goes smoothly. That’s a suggestion from Huntington.
Step 10: Recipient deposits or cashes the check
The new recipient can attempt mobile deposit (if their bank allows third‑party checks) or visit a branch. Remind them to bring valid ID and any required account details.
Step 11: Keep your own records and consider marking the check “VOID” after deposit
Even though you handed it off, you should note the transaction for your own bookkeeping (especially if it’s for reimbursement or a gift). Marking “VOID” or “Deposited” once confirmed can help avoid confusion.
Step 12: Be aware of alternatives if this method doesn’t work
If the bank refuses the third‑party endorsement, fallback options include: you deposit the check into your account and then send the funds via Electronic Transfer/Zelle, or simply write a new check yourself. The Citi guide lists these alternatives.
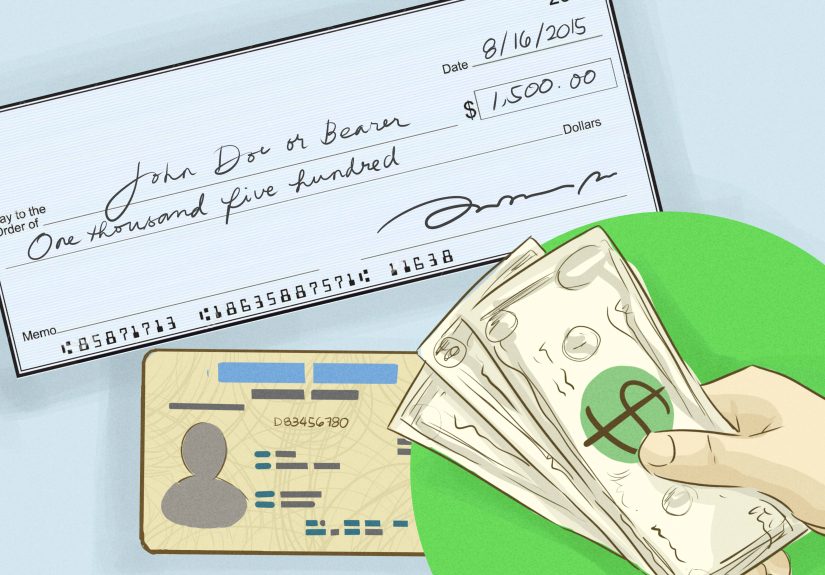
Picture Guide Snapshot
(Imagine images here: check front annotated, back endorsement area, writing “Pay to the order of …”, dark‑ink close‑up, hand‑off to recipient.)
Common Mistakes & How to Avoid Them
- Using the wrong ink color: Light or gel inks may not be read by bank scanners. Use blue or black.
- Bank won’t accept third‑party check: Always check first. Some banks have strict policies.
- Name mismatches: If your name is spelled differently on the front, sign both versions.
- Invisible endorsement area: Endorse on the correct box avoid writing below the “Do Not Write Below” line.
When Is It Smart to Sign Over a Check?
One common scenario: you receive a check but don’t have access to your bank right now, or you’d prefer the recipient deposit it directly because they’re the one who needs the funds. The Citi guide outlines such situations: when the payee lacks a bank account, or you simply want to transfer the check.
On the flip side, if you can deposit the check yourself easily, it may be simpler and less risky for you to deposit it and then “pay” the other person electronically.
Security & Fraud Considerations
Because you are essentially transferring the legal right to cash the check, there is a risk. As Investopedia explains for endorsements: special endorsements (third‑party) are more vulnerable to fraud.
Always ensure both you and the recipient trust each other, and you’ve checked the bank’s policy. This isn’t a move to do for anonymous transactions or large sums without caution.
Conclusion
Signing over a check to someone else can be a perfectly fine way to transfer funds but only if you follow the right steps, confirm the bank’s policy, and use correct endorsement wording. The 12 steps above (from checking the front of the check to handing it to the recipient) will help you do this confidently, cleanly and with minimal risk.
When in doubt: deposit the check yourself and pay the recipient by other means. That’s often the simpler path.
500‑Word Personal Experience & Insights
Here’s something I learned the hard way: I once had a check written to me by a friend as reimbursement for part of our vacation rental. But I was overseas and my bank app wouldn’t support mobile deposit from abroad. So instead of letting the check sit, I decided to sign it over to my friend who still lived in the U.S. and could deposit it. Yep, risk accepted.
I followed the steps: confirmed their bank would accept a third‑party check (turned out yes, whew), signed my name in blue ink, wrote “Pay to the order of Jamie Smith,” then handed it off. The friend deposited it, and I sent them the equivalent via Venmo just to even things out. Everything went smoothly until the next month, when I realized I’d forgotten to record it in my personal ledger. Cue guilt. So I added a note in my finances: “Check signed over to Jamie, date, amount.” Lesson: even when transferring, *your* record‑keeping matters.
Another time, I tried signing over a check to someone else for a small group project reimbursement (yes, I volunteer to organize board game nights). I assumed I could just pass the check along, no big deal. But the recipient’s bank flagged it and refused to process it because the bank’s policy didn’t allow third‑party endorsements. We ended up having to revert: I deposited it into my account, then sent them a new check or used a transfer service. That experience hammered home the message: **always check bank policy first**.
Also, using the right ink matters more than you might think. One branch told my friend that the endorsement ink looked too faint in the scanner and made us redo it. If I’d used light grey or gel pen, it might’ve been rejected so stick to classic blue/black pen, sign clearly.
Finally: handing the check off with the recipient present at the branch can sometimes make things smoother. Especially for larger amounts or if someone’s not a regular customer at the bank. That extra “we’re both here, everything’s legit” vibe helps the teller feel comfortable. If handing it off remotely, it’s still fine but anticipate possible extra questions.
In short: yes, you *can* sign over a check and with the 12‑step guide above you’re very likely to succeed. But treat it like a small legal transaction: use correct wording, confirm bank acceptance, use dark ink, keep your record. Do that, and you’ll avoid the “wait, but my bank won’t do this?” moment. And you’ll be that hero who didn’t cause the reimbursement drama. Mom‑joke bonus: your ledger thanks you.


